


How to Build a Raised Garden Bed
Updated: Mar. 06, 2024
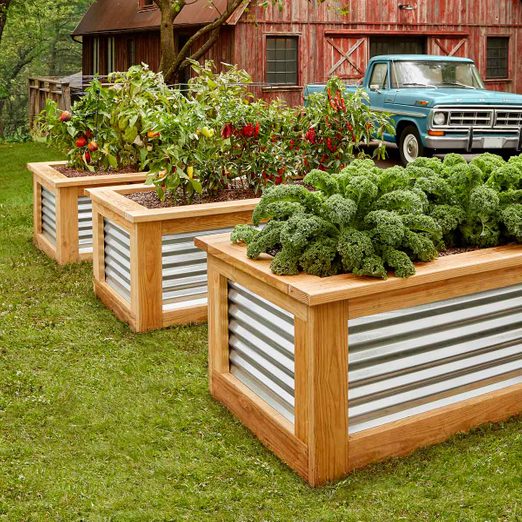
If you've always liked the look of raised garden boxes, now is your chance to finally get out and build them. They provide a rich aesthetic to your yard and ease and convenience when gardening.
A full day
Beginner
$101–250
Introduction
If you've always liked the look of raised garden boxes, now is your chance to finally get out and build them. They provide a rich aesthetic to your yard and ease and convenience when gardening.Tools Required
- Circular saw or miter saw
- Drill/driver
- Level
- Metal shears
- Stapler
Materials Required
- 1" sheet metal screws with washers
- 1/4" stainless steel staples
- 1/4" x 6" coated construction screws
- 2-1/2-in. deck screws
- 2-3/4-in. deck screws
- 2-in. deck screws
- 26" x 10' corrugated metal panel (2)
- 2x2 x 8' treated lumber (2)
- 2x4 x 8' treated lumber (4)
- 2x6 x 10' treated lumber (5)
- 3/4" x 4' x 8' treated plywood
- 6-mil plastic
Cheap Raised Garden Beds You Can DIY
The list of reasons for switching to raised vegetable garden beds is long, but these are the main advantages:
- Tending raised plants is a lot easier on the back and knees.
- You can fill planters with top-quality soil for more productivity in a smaller space.
- Raised beds curtail creeping weeds and drifting seeds.
- The height discourages pests, especially rabbits.
While you’re at it, also figure out if hugelkultur raised bed is better than a traditional bed for your garden.
Also, if you’re looking for a trouble-free landscaping option, a gravel garden might be in your future. Once established, they’re a lot less hassle than lawns and standard landscaping beds, because they need minimal weeding or irrigation.
Gathering materials for raised garden beds
Everything you need is available at home centers for about $200 per planter. We chose pressure-treated lumber that’s cedar tone rather than green, so they look like cedar raised garden beds. Take the time to select straight, good-looking lumber. When you get it home, cover it with plastic to slow its drying. Pressure-treated lumber tends to warp badly as it dries; much better to let it dry after assembly when the parts are fastened together.
Home centers typically carry light-gauge corrugated metal, which is fine for this metal raised garden beds project, as long as you reinforce it with plywood. Our metal is 30 gauge. When looking at gauges of metal, remember that a higher number means thinner material. Also, make sure all the screws you choose are rated for use with treated lumber.
Plus: Check out 10 easy vegetables every Midwest gardener should grow.
Cutting List
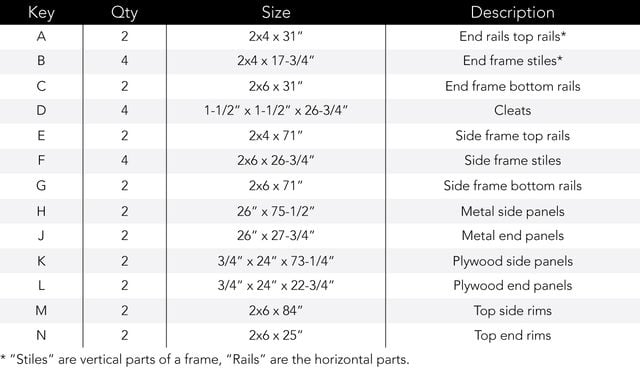
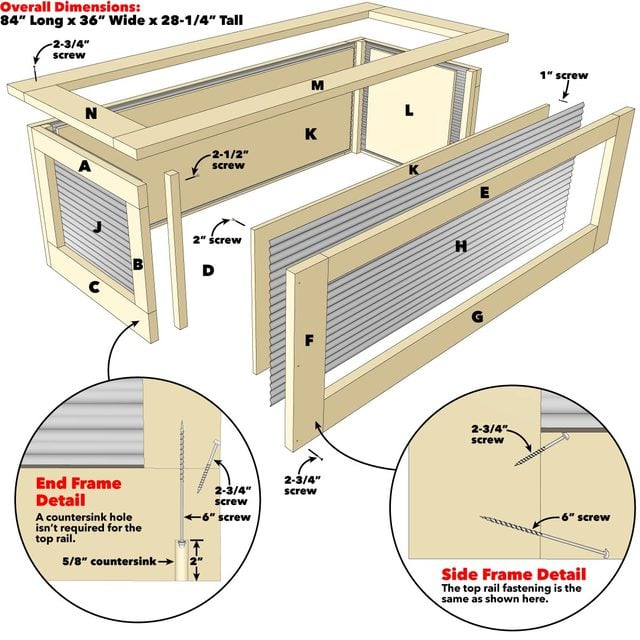
Figure A: Raised Garden Beds with Corrugated Metal
Tips for How to Build a Raised Vegetable Garden
- Start by cutting the parts according to the Cutting List. Cut shorter parts from your imperfect boards and save your straightest material for the long parts (E, G, M).
- To avoid assembly mix-ups, note that the rails fit between the stiles on the side frames. On the end frames, the stiles fit between the rails.
- We didn’t use a finish on our planters. If you do, note that it will be much easier to apply before you install the metal panels.
- If you’re tempted to miter the corners of the rim, reconsider. Outdoor miters look better than square-cut butt joints at first, but they inevitably develop ugly gaps as the wood absorbs and releases moisture.
- Here’s how to install the planter: Set it into position, then slice into the soil around it, marking its footprint. Move the planter aside and dig a shallow perimeter trench, just a couple inches deep. Set the planter in place again and check it for level in both directions.
- Add soil or deepen the trench to level the planter.
- When the planter is in place, cut a couple large slits in the bottom of the plastic liner so excess water can drain into the soil below—unless you plan to install a self-watering system. That requires a watertight liner.
- Filling this planter requires a lot of soil, almost a cubic yard. But there are ways to fill the lower half of the planter with less effort and expense. One common filler is plastic milk jugs (with caps screwed on tight). Another trick is to set plastic buckets in place upside down.
Next, check out our favorite flower bed ideas for full sun.
Project step-by-step (10)
Build the end frames
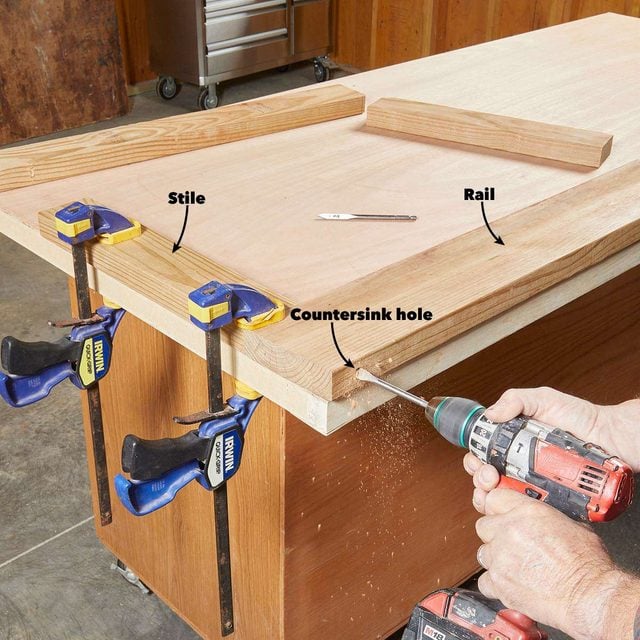
Clamp the parts to a flat surface with the best-looking sides face up. Join the parts with screws as detailed in Figure A. The bottom rails (C) require a 2-in.-deep countersink hole drilled with a 5/8-in. spade bit.
Build the side frames
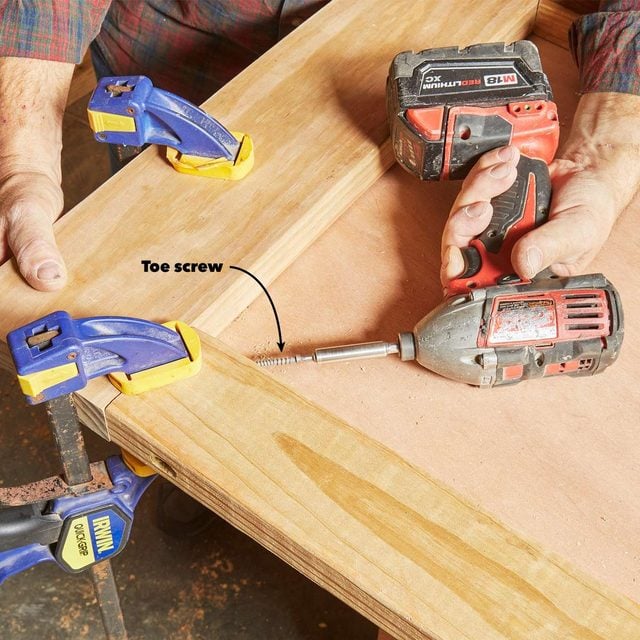
Fasten the side frame parts with “toe screws” (screws driven at an angle). If any of the screw heads don’t sink into the wood, drill a shallow countersink hole sized to match the screw head. See Figure A for details.
Assemble the box for the cedar raised garden beds

Join the frames by driving screws through cleats at inside corners. Be sure that the “show” sides of the frames are facing out.
Cut the metal
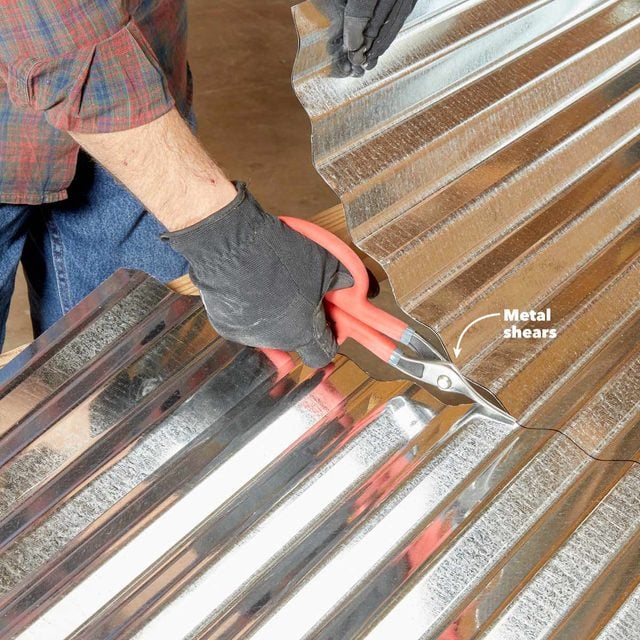
First, slip on gloves—those metal edges are sharp! Then cut the panels to length with metal shears. Standard 26-in.-wide metal panels don’t require cutting to width.
Install the metal
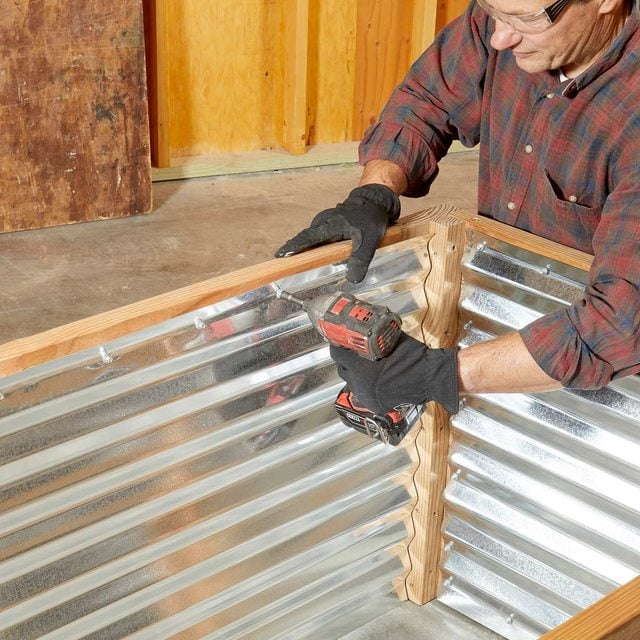
Screw the panels to the frames, placing screws every 8 in. along the top and bottom edges. Along the side edges, drive a screw at every second rib.
Add plywood backing to the metal raised garden beds

Reinforce light-gauge corrugated metal by screwing plywood over the metal. Set the plywood on 2×4 blocks to help position it.
Line the box
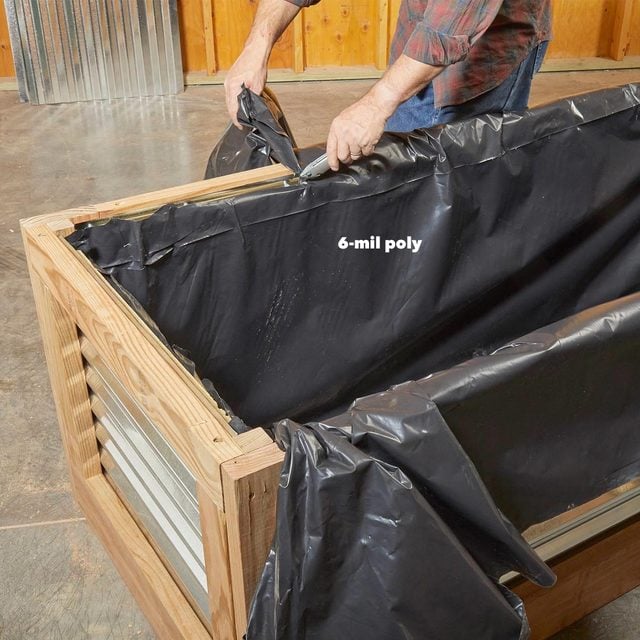
Staple plastic sheeting to the inside of the box, then trim off the excess with a utility knife. A plastic liner helps to keep the wood dry and the soil moist.
Trim the box
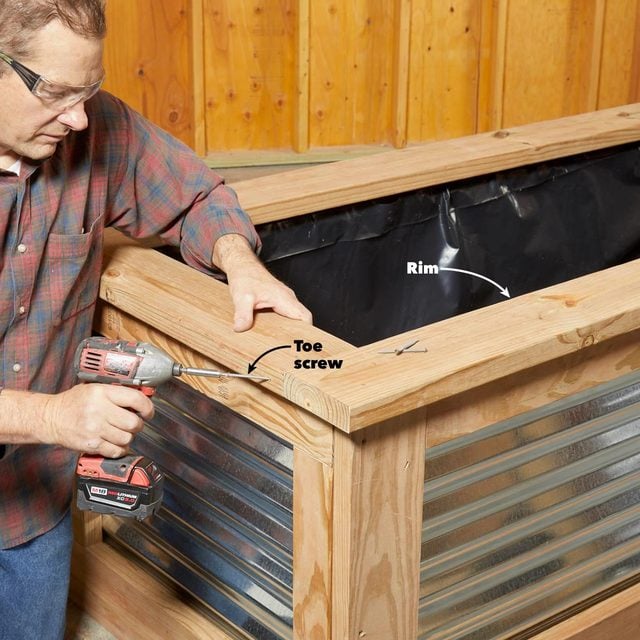
Top off the planter with a 2×6 rim. If necessary, add toe screws to the joints to hold parts flush. Next, learn how to prep soil for your vegetable garden here.
Accessorize it! Easy add-on options
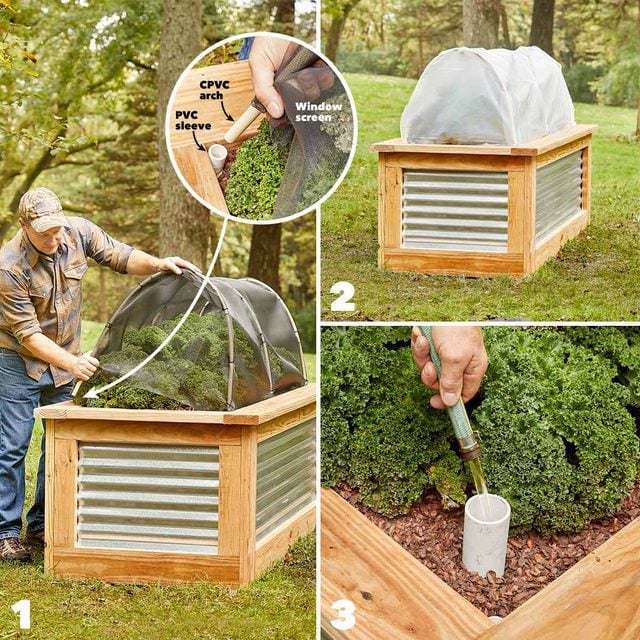
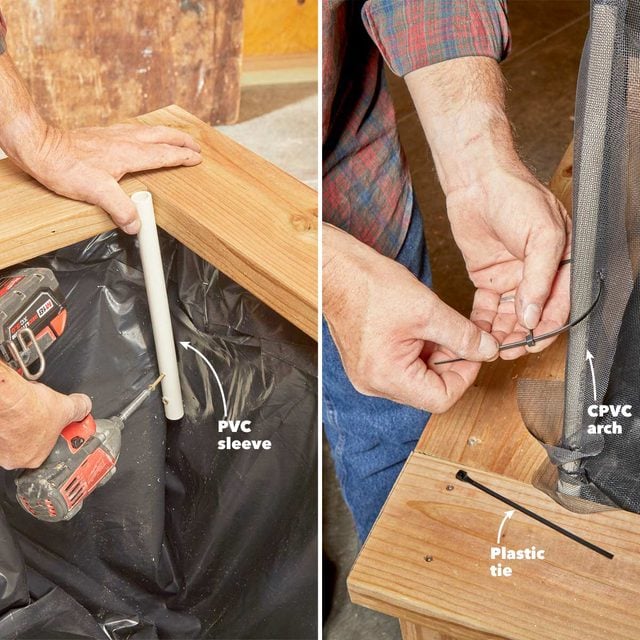
- Screen out critters – Simple arched ribs made from CPVC pipe let you protect your crop from hungry birds and beasts, especially deer! The three arches are simply 5-ft. sections of 1/2-in. CPVC pipe that you can bend and slip into 12-in. sleeves made from 1-in. PVC pipe. Buy a 4-ft. x 25-ft. roll of fiberglass window screen here.
- Extend the season – Those same ribs can support plastic sheathing. This creates a “cold frame,” allowing you to start plants earlier in spring and protect them against frost in autumn.
- Water once a month – Fill a buried reservoir that keeps soil moist for weeks. For details on how to add this feature to any raised planter, click here.
Easy arches for pest or frost protection
Arches can support screen or mesh to stop pests, or poly mesh sheeting to keep plants frost-free overnight.
While you’re at it, also learn: How to use lunar phases for planting and harvesting.
Every product is independently selected by our editors. If you buy something through our links, we may earn an affiliate commission.