
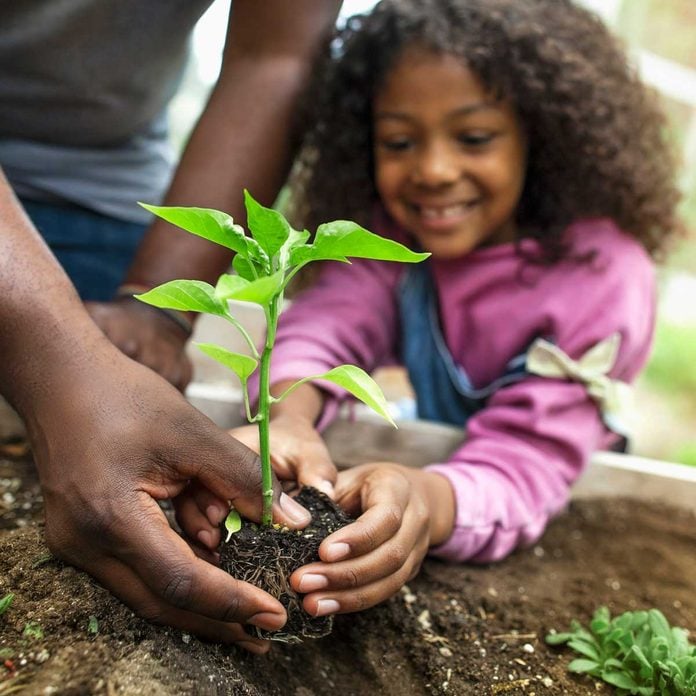
This step-by-step process explains how to start a garden from scratch.
How to Start a Garden
1
/
10
Ready to start a garden?
To start a garden the right way, plan ahead (in your garden journal!) by testing the soil and cultivating the ideal soil conditions for the plants you choose. And don’t forget to review some common gardening terms you should know. Here we’ll show you how to start a garden — any size! — from scratch. All it takes are basic garden tools. A sod cutter to remove the grass and a rototiller make the job go faster, but aren’t necessary. You can rent a garden tiller or sod cutter if you don’t want to buy one.
And don’t worry if you don’t have too much time in hand, here are a few gardening tips for busy people.
2
/
10
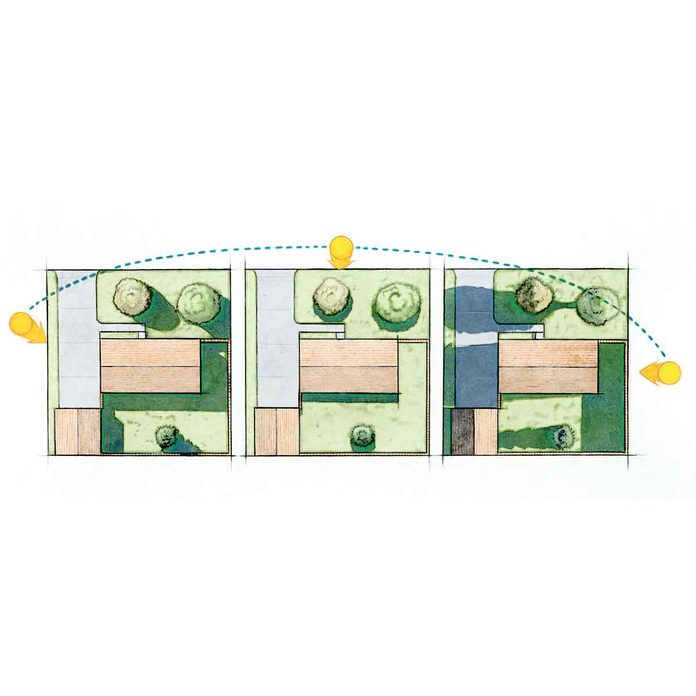
Measure the sunlight
The amount of sunlight will determine which plants you should choose and when to start a garden. You’ll have the widest selection of plants to pick from if you place the garden in full sun to light shade. Vegetables require full sun.
You probably have an idea where you want to plant flowers to enhance the landscape. If so, pick plants suited for those growing conditions (like full sun, partial sun or shade). Take photos of the proposed site throughout the day so when you shop for flowers, you’ll know how much sun the area gets.
If you’re flexible on the garden location, choose a spot that suits the sun requirements of the plants you want. Take a trip to a garden center to see what plants are available for your USDA Plant Hardiness Zone and how much sun your favorites will need.
Unless you’re planning a rain garden, avoid gardening in low spots in the yard where water collects. In the fall, low areas tend to be frost pockets, which can shorten your growing season. A well-drained area will yield the best plants.
3
/
10
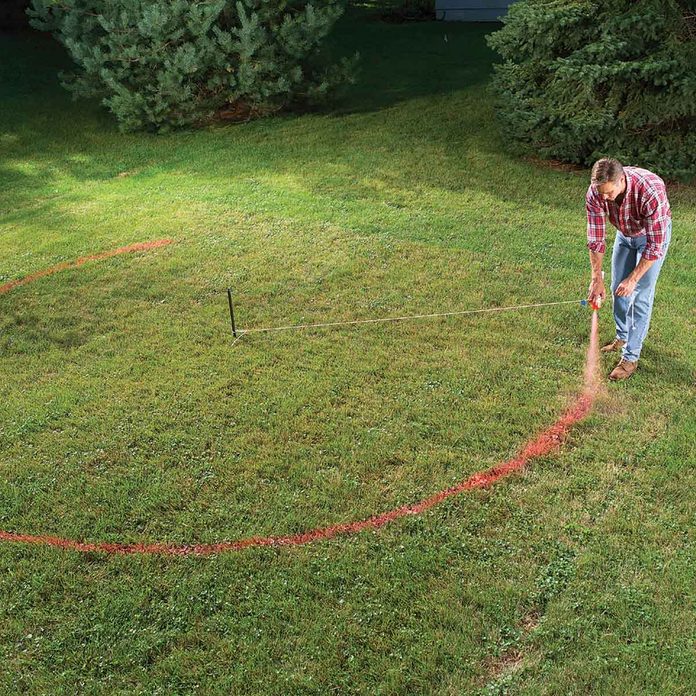
Outline the garden bed
Use a garden hose or landscaping paint to mark the perimeter. Avoid creating tight angles that would make it hard to mow around the garden. Gentle curves look more natural than sharp corners. And make the size manageable. You can always add on later if you decide you want a bigger garden.
Don’t dig yet. Wait at least one full day so you can look at the site from various vantage points (like your deck or living room) and at different times of the day. It’s a lot easier to change the shape or location now than after you’ve started digging.
Once you decide on the layout, call 811 to have underground utilities marked (for free!). You’ll need to identify irrigation lines on your own — they usually run in straight lines between sprinkler heads.
4
/
10
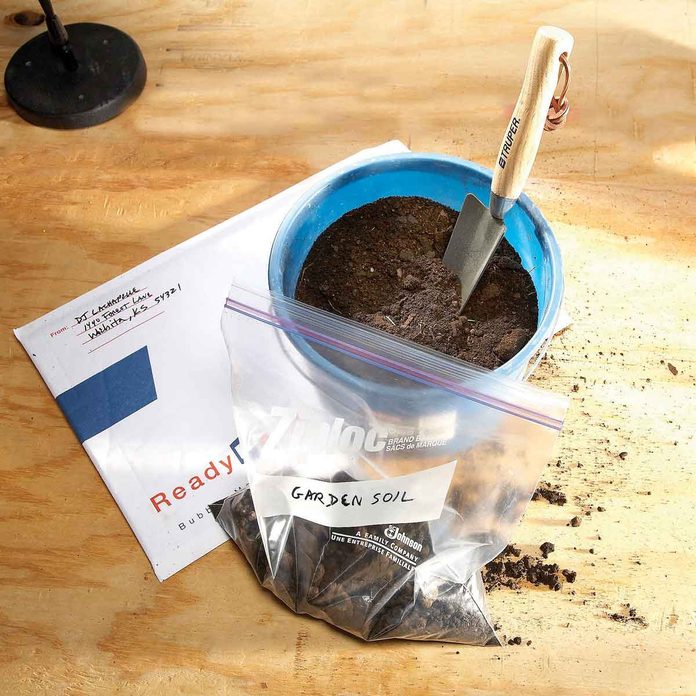
Test the soil
A soil test will tell you whether you need to add amendments such as lime, nitrogen, phosphorus or potassium to the soil.
Test kits are available at home and garden centers, but a university extension service or a state-certified soil-testing lab will provide the most accurate results. The service or lab will mail back a report telling you the nutrient content of the soil, what nutrients are needed, and the type and amount of fertilizer to add.
To find the nearest lab, enter “university extension service” and your state in any search engine. Contact the lab to get the necessary paperwork to submit with your sample. Test fees are usually $15 to $20, and results take one to two weeks.
Dig down six inches and scoop up a trowel full of soil. Take samples from five to 10 areas in the garden and mix them in a clean bucket. Wait for the soil to dry (this can take several days), then mail the soil sample, paperwork and a check to the extension service. Retest the soil every three to five years.
5
/
10
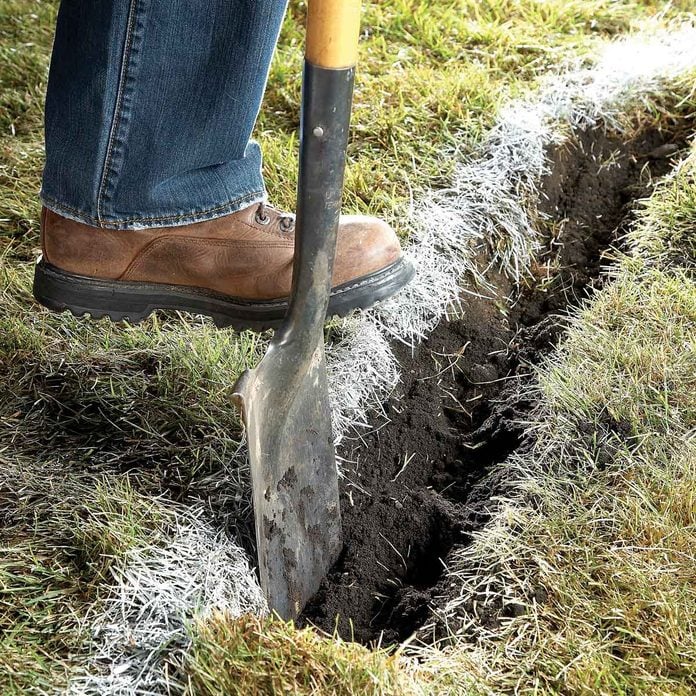
Edge the garden
Now that the prep work is done, you can dig and plant your garden in a weekend. The first step is edging the garden bed. Slice, then dig around the edge of the garden bed to make it easier to follow the shape as you remove or kill the grass. Use a square shovel or an edger to dig down about six inches, slicing through the grass roots around the garden bed.
After making the slices, dig around the garden edge at a slight angle to remove a three-inch swath of grass and create a small trench. This keeps the sod cutter or herbicide from going into your yard when you remove or kill grass in the garden.
6
/
10
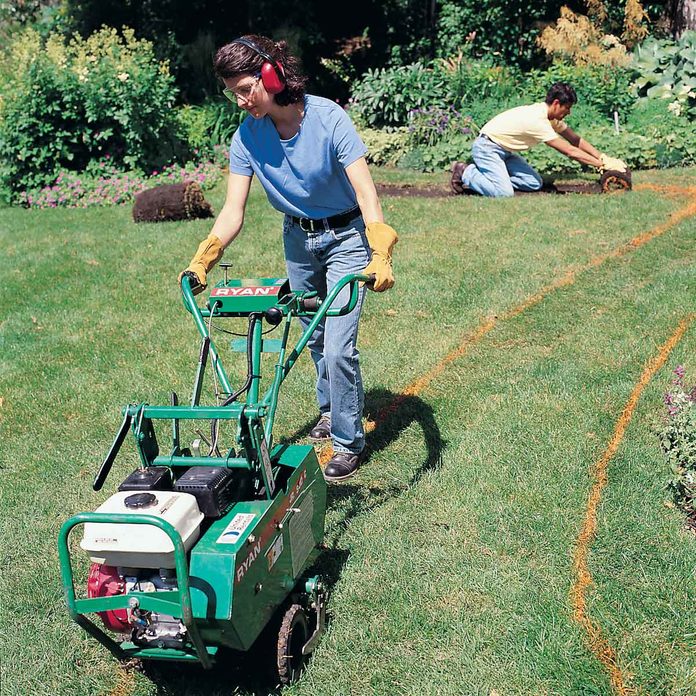
Remove the sod
Set the blade to cut just below the roots and slice the grass into long strips. Then roll the sod into easy-to-carry bundles. Use the sod to fill bare spots in the yard, or turn it upside down and start a compost pile.
Ways to Get Rid of Grass
A sod cutter is the fastest way to remove grass, but you can kill it and till it instead. Here are three options:
- Herbicide. Spray with a non-select herbicide. Spray after you’ve edged the garden so the weed-and-grass killer won’t run into the lawn. If anything is still growing after seven days, spray it again and wait another seven days.
- Plastic. Stake down clear plastic that’s at least two millimeters thick over the garden for six to eight weeks to kill the grass.
- Mulch. Place your mower deck on its lowest setting and cut the grass. Then cover the area with at least two inches of newspaper, cardboard, leaves or wood chips and keep them wet. The covering and grass will naturally decompose, giving you rich compost. This process takes several months.
7
/
10
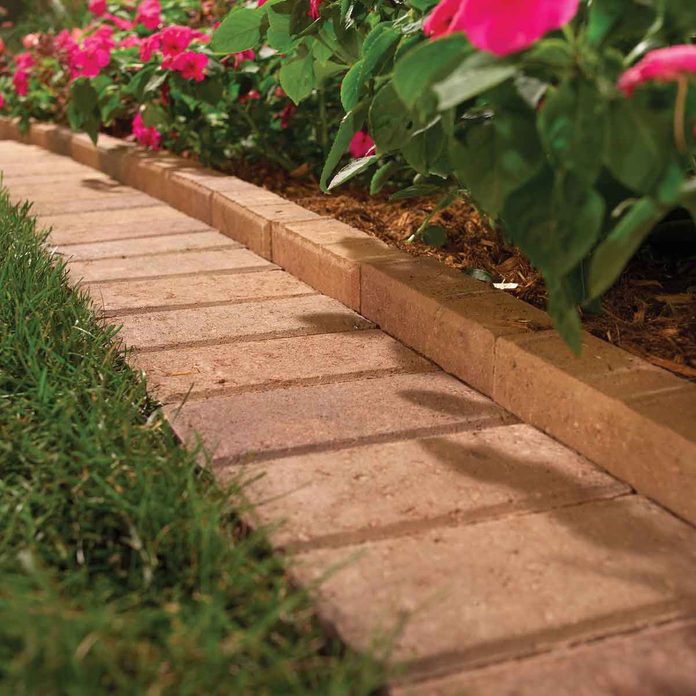
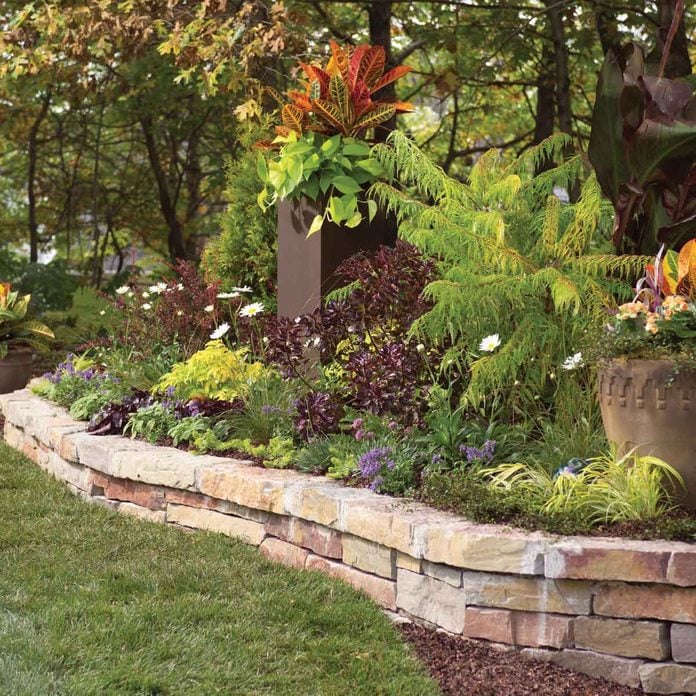
Keep out grass
Add a border to keep grass in your lawn from invading your garden; it’s hard to get rid of once it does. Home and garden centers sell various border and edging materials.
Strips of steel, aluminum or heavy-duty plastic work best on even terrain and are unobtrusive. Pavers form a wide border that allows flowers to spill over and provides a flat surface to mow over. A raised stone wall contains the garden and looks attractive, but it’s the most expensive option. Be sure your border extends at least four inches into the ground to keep out grass.
8
/
10

Fertilize to suit your soil
Your soil test will tell you the type of fertilizer your garden needs. Fertilizer labels list the three main nutrients needed for plant growth. A 10-20-10 formula, for example, contains 10 percent nitrogen (N), 20 percent phosphorus (P) and 10 percent potassium (K).
Buy a slow-release granular fertilizer that contains the appropriate percentage of the nutrients your soil needs. If your soil only needs one nutrient, don’t bother adding the others. Some fertilizers contain just one nutrient, such as a 20-0-0. Apply the fertilizer just before planting.
9
/
10
Enrich the soil
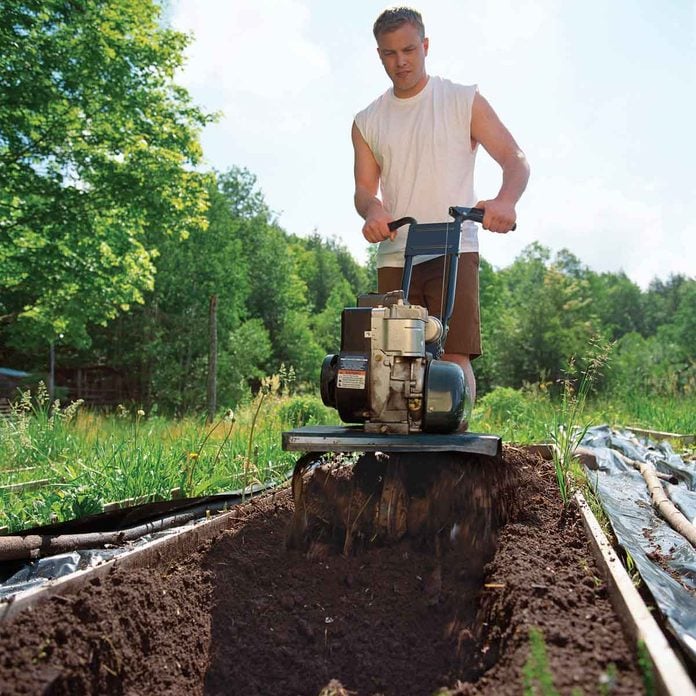
Adding organic matter such as compost, manure or peat moss increases drainage in clay soils and water-holding capacity in sandy soils. It also makes the soil more permeable, which encourages root growth and attracts organisms that leave nutrients in the soil. There isn’t one best type of organic matter, so buy whatever’s the least expensive in your area.
Spread two to four inches of organic matter over the garden. You can work it into the top six to 10 inches of soil with a shovel by digging down, then flipping the load over to mix the organic matter and soil. But a faster, easier way is to use a rototiller.
10
/
10
Consider a Raised Bed
If it’s almost impossible to grow plants in your soil (heavy clay, poor drainage, rocky), a raised garden bed is the perfect solution. Which also works ideally for a cut flower garden. It lets you bring in good soil and create the ideal garden bed. It also lets you garden without bending over as far, or working on your hands and knees.
Limit the size of the bed so you can reach all the plants from the border, and build it at least 12 inches deep to fill with topsoil.
To begin, cut the grass in the area and cover it with cardboard or layers of newspaper to kill it. The paper will decompose into organic material. Then build the bed and fill it with topsoil, mixing organic matter into the top six to 10 inches.