How To Build a Raised Dog Bed
Updated: Oct. 28, 2020
Keep your dog off the furniture and up off the cold floor.
A half day
Intermediate
$51–100
Introduction
Many of us like to keep our dog off the furniture and up off the cold floor. Here is a simple project you can build in an afternoon for only a few bones.Tools Required
- 18-Gauge Brad Nail Gun
- Circular saw or table saw
- Hearing and eye protection
- Measuring tape
- Miter saw or jigsaw
Materials Required
- 1 qt. paint
- 1-1/4-in. 18-gauge brad nails
- 12-ft 1x8 poplar (1)
- 220-grit sandpaper
- 4x4-ft 3/4-in plywood (1)
- Wood glue
Project step-by-step (11)
Step 1
Cutting the Boards
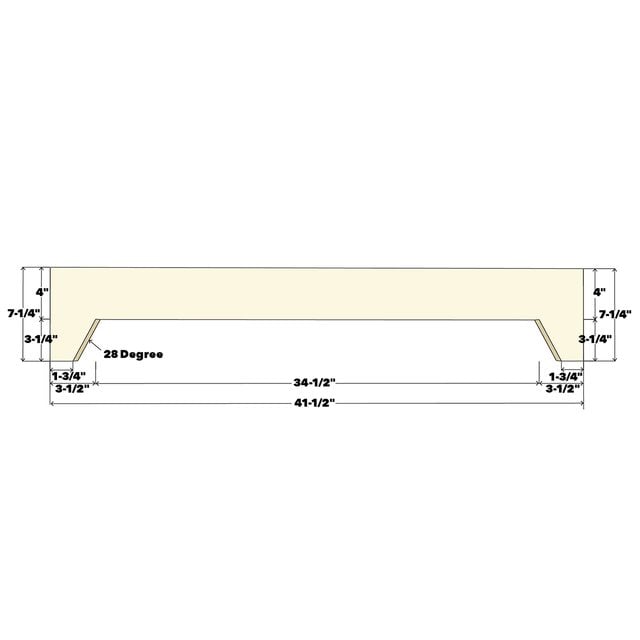
- Cut two pieces of the 7-1/4-in. poplar at 41-1/2-in. for the front and back legs.
- Cut two more pieces of the 7-1/4-in. poplar at 30 inches for the side legs.
- Cut one plywood bottom at 30 x 40 inches.
- Rip three 3/4 x 48-in. cleats from the remainder of the plywood.
- Cut two cleats at 34-1/2-in. and two side cleats at 24 inches.
- Pro tip: Always check the width of the board. Sizes may vary coming from the store.

Step 2
Layout the Side Legs
- Make pencil marks on the bottom edge of the board one inch from each end.
- Draw a line 3-1/4-in. up from the bottom across the length of each board.
- Connect the one-inch lines with the 3-1/4-in line at a 28 degree angle using an adjustable square, or make a 28 degree template with your miter saw (see photo).


Step 3
Cut the Side Legs
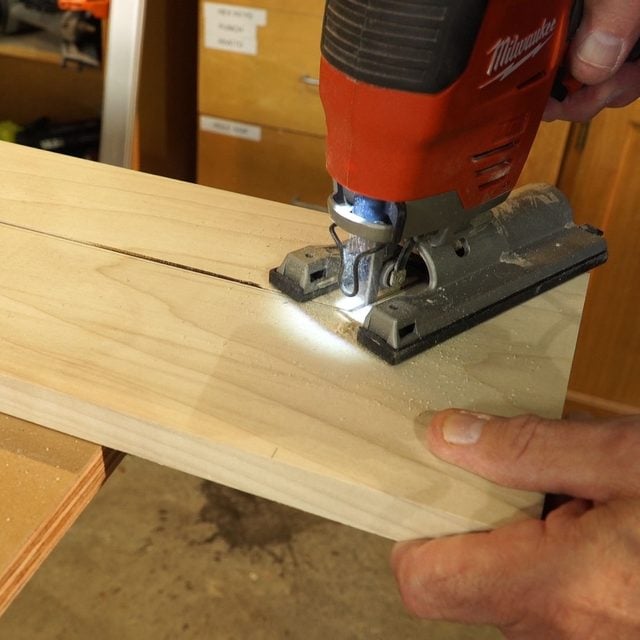
- Cut the angles using a circular saw or miter saw. Be sure not to cut past the horizontal line.
- To cut the horizontal line, make a plunge cut using a circular saw with a straight edge, or a table saw. Be sure to stop before the angle cuts.
- Finish the cuts with a hand saw or jigsaw.
- Using the side leg board you just cut as a template, lay it on the top of the other side leg board and trace the pattern onto the face of the board.
- Cut on the lines as you did previously. Option: A jigsaw can be used for all the cuts.


Step 4
Layout the Back Leg
- Make pencil marks on the bottom edge of the back leg board 1-3/4-in. from each end.
- Lay the side leg board on the top of the back leg board lining up the inside of the leg with the 1-3/4-in. marks. Now trace the pattern onto the board.


Step 5
Cut the Back Leg
- Cut the back leg as you did previously with the side legs.
- Finish the cuts with a hand saw or jigsaw.

Step 6
Layout the Front Leg
- The bottom cuts of the front leg are identical to the back leg. Use the back leg as a template and trace the pattern onto the board.
- To layout the top cuts, first make pencil marks on the top edge of the board 3/4-in. from each end.
- Draw a line 2-1/4-in. down from the top across the length of the board.
- Connect the 3/4-in. lines with the 2-1/4-in. line at a 50 degree angle using an adjustable square, or make a 50 degree template with your miter saw.


Step 7
Cut the Front Leg
- First, make all your angle cuts as you did previously with the side and back legs. Be sure not to cut past the horizontal lines.
- To cut the two horizontal lines, make a plunge cut using a circular saw with a straight edge, or a table saw. Be sure to stop before the angle cuts.
- Finish the cuts with a hand saw or jigsaw.


Step 8
Attach the Cleats
- Apply wood glue to the 24-in. cleats and attach them to the inside bottom edge of each side leg, using 1-1/4-in. nails.
- Apply wood glue to the 34-1/2-in. cleats and attach them to the inside bottom edge of the front and back legs, using 1-1/4-in. nails.

Step 9
Assemble the Legs
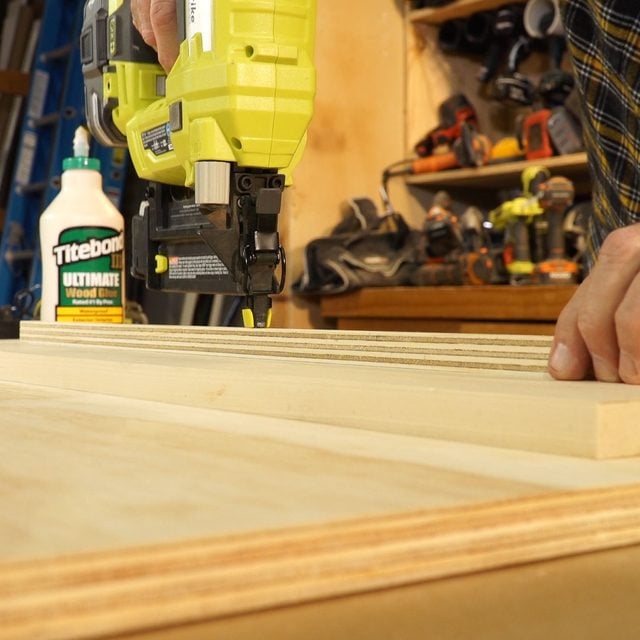
- Apply wood glue on the ends of the right and left sides and attach them to the back leg using 1-1/4-in. nails (see photo).
- Apply wood glue on the other end of the right and left sides and attach the front leg using 1-1/4-in. nails.

Step 10
Install the Bottom
- Apply wood glue to the top of all four cleats.
- Place the bottom on top of the cleats and attach it with 1-1/4-in. nails.

Step 11
Sand & Finish
- Fill the nail holes with wood filler and let dry.
- Sand the entire piece, taking off the sharp corners and edges with 220 grit sandpaper.
- Prime and paint to the desired color.


