


How to Make a DIY Dog House

Updated: May 08, 2023
Your dog will love it. And so will you.

A full day
Intermediate
$101–250
Introduction
Here is a simply-designed, low-cost dog house you can build in an afternoonTools Required
- Bar clamps
- Circular saw and cutting guide (or table saw)
- Drill bits
- Drill/driver
- Hearing and eye protection
- Measuring tape
- Metal straightedge
Materials Required
- 1-1/2-in deck screws
- 1-1/4-in finish screws
- 2-in screws or nails
- 2x4-ft 1/2-in PVC (2)
- 3-in. deck screws
- 4x8-ft 3/4-in plywood (1)
- 8-ft 2x2 (3)
- 8-ft 2x4 (2)
- Silicone caulk

Project step-by-step (14)
Step 1
Cut Floor Material
- Cut two 2x4s at 34-1/2-in.
- Cut three 2x4s at 19-1/4-in.
- To make it easier to manage the large 4×8 sheet of plywood, first cut 22-1/4-inches from one end of the sheet, using a table saw or circular saw.
- Cut the 22-1/4-in piece to 34-1/2 inches.
Step 2
Assemble the Floor
- Set the 2x4s on edge and create a box frame with the three shorter boards evenly spaced between the two longer boards, as shown.
- Attach the boards using three-inch deck screws.
- Place the 22-1/4-in. x 34-1/2-in. plywood floor on the frame, keeping it flush with the edges.
- Attach the floor using 1-1/2-in deck screws.

Step 3
Cutting the Dog House Front & Back
- First cut 36 inches from one end of the sheet of plywood, using a table saw or circular saw.
- Cut the 36-in. piece into two 23-3/4-in. pieces.
Step 4
Roof Peaks & Door Layout
- Make a mark 24 inches up from the bottom on each side of the front and back boards.
- Make a mark in the middle at 11-7/8-in. on the top edge of each board.
- Draw a line at a 45-degree angle from each 24-inch mark up to the 11-7/8-in. mark on both front and back boards.
- Cut on the lines using a circular saw.
- Pro tip: Clamp a straight edge to the plywood to guide your saw.
- Make another mark in the middle at 11-7/8-in. on the bottom edge of the front board.
- Draw a line 15 inches up from the 11-7/8-in. mark.
- Draw a 12-inch circle at the 15-inch mark using a compass.
- Draw a line 4-1/4-in. up from the bottom across the width of the board.
- Measure 5 -7/8-in. from each side and make marks on your four-inch line.
- Connect the two 5-7/8-in lines with the outer edge of the circle.

Step 5
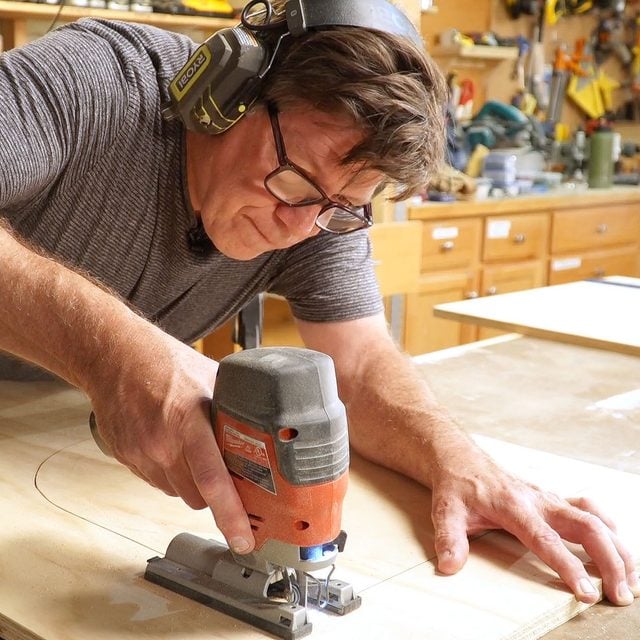
Cut the Door Opening
- Drill a 3/8-in. hole on the inside edge of the opening.
- Cut along the lines using a jigsaw.
- Round over the sharp edges of the opening with 150 grit sandpaper.
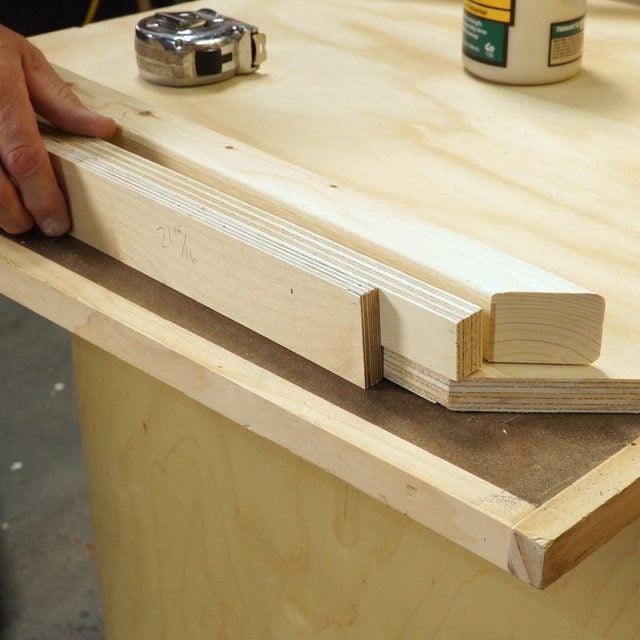
Step 6
Cutting 2×2 Frame & Ridge
- Set your saw to a 45 degree angle.
- Cut four side frame 2x2s so they measure 22-1/4-in. to the long point of the 45 degree angle.
- Cut four roof frame 2x2s so they measure 13-11/16-in. to the long point of the 45 degree angle.
- Set your saw back to 90 degrees.
- Cut one roof ridge 2×2 to 34-1/2-in. long.

Step 7
Attach Front and Back Frames
- Draw lines 3/4-in. from each side on the inside of the front and back boards.
- Apply a small amount of glue to the side frame 2x2s.
- Attach the four side frame 2x2s to the inside of the front and back boards on the ¾-in. mark, using two-inch screws or nails. Be sure the 45 degree angle is flush with the top and follows the angle of the roof.
- Apply a small amount of glue to the roof frame 2x2s.
- Attach the four roof frame 2x2s along the top edge of the inside of the front and back boards, using two-inch screws or nails. Be sure they are flush with the top edge and follow the angle of the roof.
- Pro tip: Use a 3/4-in. scrap of plywood as a spacer when attaching the side frame 2x2s.
Step 8
Assemble Front, Back & Bottom
- Place the front assembly against the short end of the floor platform, assuring the 2×2 side frames are flush with the long edge of the floor. Clamp it in place.
- Secure the front assembly to the floor platform using two-inch screws.
- Repeat the same with the back assembly.

Step 9
Roof Ridge Board
- Apply a small amount of glue to both ends of the roof ridge board.
- Place it in the cradle of the roof peak between the front and back assemblies.
- Secure it from the outside of the front & back assemblies using 1-1/2-in screws.

Step 10
Cutting Sides
- Cut two 23-3/4-in. x 34-1/2-in. sides from the remainder of the plywood.
- Set your saw to 45 degrees.
- Cut a 45 degree angle on the 34-1/2-in long edge of each board.
Step 11
Attach the Sides
- Draw a line 3/4-in. from each side the length of both side boards.
- Pre-drill six 1/8-in. pilot holes at your 3/4-in. line, three inches from the top and three inches from the bottom, with one hole in the middle on each board.
- Tip the doghouse on to one side.
- Place the side between the front and back on the 2×2 side frame. Slide it up so the 45 degree angle meets with the roofline.
- Secure the side to the front and back using 1-1/2-in. screws in the pre-drilled pilot holes.
- Tip the doghouse onto the other side and repeat the previous procedure.
Step 12
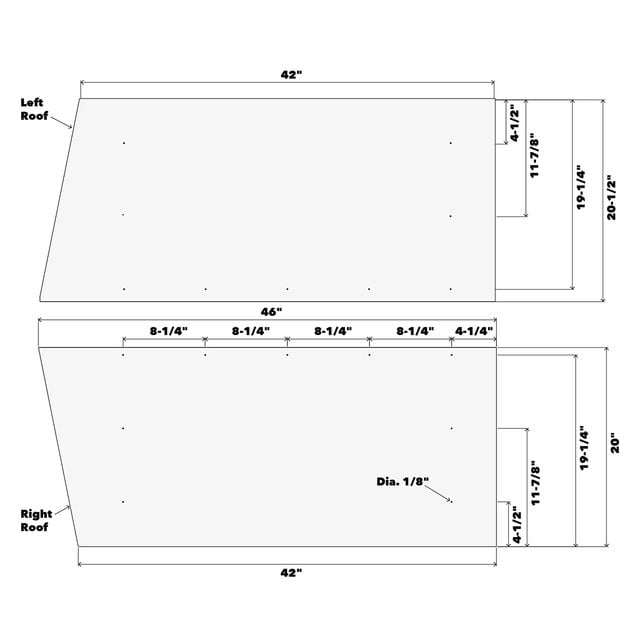
Cut the Roof Panels
- Cut the right roof panel at 20-in. x 46-in.
- From the left edge make a mark four inches in on the bottom edge.
- Draw a line from the top left corner down to your four-inch mark.
- Cut on the line using a circular saw.
- Cut the left roof panel at 20-1/2-in. x 46-in.
- From the right edge make a mark four inches in on the bottom edge.
- Draw a line from the top right corner down to your four-inch mark.
- Cut on the line using a circular saw.
- Pro tip: Clamp a straight edge to the PVC to guide your saw.

Step 13
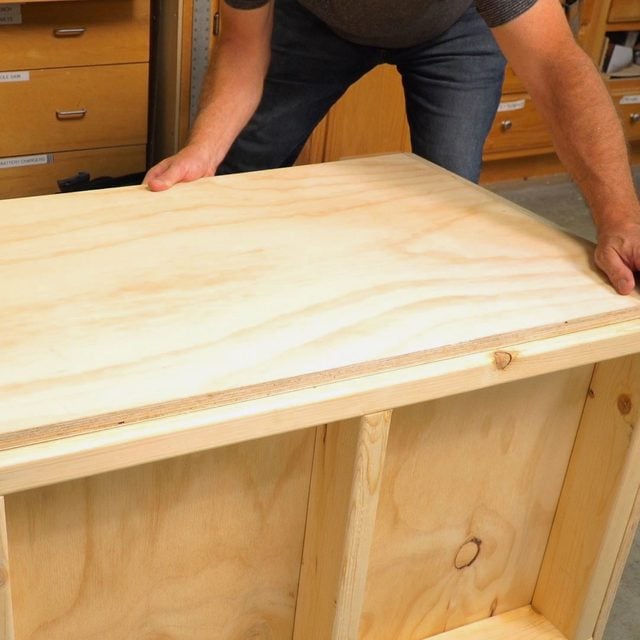
Attach the Roof Panels
- To make it easier when attaching the roof panels, pre-drill 1/8-in. pilot holes as per the drawing below (optional).
- Place the 20-in. right panel on the right side of the dog house roof letting it overhang three inches off the back.
- Clamp the panel to the roof ridge.
- Secure the panel to the roof ridge, front and back 2x2s using 1-1/4-in. finish screws.
- Add a bead of silicone caulk along the top edge of the roof panel you just installed.
- Place the 20-1/2-in. left roof panel on the left sides of the dog house roof so it overlaps the right roof panel’s ridge, keeping it flush with the front and back edges.
- Secure the panel to the roof ridge, front and back 2x2s using 1-1/4-in. finish screws.

Step 14
Finishing Touches
- Round over the sharp edges of the PVC roof panels with 150 grit sandpaper.
- Fill the screw holes on the roof with white silicone caulk.
- Prime and paint the dog house to the desired color. While you’re at it, learn how to build DIY dog stairs.
Originally Published: October 06, 2020