


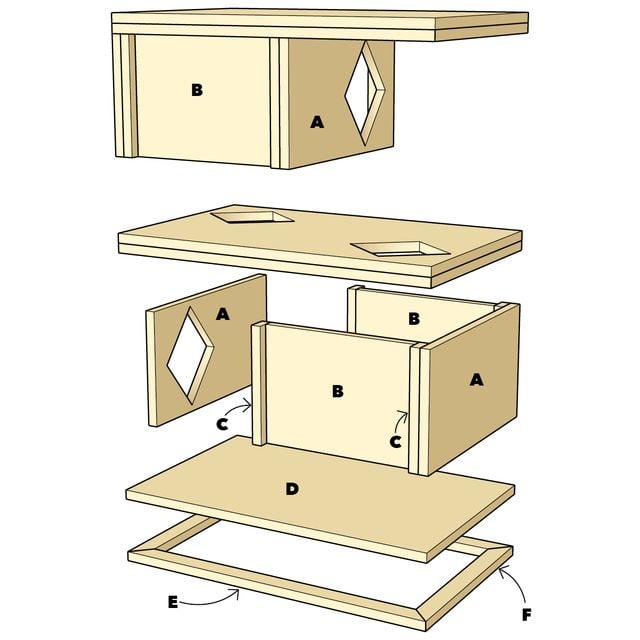
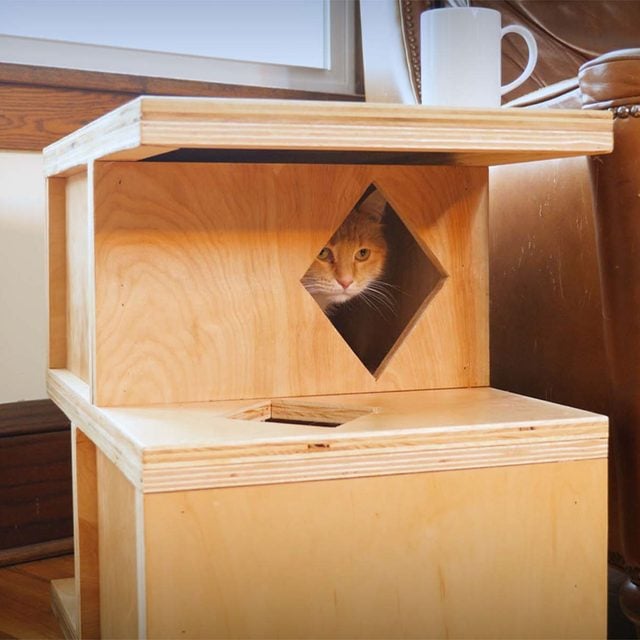
This cat house/side table is functional for you and your furry feline friend.
A full day
Beginner
$50-75
Introduction
Cats and boxes go hand-in-hand, and as a cat lover, watching my cat play gives me great joy. I decided to spice up my cat's life by designing a piece of furniture that, like our relationship, functions for me and my cat.
This side table/house is proportioned for the average cat and couch, and can be easily tweaked to match you and your pet’s needs. The diamond-shaped cat-holes give this piece a mid-century modern feel that matches my space well, but feel free to use any shape that compliments your home. With this design, all you need is one sheet of plywood.
Cutting Diagram: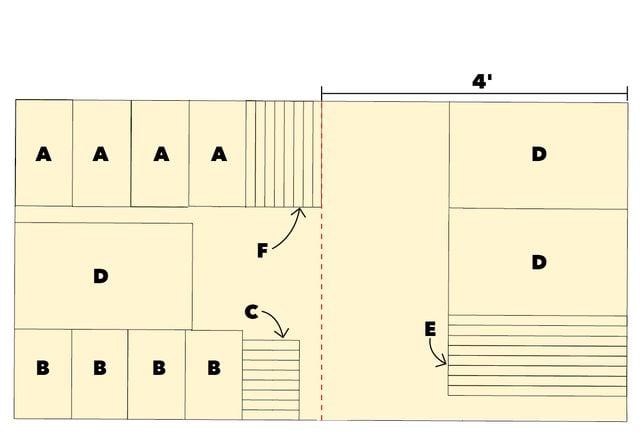
Cut List:
A) Fronts and backs: 4 @ 19-1/2-in. x 10-1/2-in.
B) Sides: 4 @ 16-1/2-in. x 10-1/2-in.
C) Side cleats: 8 @ 1-1/2-in. x 10-1/2-in.
D) Top, bottom and center platforms: 4 @ 19-1/2-in. x 32-in.
E) Top, bottom and center build-up sides: 6 @ 1-1/2-in. x 32-in.
F) Top, bottom and center build-up ends: 6 @ 1-1/2-in. x 19-1/2-in.
Tools Required
- 1/2" drill bit
- 18-gauge nail gun
- Carpenter's square
- Drill/driver
- Jigsaw
- Miter saw
- random orbital sander
- Table saw
- Tape measure
Materials Required
- 1-1/2-in. 18-gauge brad nails
- 1-1/4-in. 18-gauge brad nails
- 120-grit sandpaper
- 2-in. trim-head screws
- 4x8 sheet of 3/4" Fir Core Birch Plywood
- Wood glue
Watch How to Build a DIY Cat House
Project step-by-step (8)
Step 1
Cut Out Parts from Plywood
- Cut your parts on the table saw using the plywood layout diagram and cut list as a guide.
- Rip the cleats and build up pieces to width and then cut to length on the miter saw.
Pro tip: Have your home store or lumber yard cut your 4×8 sheet of plywood into two 4×4 sections for easier transport home and safer handling on the table saw. The cut diagram provided reflects this approach.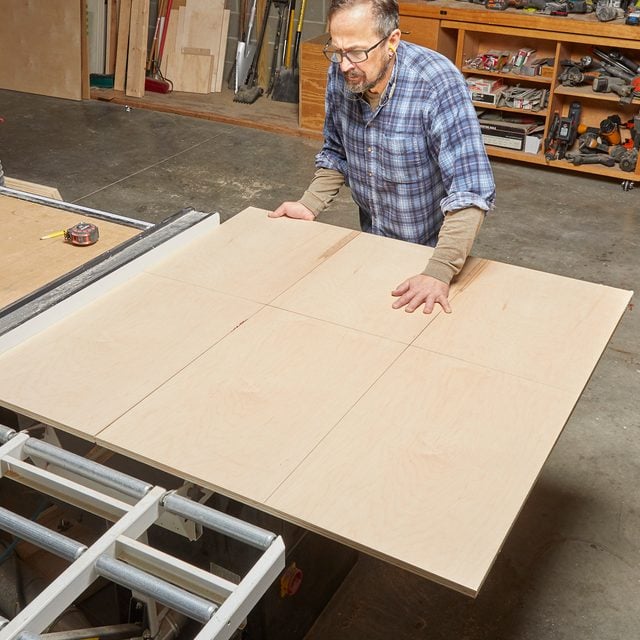
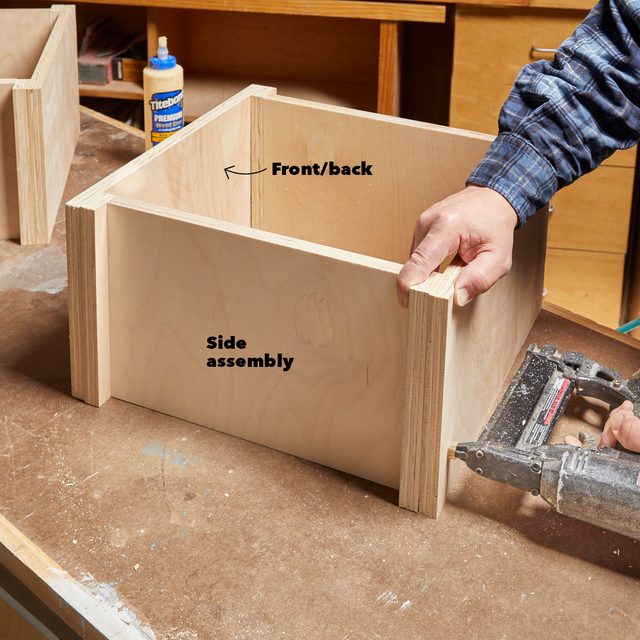
Step 2
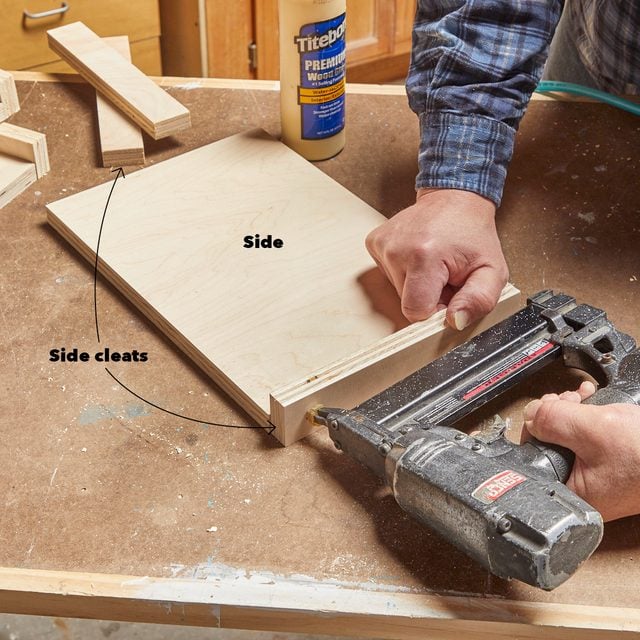
Assemble Sides
- Using wood glue and 1-1/2-in. nails, attach the cleats to the sides, keeping one edge flush with the side’s inner face.
Step 3
Attach fronts and backs
- Glue the cleats and nail them onto the fronts and backs, using 1-1/4-in. nails.
- Make sure the cleat edges are flush with the edges of the fronts and backs.
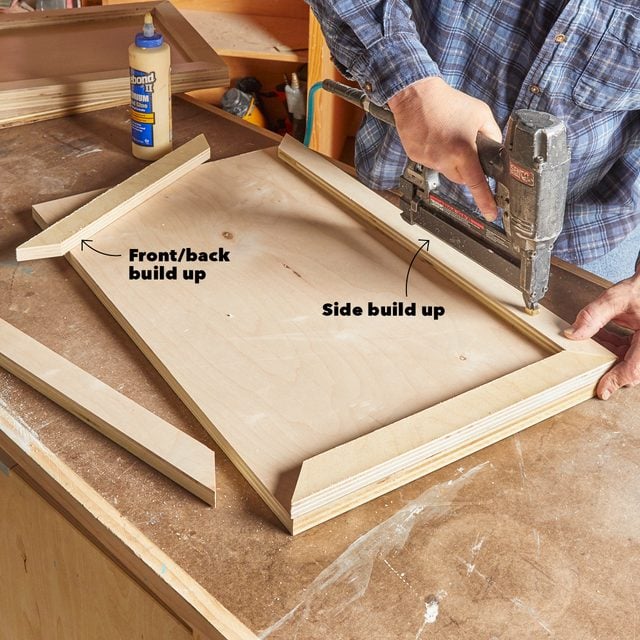
Step 4
Assemble the platforms
- Glue and nail the build-up to the bottom of each platform using 1-1/4-in. nails.
Pro tip: Do a dry fit first before gluing. Adjust the miters so the build-up is flush with the platform edges.
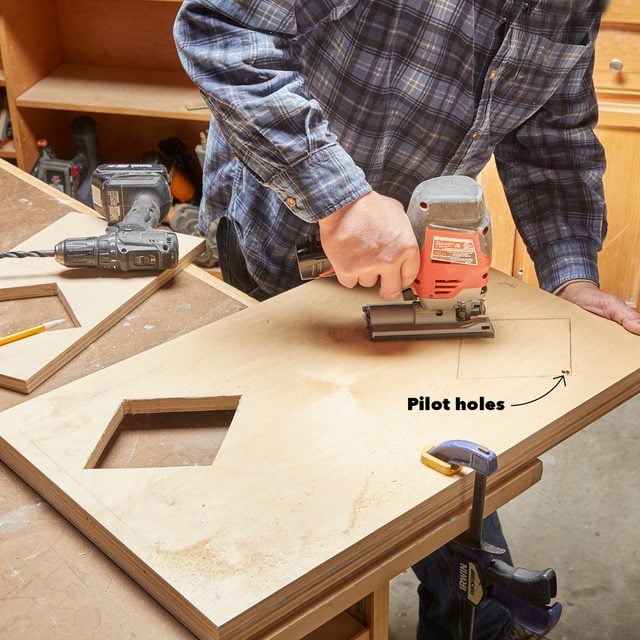
Step 5
Lay out and Cut the Portholes
- Make cardboard (or scrap wood) template the same size as a front.
- Lay out the 8-in. high x 6-1/2- in. wide diamond 1-1/2-in. from the edge of the face and a 1/2-in. from the top and bottom of the template.
- Using the template, draw the portholes on the front of the upper box and the back of the lower box. Lay out the portholes in the middle platform as well.
- Drill two 1/2-in. pilot holes in opposite corners of each porthole and cut the holes with a jigsaw.
- Smooth the cut edges with a sanding block or file.
Pro tip: Make a sanding block using sticky back 120 grit sandpaper and a scrap of 3/4-in. plywood, about 1-1/2-in. wide by 4-in. long.
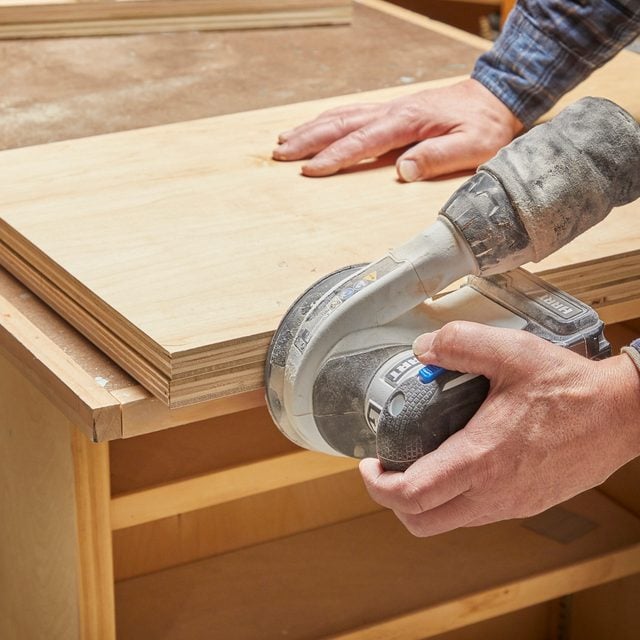
Step 6
Sand Edges Flush
- Sand all the exposed plywood edges flush using a random orbital sander with 120 grit paper.
- Round over any sharp corners with a sanding block.
Step 7
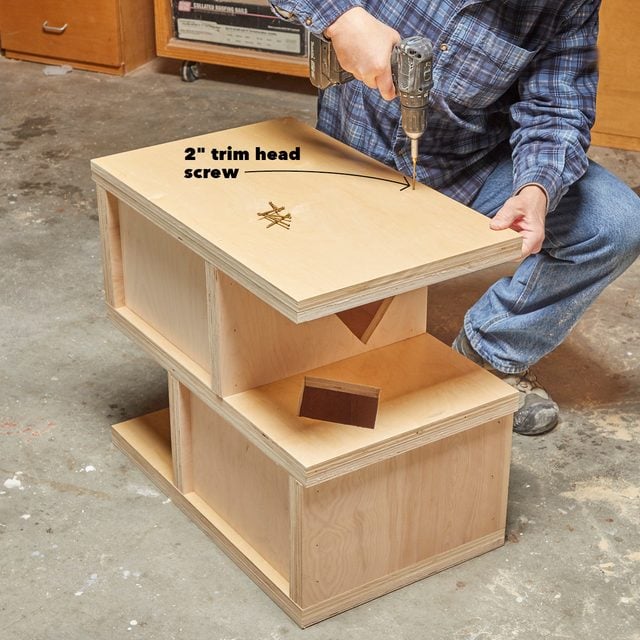
Attach Platforms to Boxes
- Apply paint or finish to the box interiors before assembly.
- Attach the bottom platform to the bottom of the lower box with 2-in. trim head screws.
- Attach the top platform to the top of the upper box with 2-in. trim screws.
- Attach the middle platform to the bottom of the upper box with 2-in. trim screws.
- Attach the upper box assembly to the lower box by sharply angling 2-in. trim screws along the sides of the upper box into the sides of the lower box.
Step 8
Finishing
You can either paint or clear coat this project. I will probably clear coat because I like the look of the exposed plywood edges. If you want to up your woodworking skill set, try some peel and stick birch veneer on those exposed edges for a super-fine finished appearance. Learn to build a DIY cat tree and tower.
Originally Published: January 22, 2021