How To Create a Gravel Garden

Updated: Sep. 13, 2023
Here's how to fashion a weed- and worry-free gravel garden that's quick, easy and affordable.
1 hour
Intermediate
$150 - $300
Introduction
If you're looking for a trouble-free landscaping option, a gravel garden might be in your future. Once established, they're a lot less hassle than lawns and standard landscaping beds, because they need minimal weeding or irrigation. And once they fill in with a bounty of native plants, they'll provide all the ecological benefits of a traditional flower garden.
Gravel gardens are a popular choice in drought-prone areas, and also good for mitigating flooding from heavy rains. Plus, they're a fun way to exercise your artistic expression, with accents like small boulders, benches and bird baths.
When choosing plants for your gravel garden, opt for ones with deep root systems so they can pull moisture from the soil. Drought-tolerant perennial grasses and evergreens are good picks, as are bulbs and even herbs.
Plants in four-inch pots are ideal, because their root balls are just large enough to penetrate the gravel. However, due to our particularly cold and dry climate, we opted for larger plants that have a better chance of surviving the winter.
We bought the gravel from a stone/quarry retailer, filled a heavy-duty trash can halfway up via shovel, and team-carried it home. But if you're creating a larger garden, you may need a delivery truck or rent a trailer to carry the tonnage you need.
We built our gravel garden approximately six feet by two feet, but yours can be larger or smaller, whatever size you want it to be.
Tools Required
- Gloves
- Hammer
- Measuring tape
- Rake
- Shovel
Materials Required
- 4 cubic feet of quartzite pea gravel (larger gravel will work too)
- 4 wood or metal stakes
- Border edging (wood or bricks or stones)
- Compost or mulched leaves or other topsoil amendment
- Landscape fabric (optional)
- Plants
Project step-by-step (6)
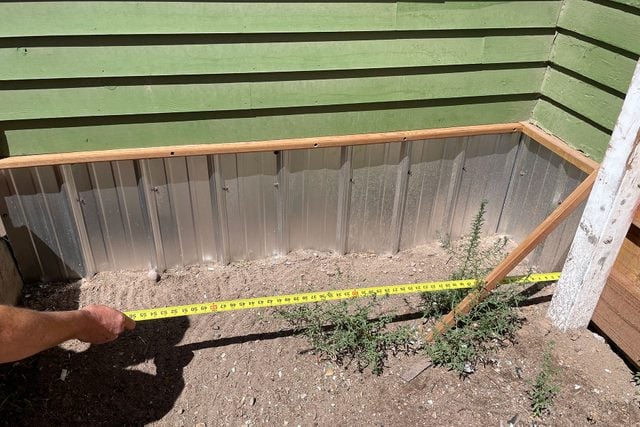
Plan out and measure the area
- Pick a flat, sunny area for the garden.
- Before you do any digging, go to call811.com to have your utility, electric, sewer/septic, gas and water lines marked.
- Map out any underground water features or wiring for lighting, if you’re going that route.
- Calculate how much gravel you’ll need by measuring the length, width and height of the garden in feet and multiplying them together. That will give you the total cubic feet.
- Choose your plants. Try to go native, since they’re best for wildlife, drought tolerance and easy maintenance.
Prepare the garden space
Depending on your layout, you may need to remove a layer of dirt. Some people just put the gravel on top, while others prefer to dig down a full eight inches.
For this garden, we chose to dig down a little because we have poor soil and wanted to amend it. We also decided to install landscape fabric because we have invasive Siberian elms that spring up anywhere we water.
- Hammer a stake at each corner, to lay out your bed dimensions.
- If you’re using wood for your border, you’ll attach your border edging to it. If you’re using part of your house or fence for the border, you don’t need to put stakes along those edges.
- Remove existing plants and grass from the garden area.
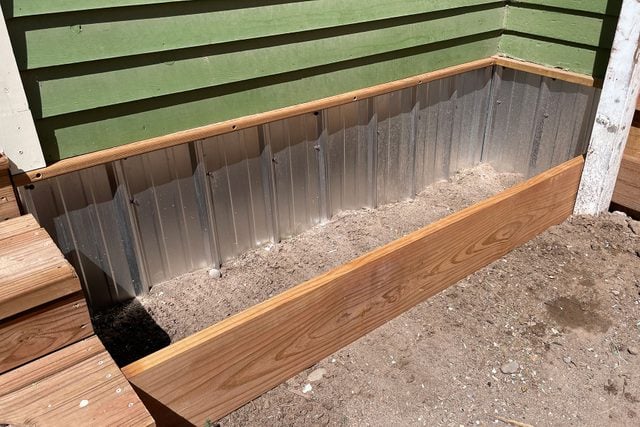
Install border edging
Whether you use wood, pavers or stones, build up your border at least six inches above the dirt, This way, the boundary’s high enough to keep the gravel from spilling out.
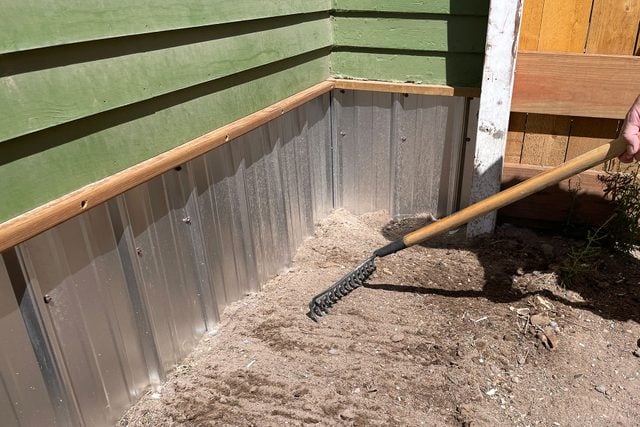
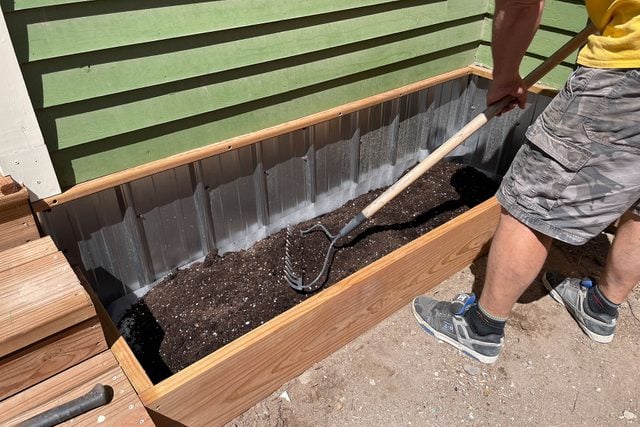
Prepare the soil (optional)
This is only necessary if your soil isn’t very healthy.
- Dig the area down approximately eight inches (four for soil and four for gravel).
- Remove rocks, weeds and other debris from the soil.
- Mix the cleaned soil with your soil amendments. For help figuring out what amendments you might need, try a soil test.
- Install landscaping fabric (optional). If you have weed-free soil, this can be done underneath it. Otherwise, it should go between the soil and the gravel. Try to find a membrane that’s permeable and plastic-free.
- Put the soil back into the bed, spreading evenly with a rake. The soil should be about four inches deep throughout.
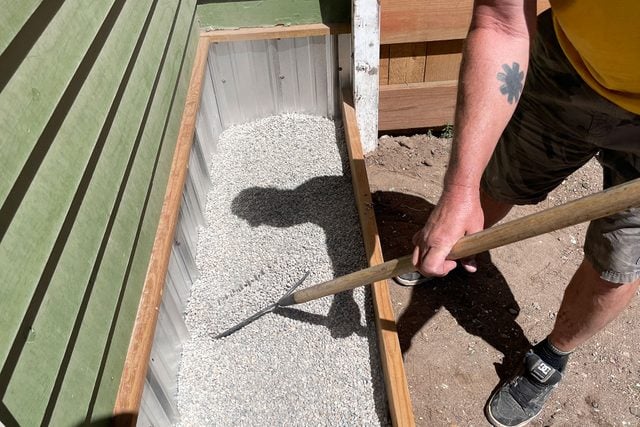
Add the gravel
- Mark your corner stakes four inches above the dirt line. This will help you gauge when your gravel is deep enough.
- Pour in the gravel and rake it level. It should be four or five inches deep throughout.
- Pro tip: If it’s too deep, the plants won’t root properly. If it’s too shallow, weed seeds can land in the gravel and germinate.
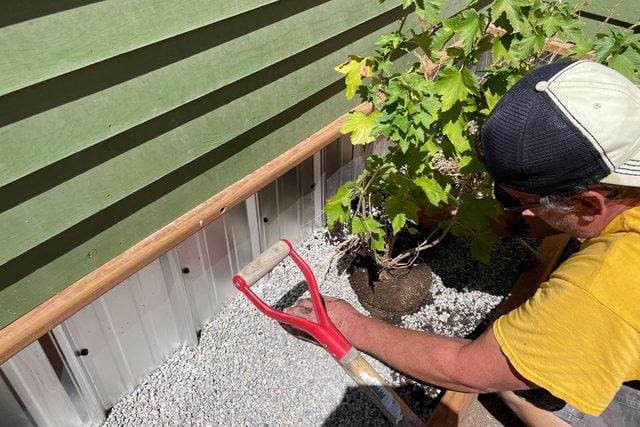
Plant everything
- Dig a small hole for each plant using a spade or just your hands. (A good pair of gloves is essential.)
- Remove some soil from the top of the root balls. An inch or so should be enough to eliminate dormant weed seeds that could be hiding in there.
- Insert the plants so their crowns are flush with the gravel, or slightly lower.
- Space plants 12 to 15 inches apart.
- Add any creative accents you want, like larger rocks or a bird bath.
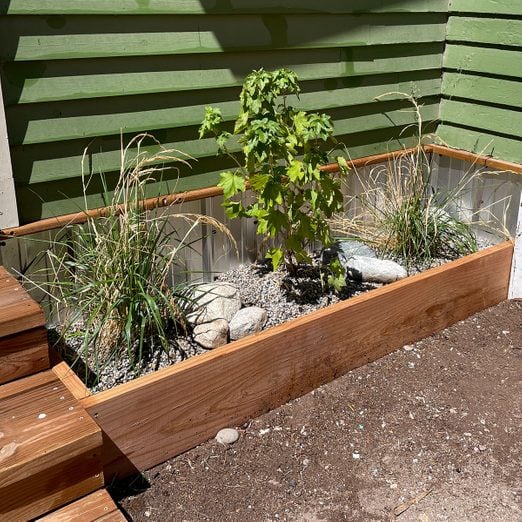
A gravel garden requires a little patience at first. It may take two or three years for your plants to fill out and mature, eventually hiding the gravel.
Make sure to water them a lot for the first year or two, perhaps even every day depending on your climate. Though your native plants are drought-tolerant, there’s little moisture available to them in the gravel, so they’re vulnerable until their roots anchor into the soil below. A temporary irrigation system will save you time and hassle.
At the end of the season, leave any dead stalks and grasses in place for the winter, which will help out the birds. Then in spring, cut back dead stalks and remove any debris with a rake or blower. Keeping the gravel free of organic matter should keep the weeds at bay.