This 15-minute fix can prevent an expensive mess.
15 minutes
Beginner
$30 to $75
Introduction
An inexpensive backflow preventer, installed in a basement floor drain, can prevent major flooding problems caused by a blocked or overloaded sewage pipe. Installation is usually easy.
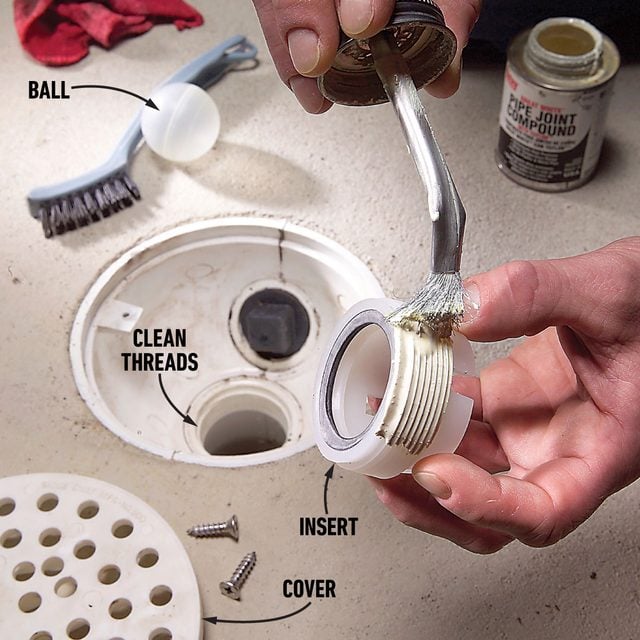
Thread in the Valve
A big pipe carries waste from your house to the main sewer line under the street. If either becomes plugged or overloaded, sewage backs up and flows out of the lowest available drain. That’s usually a floor drain.
You can prevent a sewage-filled basement or lower level by taking 15 minutes to install a floor drain backflow preventer, also known as a “backwater” valve.
Before you buy one, remove your floor drain cover to see if there’s already one in place. A call to your city building inspection department is a good idea, too. You may learn sewage backups are unlikely in your neighborhood, and installing a backflow preventer isn’t worth the effort.
On the other hand, a backflow preventer may be required by your local building code. Some home centers and hardware stores carry them. Otherwise, call a plumbing supplier or go online. For easier installation, be sure to also buy pipe thread sealant formulated for plastic.
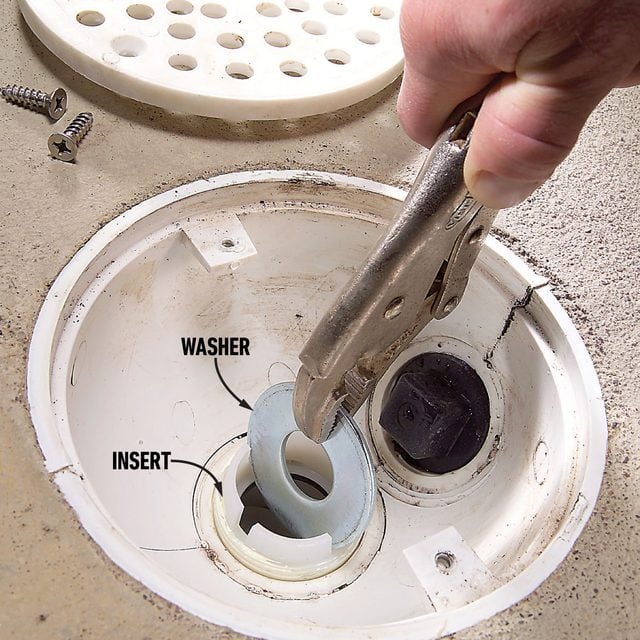
Installing a valve in a plastic drain is usually a quick, hassle-free job. But cast iron drains can be frustrating if the threads inside are corroded. If you can’t screw in the insert after cleaning it with a steel brush, try this: Screw in and then remove a six-inch long section of 2-in. threaded steel pipe (sold at home centers). The tapered threads clean and straighten the drain threads.
If that doesn’t work, call a plumber to repair the threads with a tap. Or you can seal the drain with a 2-in. “test plug,” also sold at home centers. A plug will stop rising sewage, but you’ll have to remove it every time you want to use the drain.
Tools Required
- 4-in-1 screwdriver
- Locking pliers
- Wire brush
Materials Required
- Floor drain backflow preventer
Project step-by-step (3)
Step 3
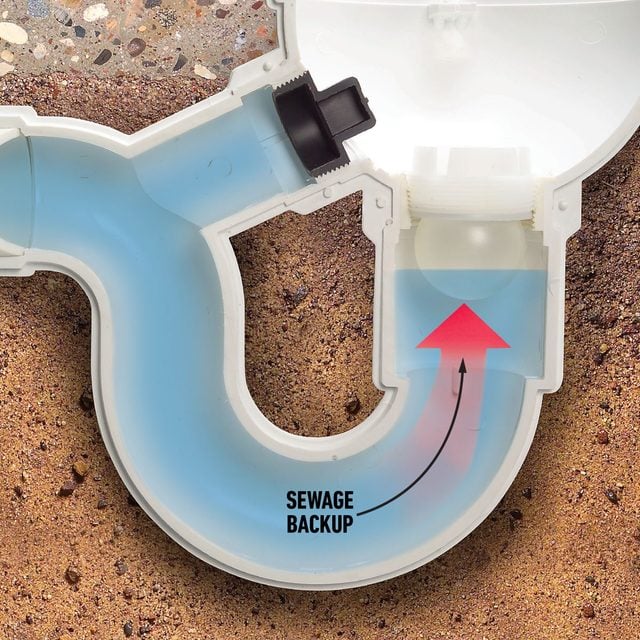
Floor drain backwater valve in place
When the sewage level rises, the floating ball seats tightly against the insert and keeps sewage from flowing out onto the floor.