


Learn how to use a drain bladder to quickly, easily and affordably clear the toughest sink clogs.
An hour or less
Intermediate
$20-50
Introduction
Clogged drains are a hassle to deal with, but a drain bladder can drastically reduce the frustration. With a minimal amount of time, effort and money, you can use a drain bladder to clear your clogged sink without the mess or difficulty involved with many other methods. Follow this step-by-step guide the next time you're battling a clog, and reap the reward of letting water pressure replace elbow grease.
Tools Required
- Bucket and towels
- Garden hose
- Gloves
- Optional: Flashlight or headlamp or portable work light
- Optional: Garden hose aerator adapter. May be included in a drain bladder kit or purchased separately.
- Optional: Garden hose shutoff valve
- Optional: Small garden hose. May be included in a drain bladder kit or purchased separately.
- Slip-nut pliers
- Small drain bladder (for 1" to 2" drains)
Project step-by-step (10)
Step 1
Prepare your workspace
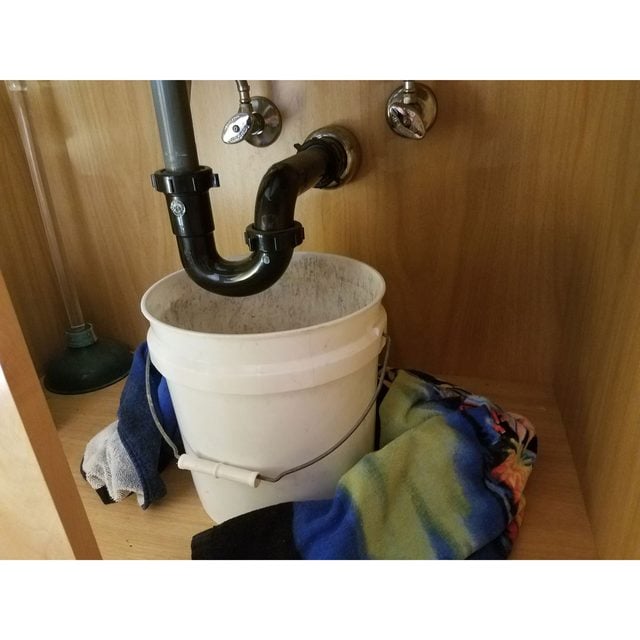
- Clear the space underneath your sink drains.
- Lay down some towels underneath the drain pipes.
- Place a bucket underneath the P-trap to catch the dirty water that will flow out after disassembly.
- Consider illuminating your workspace with a flashlight, headlamp or portable work light to increase visibility in dark areas.
Step 2
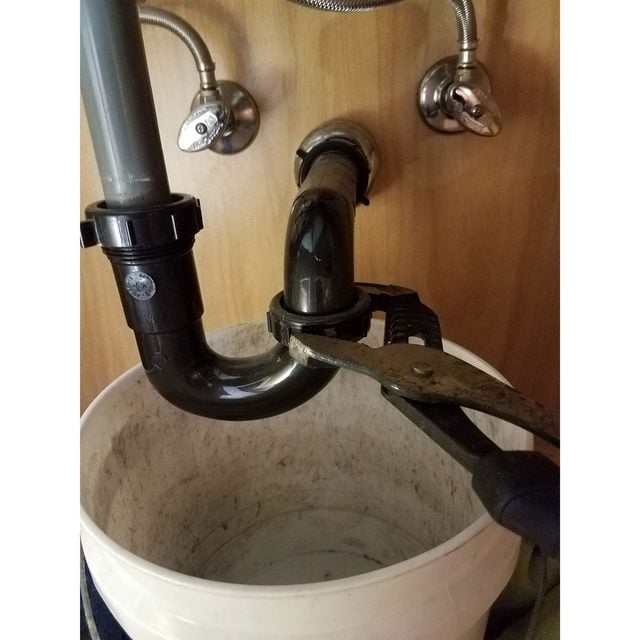
Disassemble the P-trap
- Unscrew the two slip nuts holding the P-trap in place. One slip nut connects the trap to the waste tee coming from the sink basin, and the other slip nut connects the P-trap to the trap arm (the straight, vertical drain connecting the P-trap to the wall).
- Slip nuts can be made from plastic or metal. You might be able to loosen both kinds by hand, but metal slip nuts often require pliers to loosen. Plastic slip nuts might also require pliers, but you need to be especially careful not to damage the fragile plastic with excessive force when loosening them.
- Carefully wiggle the trap free and visually inspect it for clogs and obstructions to see if that was the source of your blockage.
Step 3
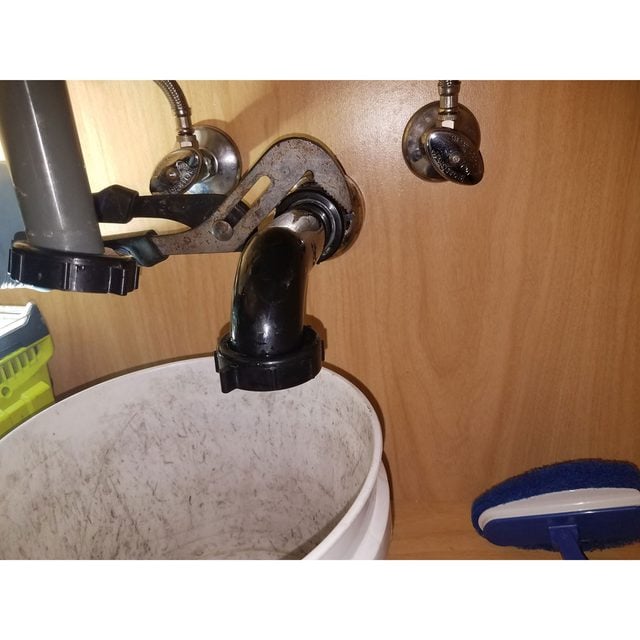
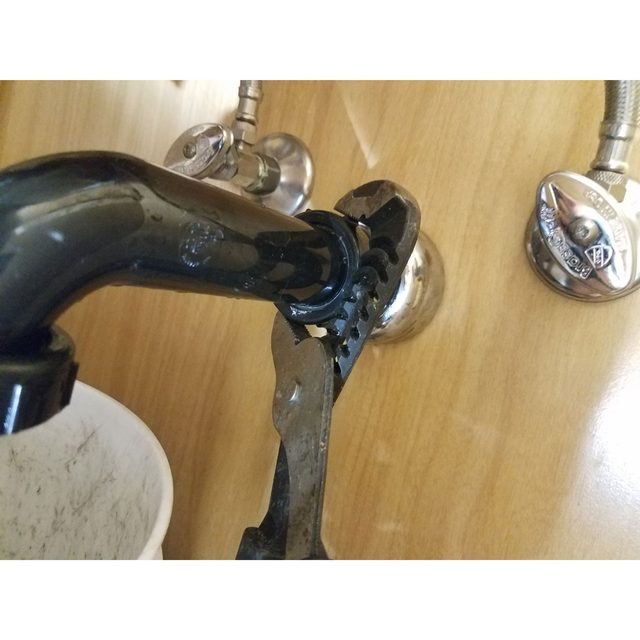
Disassemble the trap arm
- With the P-trap disassembled, loosen the slip nut connecting the trap arm.
- Remove the trap arm from the drain-line stub out (the small piece of pipe protruding from the wall).
- Visually inspect the trap arm for clogs and obstructions to see if that was the source of your blockage.
Note: There is some debate about whether a drain bladder can be inserted directly into the sink drain without disassembling the P-trap and trap arm. Some sources say that the P-trap and trap arm slip nuts aren’t designed to withstand the water pressure produced by the drain bladder, while others say it’s perfectly fine (and highly effective) to use a drain bladder to clear the P-trap and trap arm.
If you insert a bladder into the sink drain, you need to ensure that the bladder is fully inserted into the drain to prevent damaging the sink or the bladder. Some drain bladder kits include a sink crossbar adapter to use on kitchen sinks without inserting the bladder directly into the drain, but they’re often too large to use on bathroom sinks. If you go this route, you should closely monitor the P-trap and trap arm for leaks while the drain bladder is being used.
Step 4
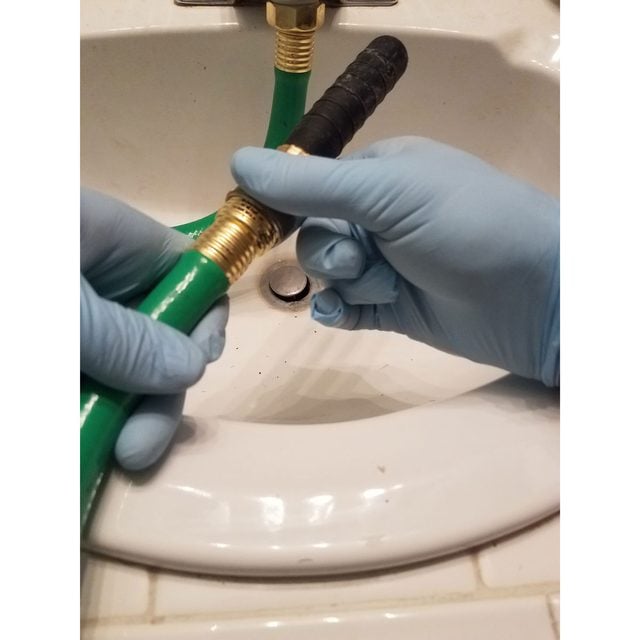
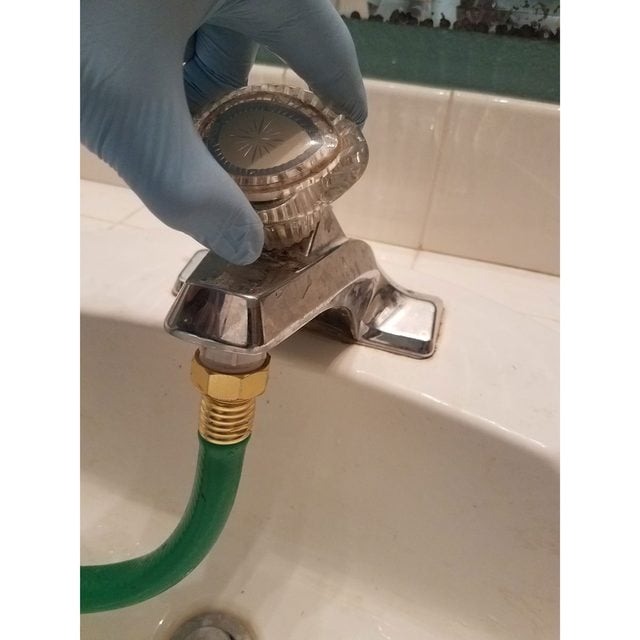
Connect the garden hose to a water source
- Thread the end of your garden hose onto the water source you will be using with your drain bladder. Double-check to make sure the hose is long enough to reach the clogged drain.
- You can connect the hose to an outside hose bib or an indoor sink faucet. If using an outdoor bib that’s located a distance away from the area where you’re working, you may need another person to turn the water on and off while you’re using the drain bladder. To connect the bladder to a sink faucet you will need to unscrew the aerator (the small cap at the tip of the faucet where the water comes out) and replace it with a garden hose adapter. Some drain bladder kits will provide this adapter. Only use cold water when using the water from your sink.
Pro Tip: If you’re using an outdoor water source and you can’t find an assistant to control the water flow for you, consider using a garden hose shutoff valve that’s attached to a smaller water hose. The shutoff valve connects to the main garden hose connected to the water faucet. The smaller water hose is then connected to the shutoff valve, with the drain bladder connected to the end of the smaller hose. This configuration lets you keep the outdoor water faucet on while controlling the flow of water with the shutoff valve. The shorter water hose will also be more flexible, making it easier to maneuver the drain bladder inside the drain pipe.

Step 5
Connect the drain bladder to the garden hose
- Hand-tighten the end of your drain bladder onto the open end of your garden hose.
Step 6
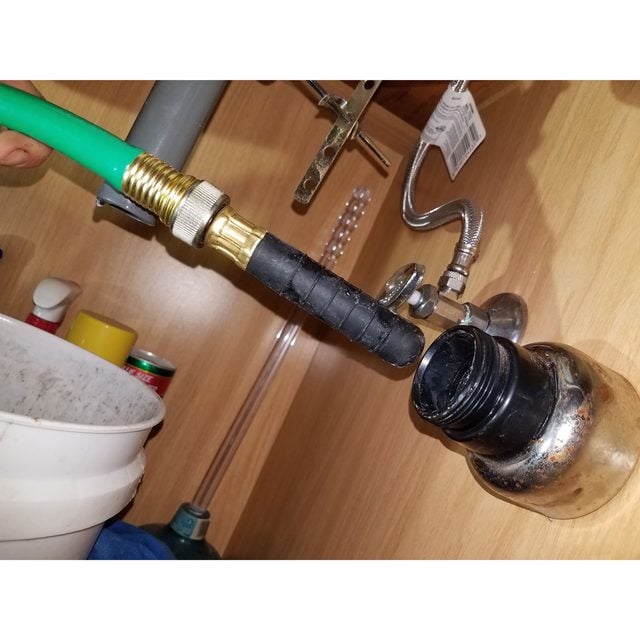
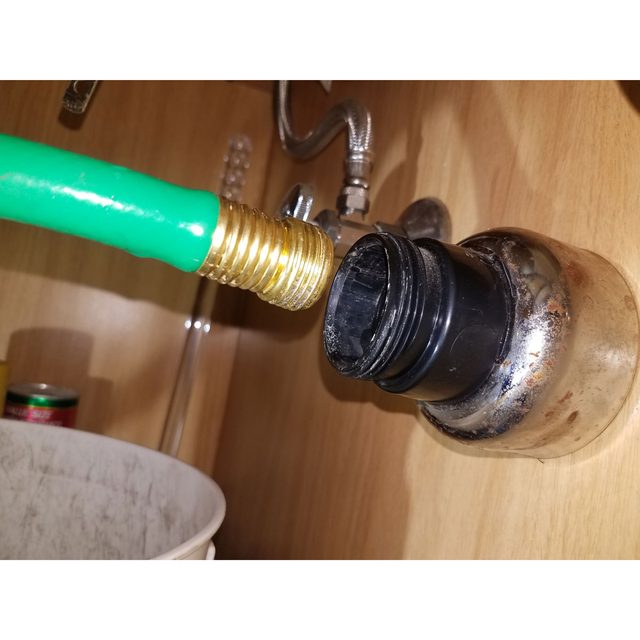
Insert the drain bladder into the wall
- Insert the tip of the bladder into the wall, and carefully press and wiggle it as far down into the drain as possible.
- The bladder should be inserted a minimum of six inches into the drain. It’s recommended to insert the bladder far enough into the drain to bypass the point where the branches off to the roof vent. If you don’t push the bladder past this tee, the water may travel up toward the roof if it encounters enough resistance at the clog. Ideally, the bladder should be inserted until it meets resistance from the clog.
Step 7
Blast the clog
- Slowly turn the cold water on and allow the bladder to inflate.
- Position yourself off to the side of the drain opening. While uncommon, pressurized water can backflow out of the drain opening and splash you.
- Keep the water on and allow the bladder to work for one to three minutes.
- Shut off the water supply and allow the bladder to deflate for about a minute.
Step 8
Retract the drain bladder
- While wearing gloves to avoid touching drain waste material, carefully remove the drain bladder from the wall.
- Unscrew the drain bladder from the garden hose.

Step 9
Test the drain
- Test if the drain is clear by disconnecting the drain bladder, reinserting the water hose and turning the water on to fill the drain with water.
- If the drain is clear, the water from the garden hose will run freely into the drain without any backflow.
- If the drain is still clogged, repeat Steps 1 through 8 a couple more times before moving on to another drain clearing method or contacting a plumber.
Step 10
Reconnect the drain pipes
- Reconnect the trap arm to the wall and the P-trap to the trap arm and waste tee.
- While your drain should be thoroughly rinsed and cleaned from the action of the drain bladder, you can run some water down the sink to verify your fix and test the drain pipe connections.
Originally Published: November 27, 2020