This may be the answer to limited counter space if you live in a small apartment or home. Follow our step-by-step instructions.
Our editors and experts handpick every product we feature. We may earn a commission from your purchases.Learn more.


This may be the answer to limited counter space if you live in a small apartment or home. Follow our step-by-step instructions.
Our editors and experts handpick every product we feature. We may earn a commission from your purchases.Learn more.
A full day
Beginner
$100 - $200
This may be the answer to limited counter space if you live in a small apartment or home. Follow our step-by-step instructions.
Whether you live in a small apartment or an old home with a tiny kitchen, cooking with limited kitchen counter space can be a challenge. Once you lay out a few essential countertop appliances (toaster, air fryer, coffeemaker, etc.), there’s next to nothing left for cutting vegetables and food prep.
Here’s the solution: An over-the-sink cutting board.
As the name implies, these boards span your sink and give you a work surface when you need it. They’re readily available in home furnishing stores. But because sinks and kitchen designs vary, no single model will work for everyone. So why not DIY one?
Here are some steps for making your own over-the-sink cutting board.
Before you start, you’ll need a few crucial measurements:
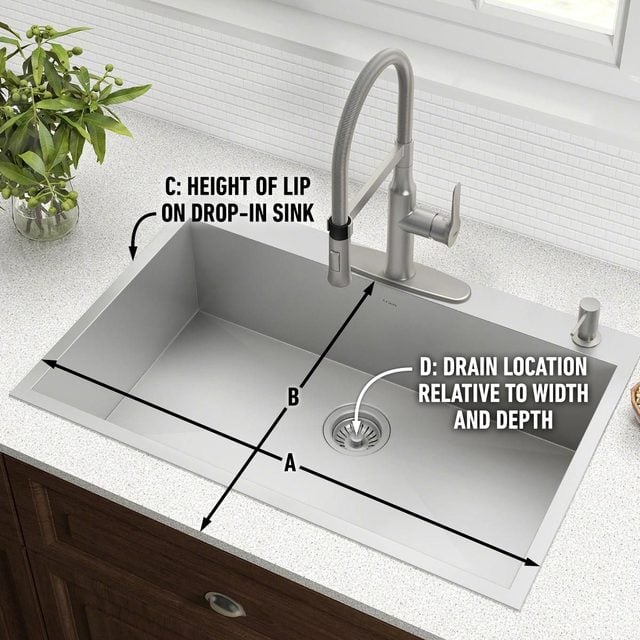
Add three inches to the width of your sink (Measurement A). That’s the length to cut your boards.
To determine how many boards you’ll need, take your sink depth (Measurement B) and divide it by the width of your boards.
I wanted my cutting board to be 1-1/4 inches thick. I chose a thickness of 1-3/8-inches, knowing I had a considerable amount of sanding and/or planning ahead of me.
My sink dimensions (used for these drawings):
Measurement A: 33 inches.
Measurement B: 19-3/8-inches.
Board length: Measurement A: 33-in. + 3-in. = 36 inches.
Board quantity: Measurement B: 19-3/8-in. divided by 3/4-in. (my lumber thickness) = 25.833, or 25 boards.
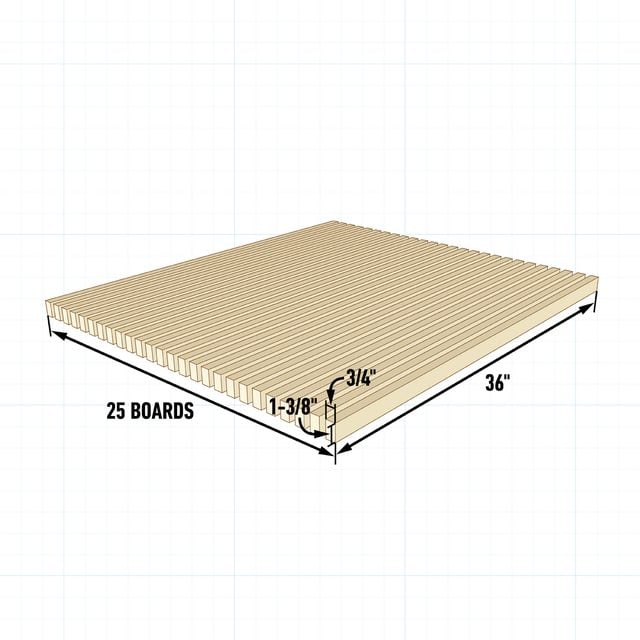
Once you’ve cut your boards, glue them together. A waterproof wood glue like Titebond III ensures every joint has 100% coverage.
Though biscuits aren’t required, I highly recommend them. They will not only strengthen the cutting board but assist in aligning the numerous boards. Distribute the biscuit joints throughout the cutting board, making sure not to place any where the drain hole will be.
Glue the cutting board and clamp it tightly until the glue dries. Then remove the clamps and scrape off any glue squeeze-out with a scraper, putty knife or chisel.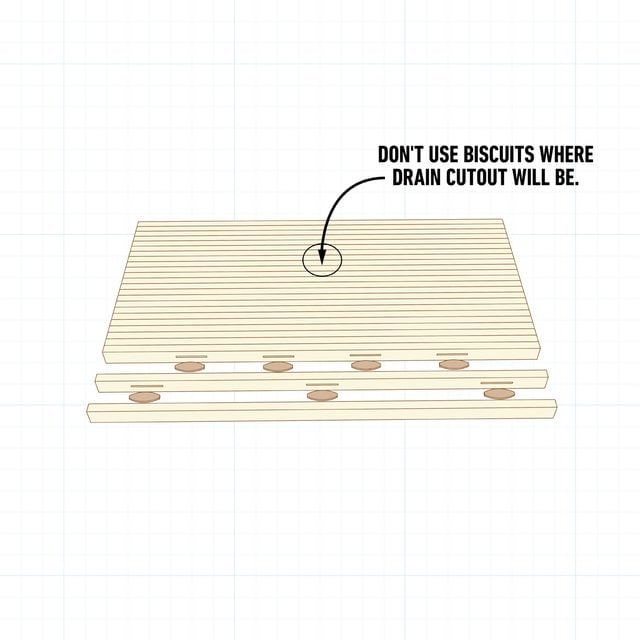
Smooth out the top and bottom of the cutting board with a belt sander, starting with an 80-grit belt and working your way up to 120-grit. If your boards are far from flush, you might be better off starting with a power planer and finishing it off with the belt sander.
Once the cutting board is flat, if the boards aren’t aligned on the sides, trim them square on the table saw.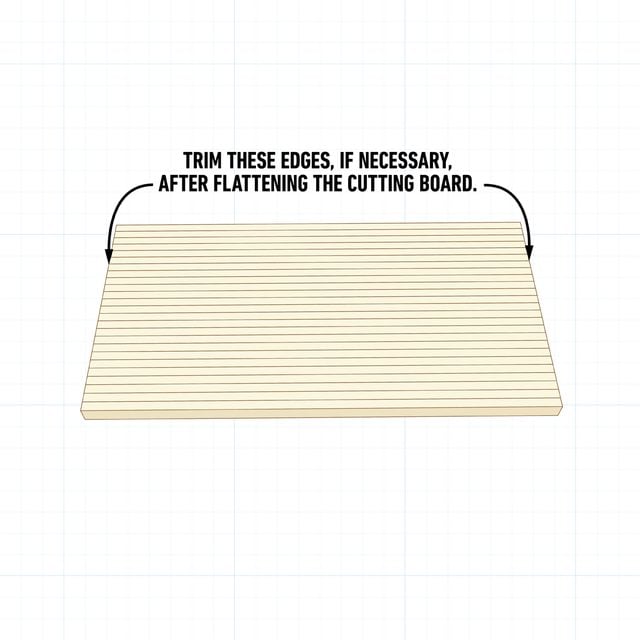
With a flattened cutting board (most likely at least 1/8-in. thinner than when you started), choose the prettiest side of the board and route a channel around the perimeter of the board 1/2-in. from the outside edge. This collects moisture and juices before they run off the surface.
Use a wood router with a 1/2-in. flute cutting bit. Make the channel 1/8-to 3/16-in. deep, leaving it about 3/8-in. wide.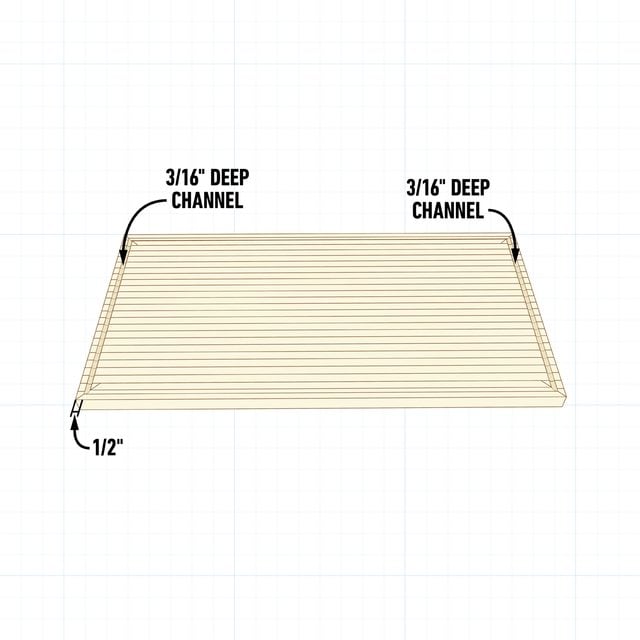
Use a router with a template or a jigsaw for this.
For me, a 5-in.-dia. hole is ideal. It doesn’t take up much space, yet I can still fit my large hands through it when some produce rolls into the sink.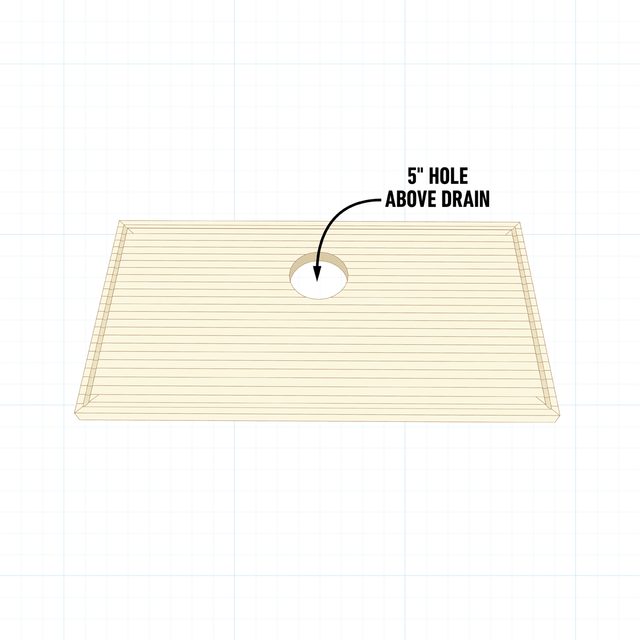
Sand the entire cutting board to 220-grit and break the edges, including those around the drain hole and the perimeter.
Clean all surfaces of the cutting boards with a vacuum cleaner or blower, and apply a food-safe finish. These come in oils and waxes; for the best protection, I recommend both. I’ve found Walrus Oil to be the best. As always, apply according to the manufacturer’s instructions.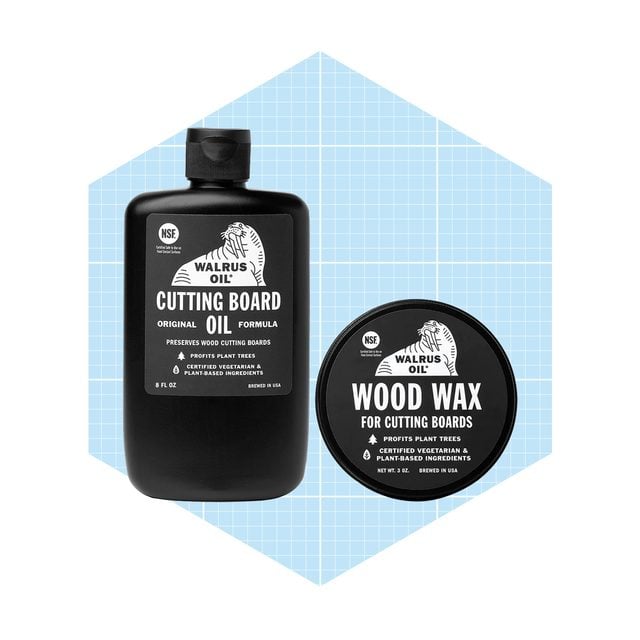
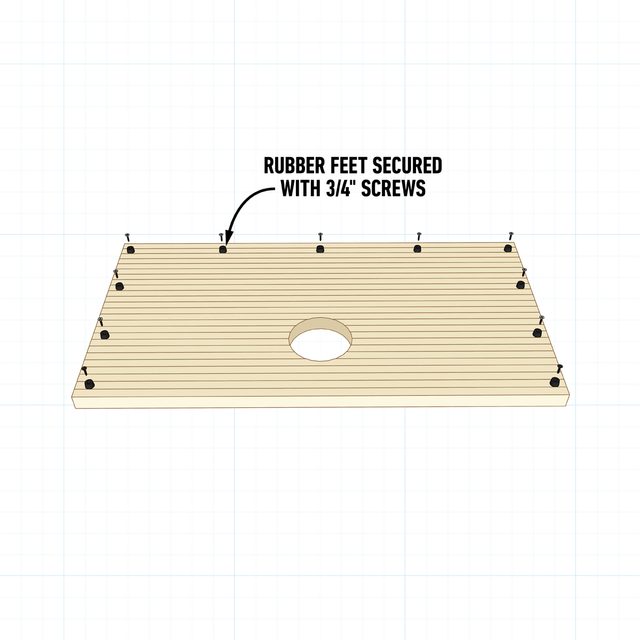
Purchase rubber feet or bumpers rather than plastic to prevent them from sliding around on the countertop surface. To avoid problems with adhesive failing, I prefer screwed-on rubber feet as well. If you have a drop-in sink, be sure to purchase a rubber feet taller than the sink lip (Measurement C).
Note: For those with farmhouse sinks that extend all the way to the counter edge, attach your feet only to the sides of the cutting board, not the front.