


Build this simple, elegant chessboard in an afternoon, and make it your own by selecting whatever wood species you like.
A few hours
Intermediate
$20-50
Introduction
Making your very own chessboard is easy.
Building a chessboard is an easy woodworking project that even a beginner can tackle. You only need some basic tools and equipment to create it, and you’ll have hours of fun playing chess with friends and family on you very own chessboard. If you really want to go all out in your customized gaming experience, we recommend making your own chess pieces too.
Before you get started, select the contrasting wood species you want for the board. Walnut is an excellent choice for the darker colors. Maple or even pine works well for the lighter color, but you can choose whatever kind of wood you like best and whatever fits your budget.
Next, gather up some glue and the few other tools and materials listed below and you’re ready to start building.
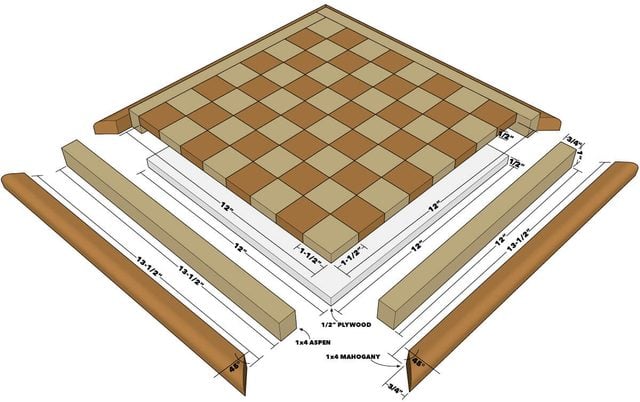
Project Plans
Tools Required
- 18-Gauge Brad Nail Gun
- Clamps
- Miter saw
- Router
- Table saw
Materials Required
- 1-in. 18-gauge brad nails
- 2’ x 2’ of 1/2” Plywood
- 8’ 1x4 Board of Dark Wood (Mahogany)
- 8’ 1x4 Board of Light Wood (Aspen)
- Wood glue
Watch How To Build A Chessboard
Project step-by-step (13)
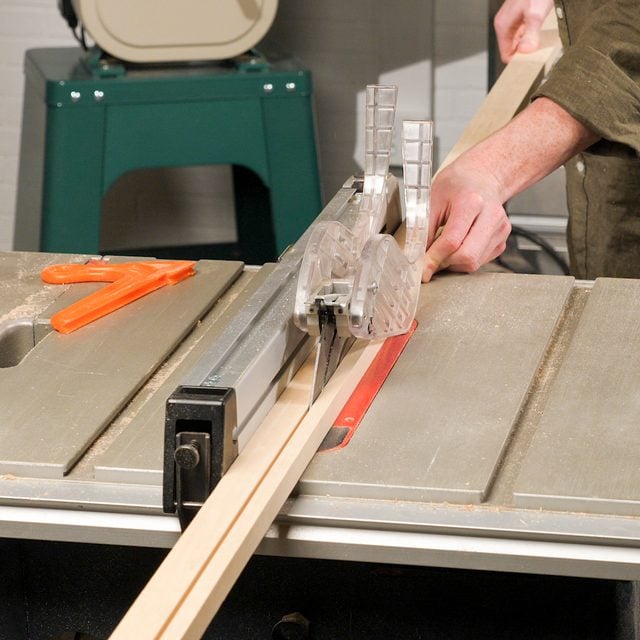
Step 1
Rip Boards on Table Saw
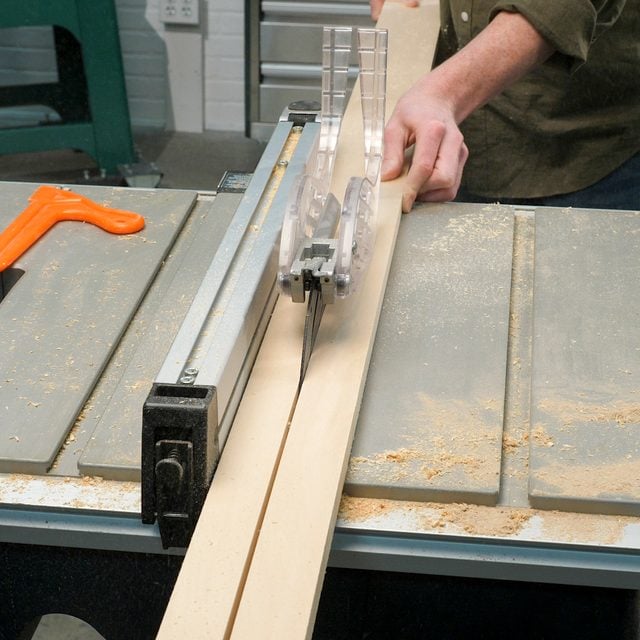
Rip boards to 1-1/2 in. on the table saw. You can also buy 1×2 boards and skip this step, but you’ll have to make sure to check that the edges are perfectly square.
Step 2
Rough Cut Boards with Miter Saw
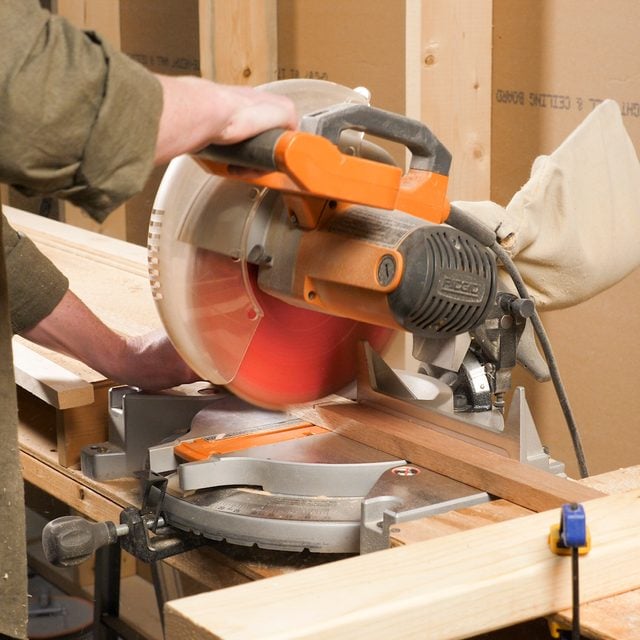
Cut four pieces from each ripped wood species to a rough 16 in. We used a stop so we didn’t need to measure over and over again. This rough cut will give you a little leeway when you glue up the pieces and when you cut them into strips.
Step 3
Glue Up the Strips
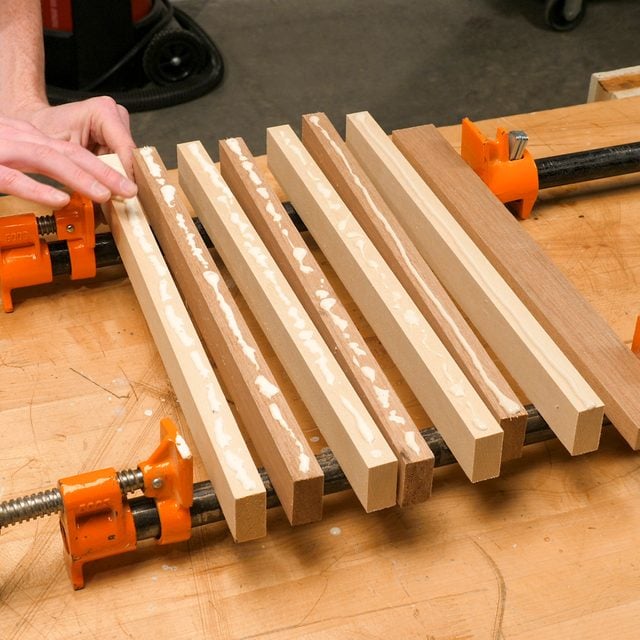
Lay out the boards alternating light and dark wood. Make sure the edges fit together well. In other words, don’t rely on the clamps to squeeze the boards together. Spread the wood glue on the boards, making sure to get it even and all the way to the edges. Clamp together with bar clamps. Let dry completely.
Step 4
Plane or Sand the Board
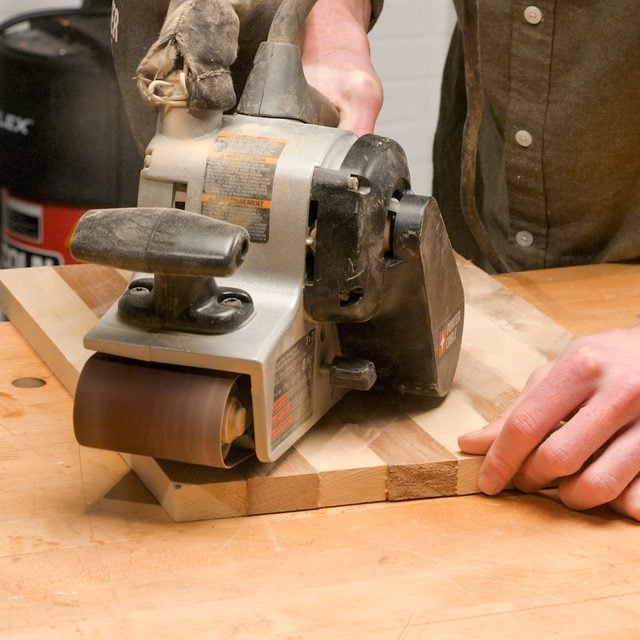
Plane or sand with a low-grit sandpaper to get the newly created board flat and even.
Step 5
Cut Off the Rough Edges

Use a miter gauge on the table saw to cut off the rough edges of the board.
Step 6
Set a Stop & Crosscut the Board
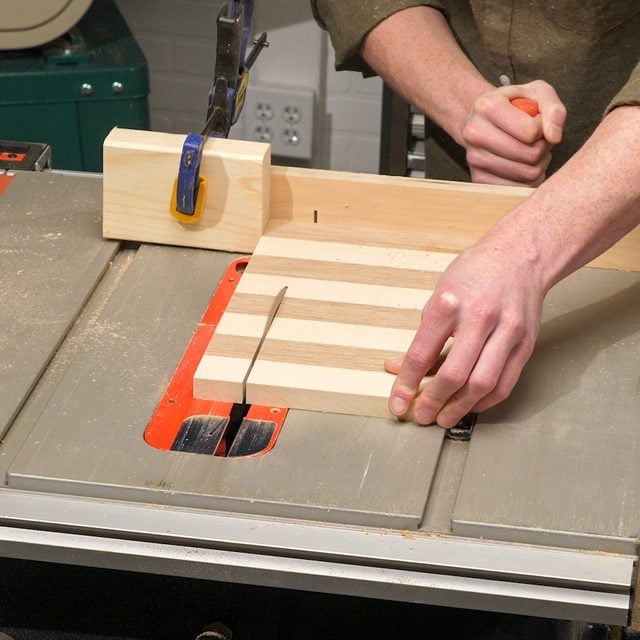
Using the same miter gauge method as above, set up a stop at 1-1/2 in. from the blade and crosscut eight strips from the board.
Step 7
Flip the Strips & Glue Up
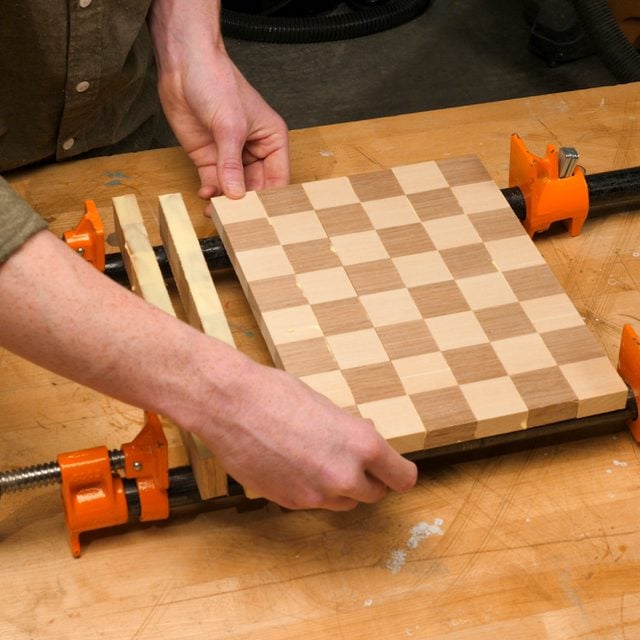
Lay out the strips and flip every other strip, creating the chessboard pattern. Glue up the strips and clamp them together. Let dry completely. Sand or plane the newly created chessboard.
Step 8
Cut Plywood & Fasten to Chessboard
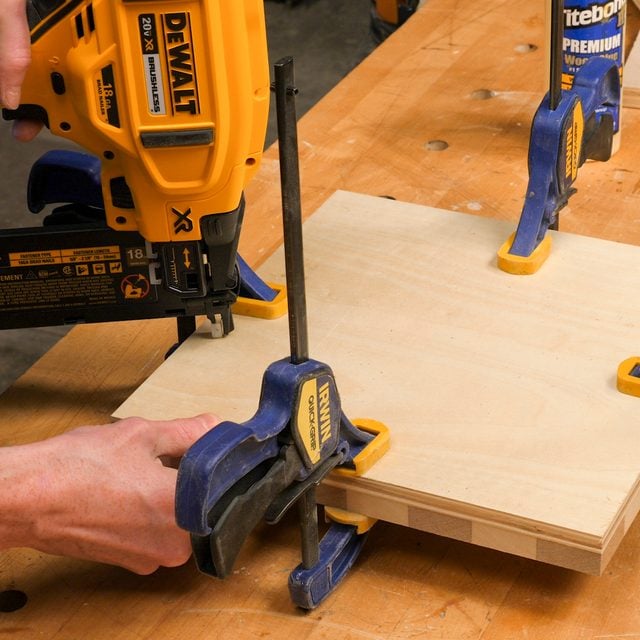
Measure the dimensions of the chessboard. It’s fairly unlikely that it will be perfectly square, but just make sure. Rip and crosscut your 1/2 in. plywood to the size of your chessboard. Using glue, clamps and 1-in. 18-gauge brad nails, fasten the plywood to the chessboard to create a flat surface on the bottom.
Step 9
Rip Wood to Depth
Measure the height of the chessboard at several points, take the smallest height, and rip the lighter wood species to that size.
Step 10
Scribe Lengths of Wood
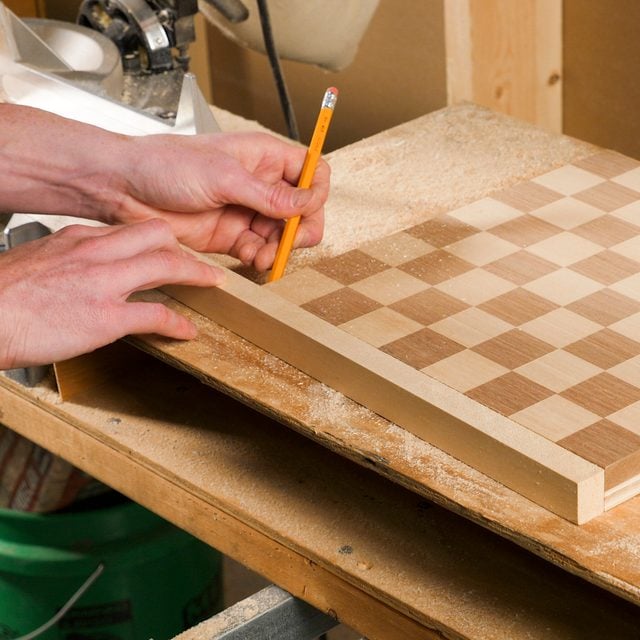
Line up the ripped light board with the chessboard and scribe the lengths. Cut the light wood board to those lengths on the miter saw. Using glue and brad nails, fasten the pieces to the edges of the chessboard. Sand until the chessboard is flush with the outer frame.
Step 11
Round Over & Rip Darker Wood
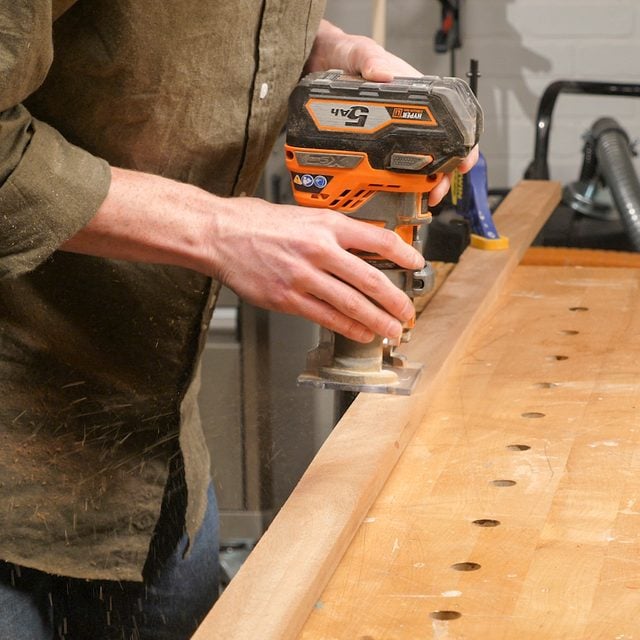
Use a router and a 1/4-in. round-over bit to round the edges of the dark wood. Rip the board to 3/4 in. on the table saw. If you don’t want to do this step, home stores sell 3/4-in. quarter-round moulding of nearly every species of wood. These materials are usually pretty cheap and can save you some building time.
Step 12
Miter Angles Into Rounded Board for the Outer Edge

Miter a 45-degree angle into the rounded board. Take it to the chessboard and scribe the other side of the board to get the length of the outer rim. Repeat this process to get the other three sides.
Step 13
Glue & Clamp
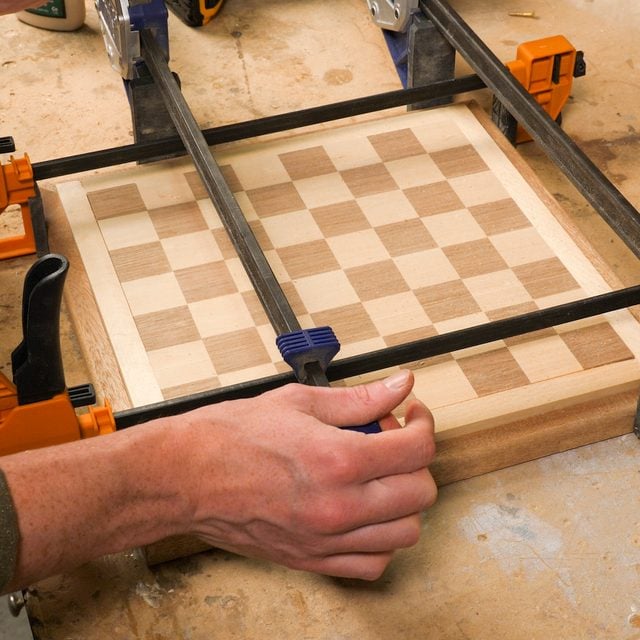
Glue and clamp the mitered boards to the chessboard and let it sit until it’s fully cured. Make sure to spread the glue onto the angles. This is key to a good hold. If you don’t trust just the glue, you can also nail 1-1/2-in. 18-gauge brad nails into the chessboard and make it completely secure.