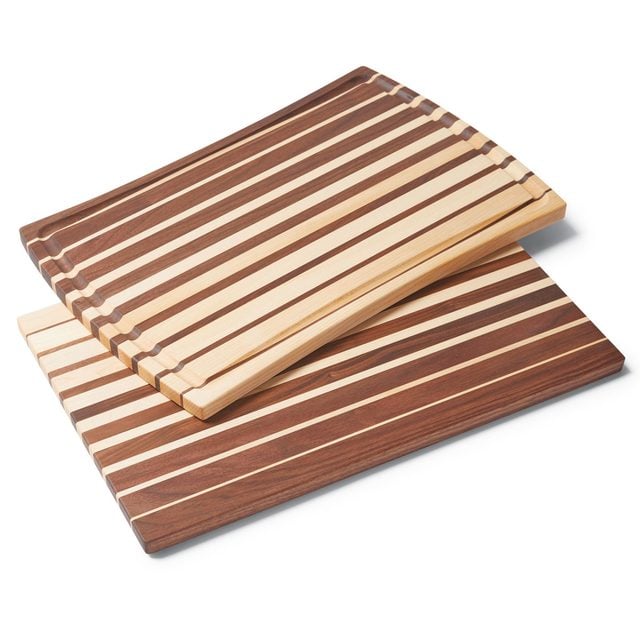
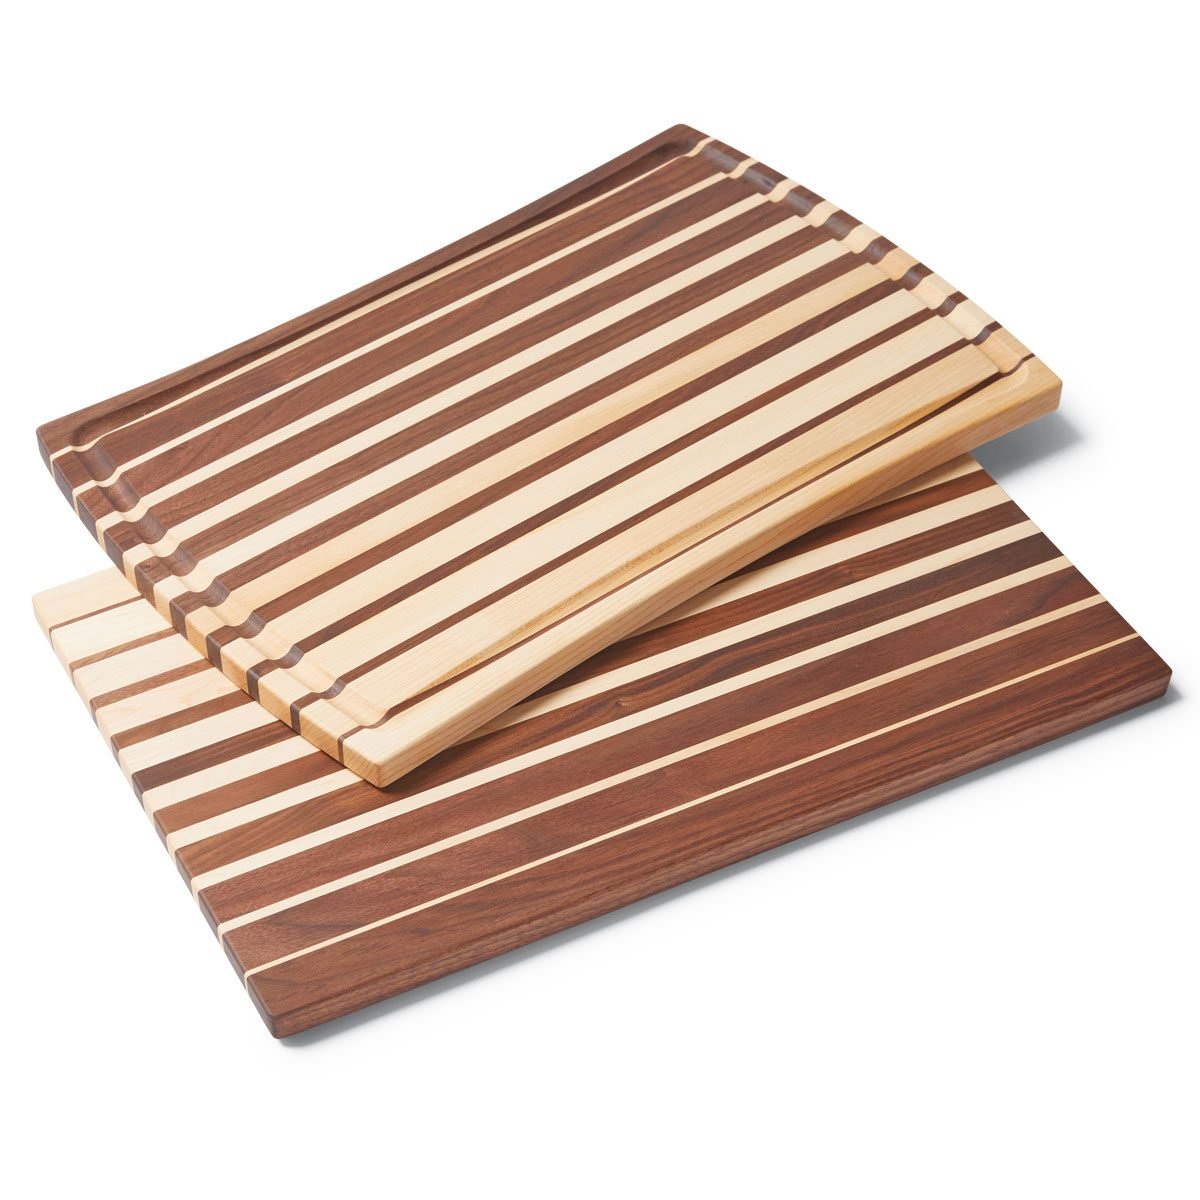
An eye-catching project made from wood scraps!
A few hours
Intermediate
$20-50
Introduction
This cutting board dazzles the eye, but making it is easy: Just cut strips of wood and glue them together. I used walnut and maple scraps cut at increments of 1/8-in., but the variations are endless. I made four versions of this design and got smarter with each.Tools Required
- Clamps
- Router
- Table saw
Materials Required
- 1/8-in. MDF
- 2x6 x 6 ft. of pine (for cauls)
- 3/4-in.-thick boards at least 22 in. long and a total width of at least 8-1/4 in. for each species. The cost for walnut and maple is about $20 per cutting board
- Double-sided tape
- Duct tape
- Mineral oil
- Sanding supplies
- Six 3/8-in. x 5-in. lag screws and washers
- Waterproof wood glue
It’s easier than it seems
Cut two strips of each width—one from maple, one from walnut. The strips differ by increments of 1/8-in., so widths are: 1/8, 1/4, 3/8, 1/2, 5/8, 7/8, 1, 1-1/8, and 1-1/4 in.
Tips for flat, tight results
START WITH LONG STRIPS: Before cutting strips, cut your boards at least 1 in. longer than the final length of the cutting board. That way, you won’t have to align the ends perfectly during glue-up. Trim off the imperfect ends after glue-up.
TUNE UP YOUR TABLE SAW: Clean, precise cuts are critical. Grab a square and make sure the blade is
square to the tabletop. Also check that the fence is perfectly parallel to the blade. Your owner’s manual will show you how. This is a good time to install a fresh, sharp ripping blade too.
LAY OUT THE STRIPS: Arrange the strips with their best faces up. Then mark a guideline across them. During glue-up, that line will help you keep them arranged correctly. Also check the overall width of the combined strips.
DO A DRY RUN: Once you start to spread glue, you have to work fast. So first clamp and caul the cutting board without glue. This dress rehearsal will reveal problems like a misfit joint or alert you to the need for another clamp.
Project step-by-step (5)
Rip thin strips safely
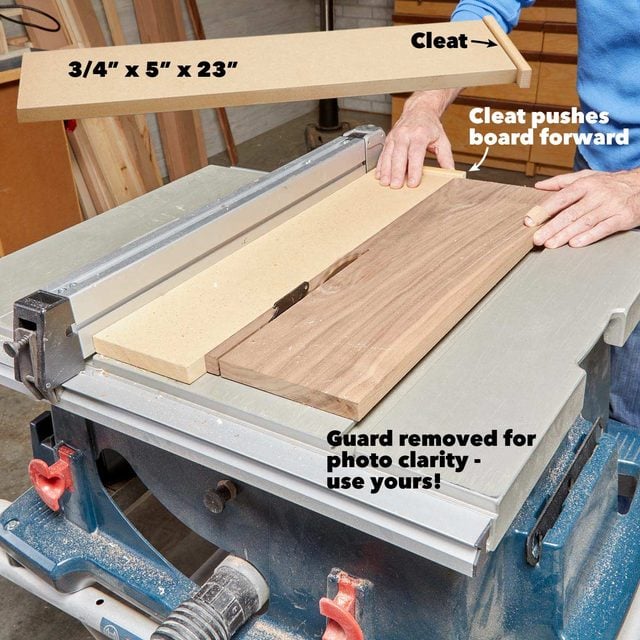
Cutting thin strips with just the fence is dangerous and leads to bad cuts. This simple jig will keep your fingers far from the blade and will prevent strips from getting trapped along the fence. It’s exactly 5 in. wide, so you get 1/4-in. strips, for example, by setting the fence at 5-1/4 in. I used it to cut all the strips that were thinner than 1 in. and then cut wider strips against the fence using a push stick.
Cauls keep it flat
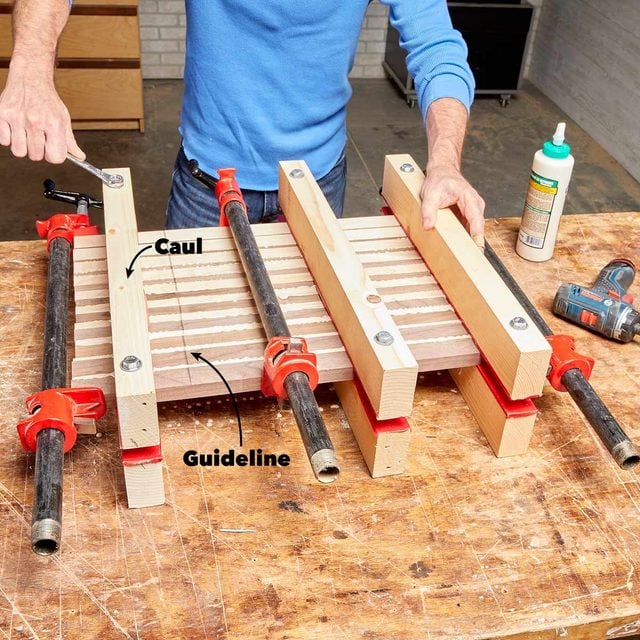
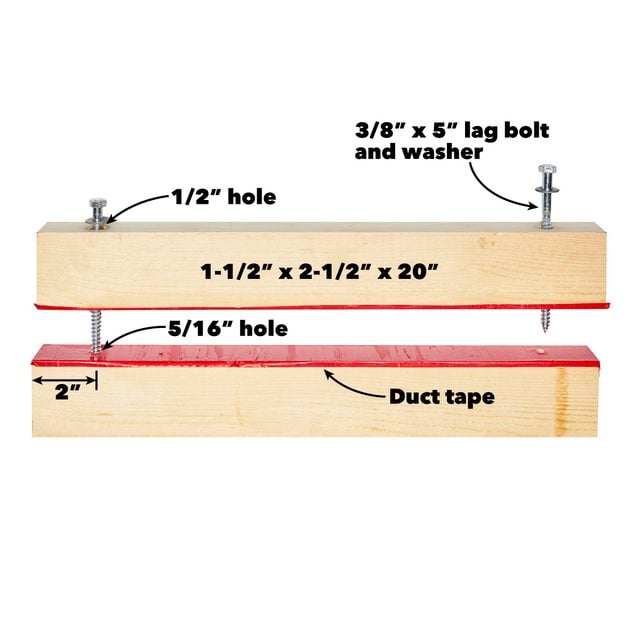
To guarantee a flat glue-up, I cut three pairs of cauls from a 2×6 and taped the edges to keep glue from sticking. I set the strips on the lower cauls, applied a generous bead of glue to both sides of every other strip and lightly tightened the upper cauls. I added clamps, applying only light pressure at first. Then I gradually tightened down both the cauls and clamps, alternating between them.
Dress it up
Ease the edges: Dull the sharp edges with sandpaper or a router. I used a 1/8-in. round-over bit.
Finish it with oil: Oil finishes are best for this project because they’re easy to renew. When the finish wears, just wipe on a fresh coat of oil. There are oils intended for cutting boards, but I used mineral oil from the drugstore (after sanding the entire cutting board with 80- and 120-grit)
Add perfect curves
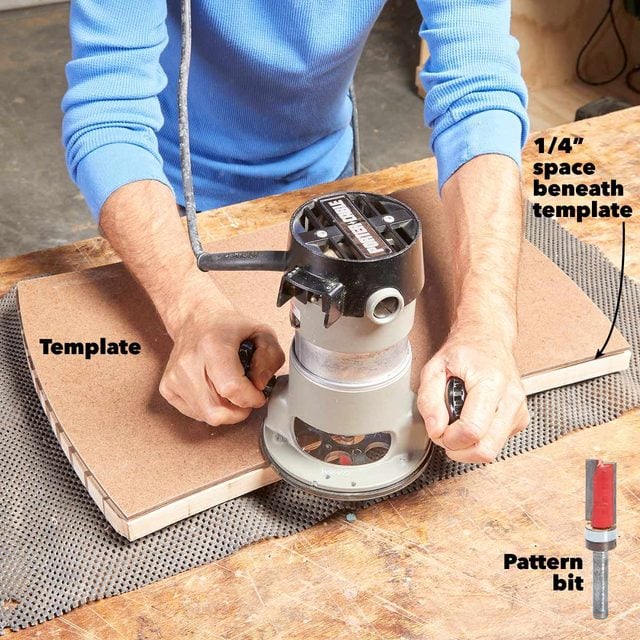
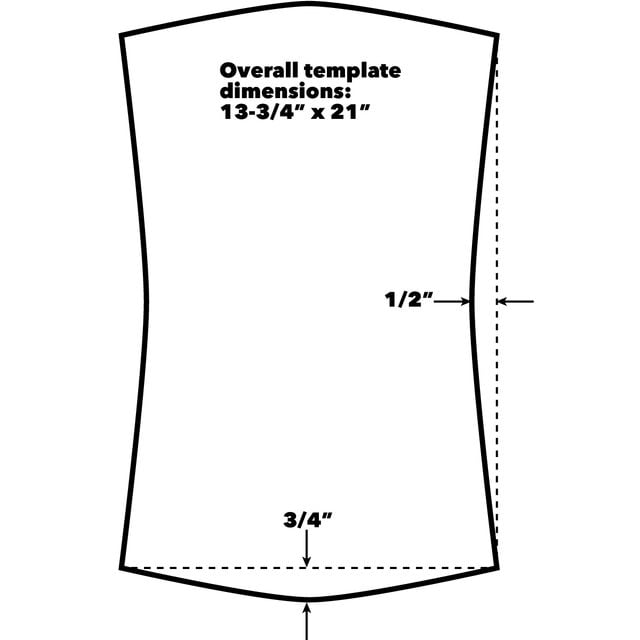
Mark curves onto the cutting board by tracing around a template made from 1/8-in. MDF. Rough-cut the shape with a band saw or jig saw, keeping the blade about 1/8 in. from the line. Then fasten the template to the cutting board with double-sided tape. A pattern bit guided by the template produces perfect curves. I glued a scrap of 1/4-in. plywood to the underside pf this template and to the juice groove template. That elevates the template and allows the bearing to make full contact with it. While you’re at it, learn how to make a wood serving board.
Cut a juice groove
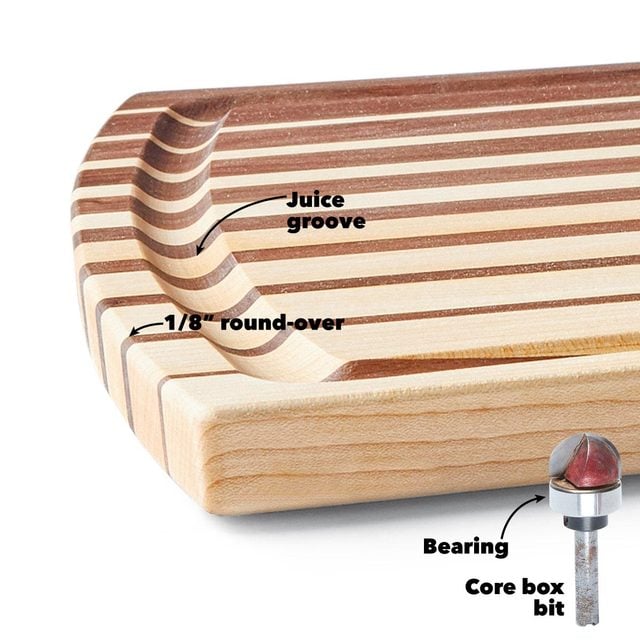
I cut a juice groove using a template (2-1/4 in. smaller than the one shown above) and a 3/4-in. core box router bit with a bearing ($40). A smaller bit would also work. Most core box bits don’t include a bearing, so you may need to add one or mount a rub collar on your router base. Next, check out some other easy woodworking projects for beginners.
This project was inspired by the Custom Edge Grain Cutting Board designed by April Wilkerson.
