


Here is how to make a room divider that adds a splash of color to your home and can be folded away for easy storage.
Two days
Intermediate
$100 - $200
Introduction
You can build this unique diy room divider over the weekend and customize it to suit your taste. Here is the simple process for making it.
Watch How to Make a DIY Room Divider
Tools Required
- #1 Phillips bit
- 1/2” straight cut router bit
- 150-and 220-grit sand paper
- 18ga. nail gun
- 3/4" Forstner bit
- Clamps
- Drill
- Drill press
- Painting supplies
- Router table
- Router w/ trammel arm
- Self-centering drill bit
- Table saw
- Tape measure
- Two speed squares
- Utility knife
Materials Required
- 1 - 1/2" x 4' x 8' birch plywood
- 1 - 3/4" diameter x 48" dowel
- 1-1/2" 18ga. brad nails
- 2 sets of 3” brass hinges
- 5 - 1x2x8' maple
- Clean shop rags
- Clear coat sealer
- Paint
- Painter's tape
- Wood glue
Making a room divider from scratch is a wonderful way to create something completely personalized to a specific room. Shape, color, dimensions — all customized by you.
You can make a DIY room divider as simple or complicated as you want it to be. The only element required is creativity. Functionality is inherent in the project. The base design is made up of three sections of wood joined by hinges. If you want your organizer to be extra special, you can add legs and a frame. If you really want to take your room divider to another level, you can further consider adding things like pegs, paint, or fabric.
Take the basic steps I share here and make it all your own. I hate to sound cliché, but the possibilities are truly endless.
Cutting List
| KEY | QTY. | PART | DIMENSIONS |
| A | 1 | Small plywood panel | 1/2″ x 12″ x 48″ |
| B | 1 | Medium plywood panel | 1/2″ x 13-7/8″ x 60″ |
| C | 1 | Large plywood panel | 1/2″ x 16″ x 72″ |
| D | 2 | Small panel side | 3/4″ x 1-1/2″ x 37″ |
| E | 2 | Medium panel side | 3/4″ x 1-1/2″ x 53-1/2″ |
| F | 2 | Large panel side | 3/4″ x 1-1/2″ x 64-3/4″ |
| G | 1 | Small panel base | 3/4″ x 1-1/2″ x 14-7/8″* |
| H | 1 | Medium panel base | 3/4″ x 1-1/2″ x 17″* |
| J | 1 | Large panel base | 3/4″ x 1-1/2″ x 19-1/8″* |
| K | 6 | Pegs | 3/4″ dowel x 4″ |
* – cut to fit
Project step-by-step (13)
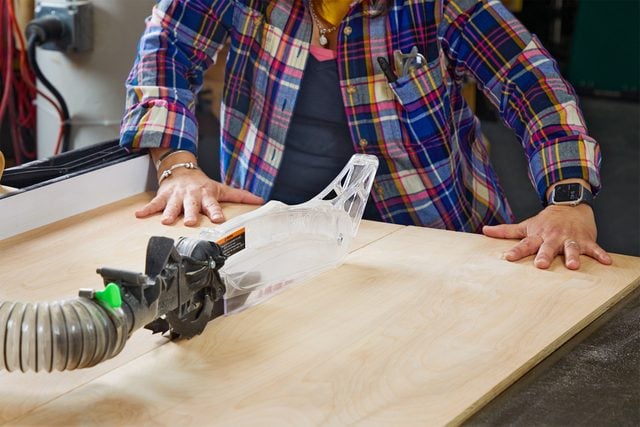
Step 1
Cut the plywood
Using a table saw, cut the three plywood panels (A – C) out of your sheet of 1/2-in. plywood. Feel free to change up the dimensions and size to fit your space. I wanted to play with the dimensions by varying the height to make the piece more interesting and optimize the yield in my sheet of plywood.
Step 2
Rout the arches
Using a wood router with a trammel arm attached to the base, cut out an arch at the top and bottom of each panel (A – C) using the center of each panel as the peak point in each arch. Because each panel is slightly different in measurement, you will have to adjust each arch slightly to center and balance so the peak point of the arch hits in the middle of each panel.
To make these arches as clean as possible, rout gradually by taking a few 3/16-in. passes rather than trying to hog through the entire 1/2-in. thickness in a single pass. After they are routed, sand the panels with 150-grit sandpaper.

Step 3
Layout and drill holes for pegs
If you plan to install pegs (K), layout spacing based on how many pegs you want and drill holes before the unit gets put together in its frame. Most drill presses don’t have the required depth to position your wood for all the peg holes. Create a jig to help you drill perpendicular holes by drilling a hole into a piece of wood with a 3/4-in. Forstner bit on the drill press.
Use this jig to drill peg holes into the panels (A – C). Clamp it down so it doesn’t wander while drilling. If you drill the holes at a slight angle, the pegs will follow that angle and look crooked.
Note: The pegs won’t be glued in, so the unit can be folded, and the peg layout can be adjusted. That said, a snug hole here is ideal.

Step 4
Add paint
If you wish to add color to the unit by painting the panels (A—C), it will also be more convenient to paint them before they are assembled. This way, you can easily manipulate the individual panels instead of trying to wrangle a large, hinged unit.

Step 5
Dado the sides and bases
Use a router table to route a 1/2-in. wide x 1/4-in. deep channel down the center of each 1×2 piece. Ensure the router table fence is locked at a right angle from side to side. This channel will be used to slide in the arched panels when you join the frame to the panels.

Step 6
Cut the sides and bases
Using a miter saw, cut the 1×2 pieces to length to create the sides (D – F) and bases (G – J) of each panel. Remember that the sides are cut square on top and have a 45° miter on the bottom, and both ends of the bases are mitered.
Slide the panels into the channel groove and position them for a dry fit. The most crucial piece of the “U Frames” are the bases (G – J). They must be cut to the exact width of the panel (A – C), plus the side pieces (D – F) that frame it. The depth of your channel will slightly change this measurement, so double-check before you cut the base piece.

Step 7
Layout hinge placement
To lay out the hinges, set aside the two outer panels (A and B), all three base pieces (G-J) and the two outermost side pieces (D and E) of the outer panels.
Lay the two sides (F) of the center large panel and the adjacent inside side of the outer panels (D and E) dado side down with the miters aligned at the bottom of the two sets of pieces. Use a speed square to mark them for hinges so one merges into the next. I placed the bottom of the lower hinges 9-in. from the tip of the miters and the bottom of the upper hinges 37-in. from them.

Step 8
Recess the hinges
Lay the side pieces (D – F) in a position to accommodate the routing of the recess hinges. Use the hinge thickness to determine the depth of your cut. Secure and clamp two speed squares on either side of your router shoe to ensure clean and straight cuts. Cutting along the hinge layout lines before you rout with a sharp-bladed utility knife will prevent tear-out while cutting.

Step 9
Assemble the panels
For each frame, attach the base pieces (G – J) to the sides (D – F) by gluing and brad-nailing the miter joints at the bottom to form a “U.” Ensure that the heads of the brad nails are set below the surface of the base pieces (G – J) to prevent the finished piece from gouging the floor. Clean up any squeeze-out and allow these joints to cure to prevent them from separating while sliding them onto the plywood panels (A – C).
Once those joints are cured, add glue to the routed channel in the side pieces (D – F) and slide the 1/2-in. arched panels (A – C) into their dedicated frame.
Secure them with 1-1/2-in. 18-gauge brad nails. Be sure to wipe away excess glue with a wet rag. Because this is the part of the piece that will see the most pull and tug, wood glue is a must.

Step 10
Apply the clear coat
Use a clear coat to seal all the wood and paint. You can either brush it or spray it on depending on your preference. Either way, you will want to do a light sand with 220-grit sandpaper between the first and second coats to remove any raised grain and achieve a smooth finish. Be sure to do any paint touch-ups on the colored sections before you apply the sealer. Also, seal the pegs to ensure all your wood has the same color and texture.

Step 11
Install the hinges
Stack and install the hinges into the finished panels’ sides (D – F) to align and connect all three. Make sure your screws are centered and straight by drilling a pilot hole using a self-centering drill bit. Ensure that you use the appropriate Phillips bit when installing hinges; otherwise, you risk stripping the screws, especially if they are brass.

Step 12
Install the pegs
To allow for the peg system to be adjustable we will not be gluing them into the panels (A – C), rather will rely on a friction fit, which means it must fit snugly to ensure pegs (K) stay in place and don’t fall out.

Step 13
FAQs
How do you make a room divider sturdy?
Anchoring a room divider to the floor or wall is the easiest way to make it sturdy. As this is not always possible, adding weight to the base of a freestanding divider will improve its stability. This can be accomplished by incorporating thicker lumber or metal into the base or by finding inconspicuous places to hide weights or sandbags once the room divider is constructed.
What do you call a folding room divider?
There are many names for folding room dividers, including folding screens, dressing screens, panel screens, shoji screens, wardrobe privacy screens, and accordion dividers.
Originally Published: May 02, 2024