Build this homemade wall shelf before lunch and spray on the finish after dinner
A full day
Beginner
$51–100
Introduction
This versatile, cherry wall shelf goes together in a few hours, and with a quick-drying finish you can have it mounted in a day. The extra-wide top makes it perfect for vases, antiques and collectibles.
Looking for shelves? Worried that you’ll have to buy them because you don’t know how to build wall shelves? We’ve got the project for you!
Sure, you can buy a wall or box shelf similar to this one at a discount store, but you won’t be able to choose the size or finish. We designed ours with a wider top to hold vases and other collectibles, but you can make yours bigger or smaller.
Plus, you can finish it to match your room. The shelf is versatile and goes together fast—it would make a great gift. We made our shelf from cherry, but you can also make it from oak or pine for about half the cost.
We finished this cherry shelf with a coat of American Walnut stain (test the color on a scrap) and three coats of spray satin lacquer. Mount the cleat that supports the shelf, then just drop the shelf over the cleat to hang it on the wall.
Tips for building the shelf
- You’ll need a miter saw and a table saw for this project. A finish nailer isn’t necessary but is very helpful.
- If you don’t have a finish nailer, drill pilot holes for the finish nails to avoid splitting the wood.
- You can use scraps of less expensive lumber for the base and cleats since these aren’t visible.
- Glue the parts together. Because you can use fewer nails, you’ll have fewer nail holes to fill.
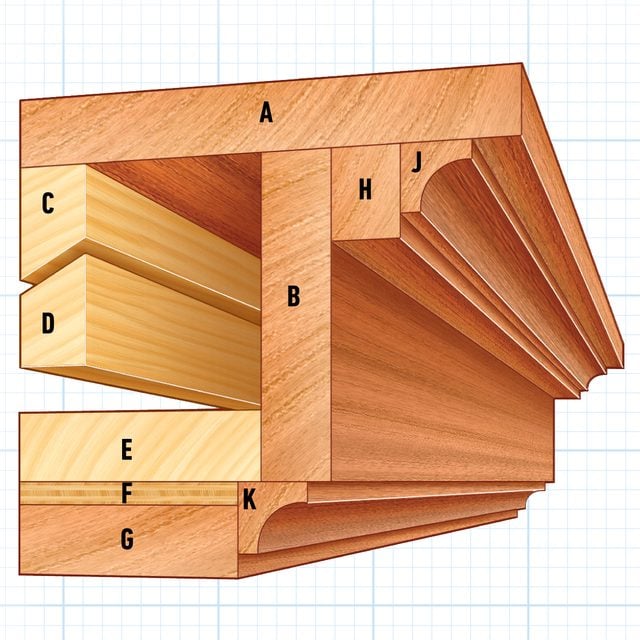
Shelf Details
The Cutting List gives finished lengths for the top, front, sides, cleats and bottom. You can cut these to the exact width and length listed and nail them together. The lengths listed for the 3/4 in. x 1 in. bands and the 3/4 in. cove moldings are oversized. You’ll mark these pieces in place for an exact fit.
Here is the complete Materials List.
Overall dimensions: 36″ x 5-1/2″ x 5-1/4″
Tools Required
- Air compressor
- Air hose
- Brad nail gun
- Cordless drill
- Countersink drill bit
- Level
- Miter saw
- Orbital sander
- Rags
- Stud finder
- Table saw
- Tape measure
Materials Required
- Wood glue
Project step-by-step (5)
Step 1
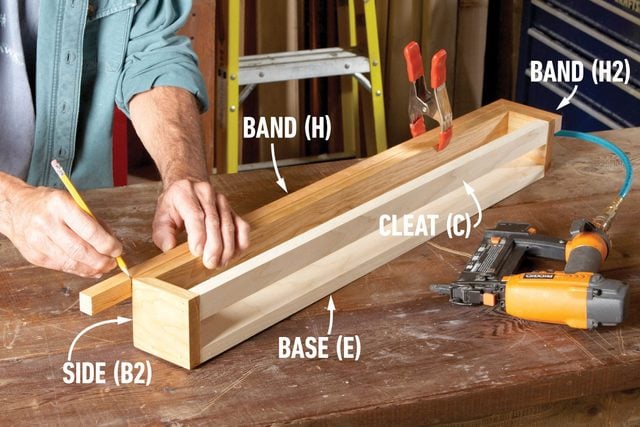
Mark trim parts in place
The first step in learning how to build wall shelves is to cut the 1-in. band and the cove moldings extra long. Fit the miter on one end, then mark the opposite end for cutting.
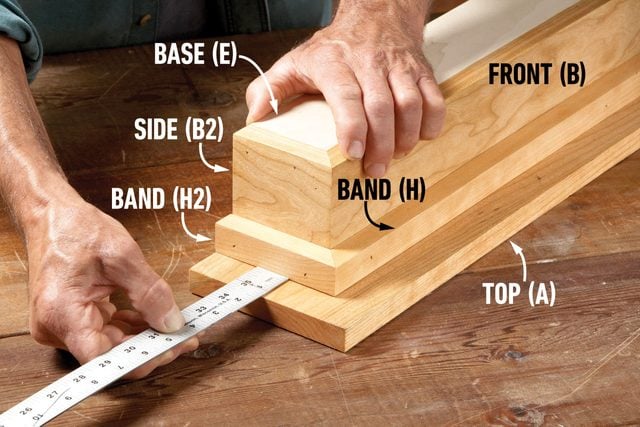
Step 2
Center the top
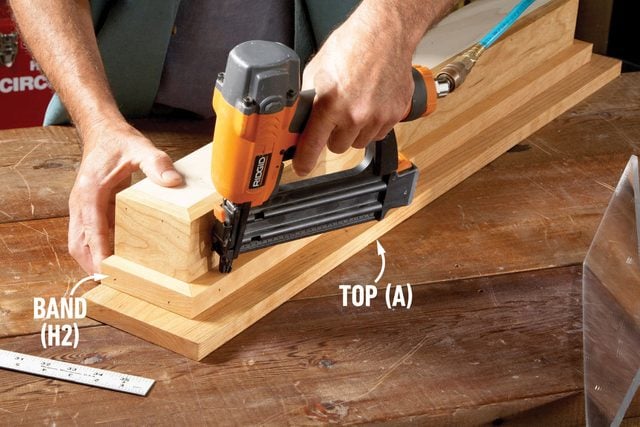
Measure the overhang on each end and adjust the top until it’s centered.
Step 3
Nail on the top
Glue the band and nail through it into the top.
Step 4
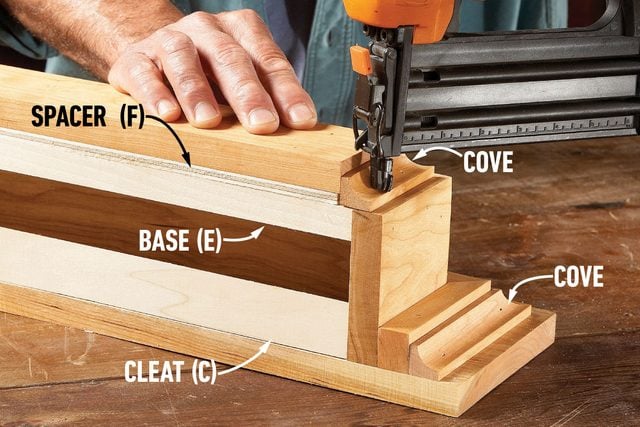
Install the cove moldings
Add the 1/4-in. spacer and bottom board. Then finish up by fitting and nailing the cove molding.
Step 5
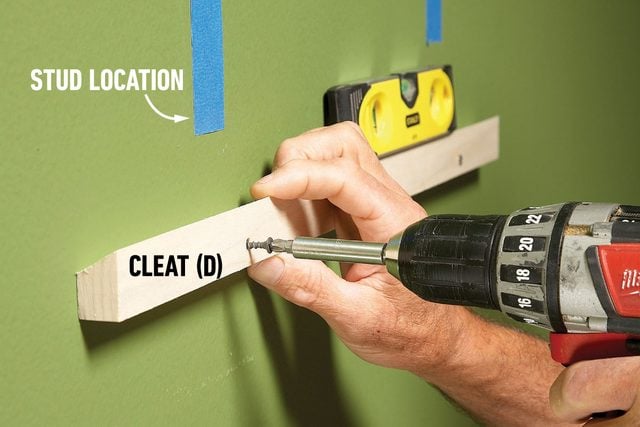
Mount the cleat to hold your homemade wall shelves
Level the cleat and screw it to the wall. You can locate studs or use drywall anchors.