


Learn how to make a bookcase with this Craftsman-style bookcase project. Simply an excellent way to showcase your DIY skills.
2 to 3 days
Intermediate
Around $350
Introduction
This simple and timeless Craftsman-style bookcase can be made with a free weekend, a few tools and this guide.Tools Required
- 1-1/4” Pocket screws
- Clamps
- Drill/driver
- Jigsaw
- Pocket hole jig
- Polyurethane
- Random orbit sander
- Shelf pin drilling jig
- Shelf supports
- Stain
- Table saw
- Wood glue
Materials Required
- 1 – 3/4” x 4’ x4’ Oak plywood
- 24 Ft. – 1x4 solid oak lumber
- 6 Ft. – 1x10 solid oak lumber
This two-sided bookcase is based on a classic Gustav Stickley, Craftsman style design. It features clean, simple lines with one decorative arch.
If you’re getting started in woodworking and have some tools and a bit of experience, I’d call it a beginner level bookcase project. If you haven’t yet begun your woodworking journey, it’s more of an intermediate project, but still doable.
Cutting List
3/4-in. Oak plywood
| KEY | QTY. | PART | DIMENSIONS |
| A | 2 | Side | 3/4″ x 10-1/2″ x 32″ |
| B | 2 | Top & Bottom | 3/4″ x 10-1/2″ x 29-3/4″ |
| C | 2 | Shelves | 33/4″ x 9-1/2″ x 29-5/8″ |
3/4-in. Solid oak
| KEY | QTY. | PART | DIMENSIONS |
| D | 1 | Top | 3/4″ x 16″ x 36″ |
| E | 4 | Legs (double 3/4″ stock) | 1-1/2″ x 1-1/2″ x 41-1/4″ |
| F | 2 | Arched rails | 3/4″ x 2-1/2″ x 29″ |
| G | 2 | Bottom rails | 3/4″ x 2″ x 29″ |
| H | 4 | Shelf edging | 3/4″ x 1/2″ x 29-5/8″ |
| J | 2 | Side bottom edging | 3/4″ x 3/8″ x 10-1/2″ |
Overall dimensions: 42-in. H x 36-in. W x 16-in. D.
Project step-by-step (11)
Step 1
Make the sides
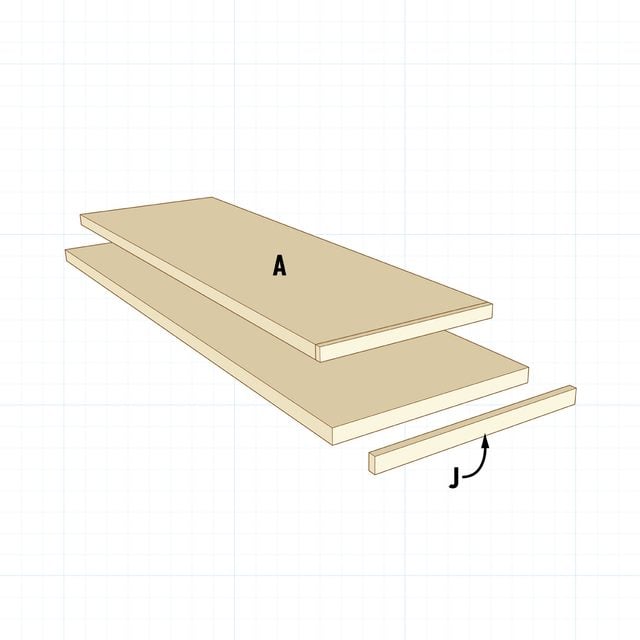
Cut the sides (A) to final dimension. Cut the side bottom edging (J) and glue it to the bottom ends of both sides. When the glue is dry, sand the edging flush. Be careful not to sand through the thin plywood veneer.
Step 2
Make the top and bottom
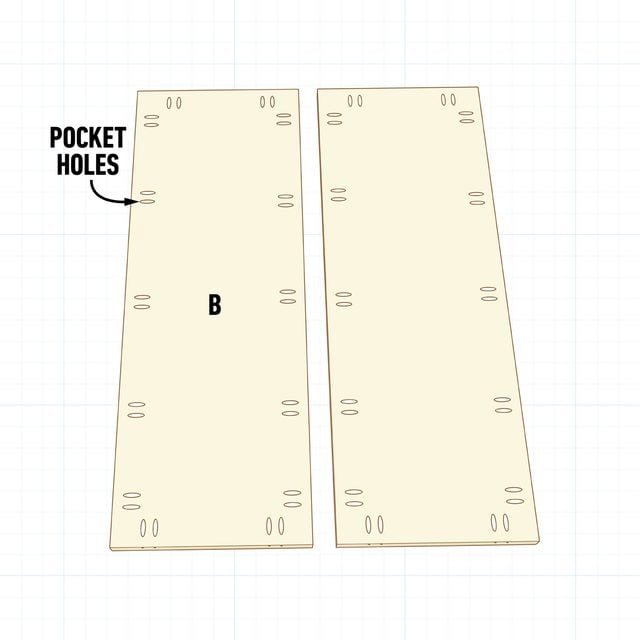
Cut the top and bottom (B) to final dimension. Drill pocket holes around the perimeter of the top side of the top and the underside of the bottom.
Step 3
Assemble the box
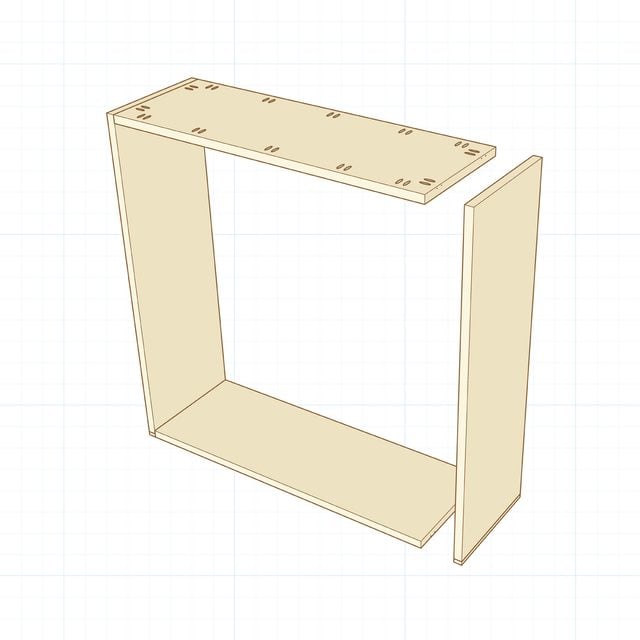
Using wood glue and pocket screws, fasten the top and bottom between the sides. Clamps are a big help to hold the parts together while you drive the screws.
Step 4
Make the legs
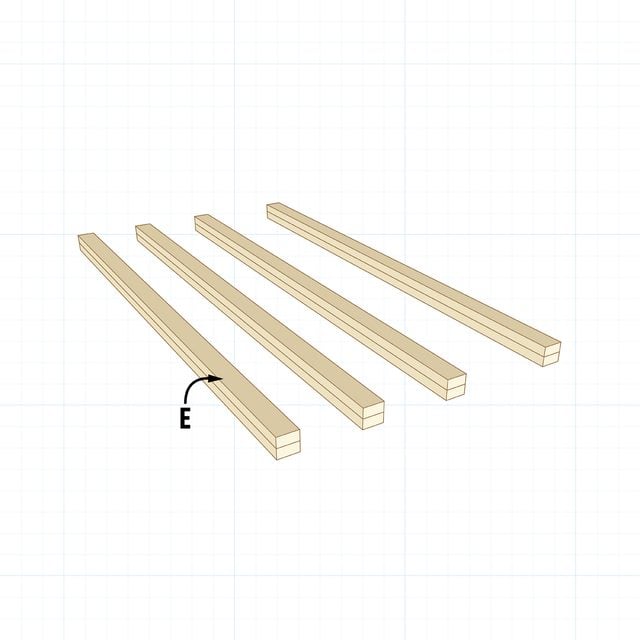
Cut the leg blanks about 1/8-inch larger than their final dimensions. Glue them together. When the glue is dry, rip them to final width and crosscut them to final length.
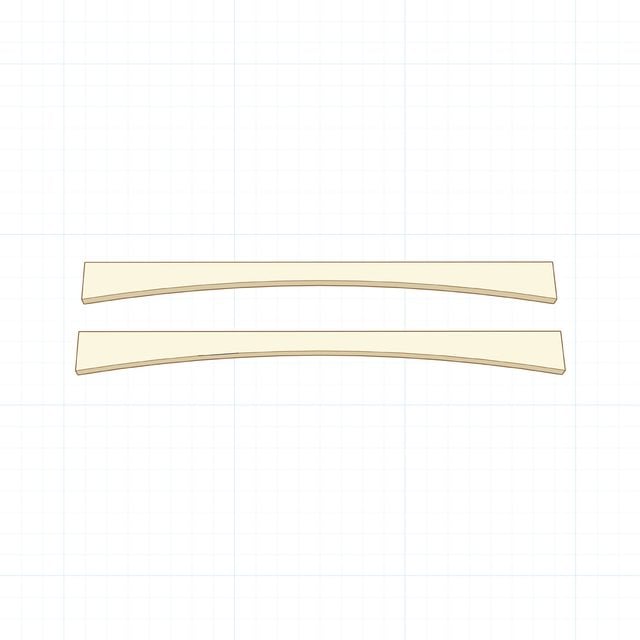
Step 5
Lay out the arches
Rip a board 3/16-inch thick and one-inch wide. Using clamps (or a helper), bend the stock into an arch on the arched rail blanks (F). The top of the arch should be about half the width of the blank. Trace the arch on both blanks.

Step 6
Cut the rails
Cut the arches with a jigsaw, then sand the arches smooth. Cut the bottom rails (G) to final dimension at this point as well. Drill pocket holes at each end on the back side of the top and bottom rails.
Step 7
Assemble the face frames
Clamp the legs and rails together as shown, gluing the ends of the rails. Fasten the face frames together with 1-1/4-inch pocket screws.

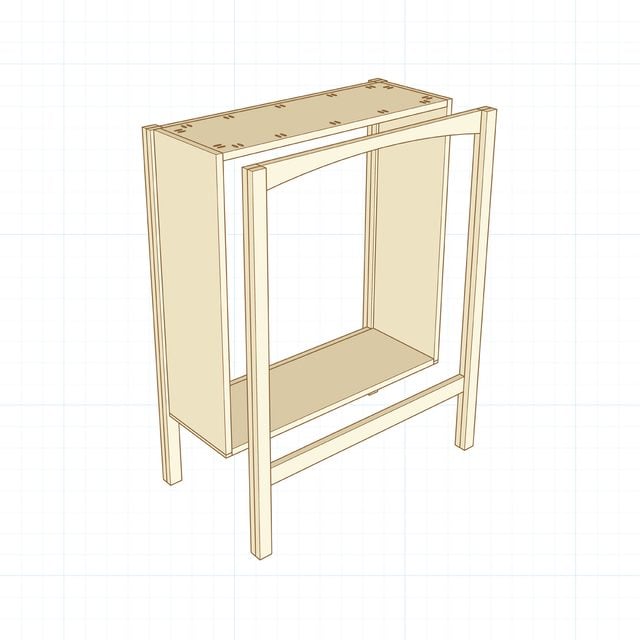
Step 8
Attach the face frames
Glue the edges of the box, then clamp the assembled face frames to the box. The legs overhang the sides by 3/8-inch. Secure the frames to the top and bottom using 1-1/4-inch pocket screws. Leave the clamps in place on the sides until the glue dries.
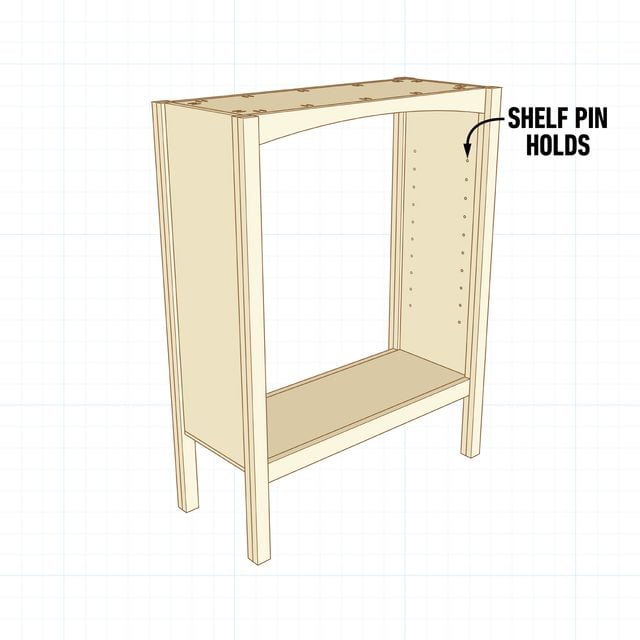
Step 9
Drill for shelf supports
Using a shelf pin drilling jig, drill evenly spaced holes for the shelf supports in both sides.
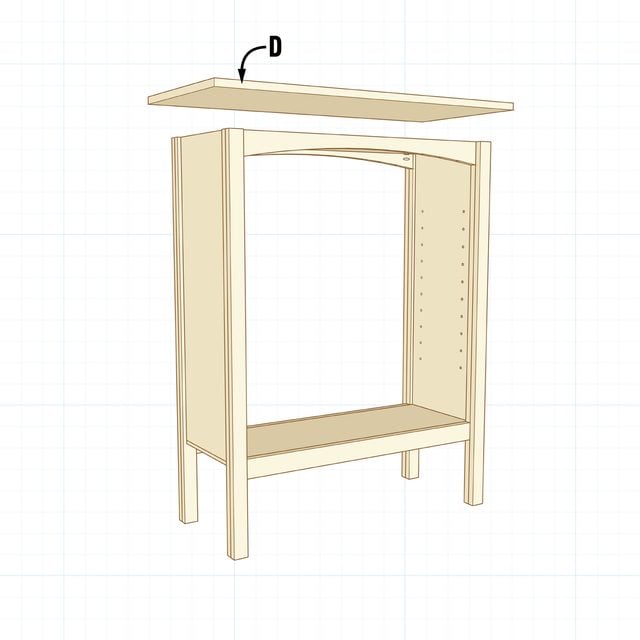
Step 10
Add the top
Crosscut the 1×10 in half and edge-glue the two halves together. When the glue dries, sand the top (D) smooth.
Add glue to the top of the sides and the top edges of the rails. Center the top on the assembled bookcase and fasten it with 1-1/4-inch pocket screws. When the glue dries, sand the whole bookcase up to 180-grit, then apply a stain and finish of your choice.
Step 11
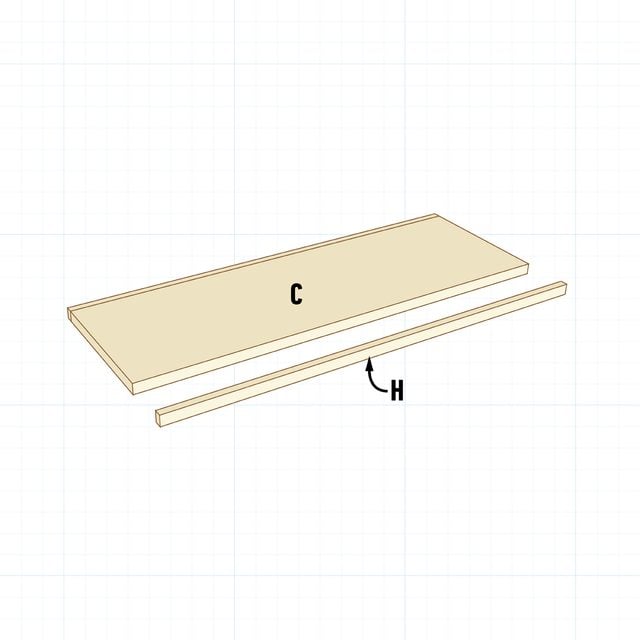
Make the shelves
Cut the shelves (C) and their edging (H) to final dimension. Glue and clamp the edging to both long edges of the shelves. When the glue dries, sand the shelves and finish as you did the bookcase.
Originally Published: July 13, 2023