
How To Make a Book Christmas Tree
Updated: Nov. 10, 2023
Looking to add a creative, literary flair to your holiday decorations? Here's how to do it with books. Yes, books.
3 – 4 hours
Beginner
Free
Introduction
I love celebrating holidays! As a professional handy person, I've crafted more DIY decorations than I can count. At this point, our family has tubs of them ready to roll out at a moment's notice. It's like we're survival preppers, but with twinkling string lights and Santa hats instead of Twinkies and bottled water.
I'm also a book lover. I've always enjoyed having a house full of books, and my collection only got more pronounced when my work started to be published.
So when I learned that I could use some of my book stacks to build a custom holiday decoration, I jumped at the chance!
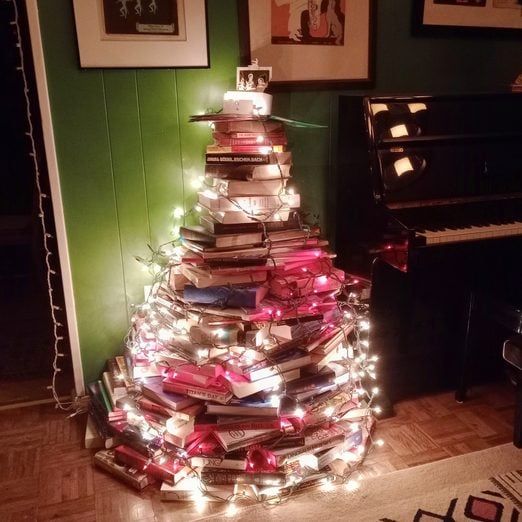
Building a book Christmas tree is a simple and fun project that can be completed in a single snowy afternoon. It's great for beginners and pros alike, and can involve the whole family. Best of all, it costs nothing more than a little floor space. Even if you don't have enough books, there's always the library!
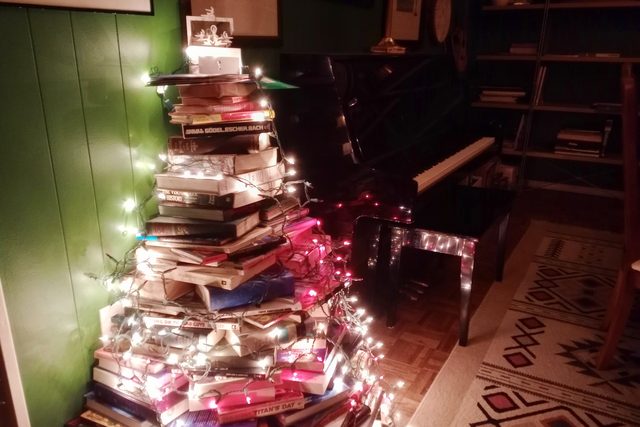
I made a tree that stands about four-and-a-half feet tall, but we'll also talk about other size options to give your tree some personalized flair.
Tools Required
- Straightedge or level
Materials Required
- Lots of books
Project step-by-step (6)
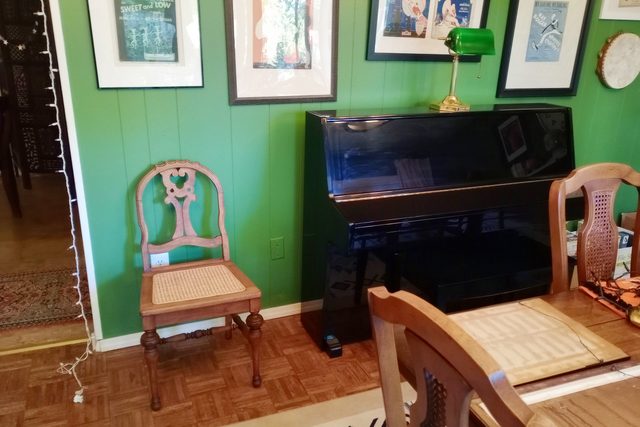
Select a location
- Choose a spot that’s relatively level and away from foot traffic.
- There are no shortage of options. You can make a smaller tree that sits on a tabletop, or a standalone circular base in the middle of the room.
- I went with a hybrid approach, where the circle of the base butted up against the wall.
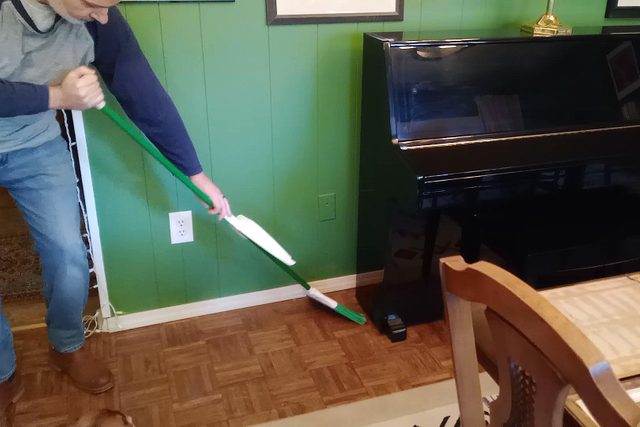
- Clean the floor before starting your first layer.
- Mopping probably won’t be needed, but you do want to sweep away any debris that could damage the books or knock them out of level.
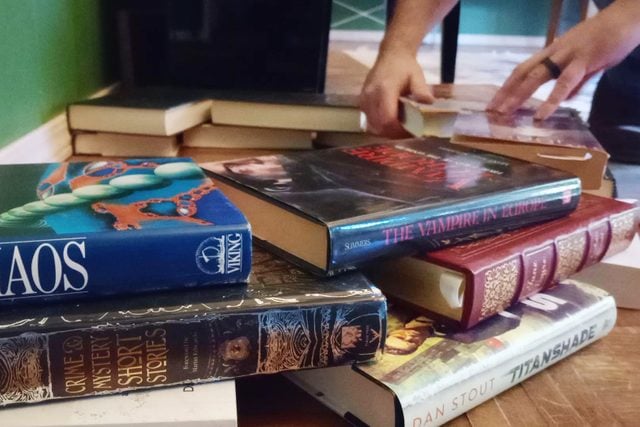
Sort the books
This is an essential step. Each layer of the tree needs to be as close to level as possible. You can make life much easier by sorting your books into groups of like sizes.
- Plan on having a lot of books on hand. My tree used more than 150, but your count will depend on the size tree you want and the books themselves.
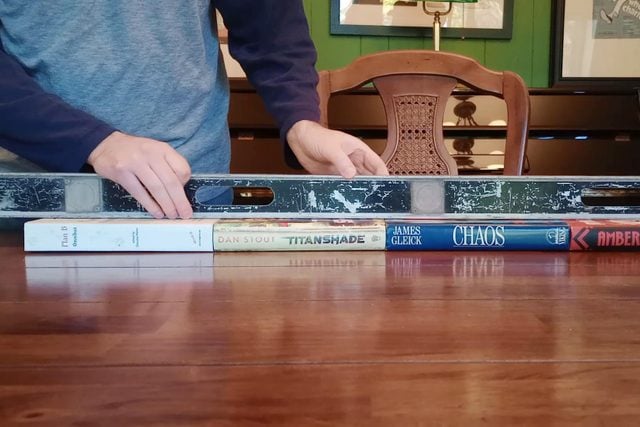
- Lay the books out on a flat surface and compare their relative thicknesses.
- Terminology here can get a bit confusing, so let’s define them quickly.
- We’re using “thickness” to refer to how wide the spine is. So a 500-page book is thicker than a 100-page book.
- We’ll use “height” to refer to how tall the book stands when set upright on a bookshelf.
- Sort them into groups, placing books with similar thickness together.
- Having multiple copies of the same book is admittedly kind of a cheat code for this (those author copies came in handy!). But book printers have a number of standard sizes, so you’ll be surprised how assorted books tend to naturally fall into a few common sizes.
- Books of similar thickness will create level layers.
- Lay a selection of similarly-sized books on a flat surface and pass a straightedge over them.
- This will quickly identify which ones are too thick or too thin for that layer
- This is also an ideal time to set aside really thin books.
- These will be helpful later because they can be used like shims.
Begin layering
- Lay down your first ring of similarly-sized books.
- I went with hardcovers, since they seem to provide a more stable base.
- You don’t need too much width on the base. My tree was about 52 inches tall, and really only needed a base 36 inches or so in diameter.
- Start adding layers!
- Adjust the positions of individual books to find the most stable position.
- Move each layer in slightly, to create a cone shape.
- I found that sometimes individual books broke the plane of the cone side. It seems better to have a stable tree than one that looks great but is doomed to collapse under its own weight.
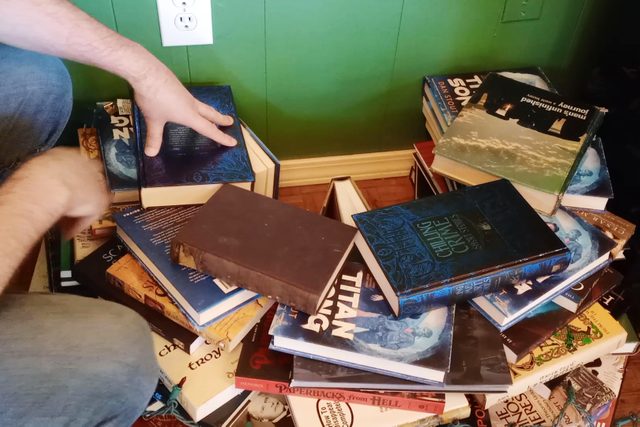
Check stability often
- Check stability and balance frequently, at least every second or third layer.
- Use the straightedge to verify you’re still level, and give the books a shake to see how they’ll stand up to accidental contact.
- Use the thinner books you set aside to shim the layers as needed.
- Adjust your plan as needed.
- In my case, I eventually needed to add a line of support along the wall because I didn’t use a full circle on my base layer.
Decorate
- As you reach the top, you’ll hit a point where you’ll need smaller and smaller books or a spiral of single books.
- When you have the tree the size you want, add whatever topper you like. I topped mine with a Christmas-themed pop-up book.
- I also ran two strands of Christmas lights around the outside, weaving it in while I built my layers.
Variations!
There are many ways to customize this project. Here are a few ideas to get your creative juices flowing.
- Change up the height.
- You can go ceiling-height or tabletop with your stacked-book tree.
- Turn the books around to expose the paper edges.
- This gives the appearance of a white, snow-covered tree, with the book covers and jackets looking like branches.
- If you have enough books with gilded edging, they can be turned around to look like garland wrapping around the tree.
- Add lights and ornaments.
- Sort your books by color as well as size, then adjust the layers, grouping different colored spines together to create patterns.