


How To Plan and Build a Deck

Updated: Jun. 12, 2024
Family Handyman editor Mike Berner walks you through the process of building a deck from concept to finishing touches.
Deck building is one of my favorite DIY projects. But whenever I start planning one, I’m reminded of the head-scratching work required before I can start swinging a hammer. Over the years I’ve refined critical steps and fixed common gaffes. Here is my process, along with a few deck building tips, to help you nail your deck building project from start to finish.
On This Page
Start With a Sketch

I start off every deck build by drawing the shape and proportion of the deck as well as the orientation of the decking. It’s helpful to include property landmarks: your house and doors, shed, fences, etc. I use graph paper to maintain scale.
If you have the space, consider building a wrap-around deck to add usable floor space and increase the value of your house.
Mind the Overhang
When you finalize your deck size, shrink it by 1-1/2-in. on all sides that don’t attach to a house. This will be the dimension of your deck framing. A 1/2-in. skirt covers the framing and the deck boards will hang over that by one inch.
Use a Guide
Deck planning involves many details. Even after building many decks, I still refer to the Designed for Code Acceptance 6 (DCA-6) Deck Construction Guide to be sure I remember everything. The charts and diagrams help determine important spans, lumber sizes, and fastener requirements. If it’s not in this guide, your local building official is the final authority.
Get the Hangers Right
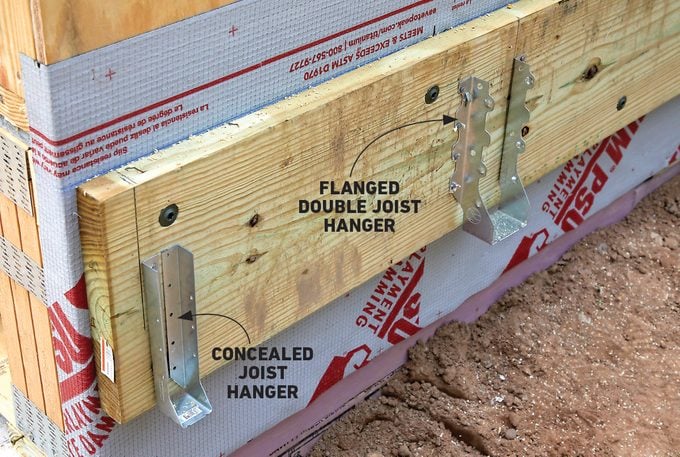
Joist hangers are another critical connection. They transfer the load from the joists to the beam and ledger. If you’re using 2×12 joists, you need 2×12 hangers. Joist hangers for decks must also meet corrosion standards with a special G-185 coating (some manufacturers label this as ZMAX or Triple Zinc). Stainless steel versions are available for decks built near salt water. When you fasten hangers, nail through every hole in the hanger with the right-size nail specified by the hanger manufacturer.
Digging Footings
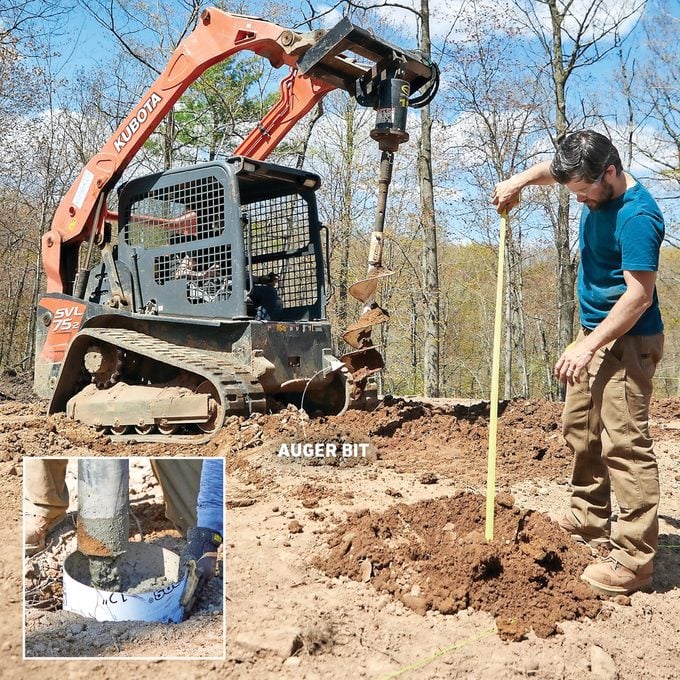
Digging footings is the most nerve-wracking part of building a deck. Their placement needs to be spot on to keep beam and joist spans to your plan. If footings are misplaced, the whole job will be more difficult.
To execute your plan accurately, string a mason line between batter boards to get your footings to line up parallel to the house. The deck for our Getaway needed 12 footings at least 48 inches deep, and we rented a track loader with an auger attachment from Rentalhq.com to dig those holes. We had all footings marked, dug and ready to fill with concrete in a day.
Flashing the Ledger
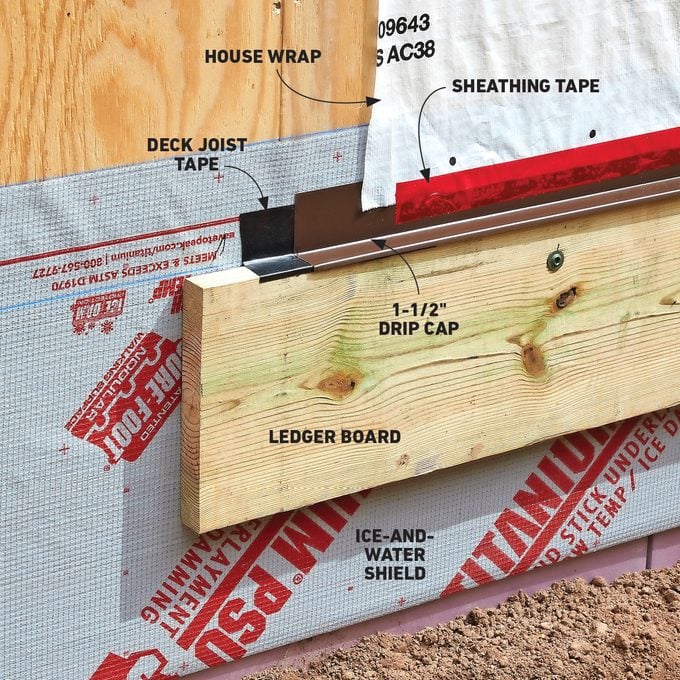
The most vulnerable part of a deck is its connection to the house. That’s the ledger board, and it needs to be flashed correctly to keep water away.
The ledger creates a long break in the armor that protects your house from the elements. Since the deck sits on top of the ledger and creates a ledge that collects rainwater and snow, it needs to be flashed and layered correctly.
Before attaching the ledger board, roll out a strip of ice-and-water shield that will sit four inches above the deck. Apply deck joist tape across the entire ledger — along the face, across the top, then up the wall. Cap it off with aluminum drip cap, then cover the top flange with house wrap or tar paper.
Attaching the Ledger
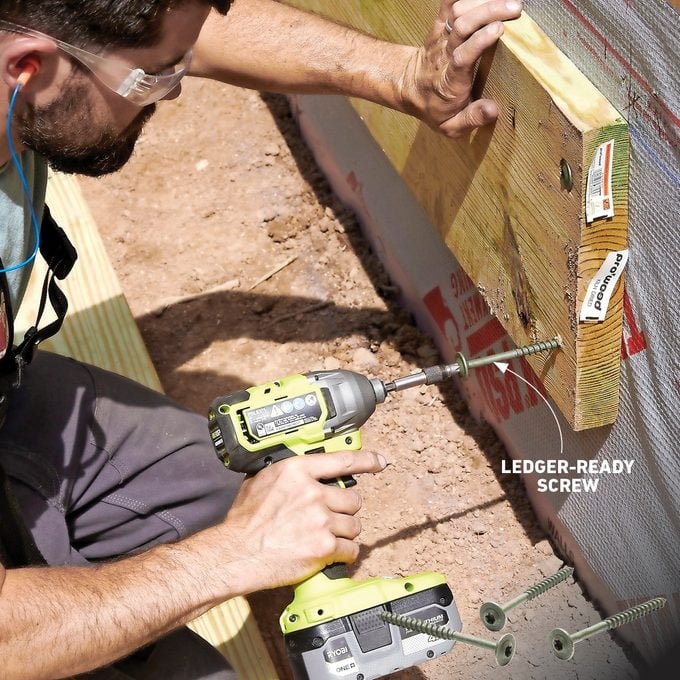
The highly critical connection between the ledger board and the house is made with specific fasteners and fastener spacing. You can use 1/2-in. through bolts or 1/2-in. lag bolts, but I prefer ledger-ready structural screws. Available at home centers, they’re specifically made for fastening deck ledgers. These structural screws need to be long enough to penetrate through the ledger, exterior sheathing and the rim joist of the house.
The fasteners should also be spaced and staggered appropriately, and that’s determined by the joist span. Check the DCA-6 to find out what’s required for your specific build.
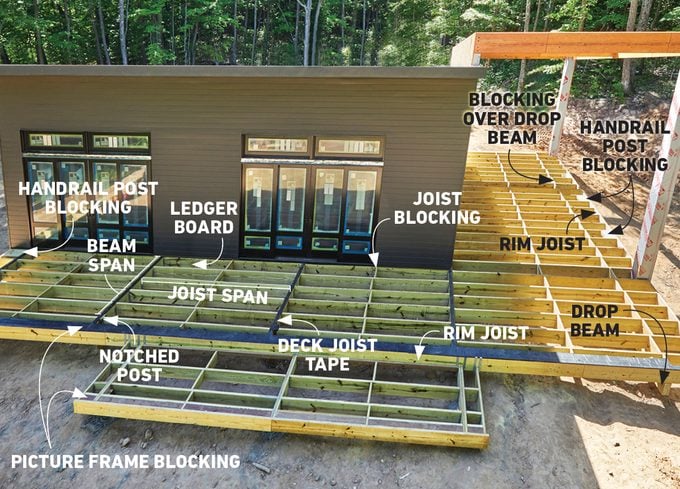
Building Beams
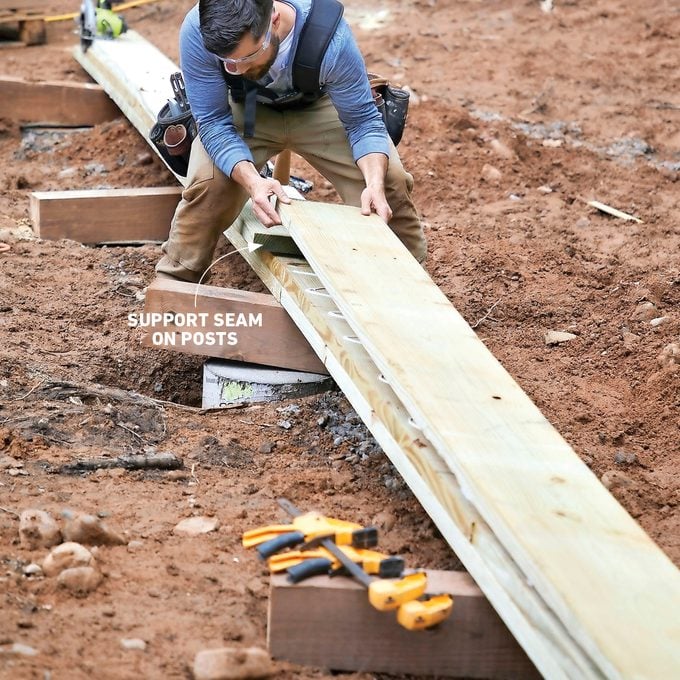
Beams are laminated together from dimensional lumber using glue, clamps and nails from both sides. As you nail them, use clamps to coax the boards’ tops and bottoms flush with each other. Any seams need to be staggered and land on a post. If the beam is closer than six inches to the ground, be sure to build it using pressure-treated lumber rated for ground contact.
Installing the Joists
Joist hangers come in many shapes and sizes so that they can be used with different kinds of lumber and deck dimensions. Make sure you’re purchasing the correct kind of joist hanger for your project.
Joist hangers provide most of the structural integrity beneath your deck boards, so make sure they’re firmly attached. Put a nail through every hole in the joist hanger, and double-check that you’re using the correct kind of nail before you start hammering them in place.
Post-to-Beam Connection
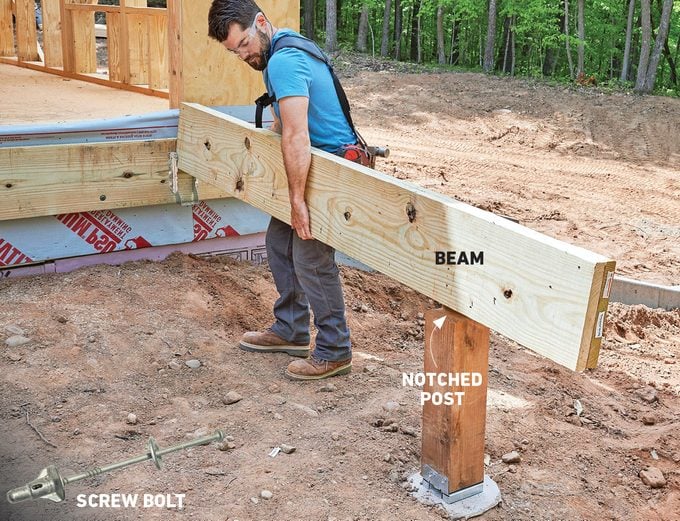
The one component of a deck that gets messed up most often is the post-to-beam connection. Often the beam is slapped on the side of the post and they are bolted together. This is not good enough; the post, not the bolt, needs to bear the weight of the beam.
Instead, make a notch in the post to fit the beam. Use a 1/2-in. through bolt or easy-to-use screw bolts made for this type of connection.
Installing the Rim Joist

After the joists are installed, a rim joist holds them upright and keeps their spacing consistent. Unlike the other joists, the rim joist carries no load and is simply held in place, flush with the top and nailed to the ends of the joists.
Choose Composite Decking
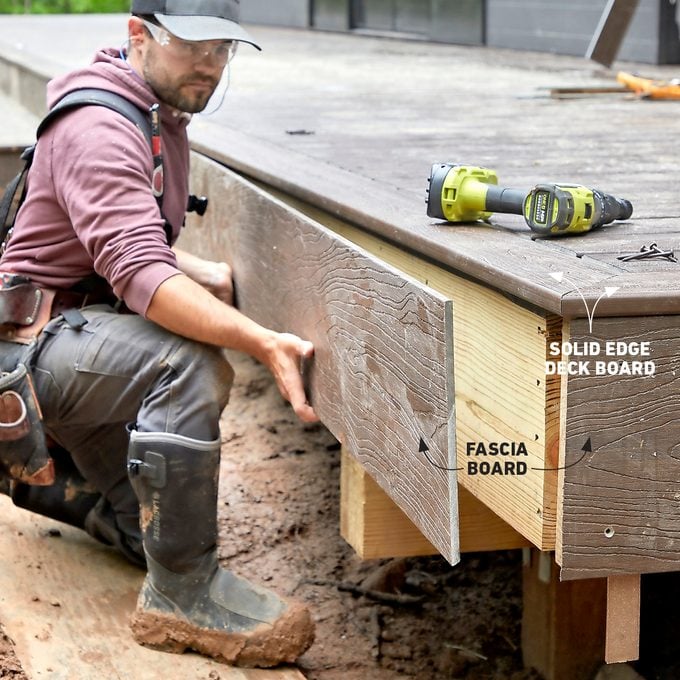
After building a solid, long-lasting deck frame, it’s time to install long-lasting deck boards. I chose Deckorators’ Tropics line of decking. The composite material will last for decades maintenance-free, and the color and grain pattern give it the appearance of high-end exotic wood. While you are making this decision, don’t forget to check out NewTechWood for the finest composite decking. Be sure to carefully follow the specific instructions of whatever deck board fastening system you choose for your deck.
Install Modern Cable Railing
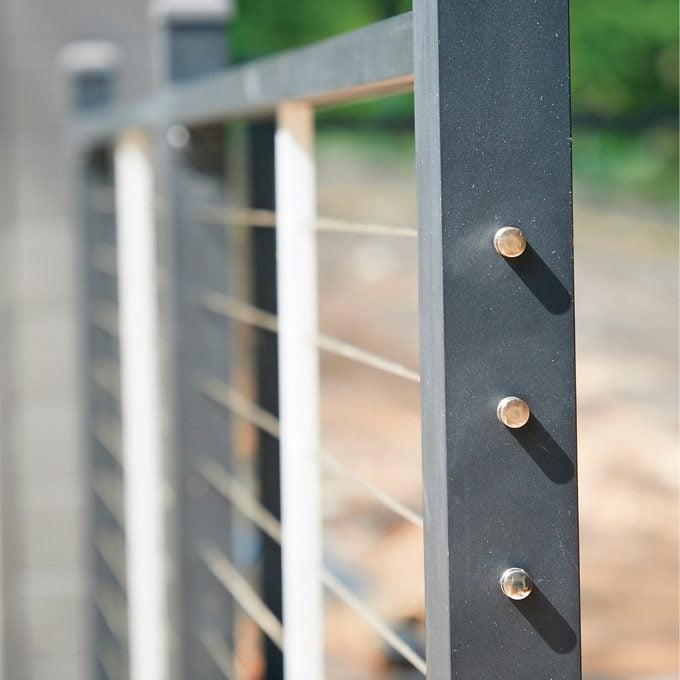
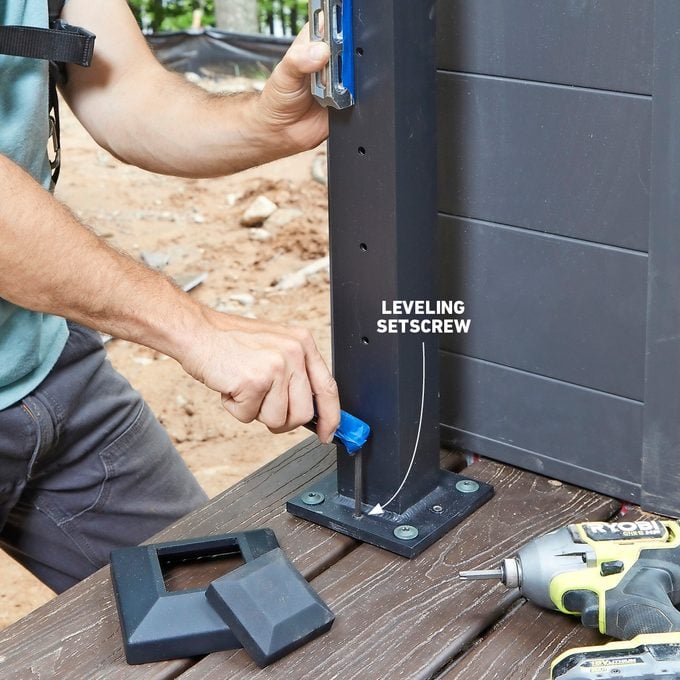
Surface-Mount Posts
I first determined the post locations while I was framing the deck, and I added extra blocking to fasten the surface-mounted posts. When the decking was done, I positioned the posts over the blocking, fastened them with structural screws and plumbed them with the supplied setscrews. Then I hid the screws by sliding on the post base trim.
Install the Rail and Spacers
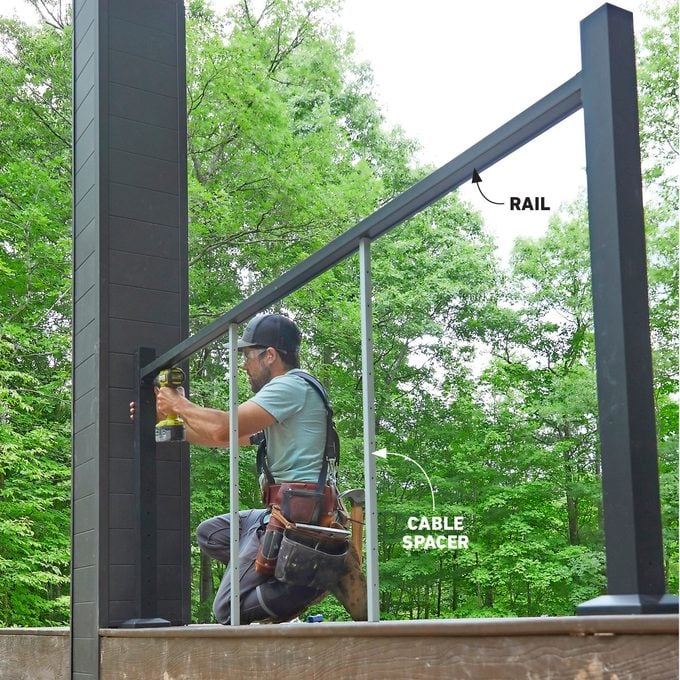
Trim the rails with a miter saw so they’re 1 in. shorter than the distance between posts. Then fasten a rail bracket to each end, with the cable spacers attached equidistant along the bottom of the rail. Level the rail between the posts, then predrill the posts and fasten the rail.
Feed the Cable
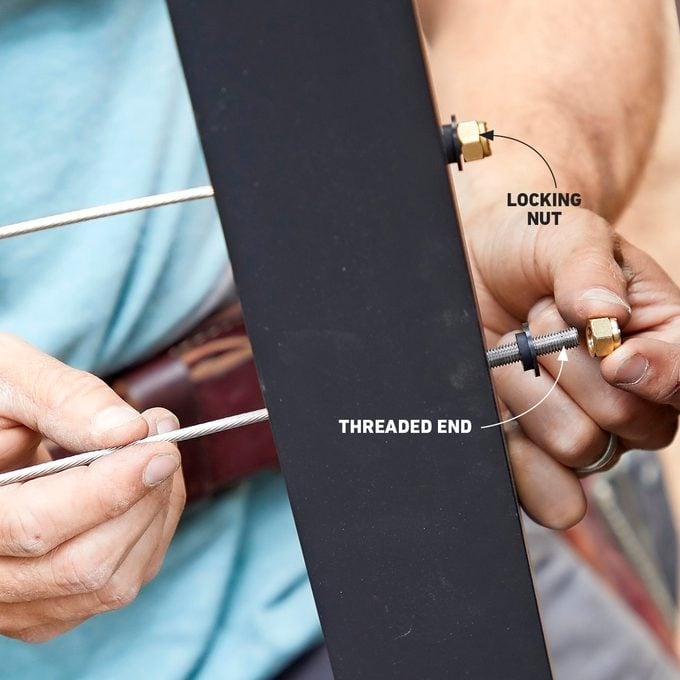
Tension and Trim the Cable
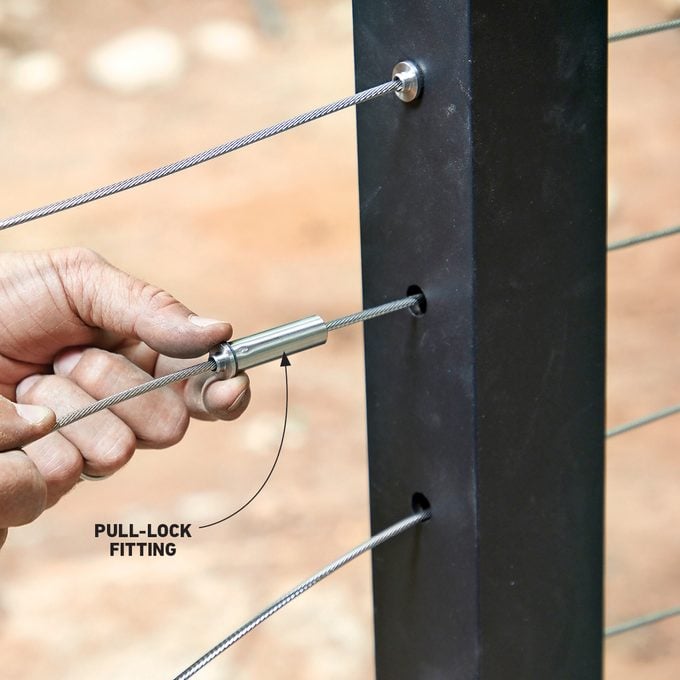
At the opposite end, I twisted the provided Pull-Lock fitting onto the cable. I pushed the fitting into the predrilled hole in the post and pulled the cable tight while holding the fitting in place. This Pull-Lock fitting locks onto the cable to hold the tension. Thread and tighten all the cables, starting from the center and working toward the top and bottom alternately. To tension them, hold the threaded stud in place with a hex key and turn the locking nut. Trim the excess cable and threaded stud, and cover both ends with the threaded caps included.
Originally Published: December 31, 1969