


To revive a shabby deck, there are five main directions you can go, and we'll guide you through them all.
Five Solutions for a shabby deck
1
/
7
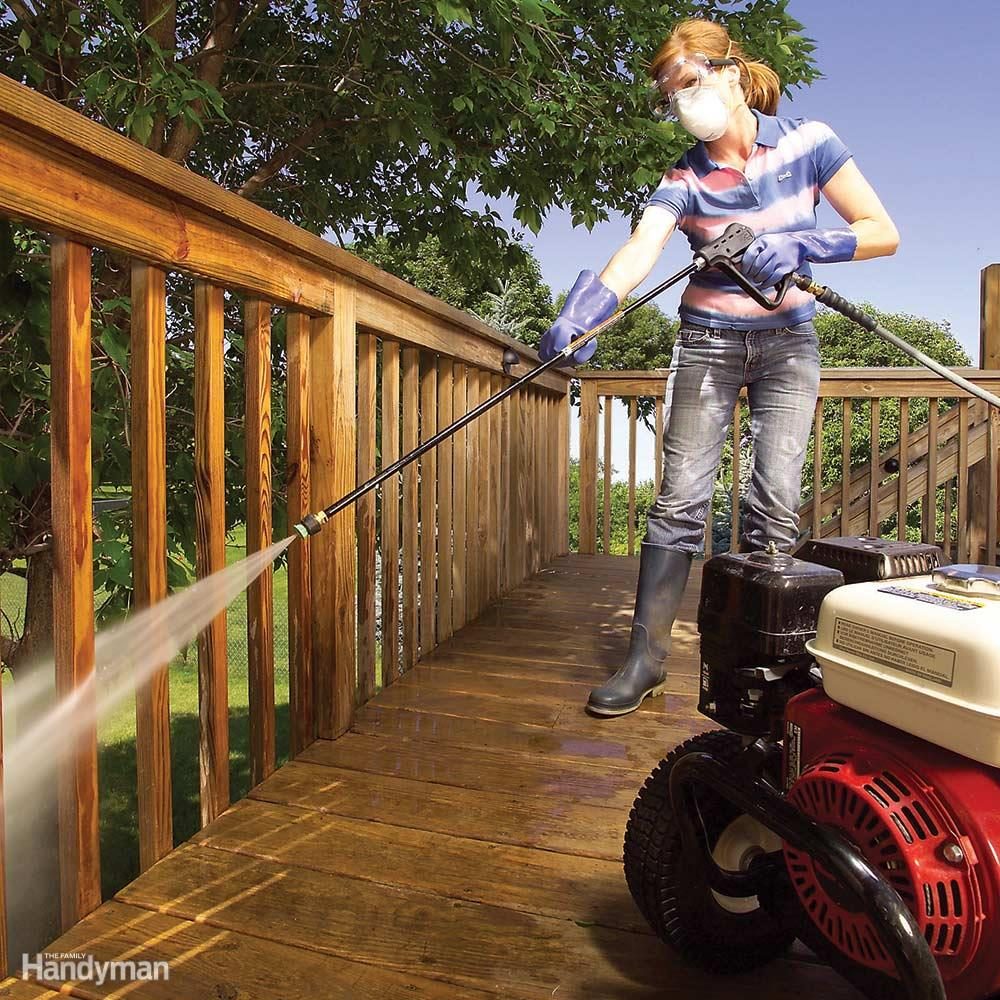
Solution 1: Clean & refinish
The basics of refinishing a deck are pretty straightforward: Strip, clean, stain, ?repeat! It's a tough chore that might take you several days to complete, one you'll have to do every few years to keep your deck looking great. But all that hard work has a huge payoff! When you're finished, your all-wood deck will look almost as good as it did the day it was built. Here are some things to think about before tackling the job yourself.
A pressure washer does a great job of cleaning your deck and stripping old finishes. They're available as gas or electric models and vary widely in price—anywhere from $70 to $1,000 at home centers. You can also rent one for about $80 per day. You can get the job done without a pressure washer, but it's a real time and labor saver.
2
/
7
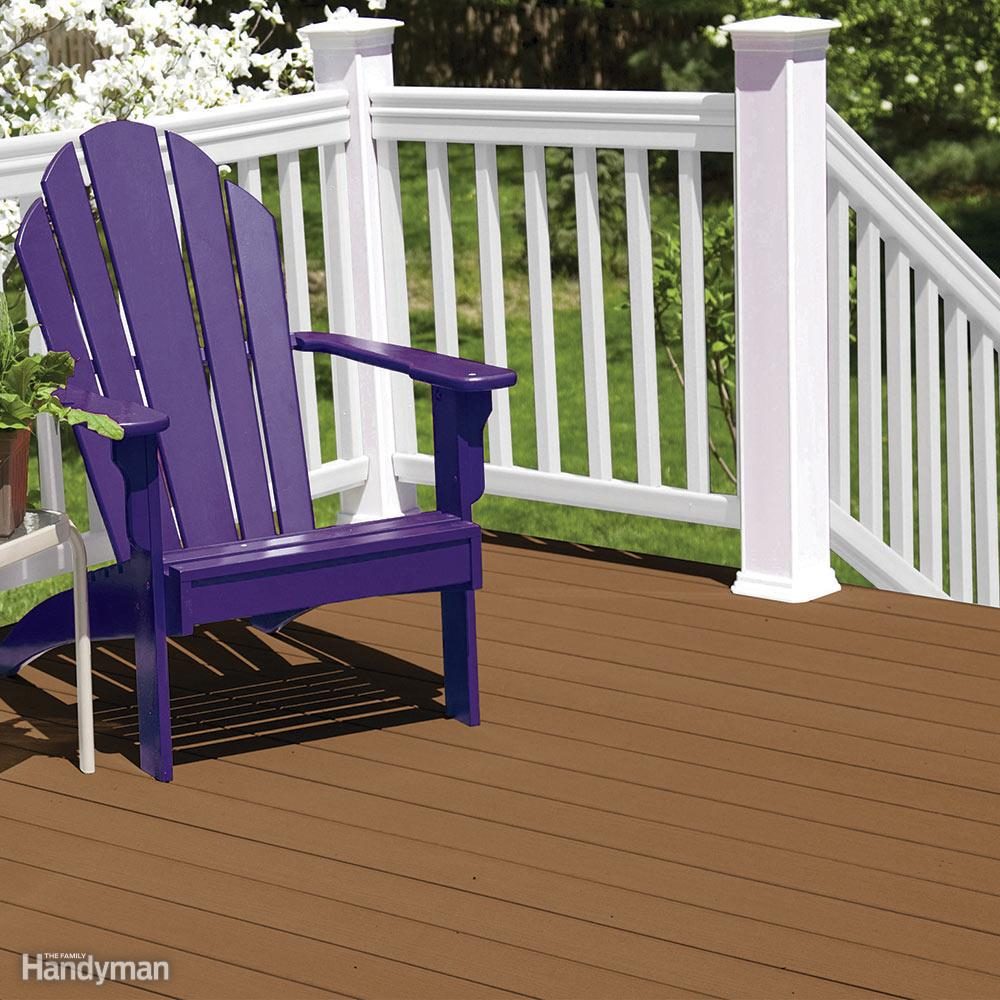
Solution 2: Deck Restoration Coatings
Deck restoration coatings are acrylic based and go on like really thick paint. You'll need to apply two coats. Once dry, they form a coating similar in appearance to composite decking.
A word of caution about these products: We found many online complaints and even some reports of lawsuits related to peeling of deck coating products not long after application. It's very important to follow preparation instructions from the manufacturer, which might include power washing and application of a prime coat. Bottom line: Read the manufacturer's instructions before use and contact the company directly if you have questions or concerns about whether it'll work for your particular situation.
Here’s how you can preserve the rich color tones of the hardwood and still restore a deck.
3
/
7
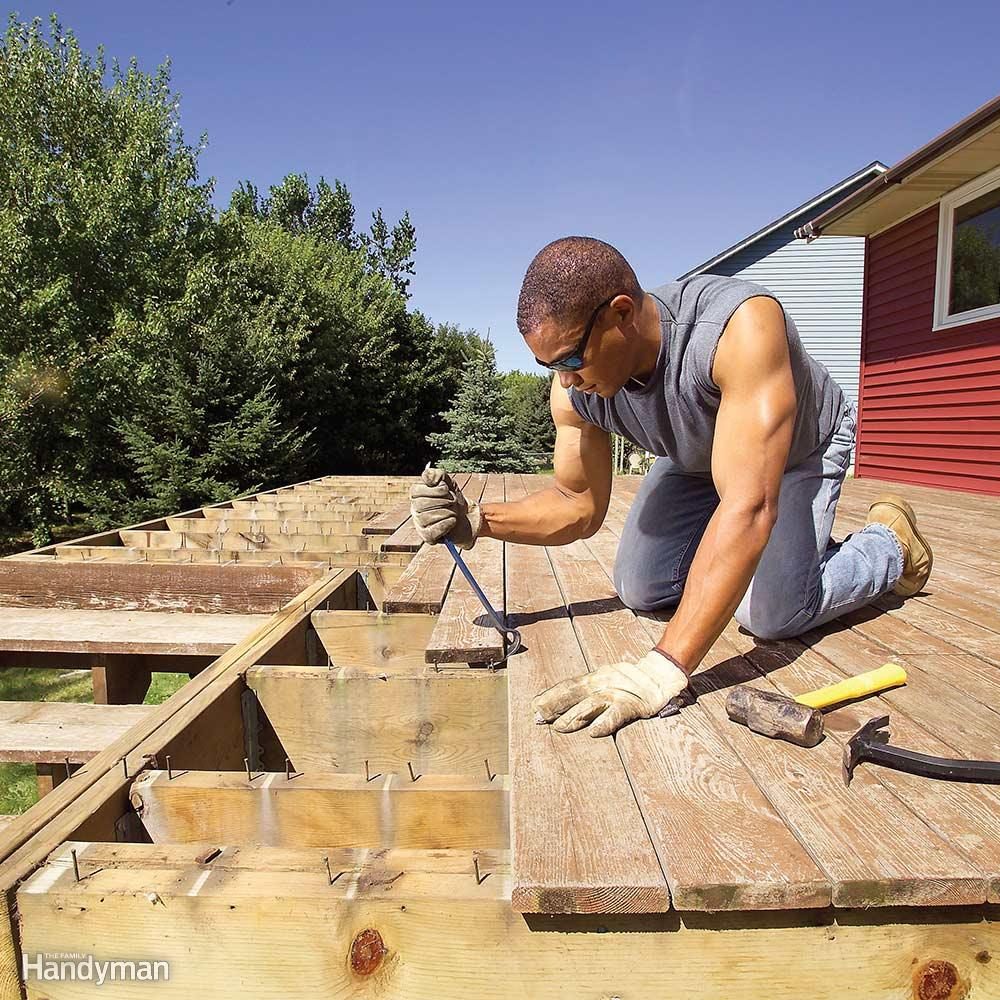
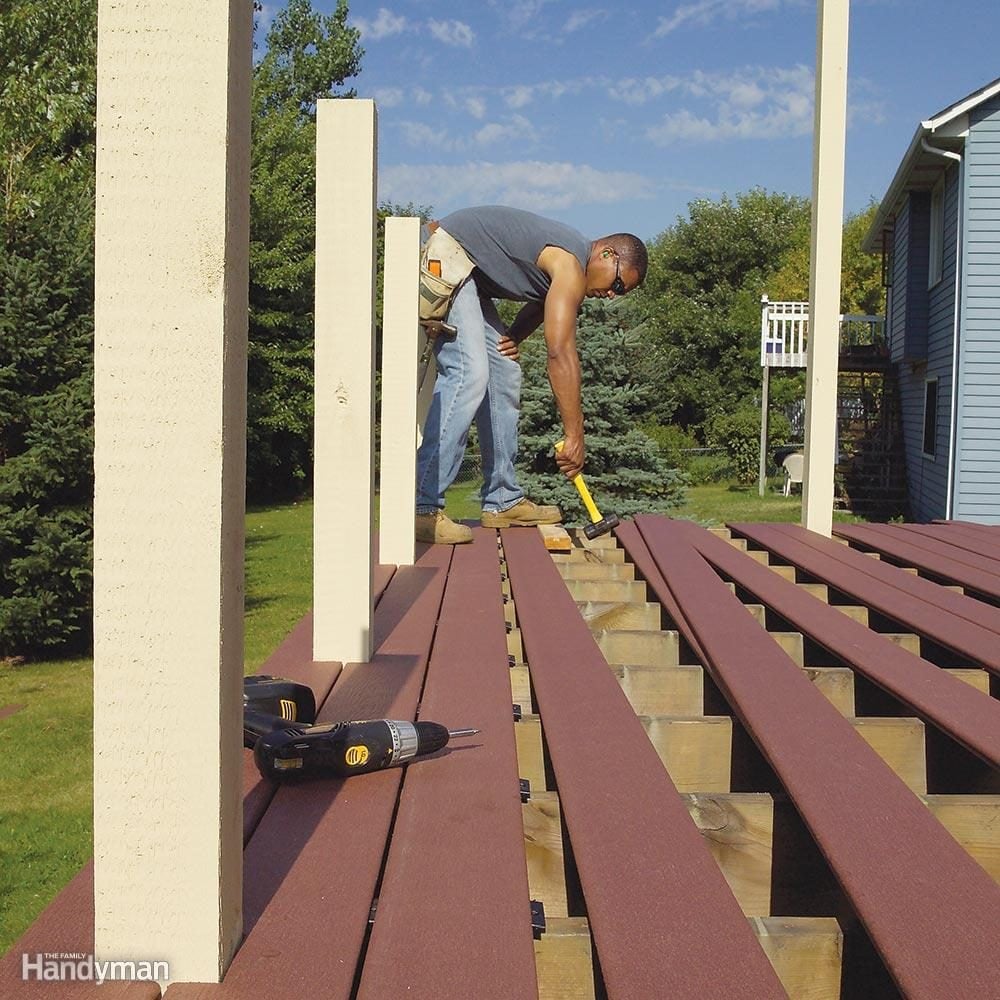
Solution 3: Replace the Deck Boards
It's not the easiest option, but replacing your wooden deck boards with synthetic decking (composite or PVC) might be your best investment, in both time and money. In just a few weekends and with basic carpentry tools, you can have a stunning deck that looks brand new and will look great for many years.
Costs vary widely for synthetic decking, but expect to pay anywhere from $5 to $10 per square foot. Be warned, however, that synthetic decking requires closer spacing of joists and stair stringers (maximum 16 in. apart), so you might have lots of framing to do.
4
/
7
Specifics
Cost: Varies widely, but generally $5 to $10 per sq. ft.
Life Span: Can easily last 20 years or more.
Pros:
- Low maintenance - just needs occasional cleaning.
- Stands up well to heavy traffic.
- Lasts for decades.
- Can use screws or hidden fasteners.
- Wood grain patterns available with many brands.
- Lots of color choices.
Cons:
- You'll have to tear off the old decking first - a huge job.
- Expensive.
- Gets very hot when the sun hits it (especially dark colors and dense boards).
- Doesn't look like real wood (but some brands come close).
- Can be slippery when wet.
Other considerations:
- You'll need a building permit and inspection.
- It's a lot of work to install.
- You'll need a dumpster for all the old material.
5
/
7
6
/
7
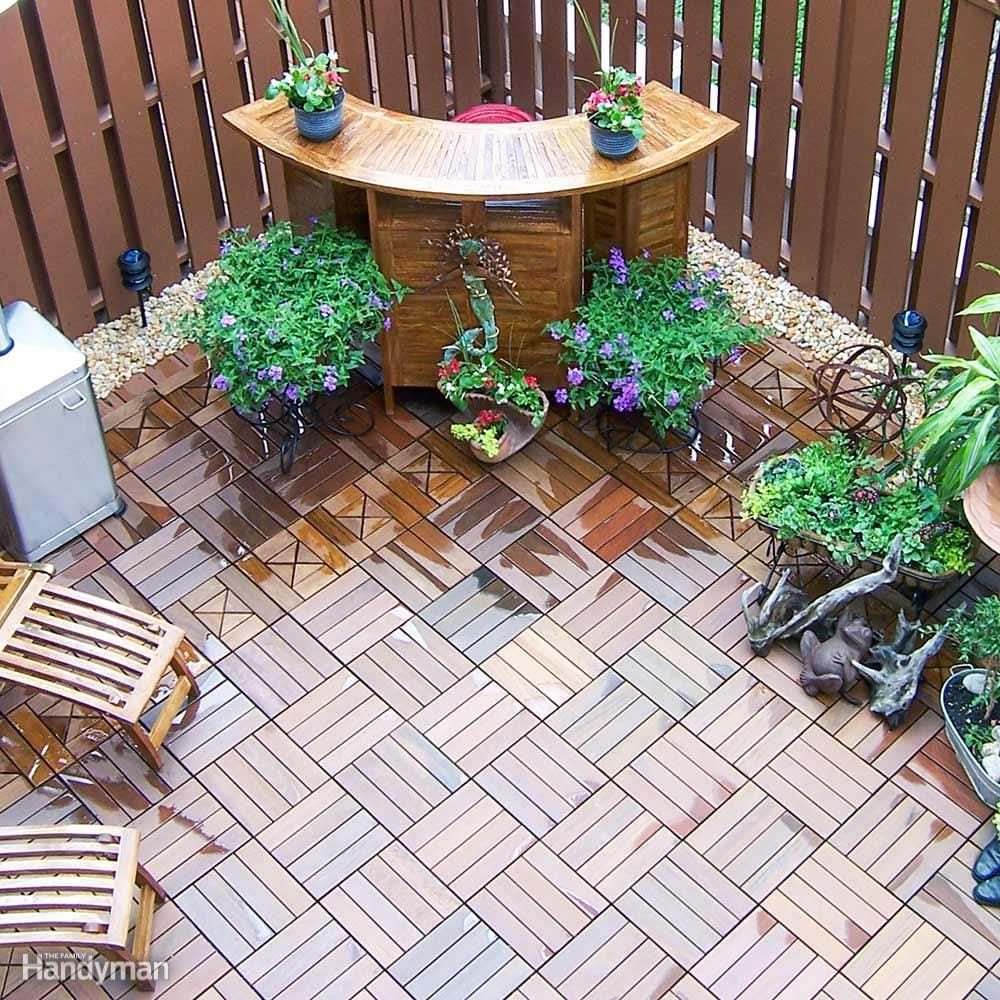
Solution 4: Deck Tiles
Think of this option as a slipcover for your deck. Instead of ripping out or recoating your old deck boards, you place new wood or synthetic decking right over your old deck. Several companies make tiles out of composite or exotic woods like ipe that you just lay down and snap together. Plastic grids underneath the tiles allow for airflow, which helps prevent wood rot.
7
/
7
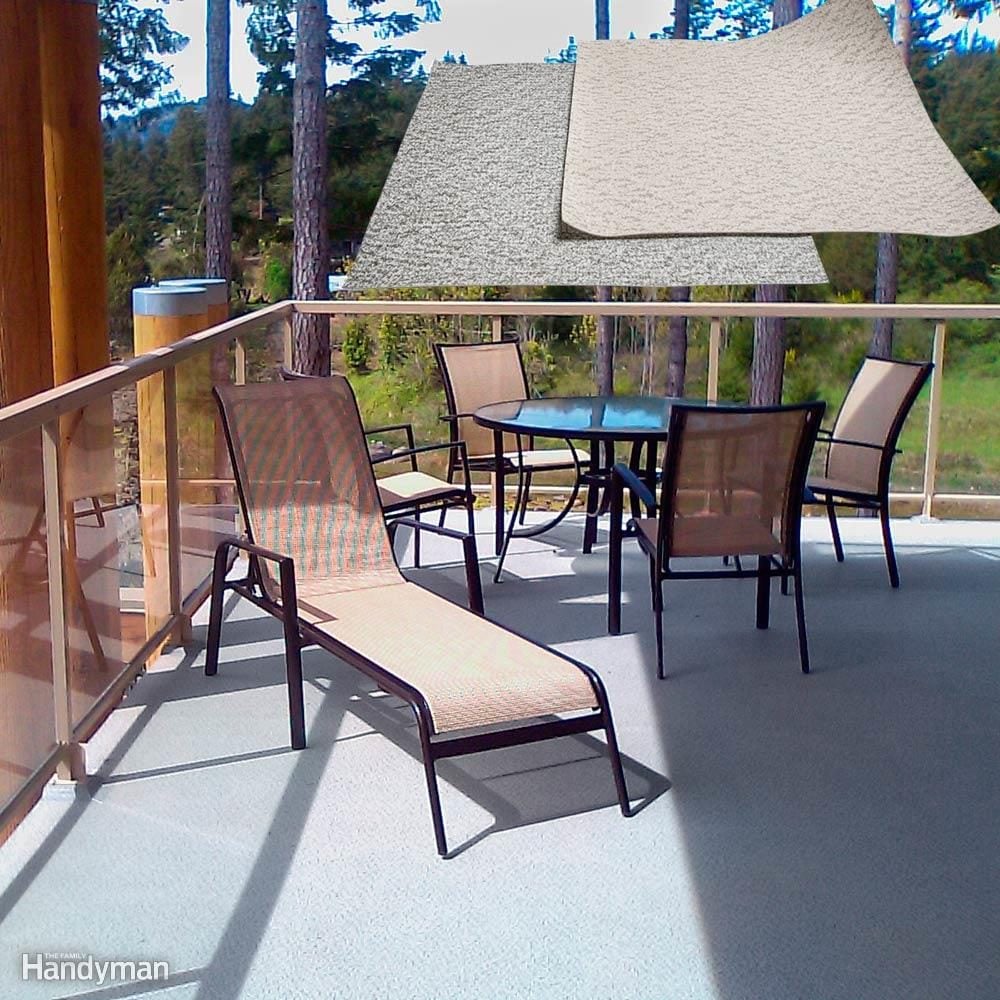
Solution 5: Exterior Floor Covering
DeckRite is a sheet material that comes on a roll, much like sheet vinyl flooring. It basically turns your old deck into an outdoor floor with no gaps in it and creates a watertight roof for the area beneath your deck. As long as your old deck boards are at least 5/4 thick and structurally sound, you can screw 1/2-in. pressure-treated plywood right over it and stick the flooring membrane on top. If the deck is really big, it might require multiple sheets, and you'll need to rent a hot air welder from DeckRite to deal with the overlapped seams. Cost is about $6 per sq. ft. for all the materials you'll need. Visit deckrite.com for more information.