


Follow these tips and your deck restoration project will be flawless.
Multiple Days
Intermediate
Varies
Introduction
Restore an old wood deck, even if it's worn, cracked and splintery. Simply paint it with a thick, acrylic deck restoration coating, which will create a smooth surface that lasts for years.
Tools Required
- 6" Stain brush
- Drill/driver
- Pressure washer
- Random orbit sander
- Roller extension pole
- Roller screen
- Safety glasses
- Special application rollers
- Stiff scrub brush
Materials Required
- 80-grit sanding discs
- Deck restoration coating
- Manufacturer's recommended deck cleaner
- Masking tape
- Paint stir sticks
- Plastic sheeting
Keeping a wood deck in good shape takes a lot of work. Even if you stain or seal it, the boards can still crack and splinter, making the deck look old and worn.
Switching over to composite decking is one option, though the cost may be prohibitive. But there’s another, far more affordable solution: Restoring your existing deck by applying a deck paint restoration product.
Deck paint restoration coatings are thick enough to fill all cracks, knotholes and splinters. Best of all, they provide a new textured surface that can last as long as 13 years without additional applications. You can do the prep work in one day, then apply the restore paint product over a two-day period the following weekend.
You’ll need a pressure washer (rent it if you don’t own one), a jug of deck cleaner, a special roller, masking materials and a roller extension. Here’s how to buy the best deck paint product, prepare the surface and apply it.
What is a deck restoration coating?
A product made from a long-lasting tintable acrylic base material with UV inhibitors and added solids (aluminum oxide or sand). The solids provide texture and hold the product together, like aggregate in concrete.
Some brands allow the wood to breathe yet repel water, while others form an impermeable barrier. Some work on vertical surfaces as well as the decking surface. The coverage ranges from 20 square feet to as much as 75 square feet per gallon.
All brands require rigorous surface preparation and application methods to revive the deck. The procedures vary by manufacturer; read the product label.
Choose the color carefully, because deck restoration coatings absorb a lot of heat and retain it longer than plain wood. If you pick a dark color and your deck receives direct sunlight, it may be too hot to walk on with bare feet.
Project step-by-step (9)
Step 1
Make small repairs
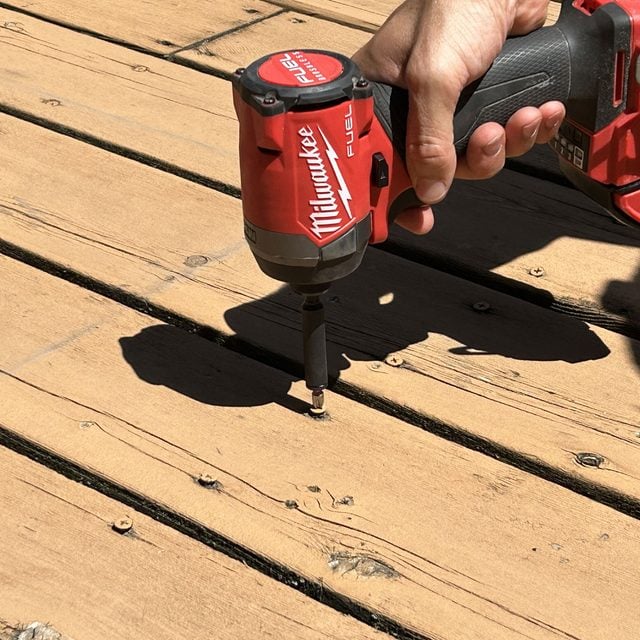
Start by breaking off any large splinters. Then reset any protruding nail heads, or remove them and secure the boards with deck screws instead.
These deck boards were fastened with screws. As I tightened several that backed out, they broke off. If this happens, pull out the deck fastener and replace it with a new one. Finally, replace any bad boards with new decking.
Step 2
Prepare deck for painting
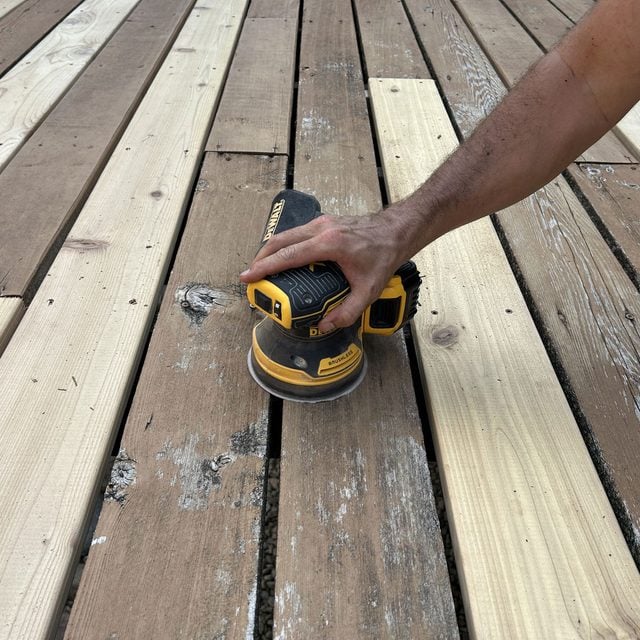
Use an orbital sander with 80-grit sandpaper on any areas of the deck with old paint or finish that’s peeling or chipped.
If you’ve applied a solid stain or clear sealer, then covered areas of the deck with patio planters or furniture, those sun-shielded areas must be sanded to rough up the surface.
Step 3
Clean the deck
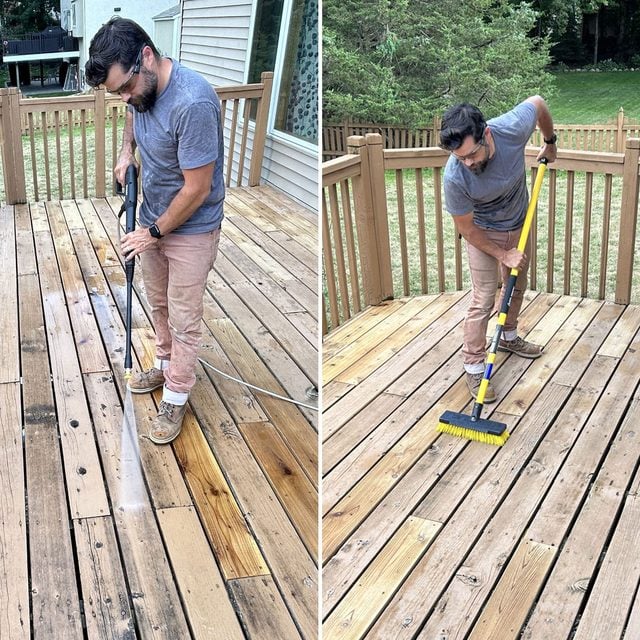
Next, dilute the deck cleaning product, apply it, and let it soak in for the recommended time. Then scrub the entire deck with a stiff scrub brush and extension handle.
Pay extra attention to any greasy areas; get all the grease off. Then power wash the deck to remove ground-in dirt and loose stain. Aim the nozzle into the board gaps to clean them out, too.
Step 4
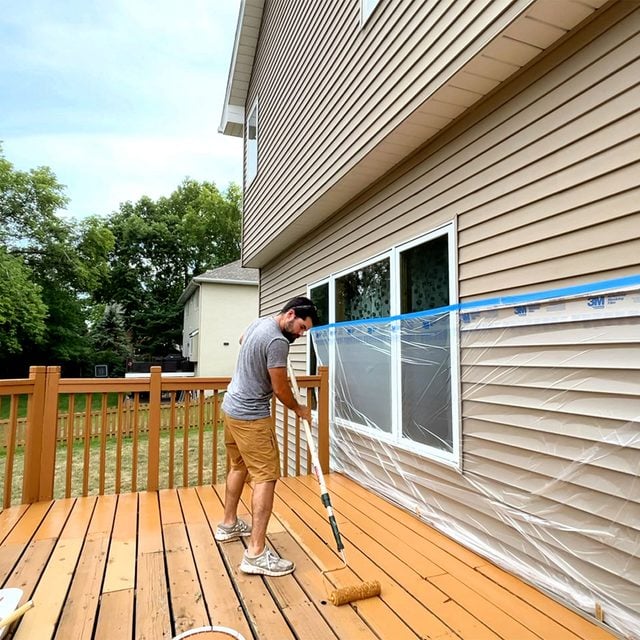
Mask off the house
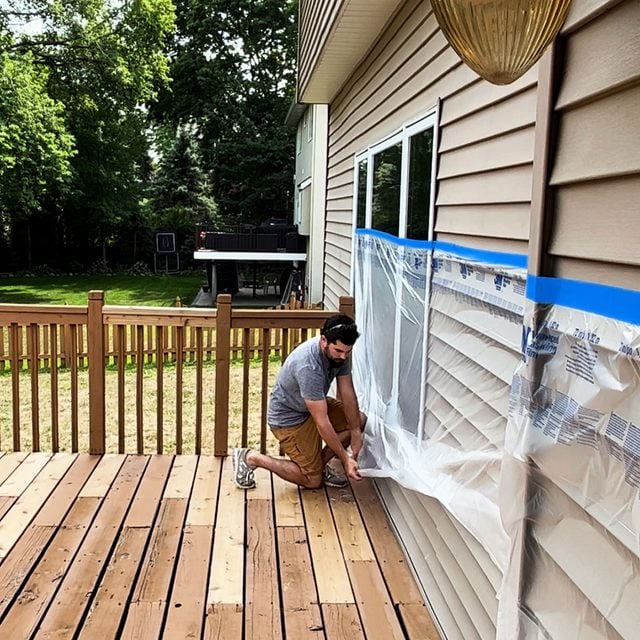
Before applying the restoration product, let the wood dry completely and mask off any surface you want to protect from the paint. I masked off the siding above and below the deck, the river rock below the deck, and nearby bushes.
Step 5
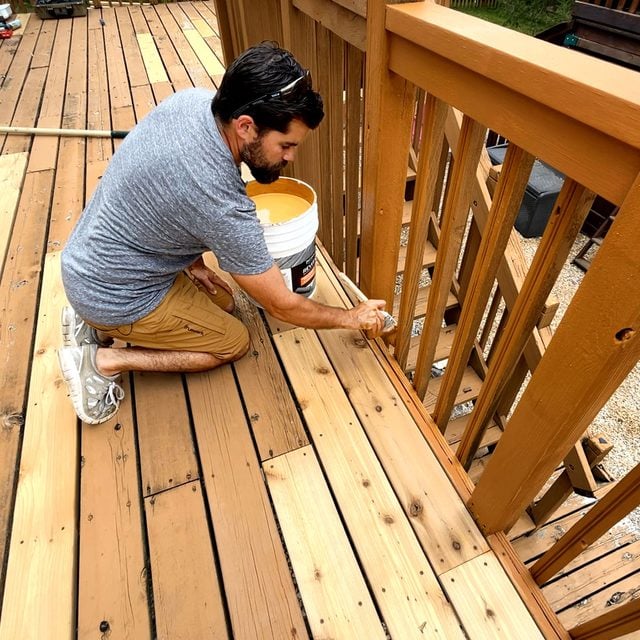
Start with the railing
After giving the coating a nice stir, I started coating the railings. I started with the balusters and the posts, then moved to the rail. Before I got too far, I also cut in the coating into the corners of the deck at the base of the posts and balusters.
Step 6
Roll on the deck coating
Instead of using a paint tray, roll right out of the five-gallon bucket. Use a roller screen made to hang onto the side of the bucket to limit unwanted drips as you roll the coating onto the deck boards. Then lift, reload and do the next section.
Don’t back-roll. You’ll have to reload the roller every few feet to get the proper coating thickness.
Don’t try to make the product go further by working it back and forth — that will thin it and load it with air bubbles. Coat several boards at a time. Some products will fill the gaps, and some will fall through and be wasted.
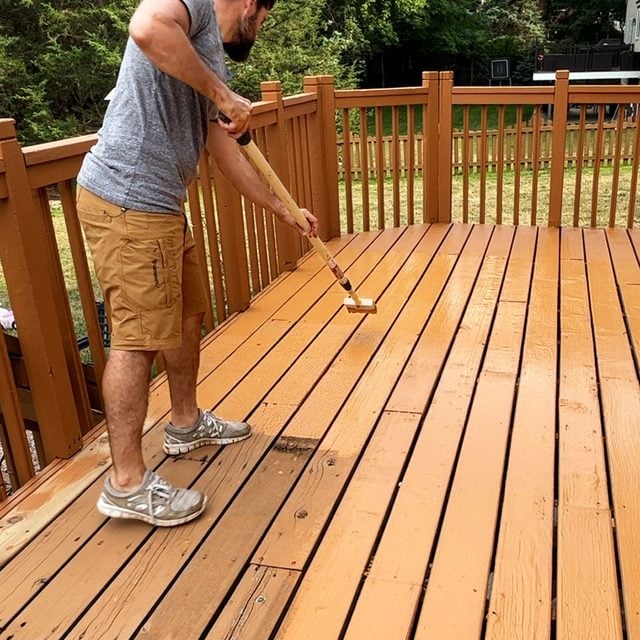
Step 7
Coat the entire length of the boards
Roll the entire length of the deck boards, a few rows at a time. Once you’ve rolled a few rows of boards, switch to a six-inch staining brush and glide it over each of the coated boards, all the way across in one stroke. The brush I used had a threaded end, letting me attach it onto an extending paint pole so I could reach into the corners.
Step 8
Fill in deck cracks
As you’re rolling, take notice of areas the coating doesn’t fill in completely. If you come across any knots, screw or nail holes, gouges or cracks that aren’t filling up, load up a brush and drip it in to fill the gaps.
Step 9
Roll on a second coat
Clean up with soap and water and let the first coat dry for three to six hours, or until dry to the touch. You probably won’t like the look of the first coat. Don’t worry; it’s just the primer. The second coat is the “magic coat” that fills in all the gaps and provides the smooth texture you saw at the store.
Apply the second coat using the same method. Then let the deck dry for two full days before walking on it.
For the longest-lasting results when you restore the deck, clean the coating in the spring and fall using the manufacturer’s cleaner.
Originally Published: February 19, 2019