
Easy Deck Inspection and Deck Repair Tips
Updated: Jul. 21, 2023
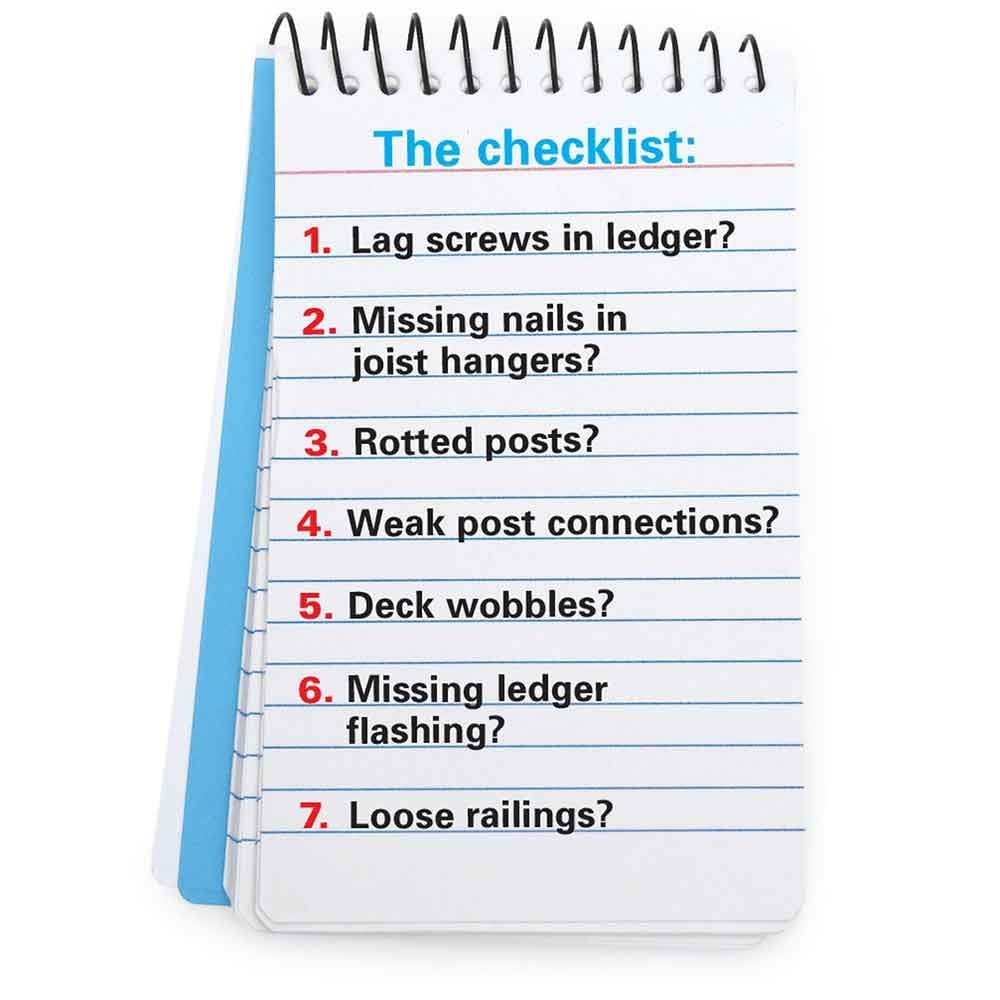
7 minutes, 7-point inspection and 7 easy repairs.
1
/
16
Overview: The weak deck problem and solutions
If you've thought to yourself maybe it's time to check my deck; then it's time. A well-built deck will last for decades. But a deck that's rotting or missing fasteners, or that moves when you walk on it, may be dangerous. Decks built by inexperienced do-it-yourselfers, not inspected when they were built, or more than 15 years old (building codes were different back then!) are susceptible to serious problems. Every year, people are severely injured, even killed, when decks like these fall down. This has usually happened during parties when the deck was filled with guests.
Now for the good news. Most of the fixes are quick, inexpensive and easy. Home centers and lumberyards carry the tools and materials you'll need. Or visit strongtie.com to find local stores that stock anchors, post bases and connectors.
In this article, we'll show you the warning signs of a dangerous deck—and how to fix the problems. If you're still not sure whether your deck is safe, have it inspected by your local building inspector.
2
/
16

Problem 1: No lag screws in ledger board
The ledger board holds up the end of the deck that's against the house. If the ledger isn't well fastened, the deck can simply fall off the house. A building inspector we talked with said the most common problem with DIY decks is ledger boards not properly fastened to the house. For a strong connection, a ledger needs 1/2-in. x 3-in. lag screws (or lag bolts if you have access from the inside to fasten the washers and nuts) driven every 16 in. This ledger board was fastened mostly with nails instead of lag screws (and no washers).
Starting at one end of the ledger board, drill two 1/4-in. pilot holes. Offset the holes so the top isn't aligned with the bottom hole. Then drive the lag screws (with washers) using a drill and an impact socket (you'll need a socket adapter that fits in your drill). Don't countersink the screws—that only weakens the ledger board.
3
/
16
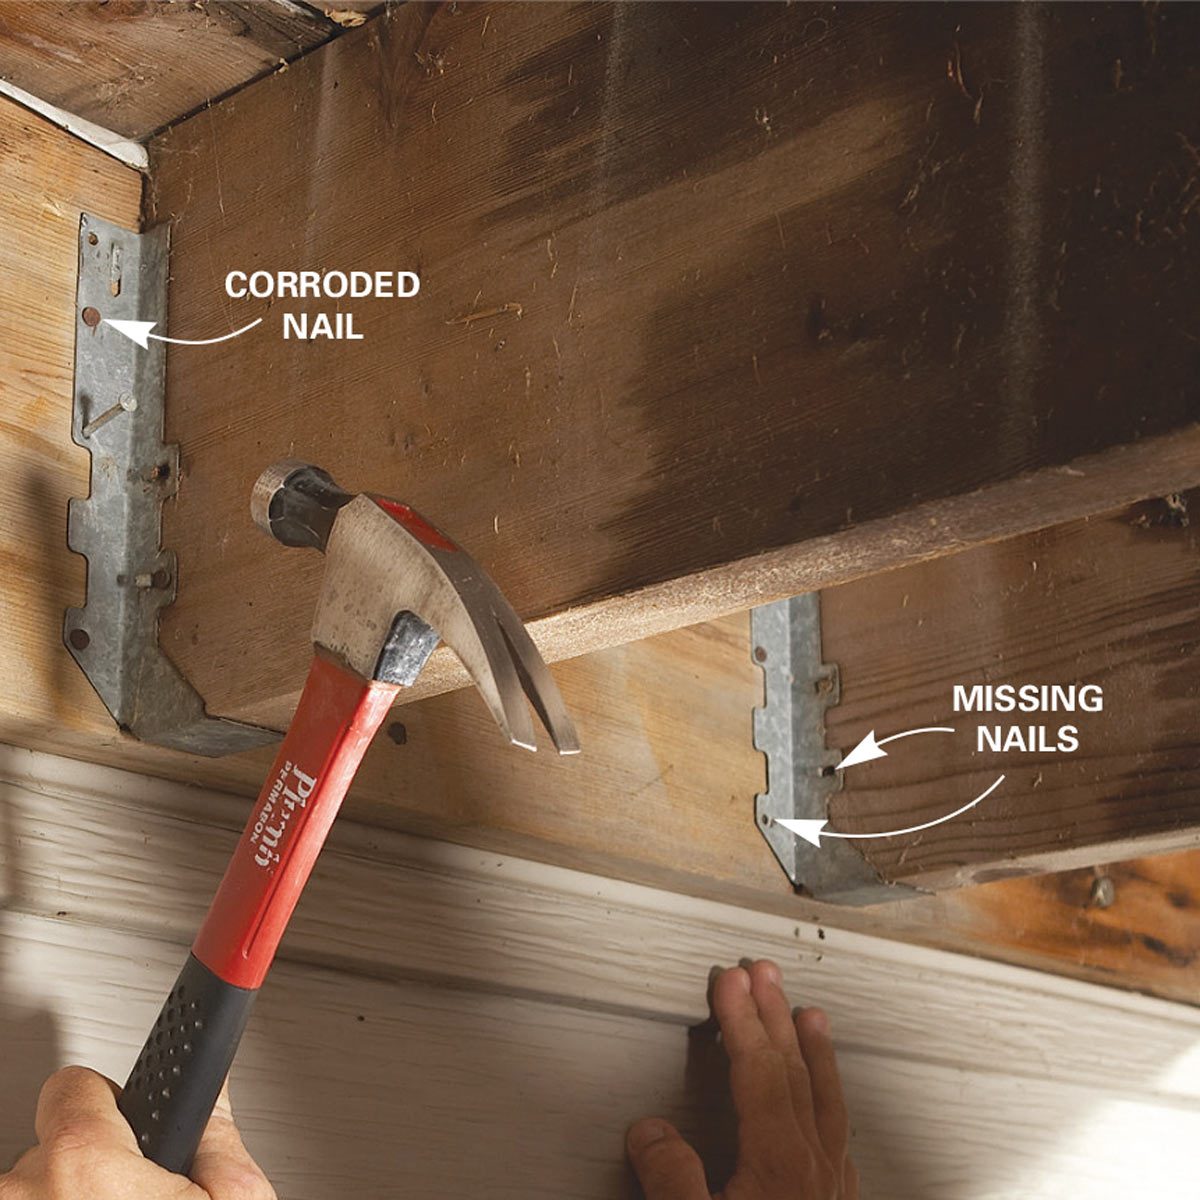
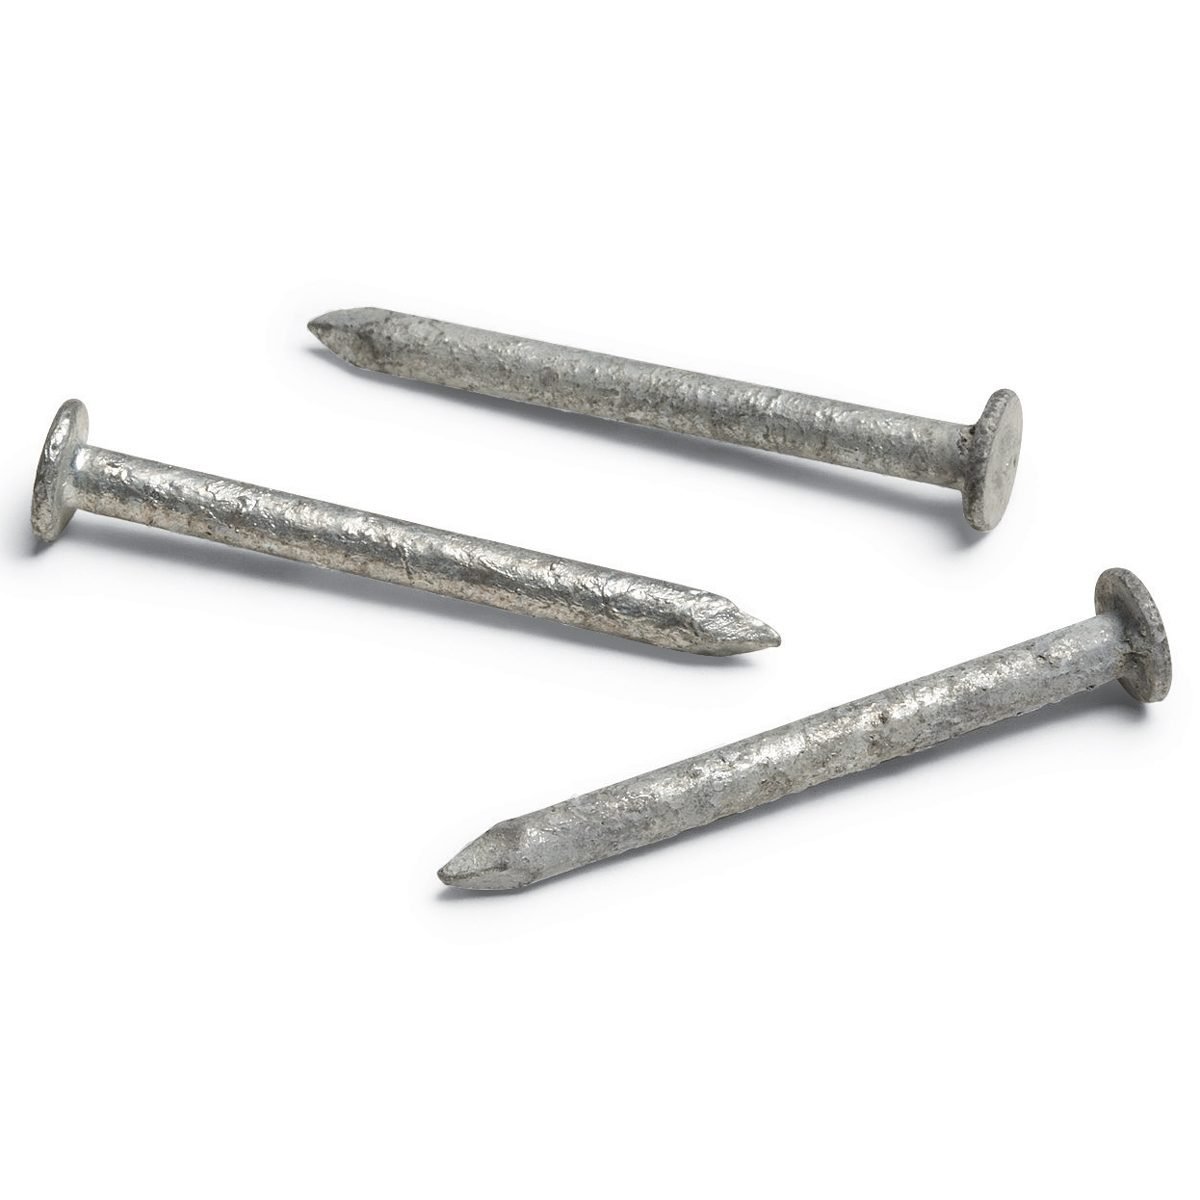
Problem 2: Missing nails in joist hangers
Granted there are a lot of nail holes in a joist hanger—but they all need to be filled. Otherwise, the hangers can pull loose from the ledger board or rim joist. Deck builders sometimes drive a couple of nails into the hangers to hold them in place, then forget to add the rest later. This deck had only a single nail in some joist hangers. In other areas, it had the wrong nails. Joist hanger nails are the only nails acceptable. These short, fat, galvanized nails are specially designed to hold the hangers in place under heavy loads and resist corrosion from treated lumber. Joist hanger nails have thicker heads and a heavy galvanized coating.
4
/
16

Problem 3: Rotted Deck Support Posts
Deck posts that rest directly on footings soak up water and then they rot, especially deck support posts that aren't pressure treated. As the post rots, it loses its strength and can't support the deck's weight. Newer decks keep the concrete footings a few inches above ground and use a special base bracket to keep the deck support posts dry. Replacing a rotted post is the best solution. Before removing the post, be sure you have everything you need for the replacement, including a wedge anchor.
5
/
16
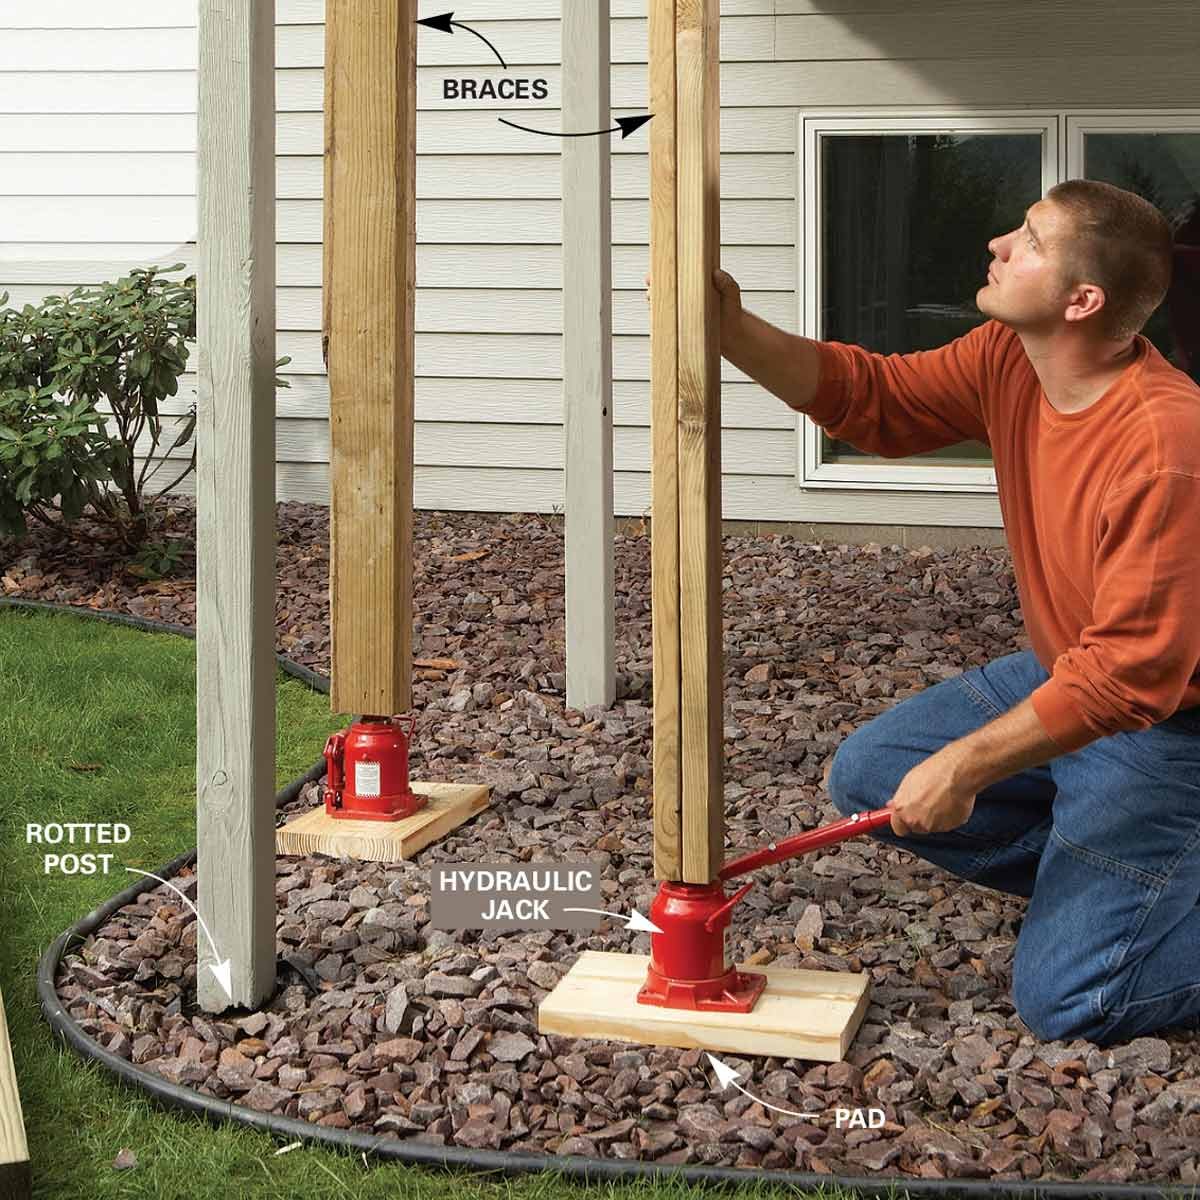
Problem 3: Rotten Deck Posts, Brace the Deck
Clear grass or stone away from the bottom of the deck post. Prod along the bottom of the post with a screwdriver or an awl. If the wood is spongy or pieces easily peel away, you'll need to replace the post. Start by nailing 2x4s or 2x6s together to use as temporary braces. Place scrap wood on the ground for a pad within 3 ft. of the post being replaced, then set a hydraulic jack over it. Cut the brace to size, set one end on the jack and place the other end under the rim joist. Slowly jack up the brace until it's wedged tight. Be careful not to overdo it. You're just bracing the deck, not raising it. If you hear the joist boards creak, then stop. Then place a second brace on the other side of the post (as seen in the photo). (If you don't have jacks, you can rent them.) Or you can set your temporary braces directly on the pads and drive shims between the posts and the rim joist.
Mark the post location on the footing, then remove the post by cutting through the fasteners that tie it to the rim joist. Use a metal blade in a reciprocating saw (or knock out the post with a hammer). If there's already a bolt sticking out of the footing, use it to install a new post base. If not, you'll need to add a 3/8- by 4-in. wedge anchor. Do this by placing the post base at the marks where the old post sat, and then mark the center. Remove the post base and drill the center mark with a 3/8-in. masonry bit. Drill down 3 in., then blow the dust out of the hole.
6
/
16
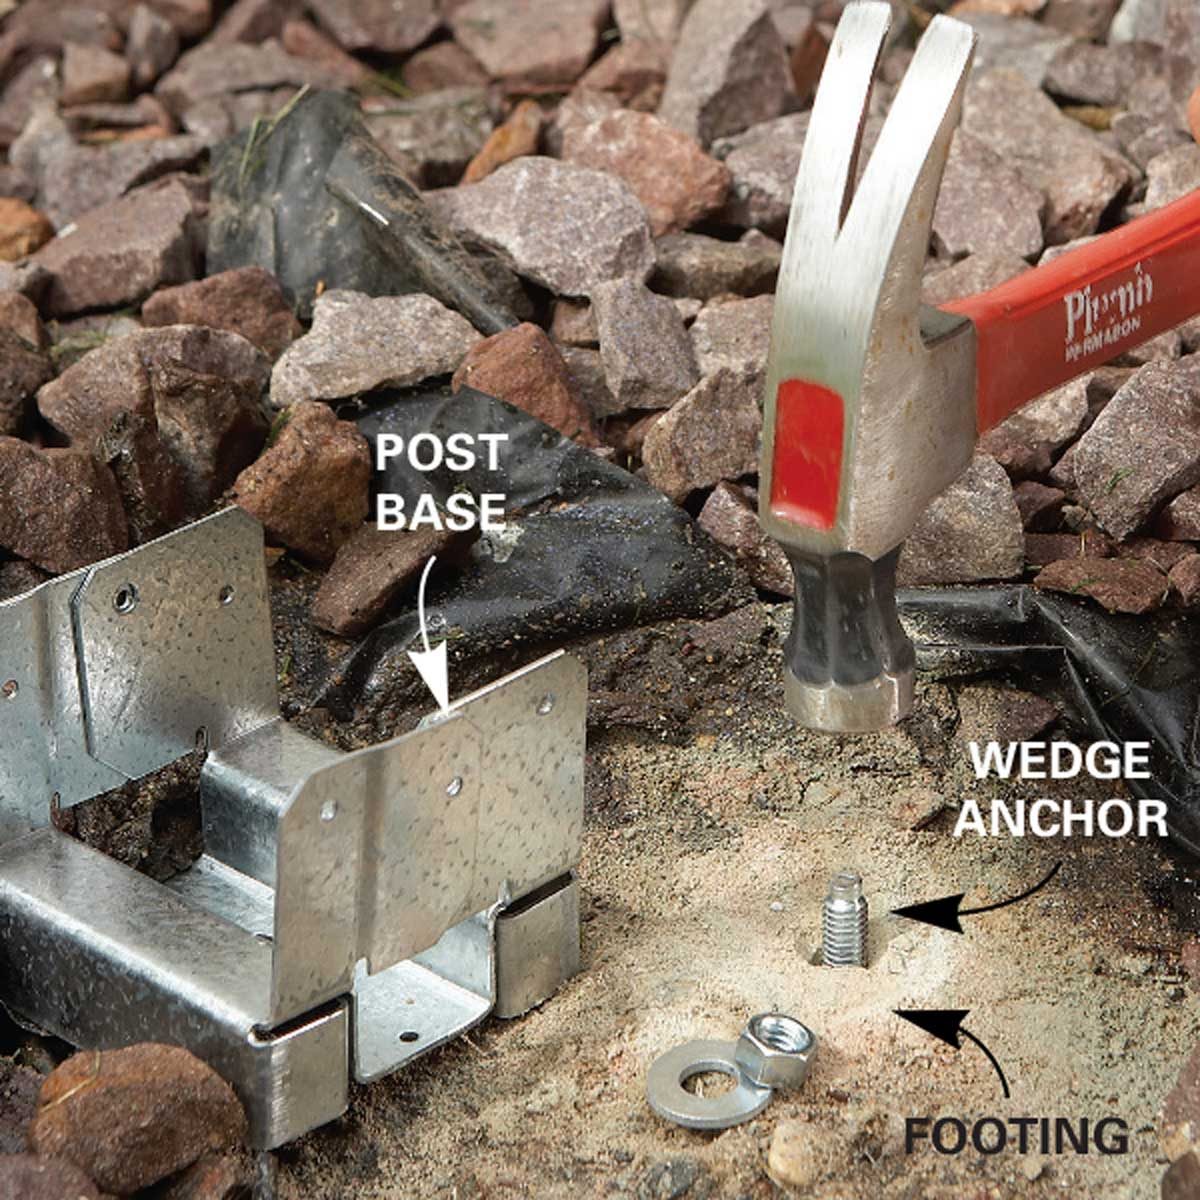
Problem 3: Rotten Deck Support Posts, Install an Anchor and Base
Tap the anchor into the hole with a hammer (as seen in photo). Install the post base over the anchor. As you tighten the nut on the anchor, the clip expands and wedges tight against the hole's walls to hold itself in place. The wedge anchor fastens the metal post base solidly to the footing.
7
/
16

Problem 3: Rotten Deck Posts, Install the New Post
Cut a treated post to fit between the post base and the top of the rim joist. Set the deck support post into place and tack it to the post base with 8d or 10d galvanized nails (as seen in photo). Place a level alongside the post. When it's plumb (straight), tack it in place to the rim joist.
8
/
16
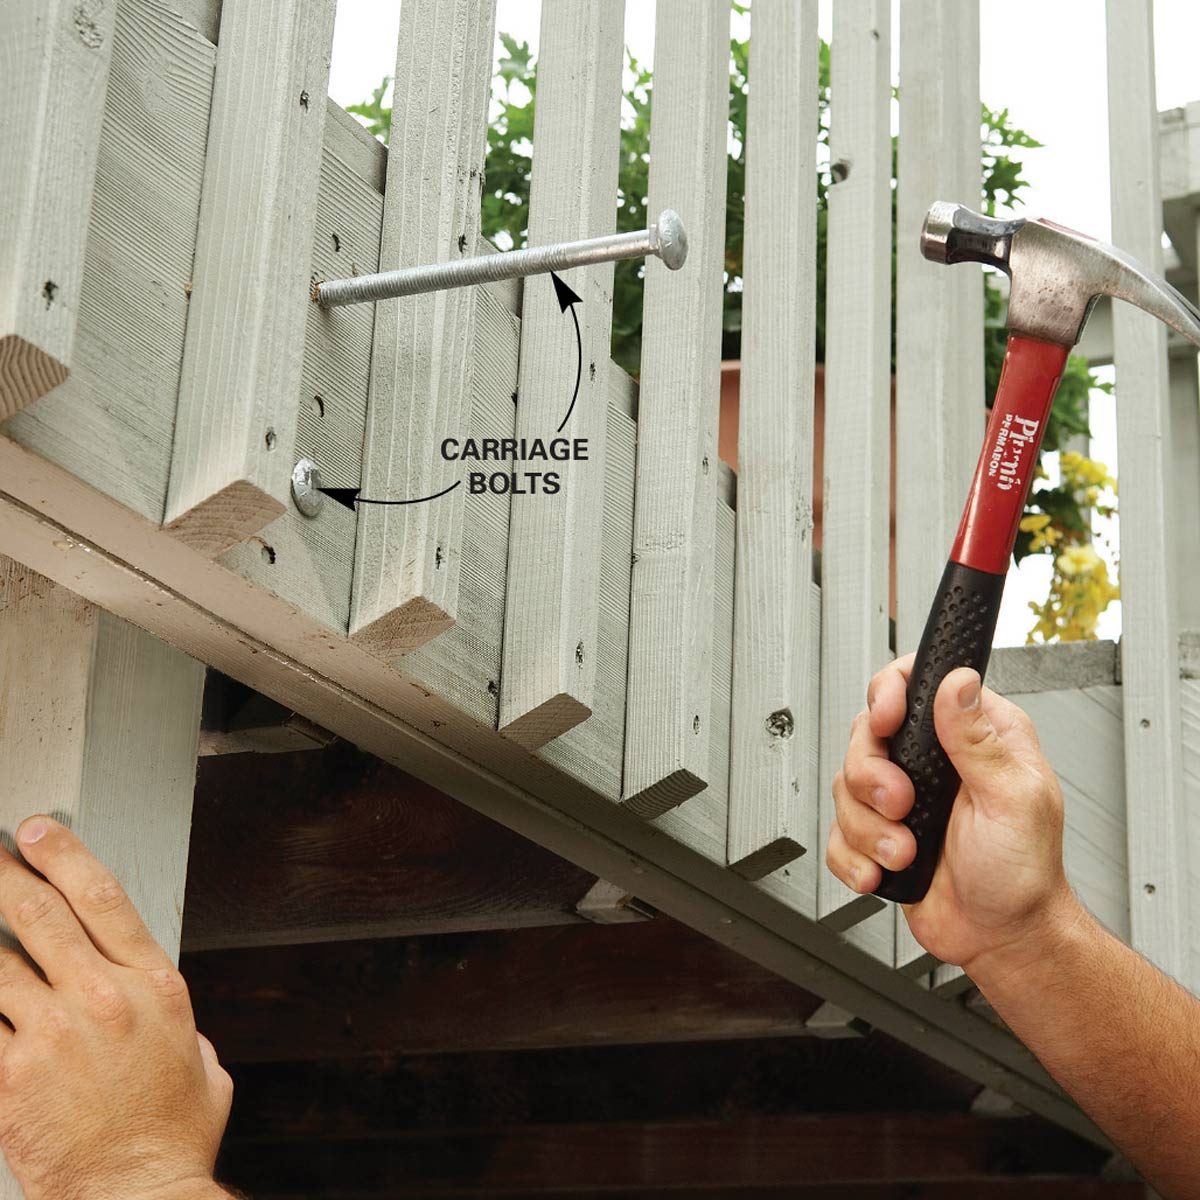
Problem 4: Wimpy post connections
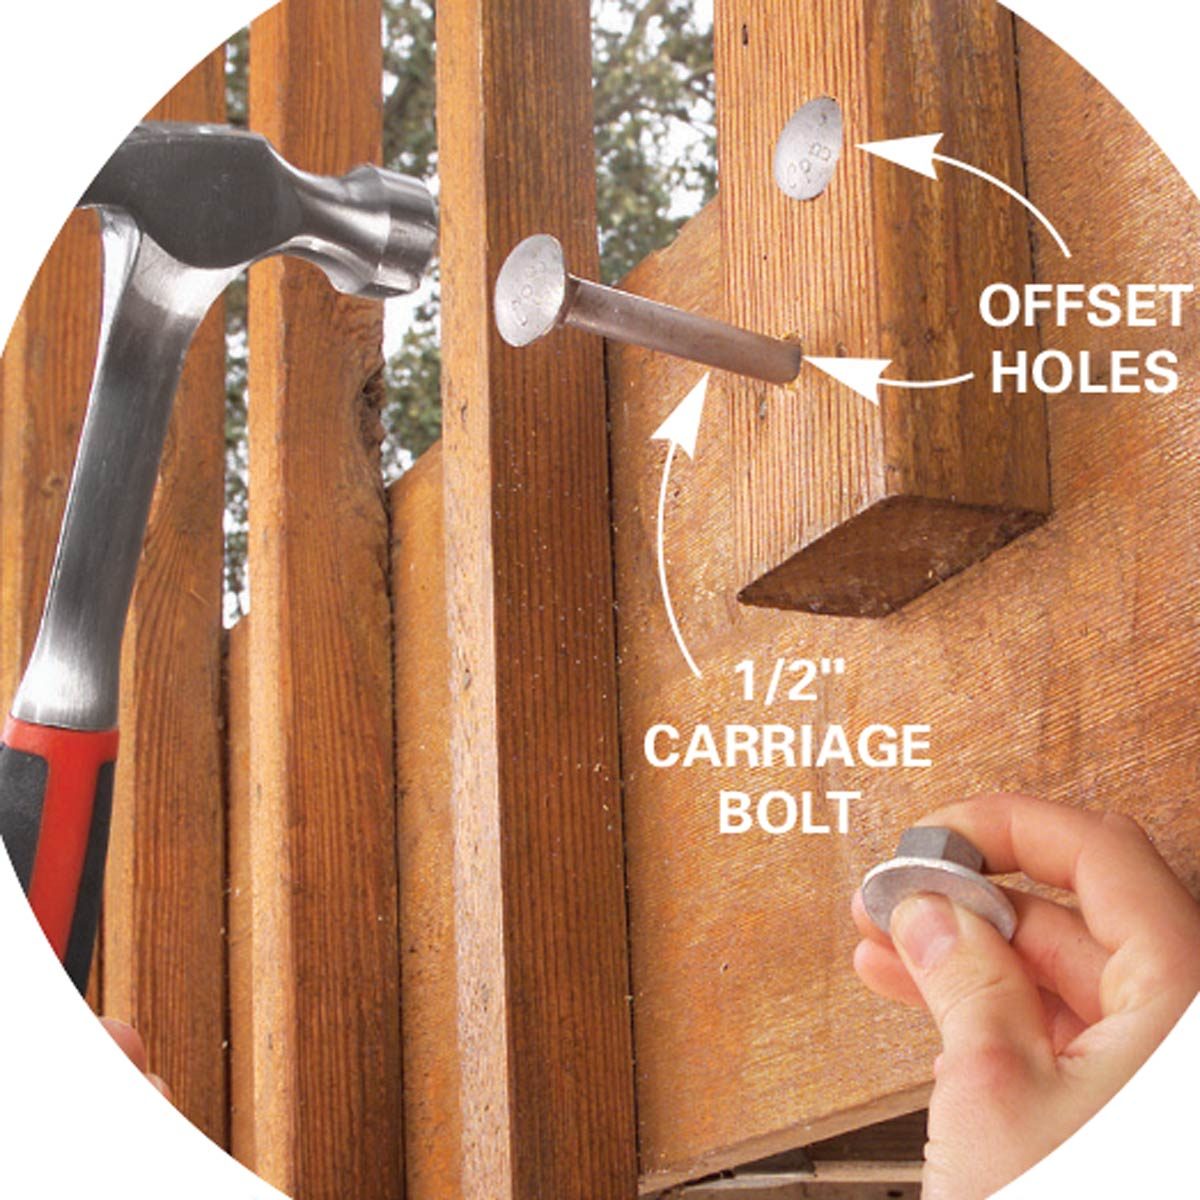
Strengthen post connections with carriage bolts. Drill holes, knock the bolts through, then tighten a washer and nut on the other side.
Ideally, posts should sit directly under the beam or rim joist to support the deck. If the posts are fastened to the side of the beam or rim joist, like the one shown here, the weight is put on the fasteners that connect the post to the deck. This deck had only three nails in the post—a recipe for collapse. Nails alone aren't strong enough for this job, no matter how many you use. For a strong connection, you need 1/2-in.-diameter galvanized carriage bolts.
Add two of these bolts by drilling 1/2- in. holes through the rim joist and post. An 8-in.-long 1/2-in. drill bit costs around $10. The length of the bolts depends on the size of your post and the thickness of the rim joist (add them and buy bolts at least 1 in. longer than your measurement). We used 8-in. bolts, which went through two 1-1/2- in. rim joists and a 3-1/2-in. post. Tap the bolts through with a hammer, then add a washer and nut on the other side.
9
/
16
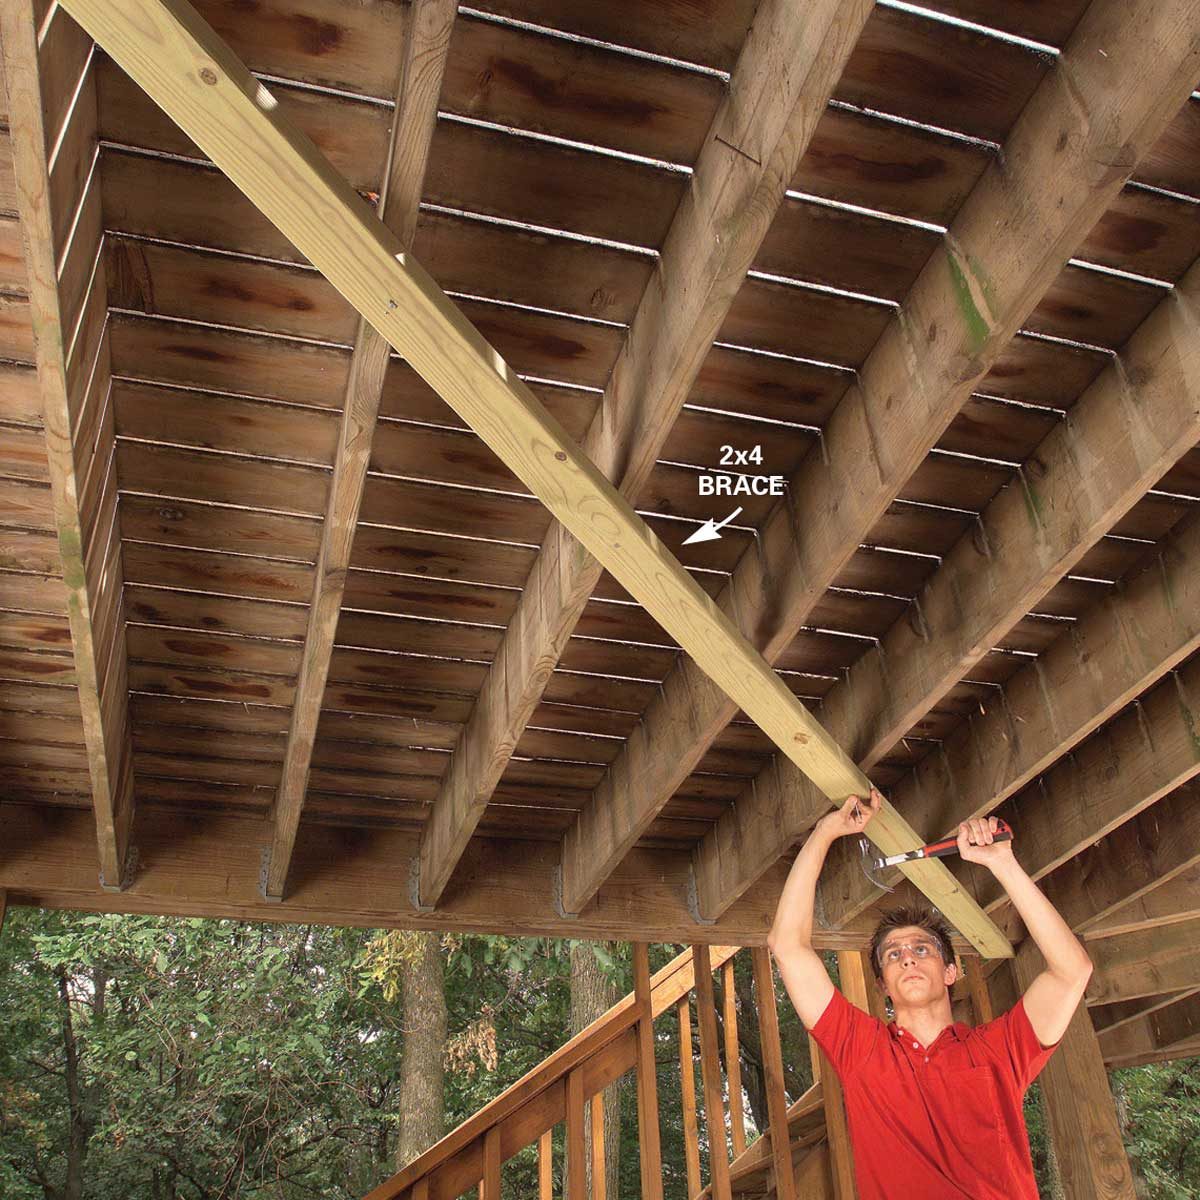
Problem 5: Wobbly deck syndrome
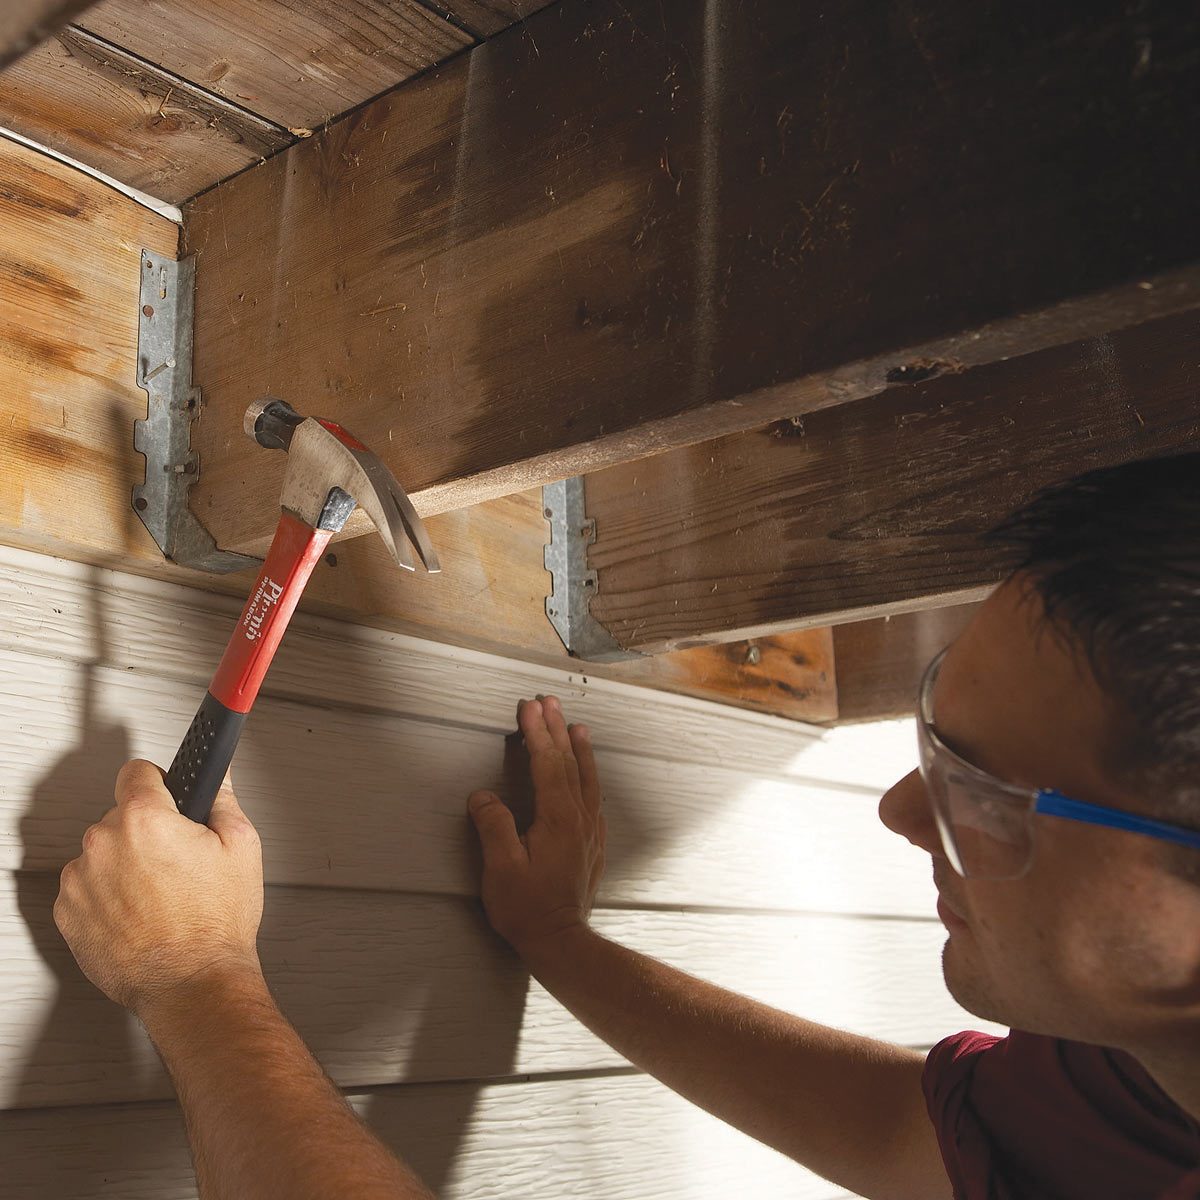
If your deck gets a case of the shakes when you walk across it, there's probably no reason for concern. Still, in some cases, the deck movement puts extra stress on the fasteners and connectors. Over time, the joists can pull away from the rim joist or ledger board and twist out of their vertical position, which weakens them. Fastening angle bracing under the deck will stiffen it and take out the sway. The braces are mostly hidden from view and let you walk on your deck without feeling like it's going to fall down at any moment.
Run a treated 2x4 diagonally from corner to corner, under the deck. Drive two 16d galvanized nails through the brace into each joist. If a single board won't span the distance, use two, overlapping the braces by at least two joists. Cut the bracing flush with the outside edge of the deck.
10
/
16
Problem 6: Missing ledger flashing
The area around the ledger board should be watertight. Even small leaks can lead to mold inside the walls of the house and, even worse, the house rim joist (which supports the ledger) will rot and the ledger will fall off. Stand or crawl under the deck and look at the ledger board. If you don't see a metal or plastic lip over the top of the ledger board, add the flashing. Flashing was completely missing from this deck.
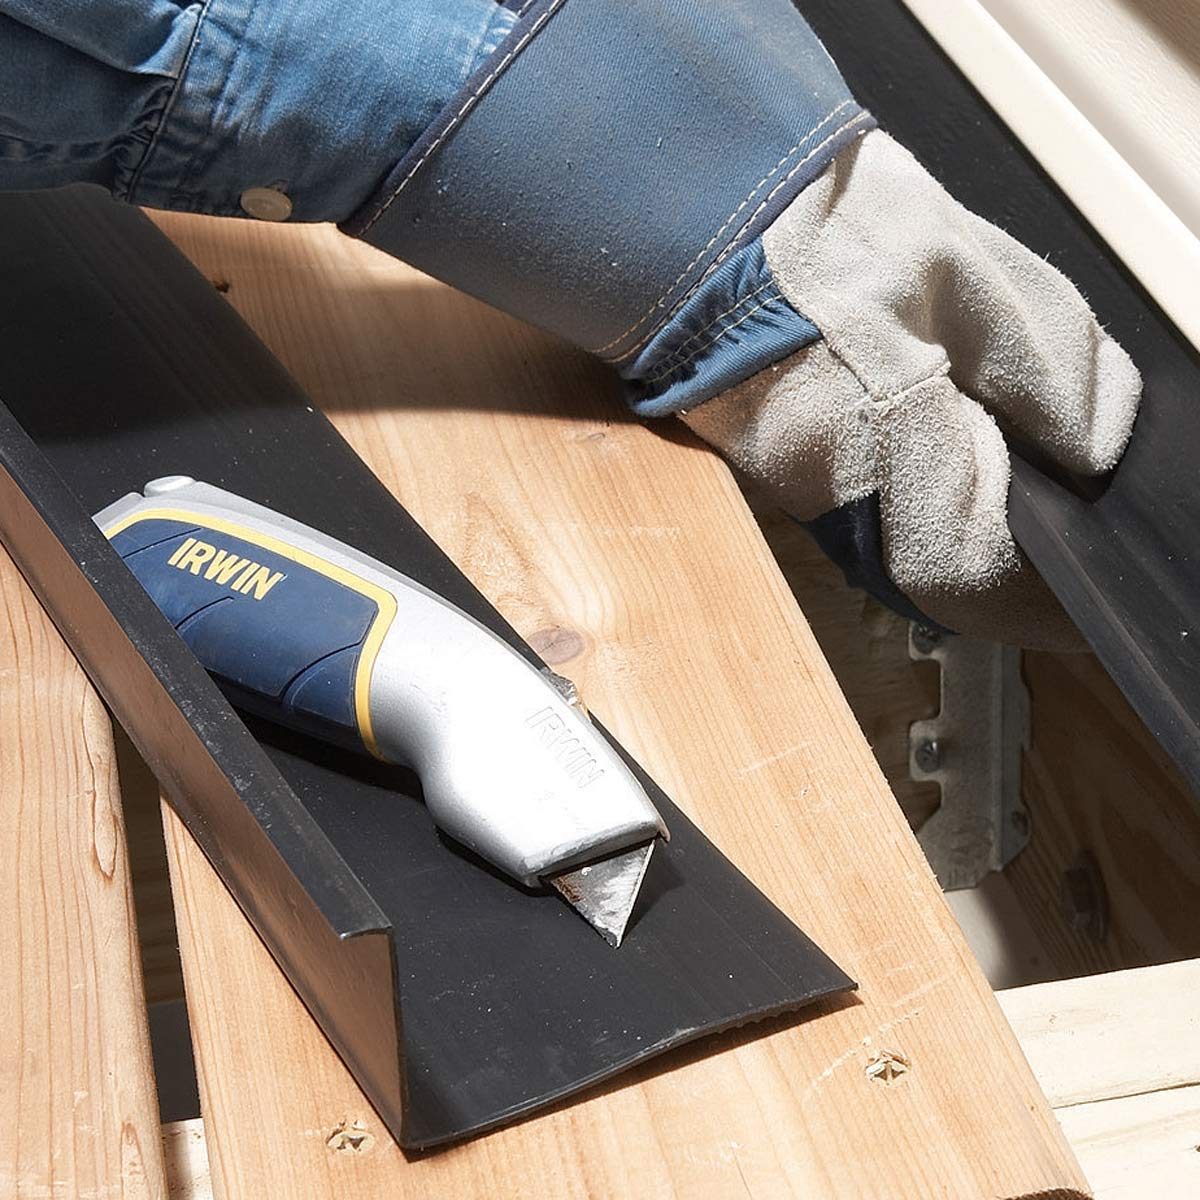
To add flashing, first remove the deck board that runs alongside the house. If the boards run diagonally, snap a chalk line 5-1/2 in. from the house, then set the blade in a circular saw to the depth of the decking boards and cut off the board ends. (Replace the cutouts at the end of the job with a 5-1/2-in.-wide board installed parallel to the house.)
11
/
16
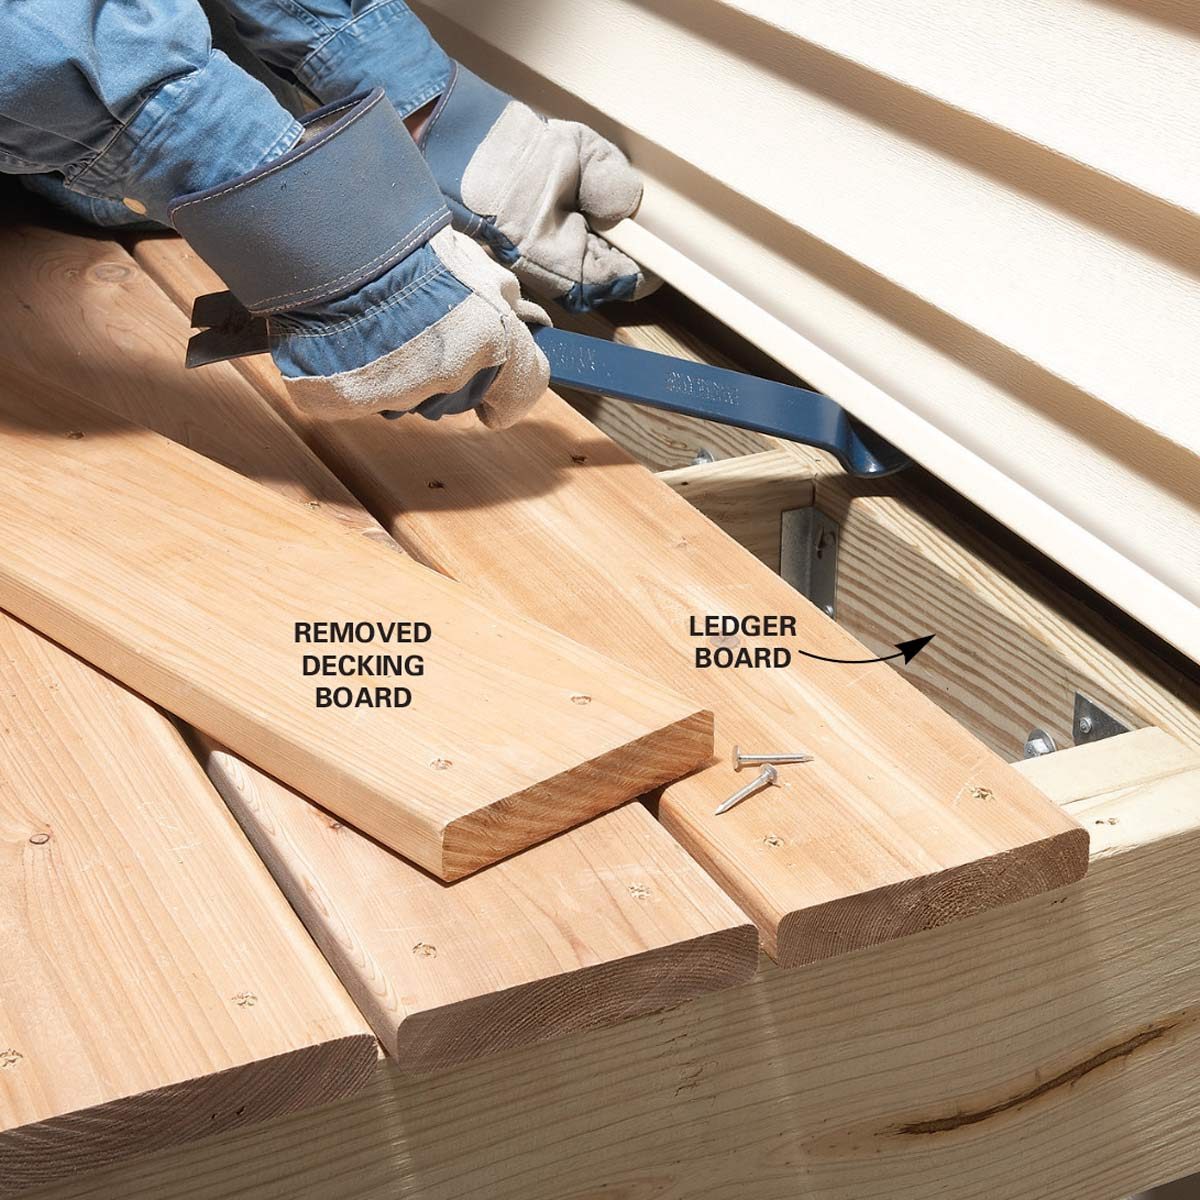
Problem 6: Missing ledger flashing - Loosen the siding
Pry the siding away from the house and remove the deck board that's over the ledger to clear the way for new flashing.
12
/
16
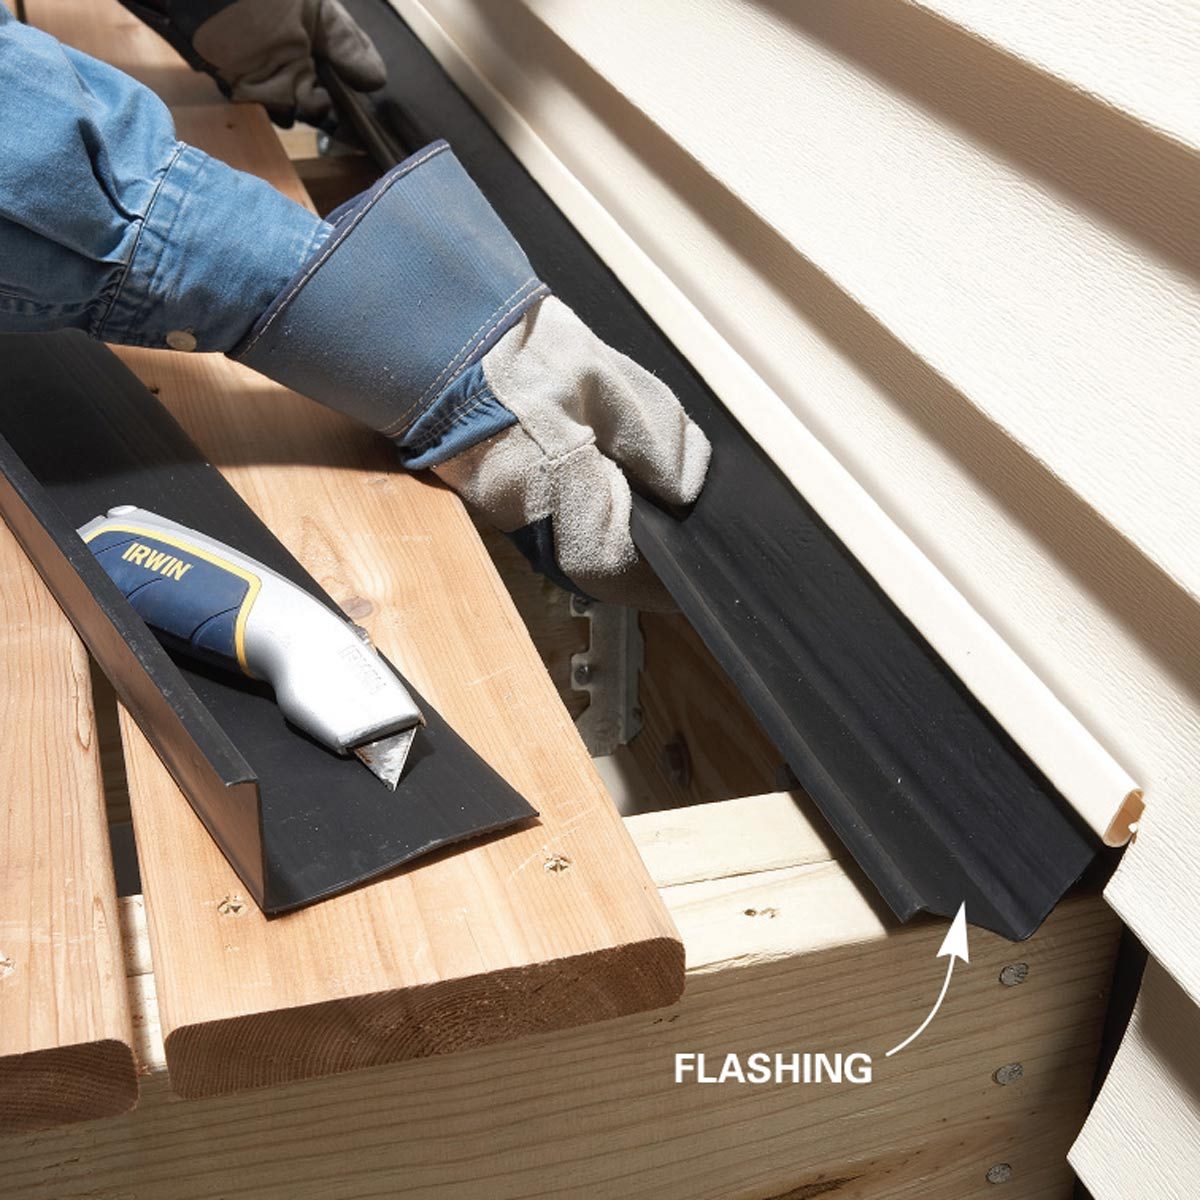
Problem 6: Missing ledger flashing - Insert the flashing
Slide the flashing behind the siding so the lip covers the top of the ledger. Reattach the siding.
If you have a brick or stucco house, you probably won't see any flashing because the ledgers are often installed directly over brick or stucco.
We used vinyl flashing, but you can also use galvanized metal or aluminum flashing. At each joist location, make a small cut in the flashing lip with a utility knife so it'll lie flat over the joists. The rest of the lip should fit over the top edge of the ledger board.
13
/
16
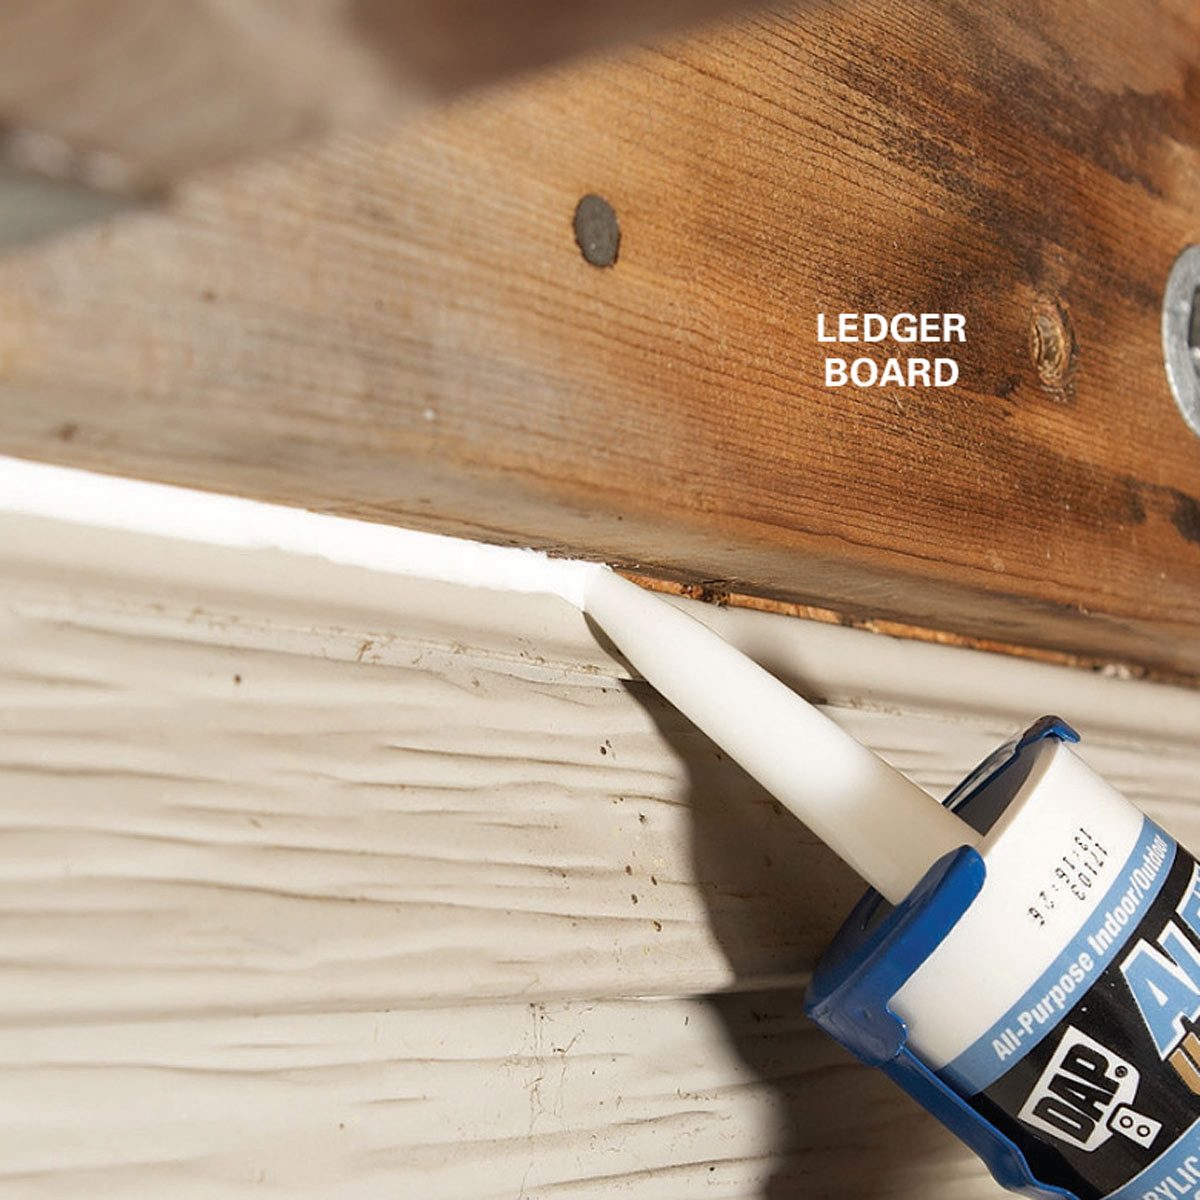
Problem 6: Missing ledger flashing - Seal the bottom
You should have flashing under the bottom edge of the ledger too. But since there's no way to add it without removing the ledger board, run a bead of acrylic caulk along the bottom of the ledger board to seal out water.
14
/
16
Problem 7: Rickety railing posts
Loose railings won't lead to your deck falling down, but you could tumble off your deck. Railing posts attached only with nails are bound to come loose, and no matter how many new nails you drive into them, you won't solve the problem. You'll need a 4x4 post anchor strong enough for deck rail. Instead, add carriage bolts. Measure the thickness of the post and rim joist, then buy 1/2-in.- diameter galvanized carriage bolts that length plus 1 in. Also, get a nut and washer for each. Drill two 1/2-in. holes through the post and rim joist. Offset the holes, keeping one about 1-1/2 in. from the top of the joist and the other the same distance from the bottom (make sure to avoid drilling where a joist abuts the rim joist). Tap the carriage bolts through the holes, then tighten the nuts until the bolt heads are set flush with the post.
15
/
16
Required Tools for this Project
Have the necessary tools for this DIY project lined up before you start—you'll save time and frustration.
- Tape measure
- Circular saw
- Socket/ratchet set
- Socket adapter
- Deep socket
- Caulk gun
- Adjustable wrench
- Drill/driver, cordless
- Impact driver
- Drill bit set
- Masonry drill bit
- Hammer drill
- Pry bar
- Reciprocating saw
- Safety glasses
- Utility knife
16
/
16
Required Materials for this Project
Avoid last-minute shopping trips by having all your materials ready ahead of time. Here's a list.
- Lag screws, 1/2-in. x 3-in.
- Joist hanger nails
- Treated deck post, 4x4 or larger
- Metal post base
- Wedge anchor, 3/8-in. x 4-in.
- Carriage bolts, 1/2-in.
- Flashing
- Acrylic caulk