How To Build a Reclaimed Wood Coffee Table

Updated: Jun. 05, 2023
Ever wanted to try making furniture with pallet wood? Now's your chance. Learn how to make a sleek reclaimed wood coffee table from pallets.
Multiple Days
Advanced
about $100
Introduction
Lumber prices continue to be volatile, making woodworking more expensive than in the past. Luckily, there's a solution.
Each year, roughly five billion shipping pallets circulate the globe, transporting goods of all shapes and sizes. Around two billion of these make their rounds in the U.S. alone. Chances are, some are close to your home right now.
Receiving large items regularly leaves businesses with a surplus, and these companies are often happy to give pallets away. That's where you come in. Asking around for unwanted pallets is a great way to get free wood, which you can use to make some wonderful reclaimed-wood furniture.
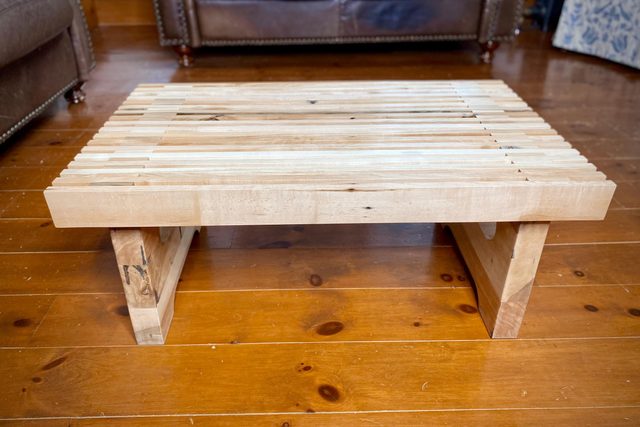
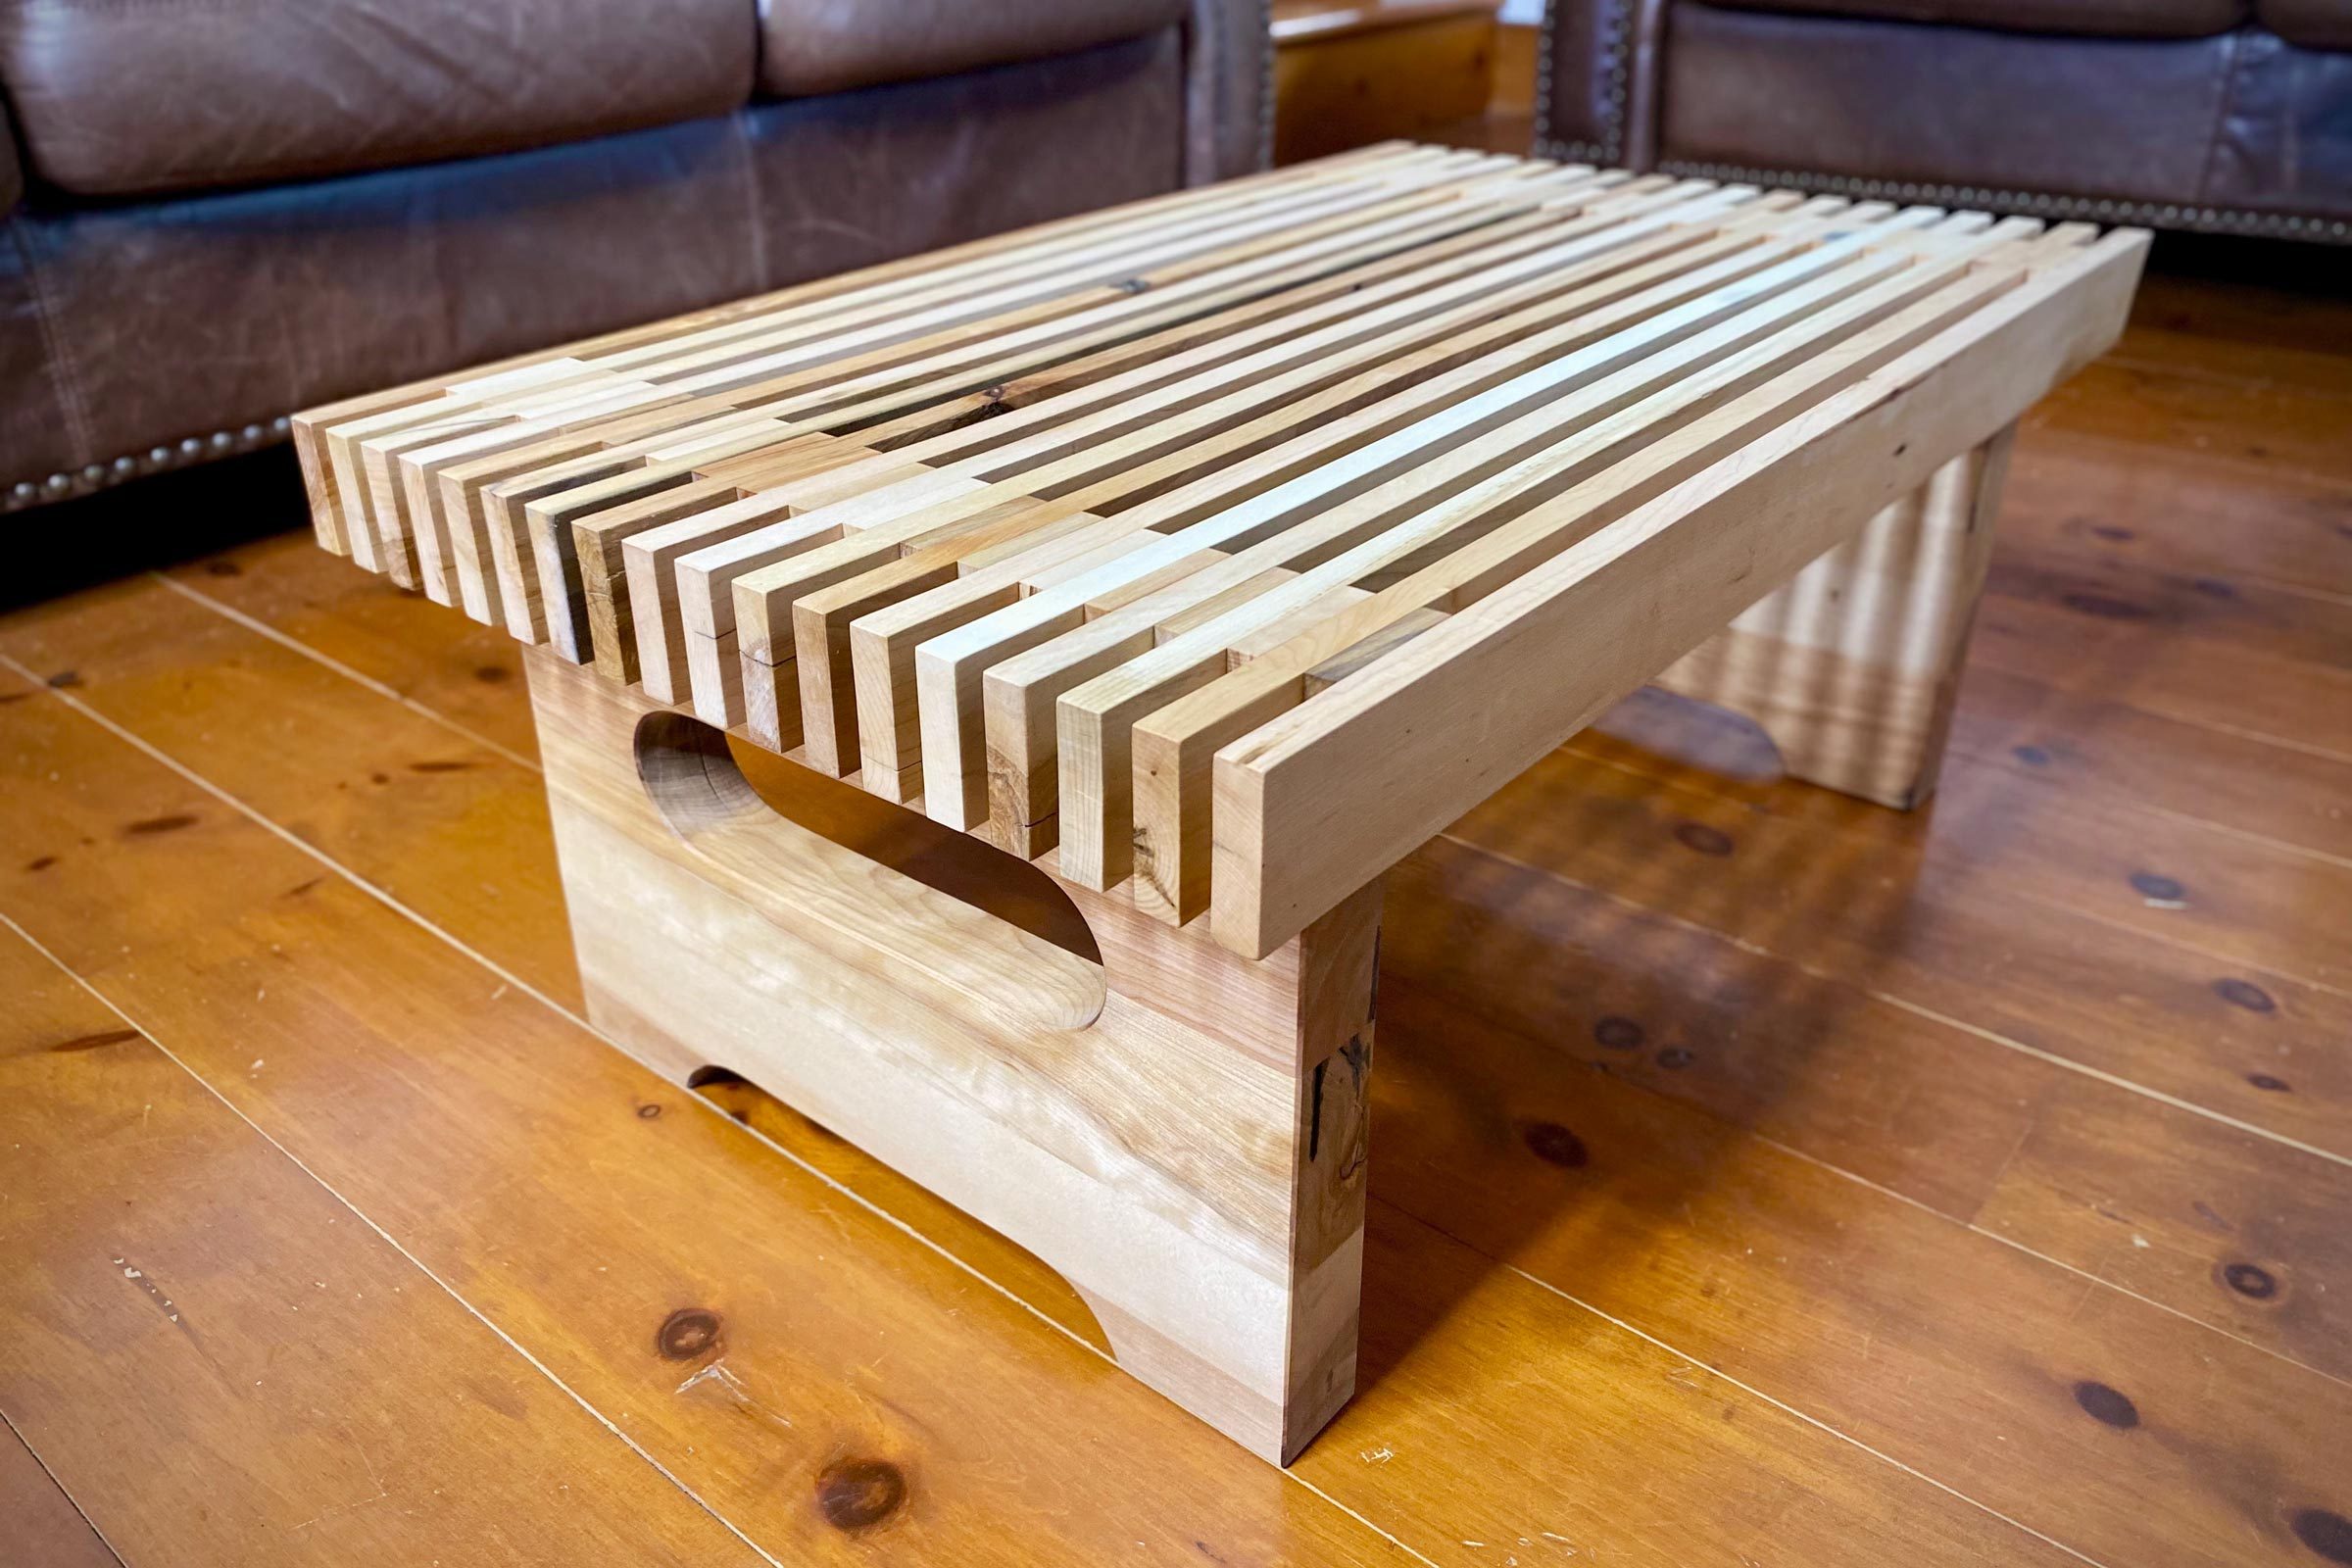
Here, I'll show you how to build a lovely, elegant hardwood coffee table with a modern flair using only wood from a couple of hardwood shipping pallets I got free from my local lumberyard. Unlike other pallet furniture, this reclaimed-wood coffee table won't look anything like a pallet when you're done. Here's how to make your table.
Tools Required
- 1/4-inch dowel center pins
- 24-inch parallel-jaw woodworking clamps x4 23-gauge pin nailer
- Air compressor and air hose
- Belt sander
- Carpenter's square
- Circular saw
- Drill press with 1/2-inch spade bit
- Edge sander with cylindrical sanding spindle
- Eye and ear protection
- Framing hammer
- Half-sheet sander
- Impact driver
- Jointer
- Linesman pliers
- Miter saw
- Moisture meter
- Pallet buster
- Pencil
- Quarter-sheet finishing sander
- Random orbit sander
- Reciprocating saw
- Shop vacuum
- Table saw
- Tape measure
- Tapered steel punch
- Thickness planer
Materials Required
- 1-inch 23-gauge pins
- 120- 180- and 220-grit sheets of sandpaper
- 120-grit sanding discs
- 2-inch deck screws
- 80-grit belt for belt sander
- At least two standard-size (40 x 48 inch) hardwood shipping pallets
- Disposable shop towels
- Masking tape
- Rubber gloves
- Scrap lengths of 2x4 approximately 20 and 30 inches long
- Scrap sheet of plywood at least 20 x 35 inches
- Six 1/2-inch diameter 1-1/8-inch-long dowels
- Wood finish of your choice
- Wood glue
Project step-by-step (15)
Gather and break down pallets
- Scout local building supply yards and hardware stores for unwanted shipping pallets. You’ll need to dismantle at least two standard, 40- by 48-in. pallets to build this coffee table, and possibly more depending on their condition.
- Ask the business owners if you can take the pallets. Heavy-duty hardwood pallets work best because they’re made with heftier boards, approximately 3/4-inch thick.
- Use a circular saw, pallet busting tool, framing hammer, reciprocating saw and pliers to dismantle two or more pallets. Be sure to remove all nails.
Allow the wood to dry
- Arrange all pallet boards and stringers on their edges in a dry, heated space.
- Give the wood a week to dry, then test the pieces with a moisture meter. They should be down to between 7% and 9% moisture content before you start building with them.
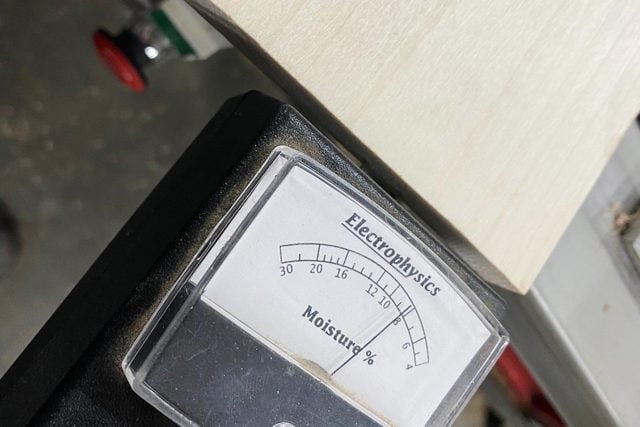
- If it’s wetter than 7% to 9%, give it another few days, then check it again.
Gather and sort the wood
- Collect all wide boards.
- Pallet boards usually come in two widths, around 6-1/2- and 3-1/2-inches. Gather enough undamaged wood to give you two 1-1/2-in.-wide strips, not including saw kerf.
- Make a second pile for narrow boards with enough good wood for one 2-1/2-in.-wide strip.
- Make one more pile for boards of either width that are too flawed to yield a 30-in.-long, 2-1/2-in.-wide strip.
- Set the thick stringers (aka joists) to one side, out of the way for now.
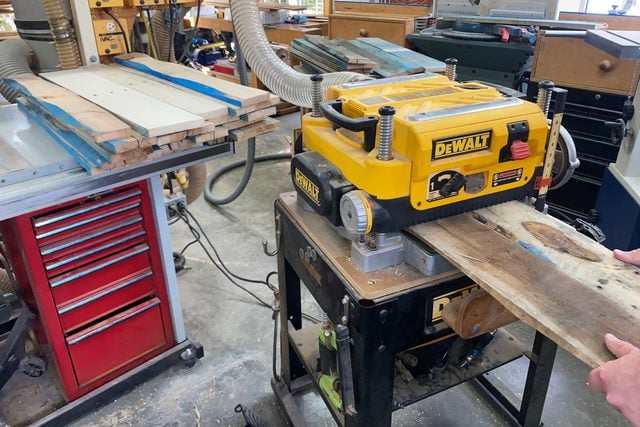
Plane and joint the boards
- Plane all the boards, including the flawed ones, down to 5/8-in. thick.
- Be sure to plane both sides equally to remove as many mill marks, surface flaws and paint spots as possible.
- Joint one edge of each board to make it straight and flat. Pass each board through the jointer enough times so the jointed edge is flawless. No paint, mill marks or waney edges should remain.
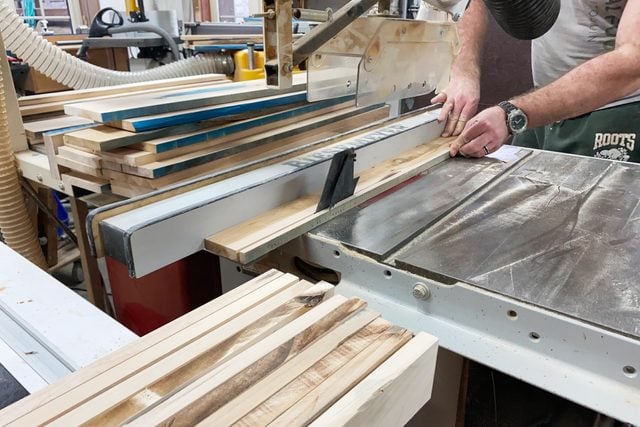
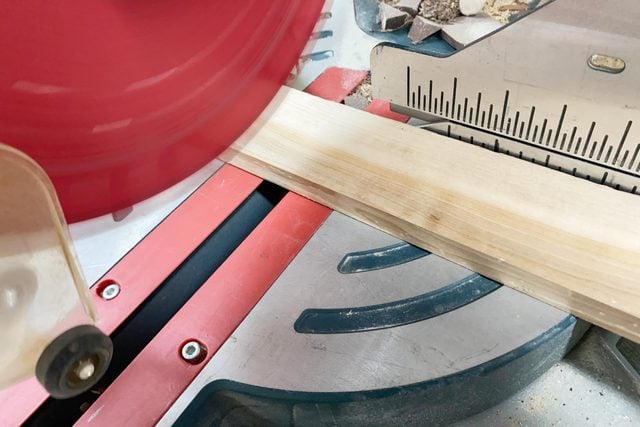
Cut the boards to width and length
- Set the fence of your table saw to 2-1/2-in. and rip all boards to this width.
- Try to get two 2-1/2-in. strips from each wide board.
- Adjust your table saw fence as necessary to remove as many flawed edges as possible.
- Use a miter saw to cut all non-flawed 2-1/2-in.-wide strips to 30 inches long. You’ll need 18 of these strips to form the tabletop.
- It’s wise to cut a few extras, in case one or two split or reveal damage.
Cut the tabletop spacer pieces
- Gather the flawed 2-1/2-in.-wide strips that have not been cut into 30-inch lengths. Plane them down to 7/16-in. thick.
- Use a miter saw to selectively cut unflawed 2-1/4-in.-long pieces from the flawed strips.
- You’ll need 34 of these short pieces for the tabletop, but cut a few extras.
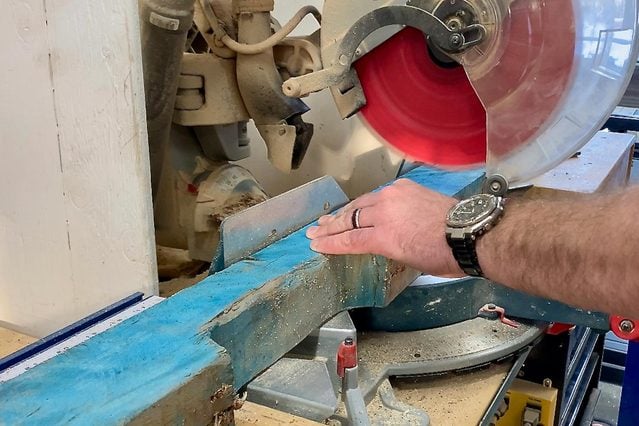
Cut the stringers
- Gather three thick pallet stringer pieces from the ones you aside earlier.
- Use a miter saw to trim off 1/2-in. of wood from the end of each string, removing the protective steel plates that may be there.
- Use a tape measure to determine the halfway point along the length of each stringer. Then cut them in half with your miter saw. You should now have six half-length stringer pieces.
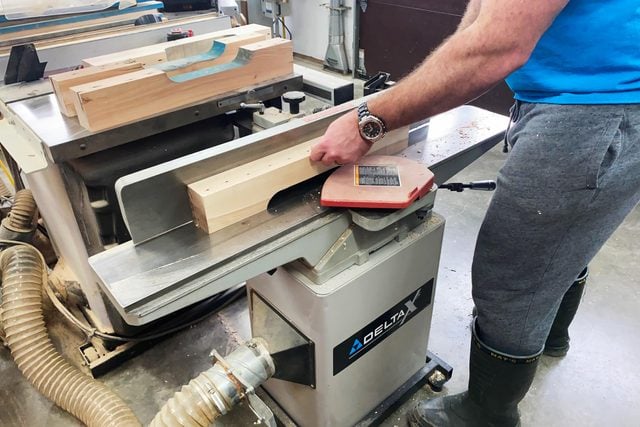
Plane and joint the stringers
- Run the stringers through the thickness planer on the sides adjacent to the curved, semi-oval cutouts until you’ve reduced their thickness to two inches. (Those cutouts, along their bottom edges, are for forklift prongs to slide through.) Be sure to plane both sides equally.
- Run the six stringer pieces through your jointer on the top and bottom sides. Be sure to take off enough wood to make the top and bottom faces smooth and remove any flaws.
- Make the same number of passes on the jointer with all stringer pieces. They all need to be the same dimensions when you’re finished.
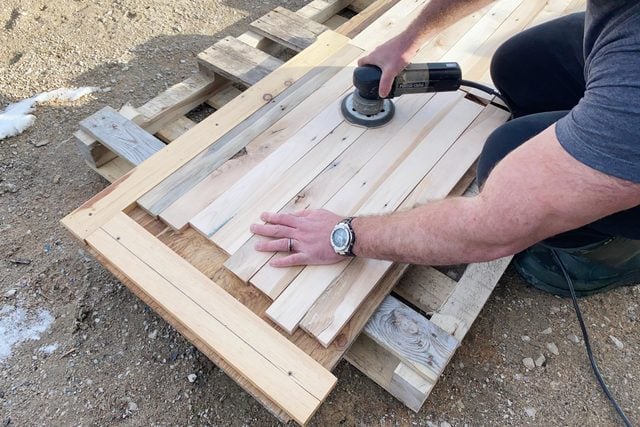
Sand the tabletop board faces
- Use a random orbit sander with a 120-grit disc to sand both faces of each tabletop board. No need to sand the edges at this stage.
- Pay special attention to knots and rough areas, ensuring they’re as smooth as possible.
- Switch to a quarter sheet palm sander with 180-grit paper and sand all tabletop board faces again.
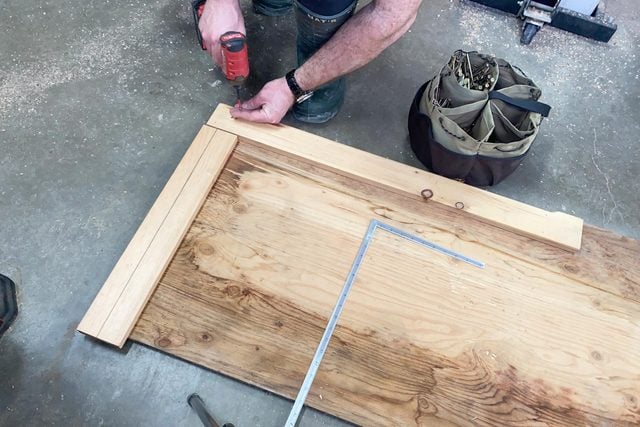
Build an assembly frame
- Gather a scrap piece of plywood at least 35- by 20-in., and two scrap lengths of 2×4 that are 20- and 30-inches long.
- Use a carpenter’s square to arrange the 2x4s at a 90-degree angle on the plywood.
- Fasten the 2x4s with two-inch deck screws.
- Use your carpenter’s square to double-check the angle formed by the lumber is still 90 degrees.
Assemble the tabletop
- Gather your plywood assembly frame, tabletop boards, 2-1/4-in. spacer pieces, wood glue, pin nailer and four parallel-jaw clamps. The nailer should be connected to an air compressor set to 90 pounds per square inch (psi) regulated pressure.
- Select a particularly nice tabletop board to begin the assembly, because the boards forming the table’s edges will be visually prominent.
- Lay this first tabletop board on its edge, pressed into the 90-degree corner formed by your assembly frame.
- Use glue and a 23-gauge pin nailer to fasten two 2-1/4-in. spacer pieces to the face of the tabletop strip. Use a third spacer to position the two you’re fastening 2-1/4-in. from each end of the tabletop board. Be sure to use only a little glue so it won’t squeeze out later when you clamp the assembly.
- Apply glue to the exposed faces of the two spacers you just fastened, then press a second tabletop board into the corner of your assembly frame, against the glue. Pin it in place.
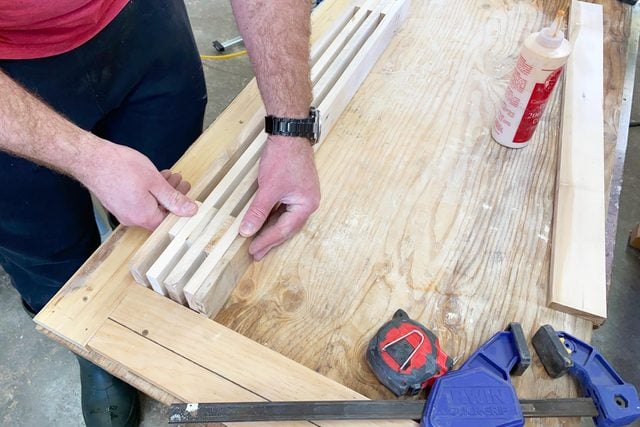
- Repeat the procedure until the tabletop is assembled. Then use four parallel-jaw clamps, two on the top edge and two on the bottom, to draw the assembly together as tightly as possible.
- Allow it to dry overnight.
Cut and assemble the legs
- Cut the six stringer pieces you’ve set aside to their final length of 1-1/4-in. less than the width of your tabletop.
- Glue the leg pieces together to form two legs of three stringer pieces each. Arrange the legs so two pieces of each leg mirror each other horizontally to form a complete oval cutout, and the third piece has its half oval cutout facing down. This half-oval piece will form the bottom of each leg.
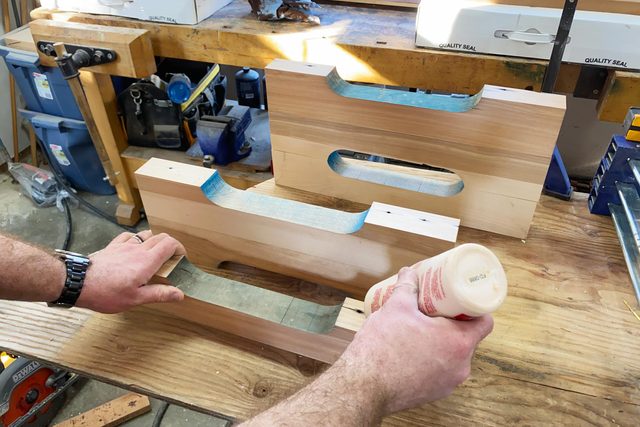
- Clamp the leg pieces together with two parallel-jaw clamps each, one on each end of each leg.
- Let dry overnight.
Sand the parts
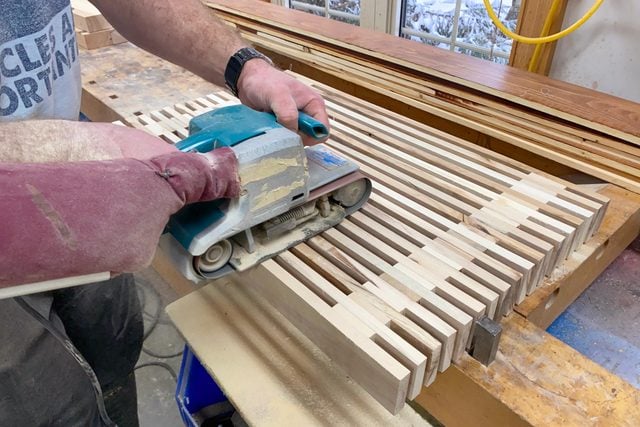
- Remove all clamps. Then belt sand the top and bottom of the tabletop with an 80-grit belt until the transition between long strips and short spacer pieces is perfectly smooth.
- Sand the top and bottom with a half-sheet sander and 120-grit paper, then transition to a quarter-sheet palm sander and 180-grit paper.
- Repeat this same procedure for the sides of the legs.
- Sand the sides and bottoms of the legs lightly with an edge sander.
- Sand the inside surfaces of the oval cutouts in the legs with a spindle attachment on your edge sander.
Apply finish
- Vacuum all surfaces of the table to remove dust.
- Select a finish based on your personal taste. I used a standard clear urethane on my table.
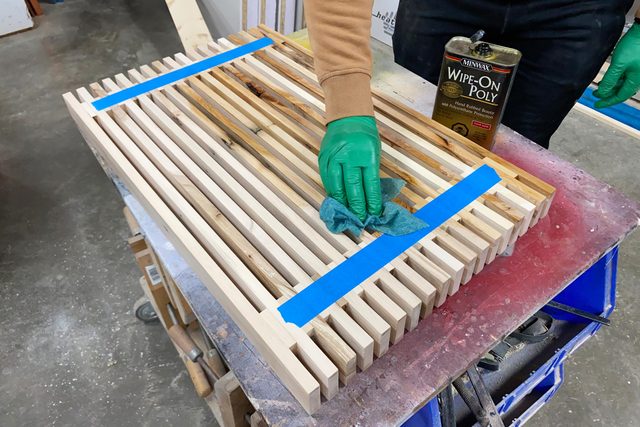
- Apply strips of masking tape to the top edges of the legs, and corresponding strips to the underside of the spacer pieces on the tabletop. This will preserve a finish-free area for glue to grab later.
- Put on rubber gloves, then apply finish to all surfaces.
- Allow the finish to dry, then sand with 220-grit paper and apply a second coat. Repeat as needed.
- Remove the masking tape.
Join legs to tabletop
- Lay the tabletop upside down on a clean, flat surface free of dust and dirt. Place the legs on it centered directly over the spacer strips. The surface doesn’t need to be soft provided it’s clean and smooth.
- Lightly trace the position of the legs with a pencil.
- Remove the legs, then mark two rows of three evenly spaced dots inside the rectangular marks. Make the outermost dots two inches in from the edges of the tabletop, and the third dots in the centers of the legs.
- Use a drill press and 1/2-in. spade bit to drill a hole at each dot, six holes in total, about 3/4-in. deep. You can try a handheld drill for this if you’re feeling brave, but it’s challenging to get the holes perfectly vertical — vital for dowel joinery.
- Place dowel center pins in the holes, then use them to mark for corresponding holes in the tops of the legs.
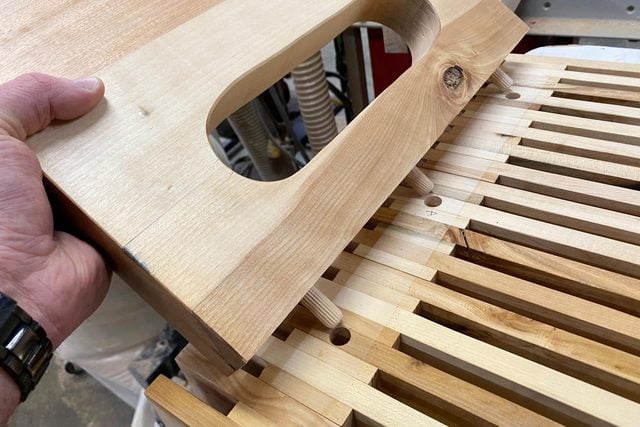
- Drill holes in the legs according to your marks.
- Drizzle a little glue into all holes, spread some over the rectangular markings on the tabletop, then tap a dowel into each tabletop hole.
- Slide the legs onto the dowels. Then attach them to the tabletop with four parallel-jaw clamps.
- Allow the glue to dry overnight.
- Enjoy your new reclaimed wood coffee table! If you enjoyed working on this project, try this reclaimed wood headboard with an old-world charm.