Tying a bow on a present is the perfect way to show someone how much you care. Here's how to make two different kinds of Christmas bows.
Introduction
Tying a bow on a present is the perfect way to show someone how much you care. Here's how to make two different kinds of Christmas bows.
Make Christmas Bows
The holidays are quickly approaching, bringing along with them the season of gift-giving. After you’ve purchased your presents, add a final flourish to your gift wrapping by making some Christmas bows. Intimidated by the ornate and elaborate Christmas bows you’ve seen in pictures? Don’t be. They’re really not that difficult to duplicate. Here are two different methods for making simple but eye-catching DIY bows that will put the finishing touch on any Christmas present.
Looking for more DIY projects for Christmas? Learn how to make your own Christmas cracker.
Tools Required
- Scissors
Materials Required
- Ribbon
- Tape
Project step-by-step (10)
Step 1
How to Make a Gift Bow
- First, wrap your present as you normally would and set it off to the side.
- Then, wrap the ribbon around your hands five times with each loop neatly placed on top of the previous loop.
- Do not cut the bow from the rest of the ribbon roll just yet.
- Pro tip: Use wired ribbon for this type of bow— it’ll make things much easier.
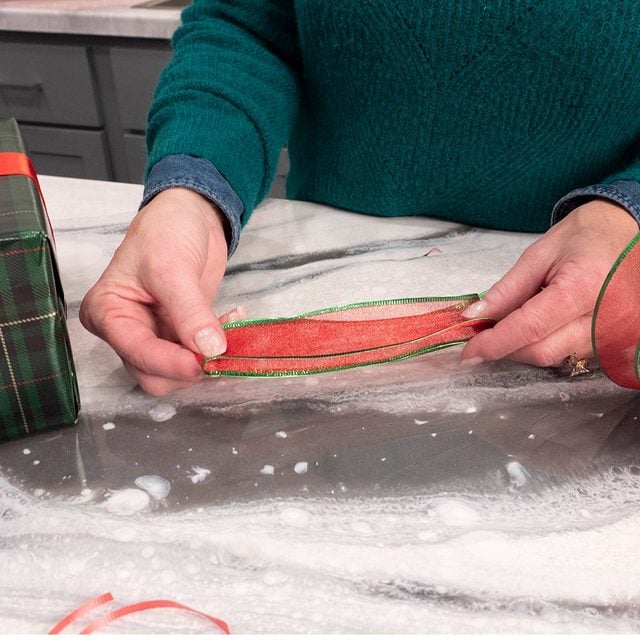
Step 2
Measure Loop Size and Remove From Hand
- Lay the loop on top of the package and adjust its size to your liking. The last loop should end on the opposite side of the starting loop.
- Cut the end off from the rest of the ribbon roll.
- Remove the ribbon from your hand and fold the loop in half.
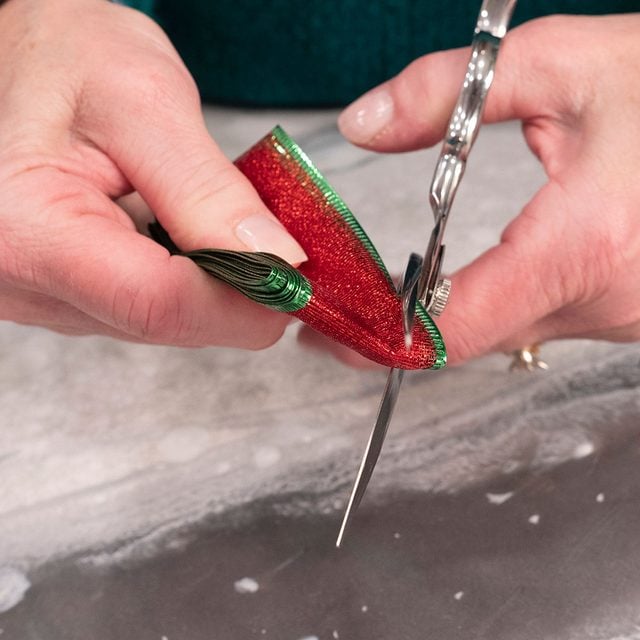
Step 3
Cut the Cinch
- Hold the folded loop so that the centerfold is facing up.
- With your other hand, take a pair of scissors and cut the corner off of either side of the centerfold.
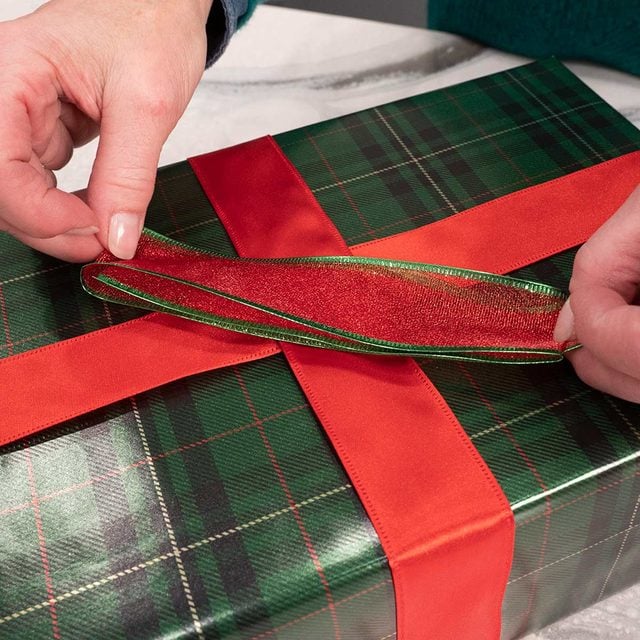
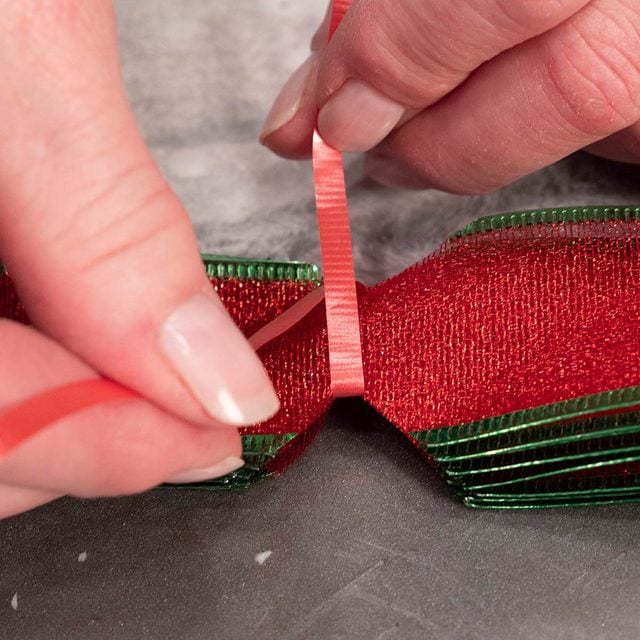
Step 4
Tie the Middle
- Take a second ribbon and tie it around the middle section.
- Pro tip: The knot should be on the backside of the bow so the bow will lie flat on top of a present.
Step 5
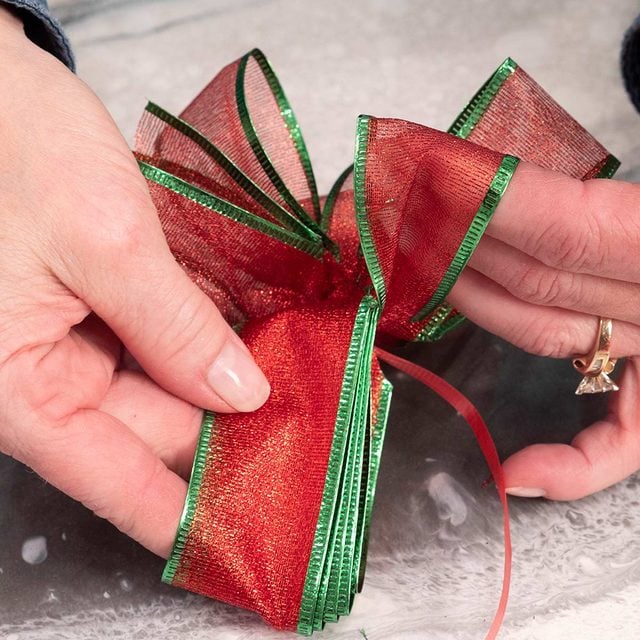
Fan Out the Bow Loops
- Separate the loops one by one from the inside to the outside.
- Then, pull the loops gently from the center and twist them toward you.
Step 6
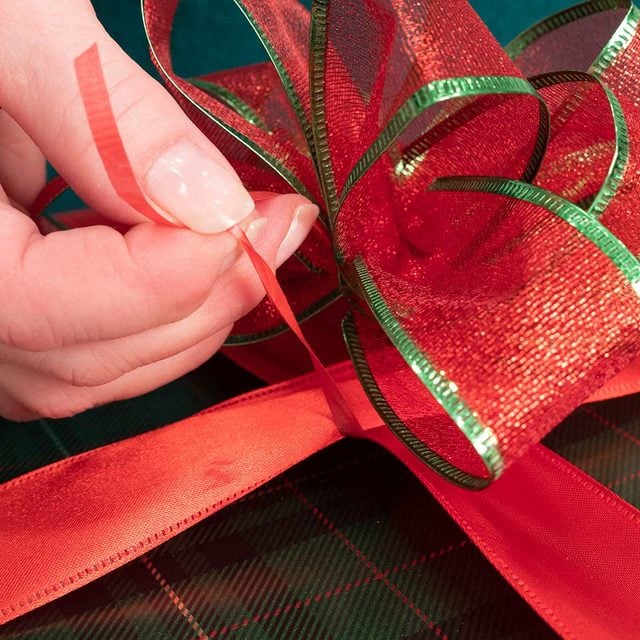
Secure Bow to Present
- Use the ribbon tails to tie the bow to the ribbon wrapped around the present.
- As a second option, you can cut the ribbon tails off from the finished bow and simply tape the bow to the Christmas gift.
Step 7
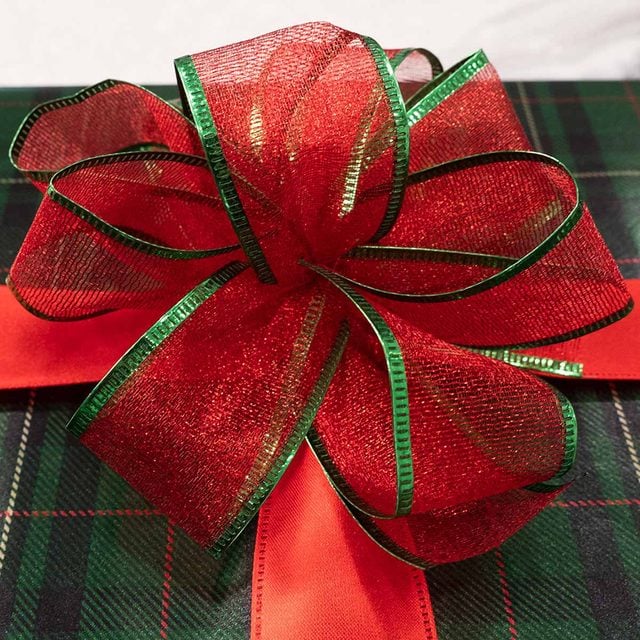
Finishing Touches
- Arrange the loops so they form a circular pattern resembling a flower petal.
Step 8
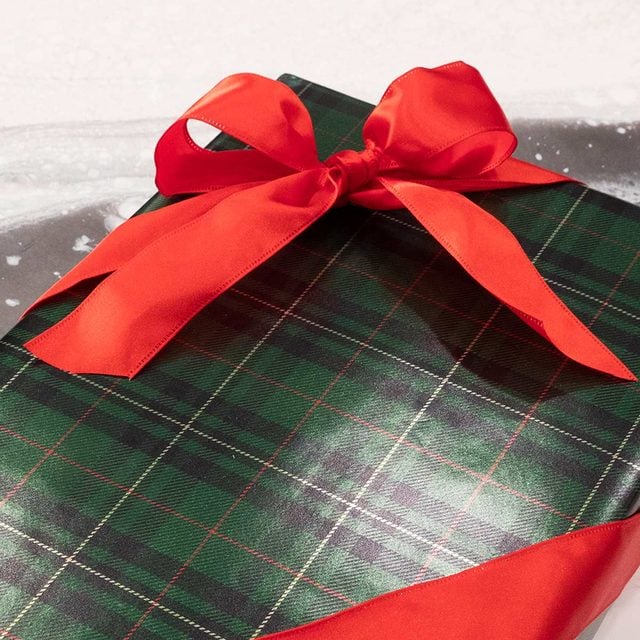
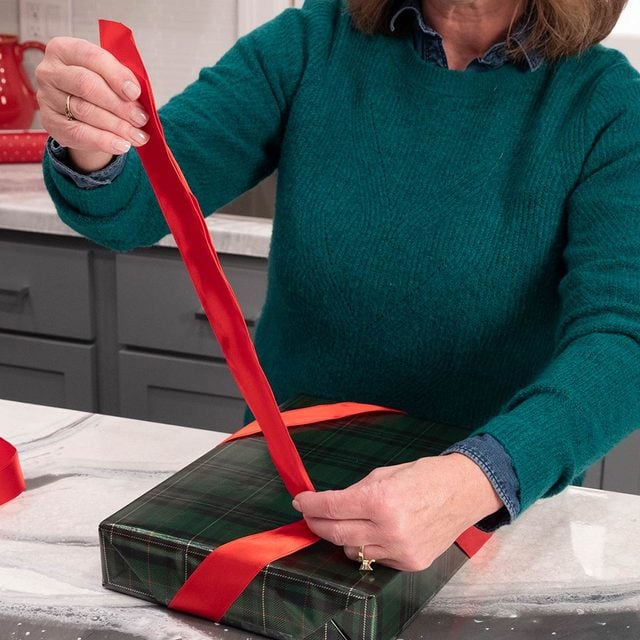
How to Tie a Classic Christmas Bow
Here’s how to make a classic Christmas bow that garnishes the corner of your gift:
- Measure the ribbon length by wrapping it around the top corner of the present. (Do not cut the ribbon from the rest of the roll.)
- Run the ribbon under the adjacent corners of the present and bring the ribbon together on the top of the last corner.
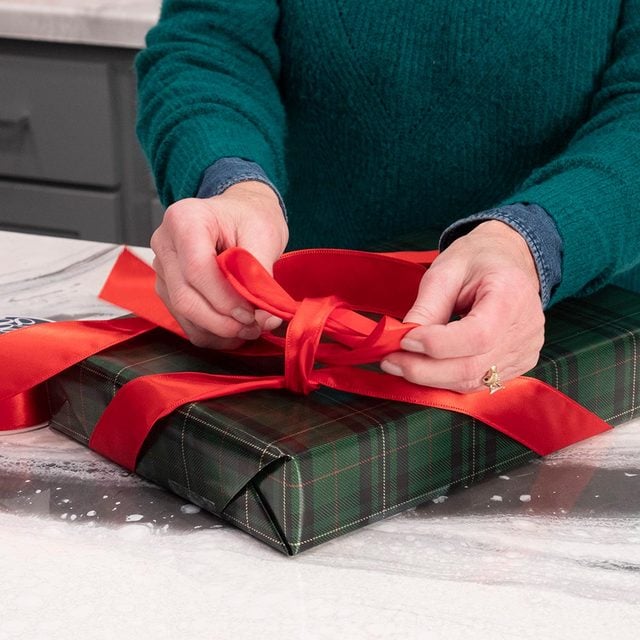
Step 9
Tie Ribbon Together
- Tie a standard bow with the ribbon pieces by knotting the two ends together so they are tight.
- Then make a loop with the left side of the ribbon.
- Take the right side and wrap it around the left loop.
- Pull the ribbon through the hole behind the left loop until you have a second loop of the exact same size. Pull it tight.
Step 10
Finishing Touches
- Adjust both of the loops so they don’t overhang the present sides.
- Cut ribbon tales at an angle.