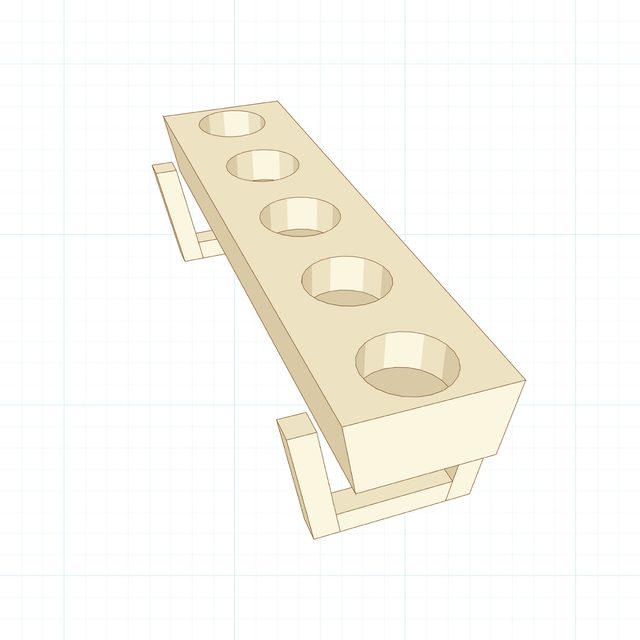
Make the most of your pile of hardwood offcuts and build this simple and elegant candle holder.
1 - 2 hours
Beginner
$10-$20
Introduction
Having difficulty finding a candle holder that matches the woodwork in your dining room? Try building your own with this simple project.Tools Required
- 1-5/8-in. Forstner or spade bit
- Drill press or hand-held drill
- Miter saw
- Painter's tape
- Sandpaper
- Table saw
Materials Required
- Hardwood lumber scraps
- Wood glue
Introduction
Sure, you can buy a candle holder, but why not make one? Even better: Why not dive into your pile of never-to-be-used wood scraps that you can’t bring yourself to throw away and make a bunch of candle holders to give away as gifts? The design possibilities are endless.
Cutting List
| KEY | QTY. | PART | DIMENSIONS |
| A | 1 | Candle block | 1-1/2″ x 3″ x 12″ |
| B | 4 | Base verticals | 1/2″ x 1/2″ x 3″* |
| C | 2 | Base horizontals | 1/2″ x 1/2″ x 2-3/8″* |
*Indicates rough length. Cut these pieces to fit.
Overall dimensions: 2-1/2-in. H x 12-in. L x 4-in. D.
Project step-by-step (6)
Make the Wood Candle Block
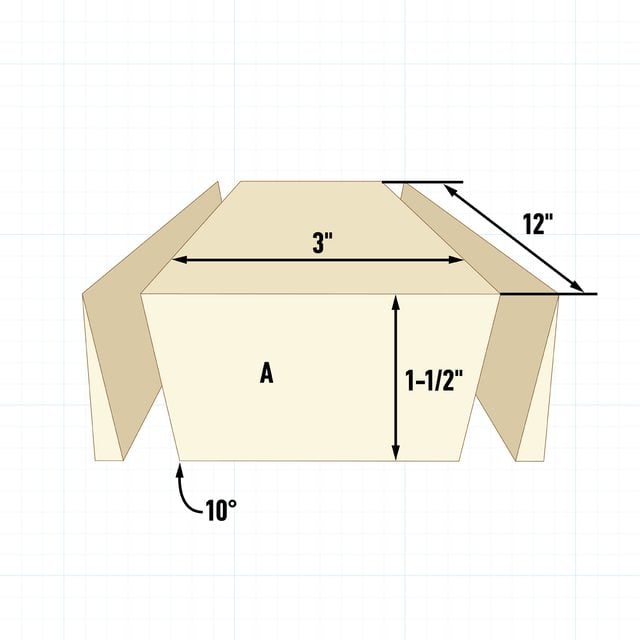
Cut the candle block (A) to length and thickness. Tilt your table saw’s blade 10 degrees, then rip both edges of the candle block.
Lay Out the Recesses
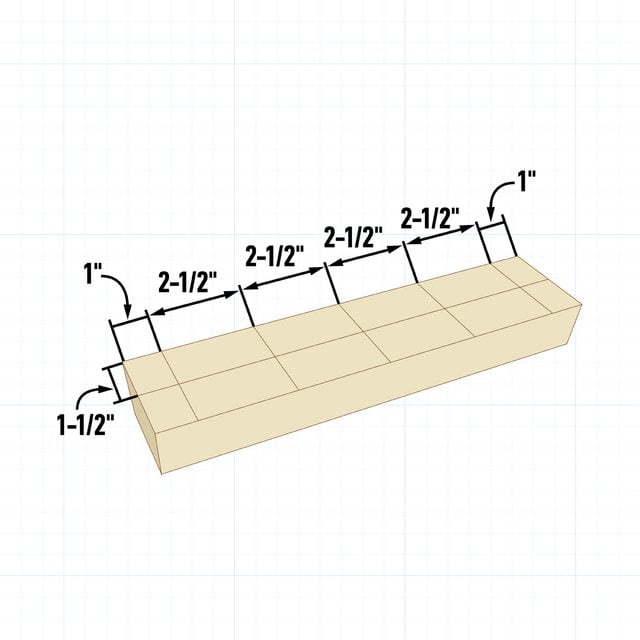
Using the dimensions shown above, lay out the candle recesses.
Drill the Recesses
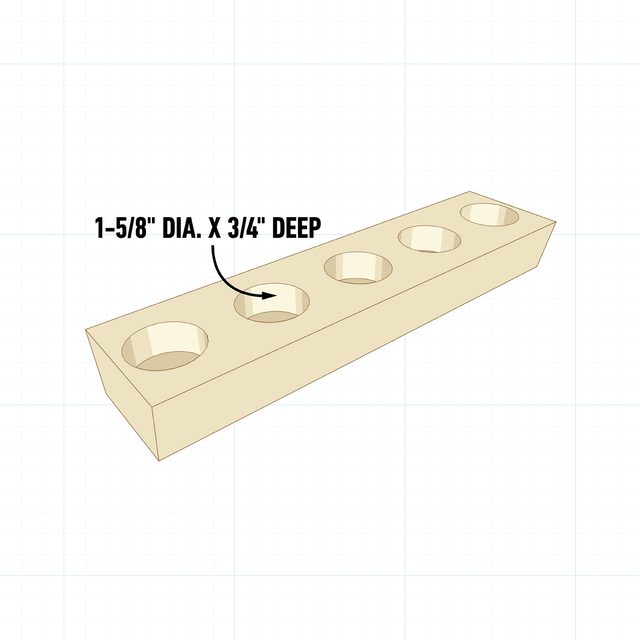
Using a Forstner or spade drill bit, drill the candle recesses to a depth that makes the candles sit almost flush when they’re in place. These recesses are 3/4-in. deep x 1-5/8-in.-dia. for standard tea lights.
Cut the Base Parts
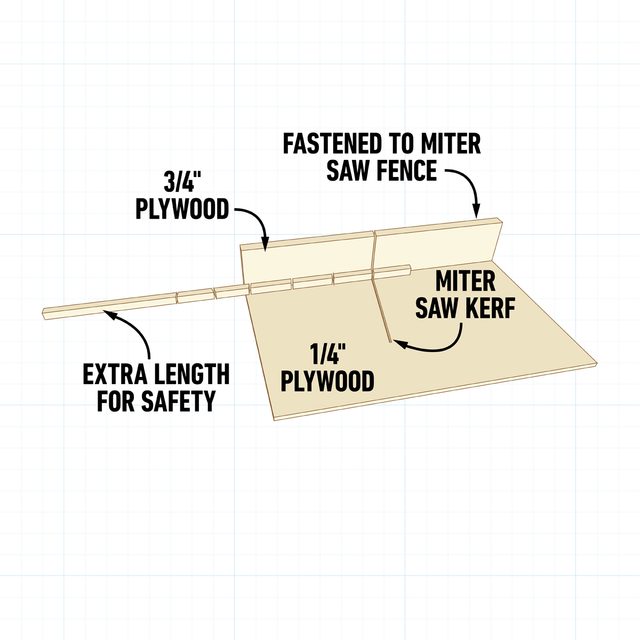
Rip a long piece of stock from which you’ll cut the base parts (B & C). Give yourself at least eight more inches than you need for the parts themselves to keep your fingers away from the blade. You can cut these pieces with a miter gauge on your table saw, or on a miter saw.
To cut small parts like this safely on a miter saw, make a zero-clearance fence/base as shown above. Glue the fence to the base and fasten the fence to your saw’s fence. Make a cut at the desired angle and you’re set.
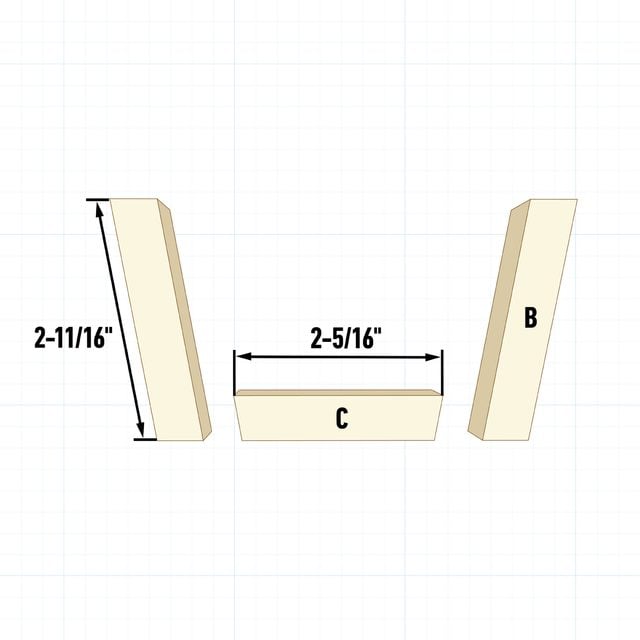
These base pieces all have 10-degree angles on their ends. The length of the verticals is arbitrary. The final length of the horizontal piece is 2-5/16-in. from long point to long point.
Make the Base
Assemble the base parts with wood glue. Hold the joints tight with painter’s tape until the glue dries.
Attach the Base
Mark the base positions on the block. Apply a dab of wood glue to each base vertical where it contacts the block, then slide the bases in place. When the glue dries, sand the whole thing up to 220-grit and apply a finish of your choice.
