


Need a DIY idea for Valentine's Day? We've got you covered.
A half day
Intermediate
$20-50
Introduction
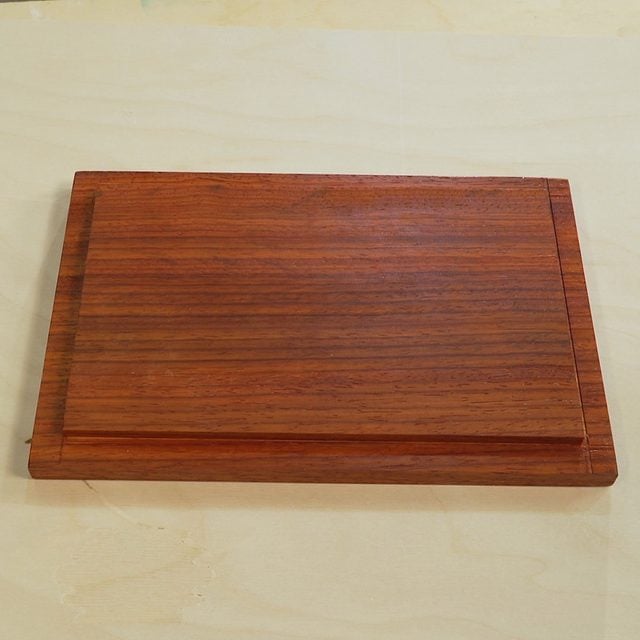
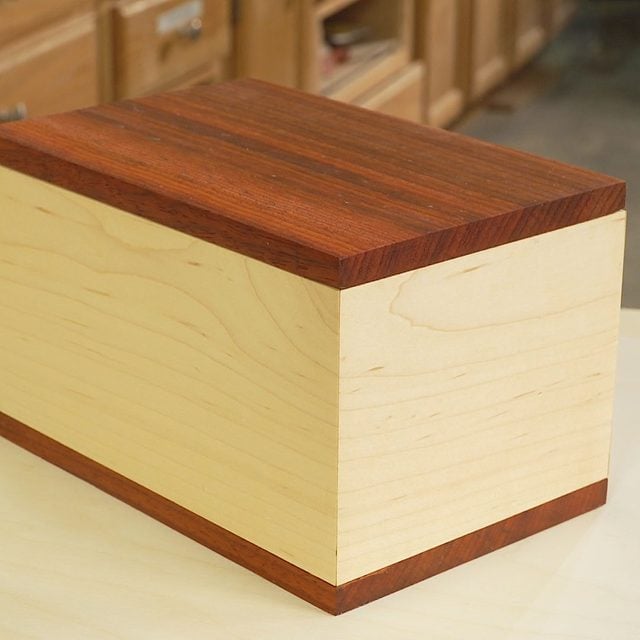
Here is a simple jewelry box you can make in an afternoon.
Tools Required
- Clear packing tape
- Hearing and eye protection
- Measuring tape
- Miter saw
- Orbital sander
- Quick-Grip clamps
- Table saw or Circular saw
Materials Required
- 1/2" x 4-1/2" x 32" hardwood or plywood
- 1/4" x 12" x 18" Baltic Birch Plywood
- 150-grit sandpaper
- 3/4" x 6" x 20" hardwood
- Wipe-on polyurethane
- Wood glue
Watch How to Make a Simple DIY Jewelry Box
Project step-by-step (11)
Step 1
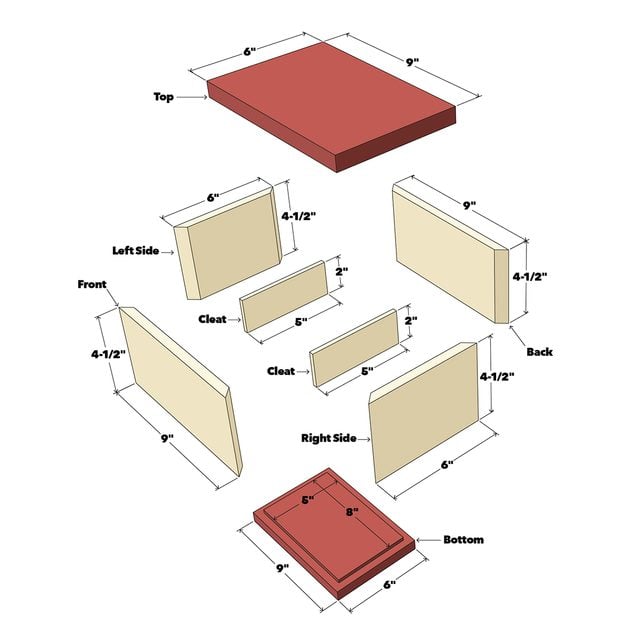
Box Top & Bottom
- Cut a piece of 3/4-inch hardwood to 6-in. x 20-in.
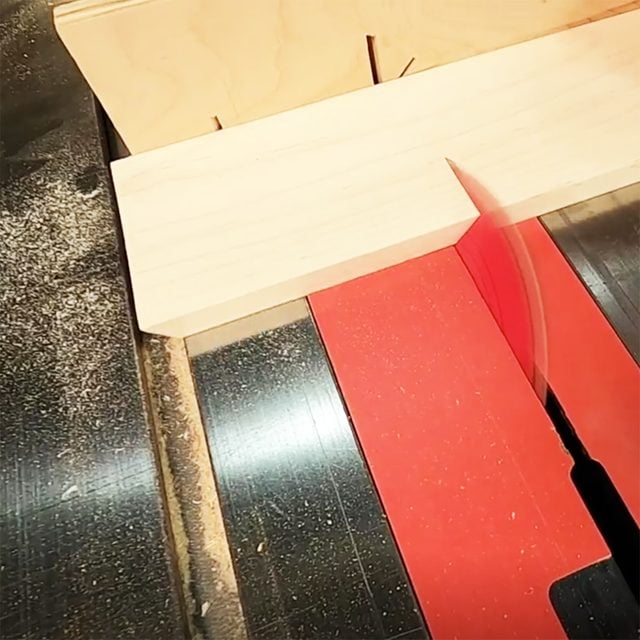
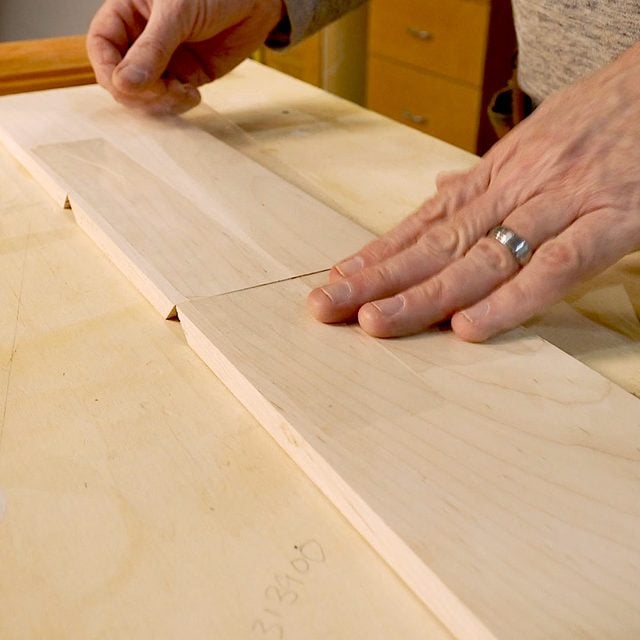
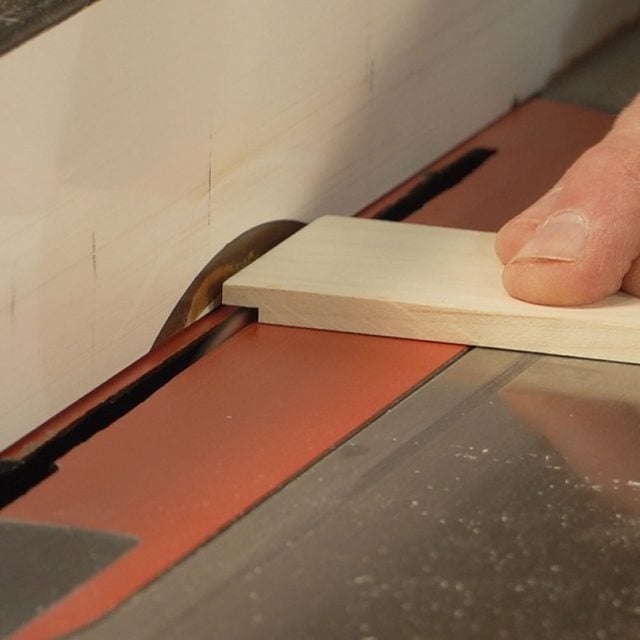
- Make a groove cut on the two long sides of the board 1/4-in. deep x 1/2-in. wide using a table saw.
- Next, cut the board into two nine-inch pieces for the front and back using a miter saw.
- Make two more groove cuts on the end of each board, 1/4-in. deep x 1/2-in. wide with a table saw. (See photo.)
Step 2
Cut Wood for the Box
- Cut a piece of 1/2-in. hardwood or plywood to 32 inches using a table saw or skill saw.
- Rip the same board to 4-1/2-in.
Step 3
Box Sides
- Cut one board at six inches with 45-degree angles on each end using a miter saw or table saw. (See photo.)
- Use the piece that you cut as a template to mark your board for your next cut.
- Cut one more six-inch side identical to the one you just cut.
Step 4
Box Front & Back
- Cut two boards at nine inches with 45-degree angles on each end for the front and back boards using a miter saw or table saw. Use the front piece as a template to mark your back board.
Step 5
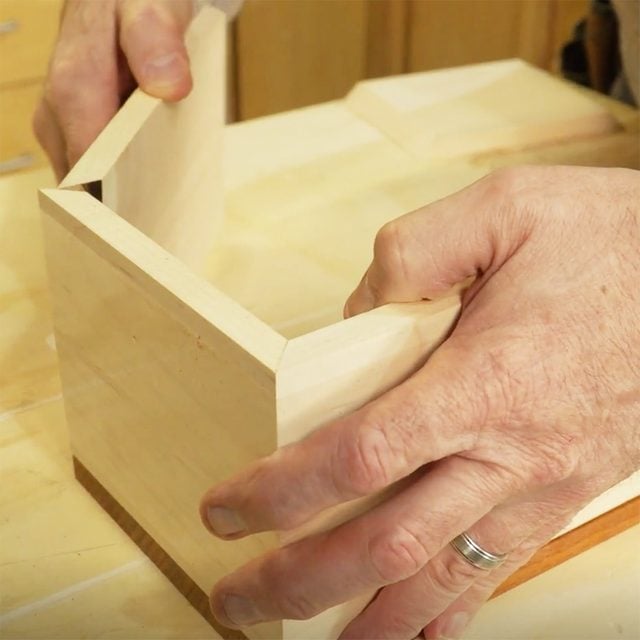
Dry-fit the Box Together
- Lay the front board flat with the 45-degree angles facing down. Place the left side board end to end with the front board. Next, place the back board end to end with the side board.
- Tape all three boards together with two pieces of clear packing tape. (See photo.)
- With the bottom board’s groove side facing up, fit the box assembly in the groove of the bottom. (See photo.)
- Now dry-fit the right side to the front, back and bottom.
Step 6
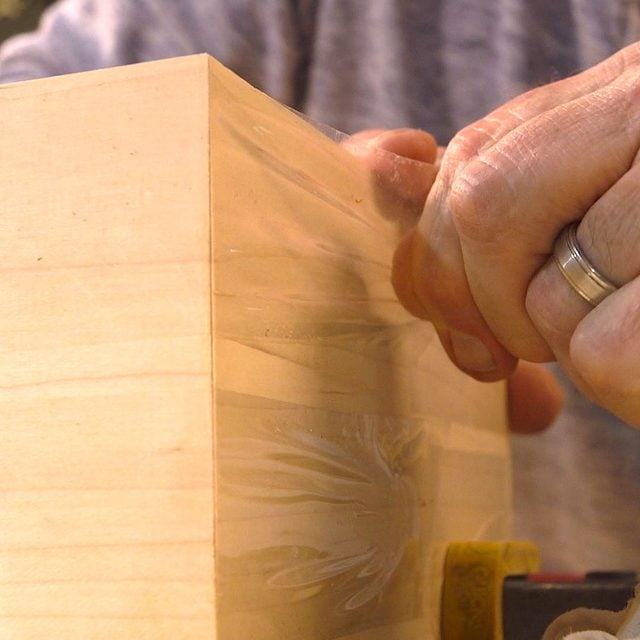
Glue the Box Together
- Lift the box assembly off the bottom and remove the tape and right side, keeping the front, back and left side taped together.
- Apply wood glue to each of the 45-degree angles and in the groove on the bottom board.
- Place the box assembly back into the groove on the bottom board. Secure it with a clamp.
- Apply wood glue to the angled ends of the right side board and fit it into the box assembly. Secure it with clear tape and clamps. (See photos.)
- Wipe away any excess glue on the inside and outside of the box with a damp cloth.

Step 7
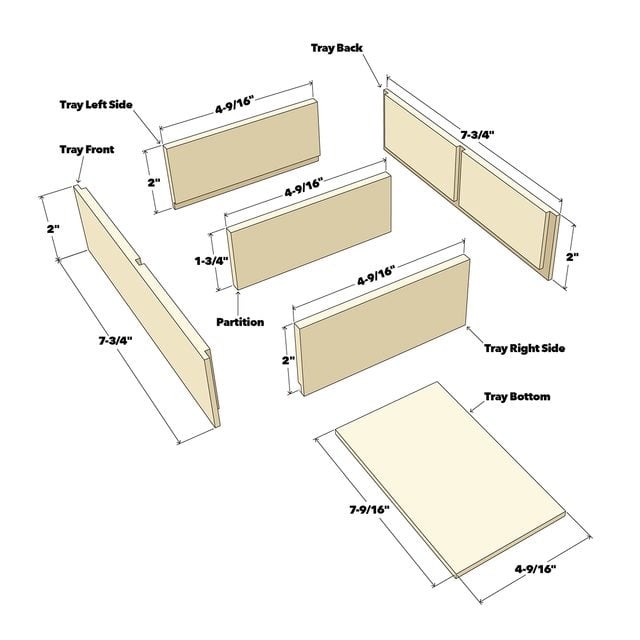
Cut Wood for the Tray
- Rip two 2-in. x 16-in. pieces of 1/4-in. hardwood or plywood.
- Make a groove cut on one long side of each board 1/8-in. deep x 1/4-in. wide using a table saw.
- Cut two pieces at 7-3/4-in. for the front and back of the tray box.
- Cut two sides at 4-5/8-in. and one partition at 1-3/4-in. x 4-5/8-in.
- Cut one bottom at 4-5/8-in. x 7-5/8-in. from 1/4-in. plywood.
Step 8
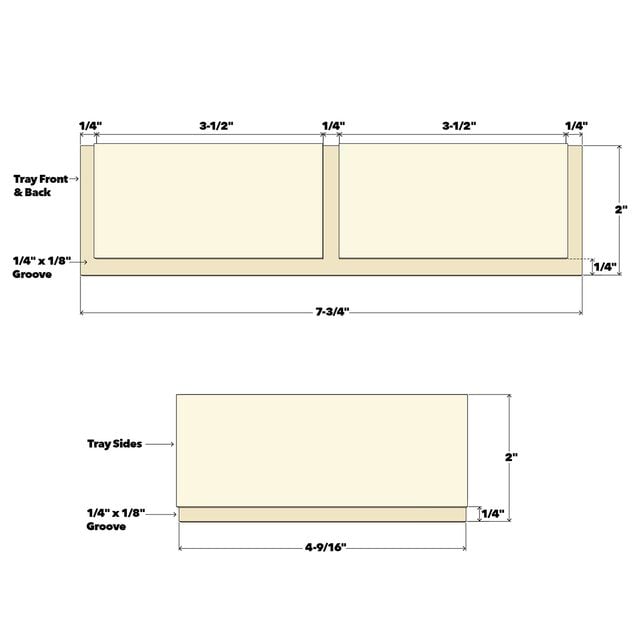
Tray Sides
- Cut 1/8-in. deep x 1/4-in. wide grooves on both the ends and in the middle on each board using a table saw. See photo for measurements.
Step 9
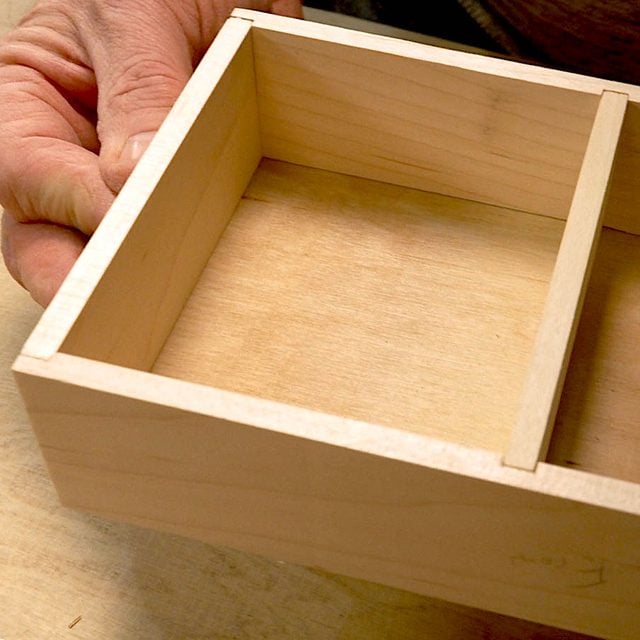
Glue Tray Together
- Apply wood glue on both ends of the sides and partition.
- Insert the partition into the middle dado groove on the front and back keeping them flush with the top edge.
- Fit the sides into the groove on each end of the front and back.
- Secure the box tightly together with clear plastic tape.
- Flip the box over and apply wood glue to the inside edges.
- Fit the bottom into the groove and secure it with a clamp until the glue dries.
Step 10
Tray Cleats
- Cut two 1/4-in. cleats 1-3/4-in. x 5-in.
- Glue the two cleats to the sides of the inside of the jewelry box, flush with the bottom. (See photo.)

Step 11
Finishing Touches
- Allow plenty of time for the glue to dry. Sand all the parts using an orbital sander with 150 to 220 grit sandpaper.
- Finish with wipe-on polyurethane.
- Add stick-on felt feet as a nice touch to the bottom of your box to prevent it from scratching another surface. Also, learn how to make a simple wooden box.
Originally Published: February 03, 2021