


Convenient work space and garage cabinet storage galore in one weekend.
Multiple Days
Beginner
Varies
Introduction
Assemble this large and versatile garage storage system in a weekend. It features many sizes of cabinets and various widths of shelves, yet leaves plenty of open wall spaces for hanging tools and other items.Tools Required
- 4 ft. level
- Brad nail gun
- Circular saw
- Countersink drill bit
- Drill bit set
- Drill stop
- Drill/driver - cordless
- One-handed bar clamps
- Stud finder
- Tape measure
Materials Required
- 1 lb. of 1-1/4" screws
- 1 lb. of 2-1/2" screws
- 12"-deep wall cabinets
- 1x2 ledgers and trim
- 1x3 backsplash shelf
- 1x4 backsplash
- 25"-wide laminate countertops (cut to 16 in.)
- 3/4" paint-grade plywood for top shelf and support for countertops
- 5/4 x 11" pine stair tread for shelves
- Butcher block for workbench
- Cabinet bolts
- Cabinet screws
- Shelf pins
- Shims
- Wood glue
For most of us, the garage is more than just a parking place. It’s also storage space for outdoor toys and gardening gear, and a workshop for home projects and hobbies.
This wall system, with its cabinets, open shelves and countertop, suits all those additional needs and still leave room for vehicles. And because it’s built around standard cabinets, installation is simple. If you can screw cabinets to the wall, you can build this system.
You can install garage cabinets, countertop and shelves in a single weekend. If you add extras like we did — a fresh paint job, a backsplash shelf, hooks and other hardware — expect to spend a second weekend completing the job. You’ll need standard tools like a drill and circular saw. A table saw will come in handy but isn’t absolutely necessary.
Project step-by-step (12)
Step 1
Shop for parts and sketch out a plan
Before you plan this garage storage project, check out your cabinet options at a home center. Most carry several styles of inexpensive standard kitchen cabinets. Other options are unfinished cabinets, which you can paint or stain, or “ready-to-assemble” cabinets you put together yourself.
Whatever you choose, ask for a list of available sizes. This entire system is based on cabinets, which in a kitchen typically hang above the countertop. Most upper cabinets are 30- to 42-inches tall, about 12- or 14-inches deep, and available in various widths.
We used mostly 30-inch-tall cabinets, including two corner cabinets. We also used three short “refrigerator cabinets” that fit above the fridge in a kitchen.
While you’re at the home center, also look at countertops. You can choose from a small selection of in-stock colors, or order any color imaginable from the help desk. If you special order, you can have the countertops made to the width you choose and avoid cutting them.
You can also make your own laminate countertops. We used butcher block in one section to provide a heavy-duty work surface.
With your list of available sizes in hand, plan the cabinet layout by making a scale drawing on graph paper. Or you can experiment with different layouts right on the wall, marking cabinet locations with masking tape.
The entire system is based on standard wall cabinets. The countertop and upper shelf rest on the cabinets. Open shelves hang on adjustable shelf supports between cabinets. Don’t space cabinets more than 36 inches apart or the countertop and shelves may sag.
You may want to leave out the countertop in one or two spots so you can hang shovels, rakes and other tall stuff on the wall. The countertop can be anywhere from 13 to 16 inches deep; just be sure it won’t interfere with parking the car or opening the doors.

Step 2
Mount the ledgers
To get started, locate all the wall studs. Then use a level to draw a continuous line on the wall. marking the position of the lower edge of each cabinet. If you make this line perfectly straight and level, your cabinet and countertop installation will go quickly and smoothly.
If your cabinets are 30 inches tall, place the line 4-1/2-inches from the floor to end up with a standard countertop height of 36 inches. Keep in mind most garage flooring slopes for drainage. To deal with that slope, we measured up 4-1/2 inches at the middle of the wall. That gave us a 3-1/2-inches height at the high end and 5-1/2-inches at the low end.
Next, screw 1x2s along the bottom of the level line to create the ledger that supports the cabinets. Fasten the ledger with 2-1/2-inch screws into each. You can make the ledger continuous, but the final project will look better if you place the ledger only where you’ll later place cabinets.

Step 3
Drill shelf support holes
If you’re planning to add open shelves to the outside of specific cabinets, it’s easiest to drill the shelf support holes ahead of securing the cabinets to the wall. Use a scrap of pegboard and a drill bit with a stop to position these holes.
Step 4
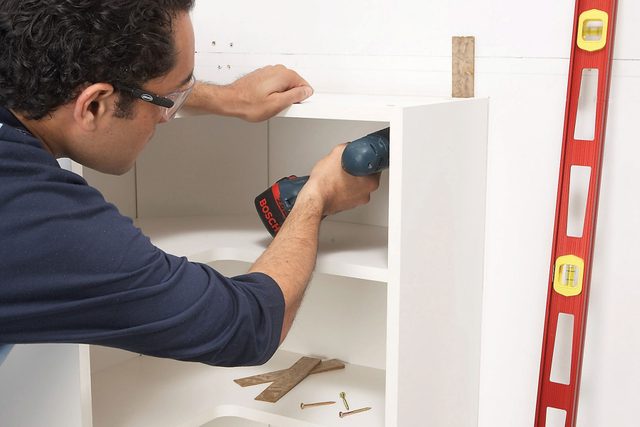
Mount the lower cabinets
Remove the cabinet doors to make installation easier. Then rest each cabinet on the ledger and screw them to the wall studs using washer-head cabinet mounting screws.
Choose your screw length wisely. Ideally, only about one inch of the screw should penetrate the wood stud. If you go any further, you may hit in-wall garage wiring or plumbing.
Drive at least two screws at the top and two at the bottom of each cabinet. With narrow cabinets that don’t span two studs, use toggle bolts. When screwing a cabinet into place, hold a level upright against the front. Chances are, you’ll have to loosen screws and insert shims behind the top or bottom to make the cabinet plumb.
Step 5
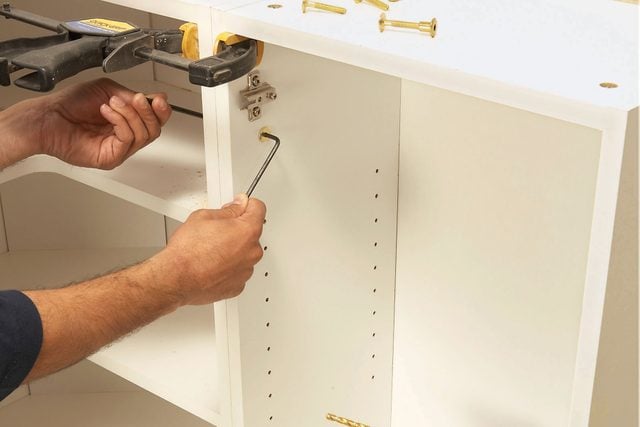
Join neighboring cabinets
Our plan included cabinets with open shelf spaces between them and a few cabinets joined together. Cabinet bolts (available at home centers) are the best way to join cabinets like ours. Screws would easily pull out of the thin particleboard sides. With face-frame cabinets, you can simply screw the face frames together.
Before continuing with the article, familiarize yourself with creating this DIY garage cabinet.
Step 6
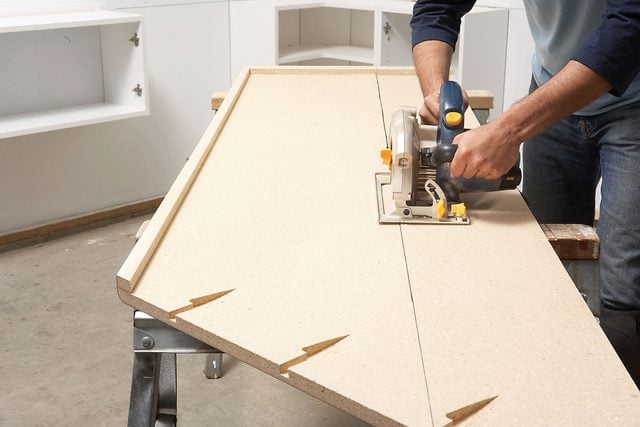
Trim the countertops
Cut the laminate countertops to width with the laminate side down to avoid chips and scratches.We cut ours 16 inches wide. The cut doesn’t have to be perfect since the backsplash will hide it.
Next, cut the countertops to length (or adjust the spacing between cabinets, as we did). If the cut end will be exposed, this cut must be straight and smooth, so clamp a straightedge to the countertop to guide your saw. Then attach a laminate end cap (from home centers) to cover the cut end.
Step 7
Add plywood support
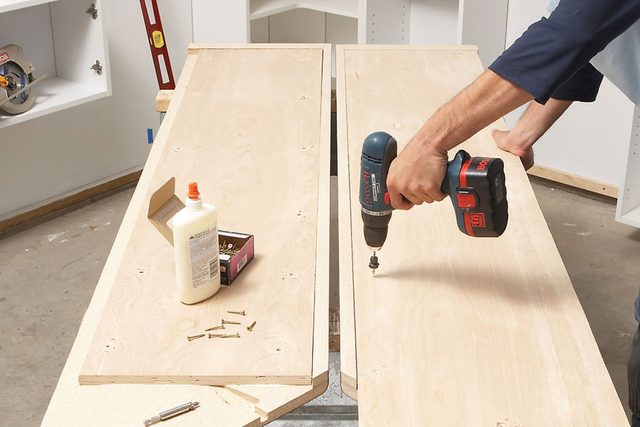
The countertop will bridge open spaces between cabinets, so glue and screw 3/4-inch plywood to the undersides of the countertops to strengthen them.
The plywood also allows you to create a “half-lap” at the mitered corners by running plywood short on one side and long on the other. You can’t join miters as usual using draw bolts because the bolt slots aren’t accessible from inside the cabinets.
Step 8
Set the countertops
Before you set the countertops in place, screw 1×2 ledgers between cabinets. Spread glue on the half-lap joint and fit the mitered countertop sections together. To fasten the countertops, drive screws into the countertops from underneath at the front and back of each cabinet.
Step 9
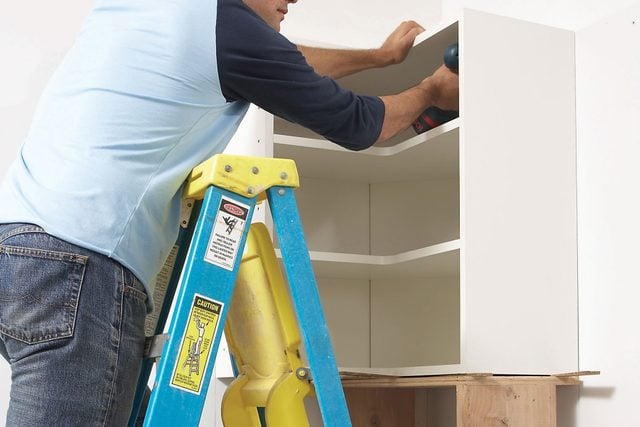
Install the uppers
Mark a level line 18 inches above the countertop. This line marks the bottom of the upper cabinets just as your previous level line marked the lower cabinets. Then build a 17-7/8-in.-tall box from scrap wood to make installing the upper cabinets easier.
Set each cabinet on this box and use shims to perfectly align the cabinet with the level line. Fasten and level the cabinets just as you did before.
Step 10
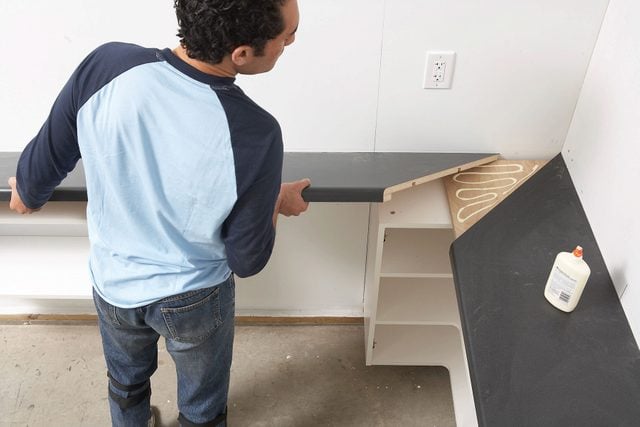
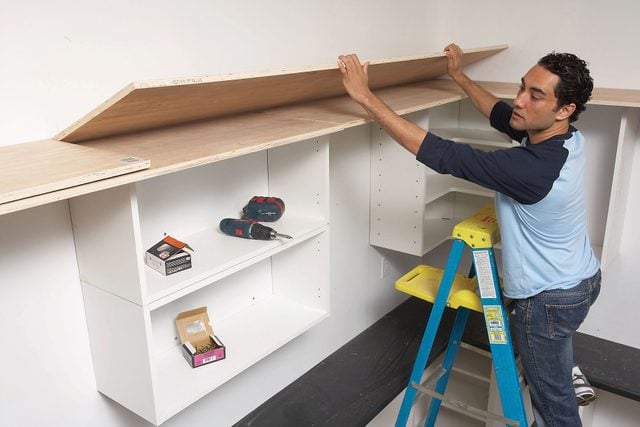
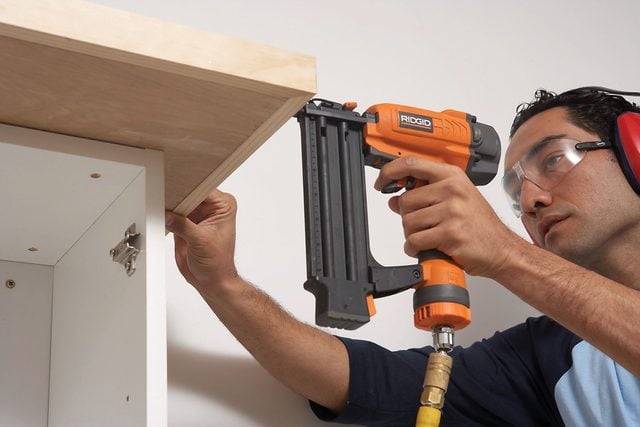
Assemble the top shelf
Build the upper shelf from two layers of plywood on top of the cabinets.
First. cut 3/4-inch plywood into strips 17-1/4-in. wide. Screw ledgers between the cabinets and set the first layer of plywood over the cabinets with the best-looking side face down. Drive 1-1/4-in. screws up through the cabinets to fasten them. Then add the second layer and screw it to the first. Offset the joints and make sure all joints are over the cabinets.
Step 11
Finishing touches
Final steps include:
- Trim the top shelf with 1×2 stock.
- Cut the shelves that hang between cabinets from pine stair tread stock, which is a full one-inch thick and won’t sag like particleboard shelves. Cut the shelves 1/4-in. shorter than the spaces between cabinets.
- If you’d like, install a backsplash to your countertop. It can be as simple as a painted 1×4 nailed to the wall. To build a backsplash shelf like ours in the drawing above, space the upright 1×2 supports every four feet along the counter.
- To avoid damaging the cabinet doors, hang them after the entire project is complete. Align the doors using the adjusting screws on the euro hinges, then attach the door pulls.
Step 12
Solutions for any garage wall
Our garage had stud walls covered with drywall, but you can install this system in any garage. Here’s how:
- If your garage has concrete block walls, follow the same steps we show, but use masonry screws to fasten ledgers and cabinets to the block. You’ll have to drill the concrete with a hammer drill so the project will take longer.
- If you have bare stud walls, you could install this system as shown. But consider covering the wall with 3/4-in. plywood or oriented strand board (OSB). That way, you can fasten ledgers and cabinets to the plywood; no need to locate the studs.
- If your garage walls are built on a protruding block or concrete curb (shown) that won’t allow you to mount cabinets near the floor, you can “fur out” the wall to create a flat surface. Screw horizontal 2x4s to the wall centered 24 inches apart, then screw 3/4-in. plywood to the 2x4s.