


Build this sturdy and simple, slide-in diy overhead garage storage system.
A full day
Beginner
$101–250
Introduction
If your garage is running out of space, try building this overhead storage system. The construction is simple and fast, and the whole system is made with standard materials.
Are all those cardboard boxes in the corner of your garage driving you crazy? Holiday decorations, camping gear, seasonal clothing and extra bedding take up valuable garage storage space. And who can tell one brown box from another? We’ve designed this system to get all that stuff up and out of the way and into unused storage space near your garage ceiling. We built this handy overhead garage storage system around special reinforced plastic totes that hang from carriages made from 2x4s and plywood strips.
In this article, we’ll show you how to assemble these simple carriages, align them perpendicular to the ceiling joists, then anchor them into place with lag screws. It’s that easy. Add labels to the sides of the totes and you can tell at a glance where to find that long-term storage item. The carriages are quick and easy to assemble. They can be constructed, installed, and you can begin to organize your garage the very same day!
Tools Required
- Circular saw
- Cordless drill
- Drill bit set
- Hammer
- Level
- Miter saw
- Safety glasses
- Socket/ratchet set
- Stepladder
- Stud finder
Materials Required
- 1/2 1x2 x 8' pine stop strip (1)
- 1/4" x
- 2" wood screws (1 box)
- 23-1/2" x 19-1/2" x 13" plastic totes (6)
- 2x4 x 8" (2)
- 3-1/2" lag screws and washers (16)
- 3" wood screws (1 box)
- 4' x 8' sheet of 3/4" plywood
- Carpenter’s glue (1 pint)
Project step-by-step (12)
Step 1
Measure
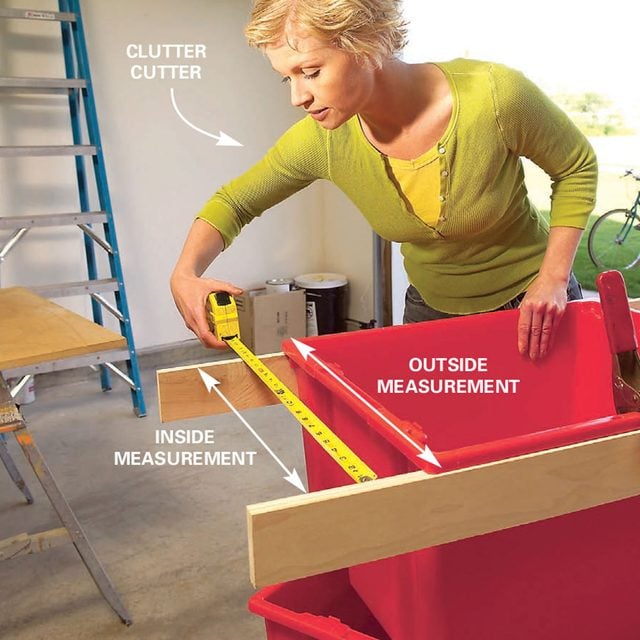
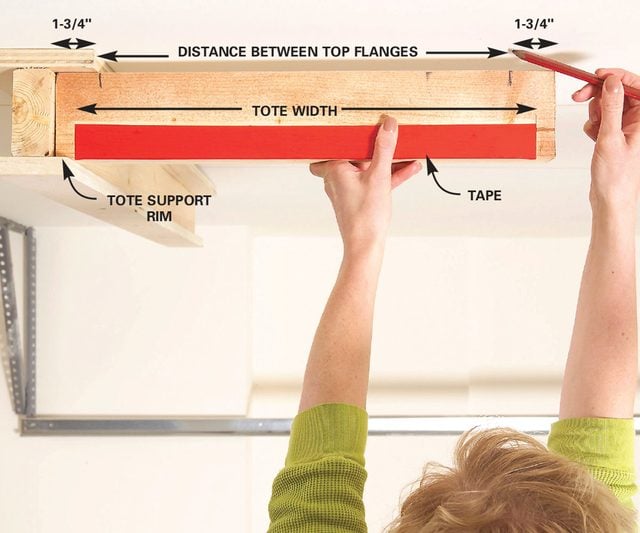
Measure the top of the tote to determine the width of the tote rims (3/4-inch) and the size of the bottom flanges of the carriages (in our case, three inches).
Step 2
Bottom flanges
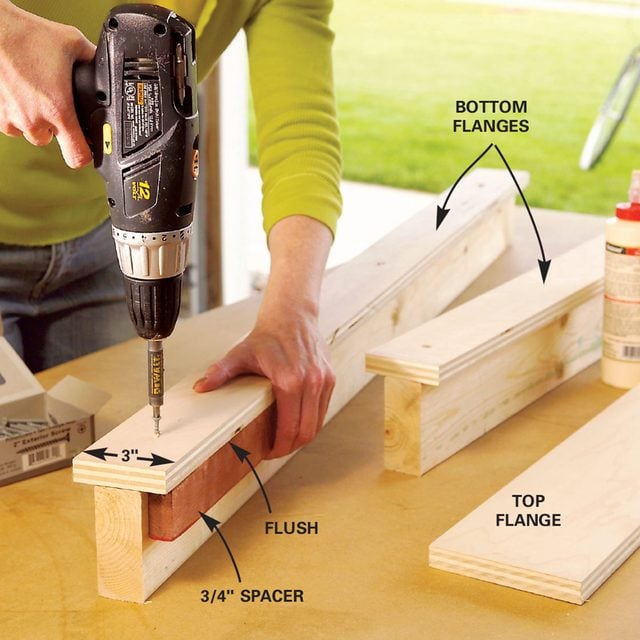
Cut three-inch-wide strips of 3/4-inch plywood for the bottom flange. Center them on four-foot-long 2x4s, then glue and screw them. Use two-inch screws every 10 inches.
Step 3
Complete the overhead garage storage carriages
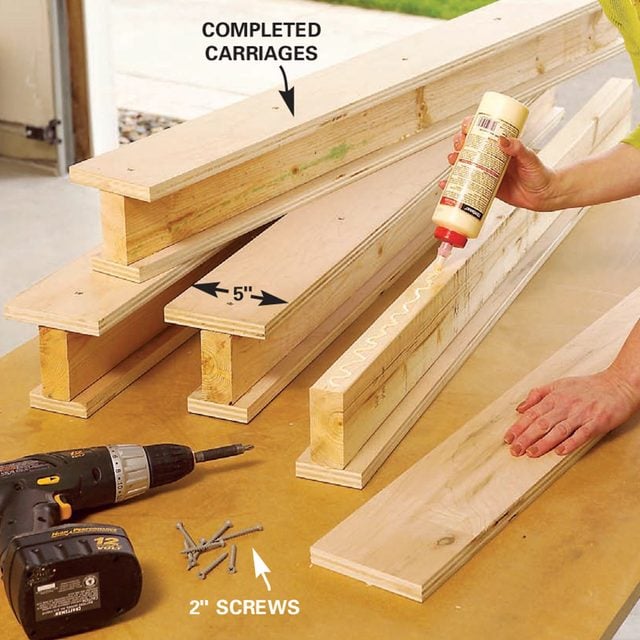
Flip the carriage assemblies over. Center the five-inch-wide plywood top flanges and glue and screw them to complete the carriage assemblies.
Step 4
Mark garage ceiling joists
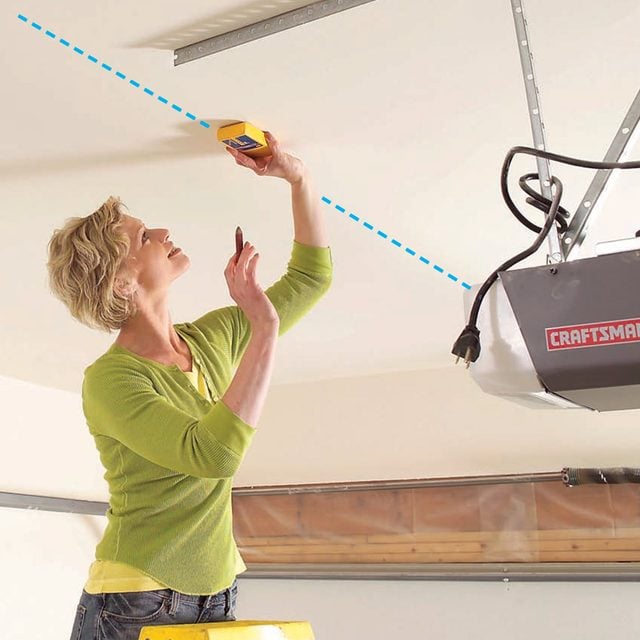
Locate the ceiling joists with a stud finder and snap chalk lines to mark them. Probe with a finish nail to make sure the lines fall on joist centers.
Step 5
Screw ceiling garage storage system in place

Mark each carriage 12 inches from the end and align the mark with the joist location. Screw the carriage temporarily to each joist on one side of the flange with three-inch screws.
Step 6
Mark the carriage locations
Cut a 2×4 template from your tote dimensions and mark the location of the top edge of the next carriage. Mark the rear side as well, then screw it and the other carriages in place on one side only.
Step 7
Test the fit of your overhead garage storage

Check the fit of the totes and make sure the rims have maximum bearing on the lower flanges. Make any necessary adjustments.
Step 8
Drive lags at joists

As good as this garage storage idea is, it needs to be properly anchored to be effective. Drill 3/16-inch pilot holes in the top flanges. Then drive pairs of 3-1/2-inch lag screws into each joist, removing the temporary screws as you go. Use a minimum of four lag screws per carriage.
Step 9
Install stops

Mark the centers of the carriages and screw a 1×2 stop along the marks. The stop will keep the totes from sliding too far into the overhead garage storage system.
Step 10
Utilize dead space
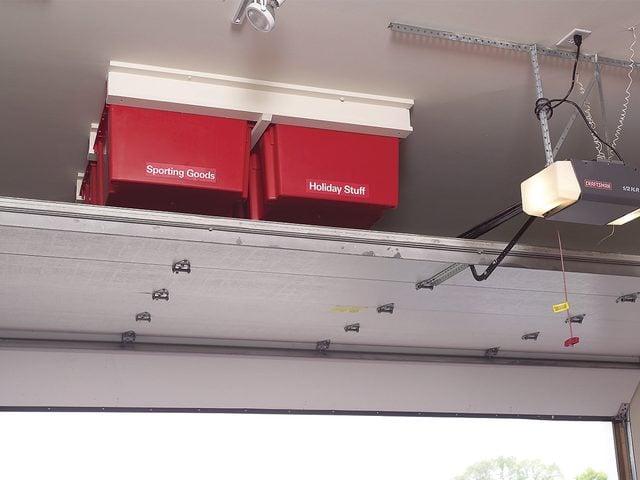
If you don’t have unused space above the garage door, you can install this ceiling garage storage system just about anywhere. However, keep the totes at least two feet from garage lighting, door springs and garage door openers.
Step 11
Different sizes

The special reinforced totes we used (available from internet suppliers like usplastic.com, simplastics.com and others) are a bit stronger than those you’ll find at home centers or department stores. The reinforced rims on these containers will support weights of 35 lbs. or more, which is perfect for this garage storage project.
Step 12
Easy access

And the totes will be easy enough to lift into place while you’re standing on a ladder. To be on the safe side, the total weight of all the totes shouldn’t exceed 210 lbs., so heavy items should be stored in bins on the garage storage wall rather than on the ceiling. Custom plastic lids are also available for dust-free storage.
If you use other types of containers, measure the rims carefully and adjust the bottom flange width to assure full support. And no matter what joist spacing you find (24- or 16-inch), be sure to fasten the carriages with at least four lag screws.
Before you order your totes, measure the height above your garage door and find totes that’ll work. Our 13-inch-deep totes required 18 inches of clearance, including the carriages. For lower clearances, you can buy totes that are 8 and 10 inches deep but with the same top size.