With this 2x2 frame and panel system, you can add 80-plus cubic feet of storage in an afternoon.
A full day
Beginner
$101–250
Introduction
Built from 2x2s and plywood, these extra-deep utility cabinets are easy and quick to build. Sliding plywood doors keep everything inside dust-free, and the extra depth makes them perfect for hard-to-store items like camping and sporting gear and kids toys.
Organizing your garage
To help keep your garage organized, it’s helpful to have some “deep” storage, a place for camping gear, holiday decorations and seasonal toys and clothes. Basically, all of the stuff you want to tuck away for months at a time. This cabinet system fits the bill. It’s spacious, inexpensive and easy to build. You can also easily customize its size to suit just about any open wall space and your storage needs. We tucked ours up against the ceiling to fill the little-used space over the car hoods.
The cabinet is divided into 32-in. wide compartments because they hang from every other garage stud. Sliding cabinet doors keep out the dust while allowing wide-open, instant access to your stuff.
In this article, we’ll show you how to build this project in four simple steps. Uncomplicated 2×2 and plywood construction makes assembly a snap. In fact, two of us built the cabinets you see in this article in about three hours. If you have a circular saw, a jigsaw, and a screw gun, you can build these garage cabinets in an afternoon.
Required materials for this project
Avoid last-minute shopping trips by having all your materials ready ahead of time. Here’s a list.
Lumber:
For every four 32-in. bays, you’ll need:
End and divider panels, bottoms: Two 4×8 sheets of 3/4-in. plywood
Shelving: One 4×8 sheet of 3/4-in. plywood
Sliding door panels: Two 4×8 sheets of 1/4-in. plywood
Framing: Eight 8-ft. 2x2s
Shelving cleats: approx. 4 ft. of 1×2 per 24-in. shelf
Hardware:
Lag screws: Sixteen 1/4 x 3-1/2 in.
Framing fasteners: 1 lb. of 16d nails
Panel fasteners: 1 lb. of 2-in. screws
Shelving cleats and cabinet bottom fasteners: 1 lb. of 1-5/8 in.screws
Track and trim fasteners: Small box of 1-in. brads
Door track: One 4-ft., one 8-ft. (Available from woodworker’s supply stores).
Finger pulls: Four 3/4-in. diameter
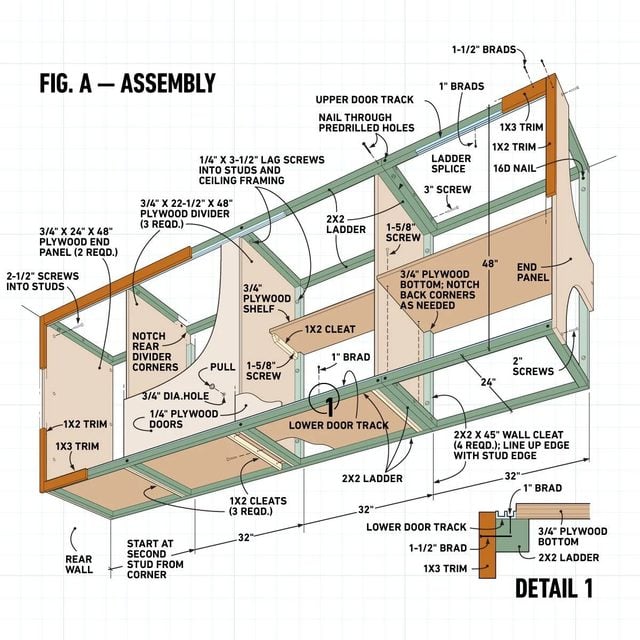
Figure A: Assembling the cabinet
Tools Required
- Air compressor
- Air hose
- Brad nail gun
- Chalk line
- Circular saw
- Clamps
- Cordless drill
- Hammer
- Jigsaw
- Level
- Miter saw
- Nail set
- Safety glasses
- Sawhorses
- Socket/ratchet set
- Stepladder
- Straightedge
- Stud finder
- Tape measure
Project step-by-step (19)
Step 1
Planning your cabinets
Like most overhead wall cabinets, these are hung from wall studs. They’re built in place using the ceiling and wall surfaces for the backs and top. This simplifies construction and saves on materials. If you don’t have a finished wall behind the cabinets, begin the project by screwing 1/2-in. plywood or drywall over the wall studs. If your ceiling is open, add drywall or plywood there as well to keep out dust.
Most garage walls have studs spaced every 16 in., so we sized individual bays to fit over two stud spaces, or 32 in. If you have studs that are spaced every 24 in., make the compartments that wide.
We sized these cabinets to use 4×8 plywood sheets efficiently. When planning your cabinet dimensions, consider:
Height: In most garages, a 4-ft. cabinet against the ceiling leaves about 5 ft. between cabinet bottoms and the garage floor. If you park long vehicles in the garage or have a shallow garage, you may need to use the space under the cabinets for the fronts of vehicles. If so, measure the height of the hood to make sure you’ll have clearance when choosing cabinet heights. Be sure to consider the heights of items you may want to store beneath the cabinets. Motorcycles, bikes, storage cabinets and wheeled tools are ideal candidates for that space.
Two other heights that efficiently use plywood are 32 in. (six panels per sheet) and 24 in. (eight panels per sheet). Keep in mind that protruding cabinets invite head bumps. So make sure walking patterns don’t pass too close to corners.
Depth: If you need to walk in front of the cabinets to access car doors, reduce the cabinet depth. Park your car in the garage to determine the maximum depth that still leaves plenty of room for foot traffic, and size accordingly. Depths of 16 or 12 in. will allow for six or eight panels per sheet respectively with little waste.
Width: The cabinets don’t have to start against a wall as we show, but they do have to begin and end on a stud. Locate and mark all studs before deciding on how many compartments fit on the wall. There’s a good chance you’ll have an odd 16-in.wide compartment at one end. You can use those compartments for open shelving or build oversized sliding doors to cover a standard opening plus the oddball. Be sure to consider access to service doors near the cabinets. Too close and it might be difficult to negotiate around cars to get into the house or backyard.
Lay out the cabinet footprint on the floor with masking tape and park the cars in the garage before you start building the cabinets. Walk around the garage and test access to the cars and service doors to make sure your cabinet layout is garage user–friendly.
Selecting the materials
Just about any type of sheet material will work for your cabinets. For a handsome, natural wood look, we used 3/4-in. birch plywood for the end and divider panels and 1/4-in. birch plywood for the sliding doors. You can reduce the cost by using MDF (medium-density fiberboard) for painted cabinets or even construction-grade plywood for down-and-dirty utility cabinets.
The sliding doors glide on a plastic track that’ll handle any 1/4-in. thick material. You can even choose 1/4-in. hardboard or Peg-Board for ventilated cabinets. If you select plywood, plan to seal all the surfaces and edges of the doors to prevent warping.
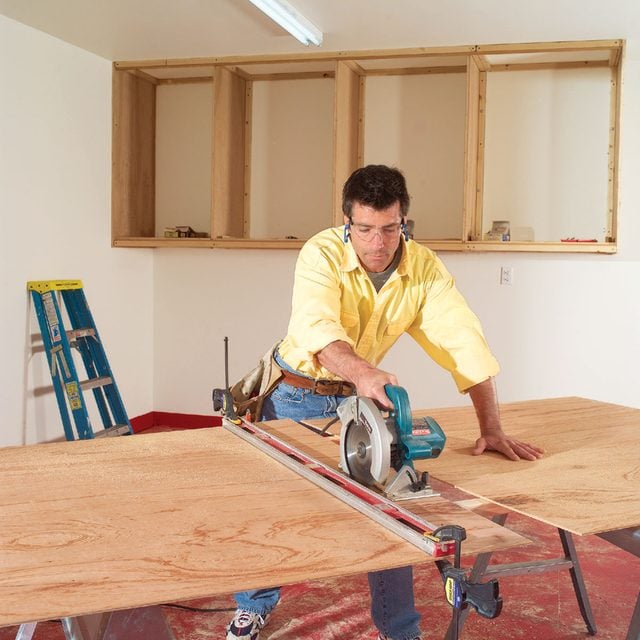
Step 2
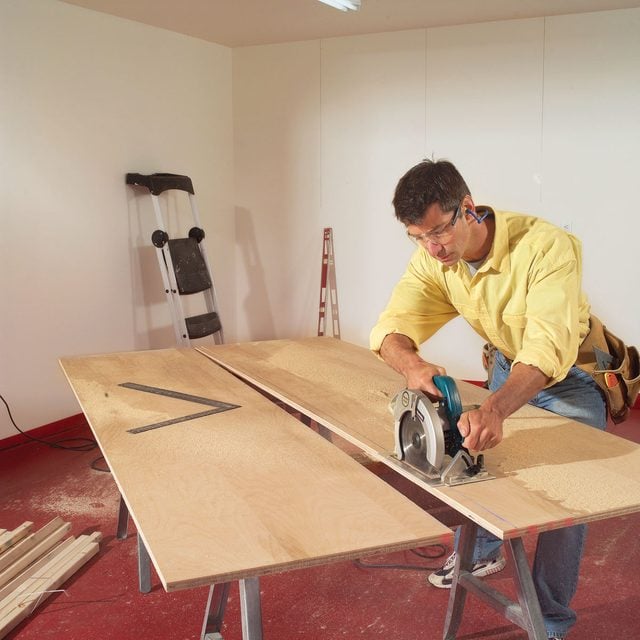
Rip the plywood
Rip one 8-ft. long, 24-in. wide length of 3/4-in. plywood for the end panels and 22-1/2 in. widths for each divider panel. Cut the panels to 4-ft. lengths.
Step 3
Fasten the end panel
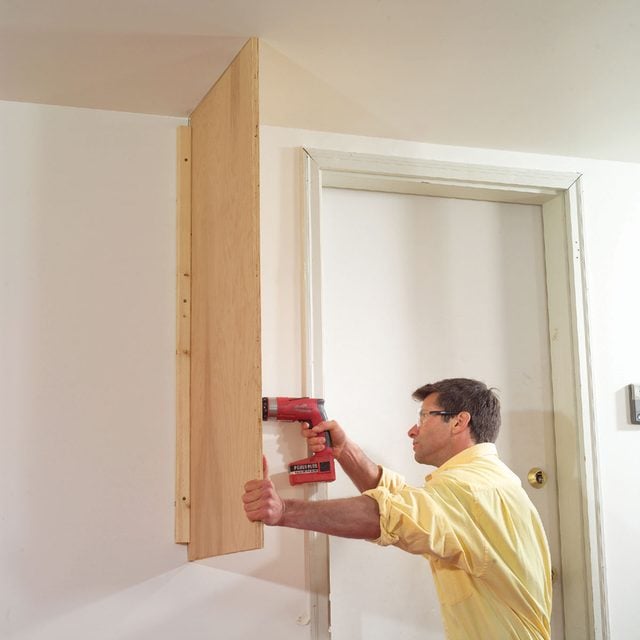
Press one end panel against the ceiling and the rear wall and screw it to the corner and first wall stud. Angle the back screws slightly to catch the corner stud.
To make it easier, start screws in the panel and then hold it against the wall, especially if you’re short on help. Angle the screws slightly at the corner to hit the corner stud and add more screws into the first stud near the corner.

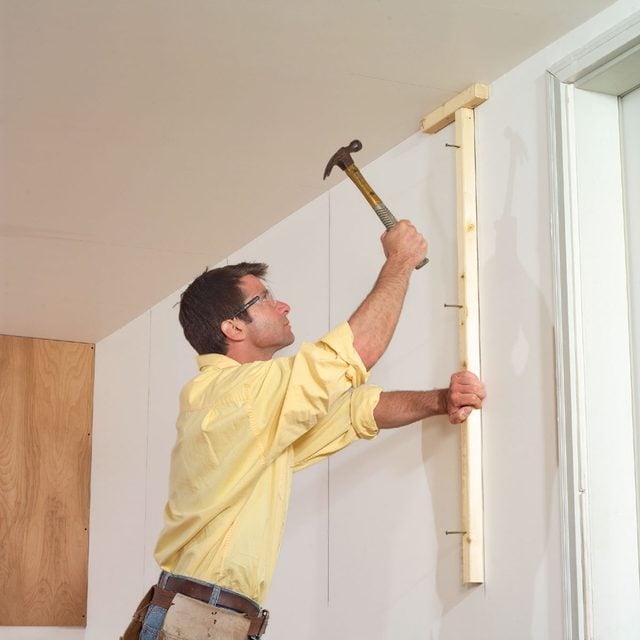
Step 4
Nail the end panel cleat
Locate the studs. Mark one edge with a 4-ft. level, then nail the end panel wall cleat into the last stud, spacing it 1-1/2 in. from the ceiling.
Cut all the cleats 3 in. shorter than the end panels to leave a 1-1/2 in. space at the top and bottom of the panels for the ladders. It’s easiest to nail the cleats to the wall first and then install the lag screws in the center of the studs. Remember that they support nearly all of the weight of the cabinet and contents.
Step 5
Attach the end panel
Press the end panel against the ceiling and wall, then screw it to the outside edge of the wall cleat with 2-in. screws.
Step 6
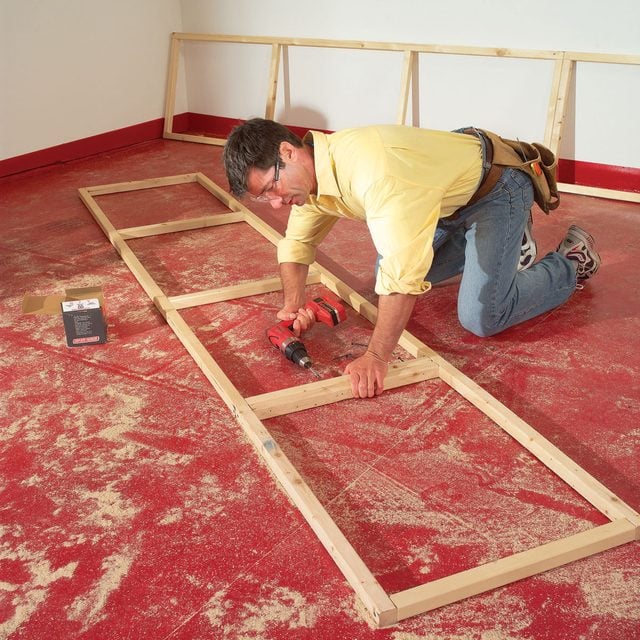
Assemble the ladder rails
Cut the ladder rails to fit between the end panels. Then carefully lay out the 2×2 rung locations using the wall studs as a guide for spacing. Nail the ladders together. Screw splices together with 3-in. screws.
You’ll be nailing the ladder parts together before holding them up and fastening them to the end panels and wall. It’s easy to split 2x2s, so predrill ends before nailing. Don’t assume the ladders will be the same size because walls and end panels can be out of plumb.
Measure and assemble the top and bottom ladders independently rather than making carbon copies. Make sure the rung edges line up with the stud edges so the framing will be aligned for the panels. Since 2x2s are generally only sold in 8-ft. lengths, cut the rails to break at a wall cleat, and splice the sections together by doubling the 2×2 rungs at that point. They’ll be wobbly, but as soon as they’re fastened, they’ll be plenty sturdy.
Sight along the outside of the bottom ladder or string lines along the outside edge to make sure the ladder is straight before fastening the divider panel bottom. Otherwise, the sliding doors might slip out of the tracks or bind.
Step 7
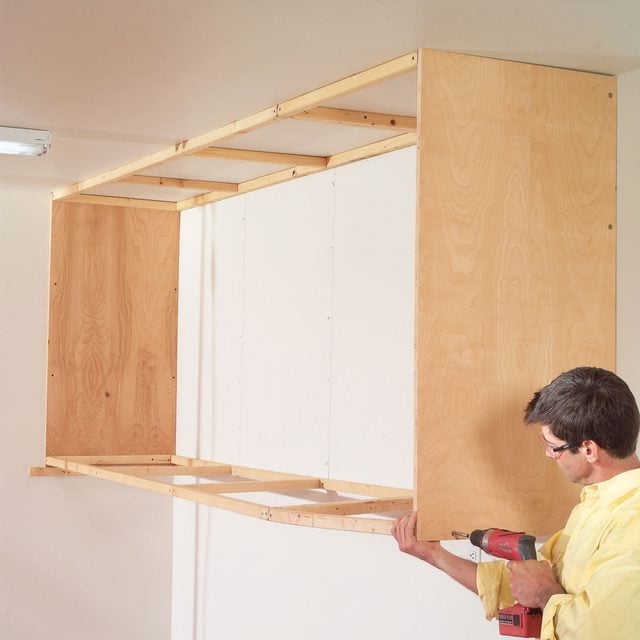
Set the top ladder in place
Tack a temporary cleat 1-3/4 in. below the ceiling, rest the top ladder on it, and lift it into place. Screw it to the end panels and then fasten it to any available ceiling framing and to the wall with lag screws.

Step 8
Screw on the bottom ladder
Snap a chalk line 1-1/2 in. above the bottom of the end panels, add another temporary cleat and screw the bottom ladder to the end panels. Align the 2×2 rail to the chalk line and nail it to the wall studs.
Step 9
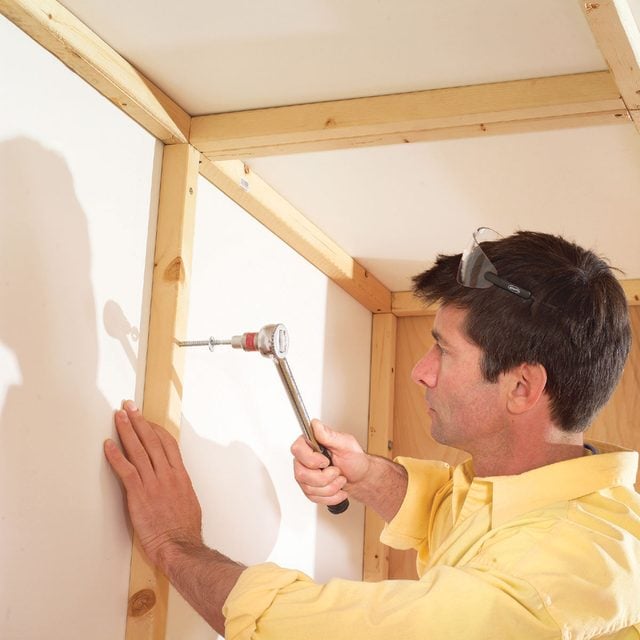
Bolt cleats to the studs
Nail the divider wall cleats to the studs, then predrill three evenly spaced 3/16-in. pilot holes and bolt the cleats to the studs with 3-1/2 in. lag screws.
Step 10
Notch the divider panels
Cut notches in the divider panels to clear the back upper and lower ladder rails. (The divider panels stop just short of the front ladder rails.)
You’ll need to cut 1-1/2 in. corner notches at the top and bottom of the back of the divider panels to clear the ladder framing. Cut them a little on the big side so you won’t have to struggle with wedging the divider panels into place. Place one on each side of the cleats.
Step 11
Place the divider panels
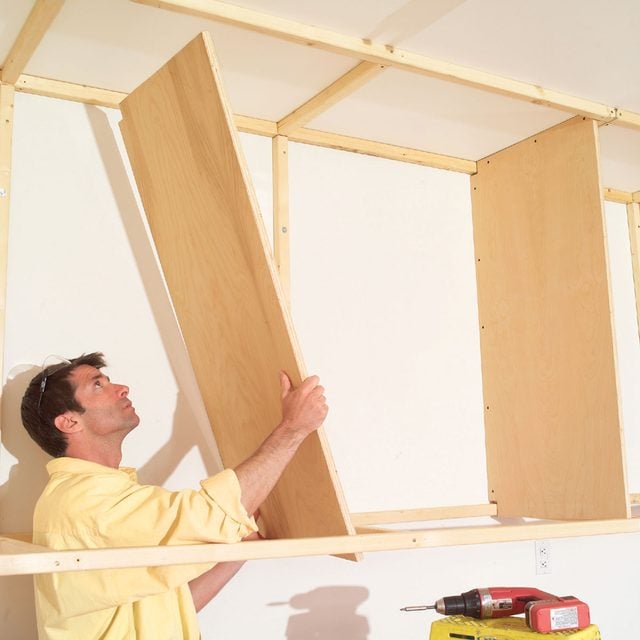
Lift the divider panels into position. Using 2-in. screws, attach them to the wall cleats and top ladder rungs only.
Step 12
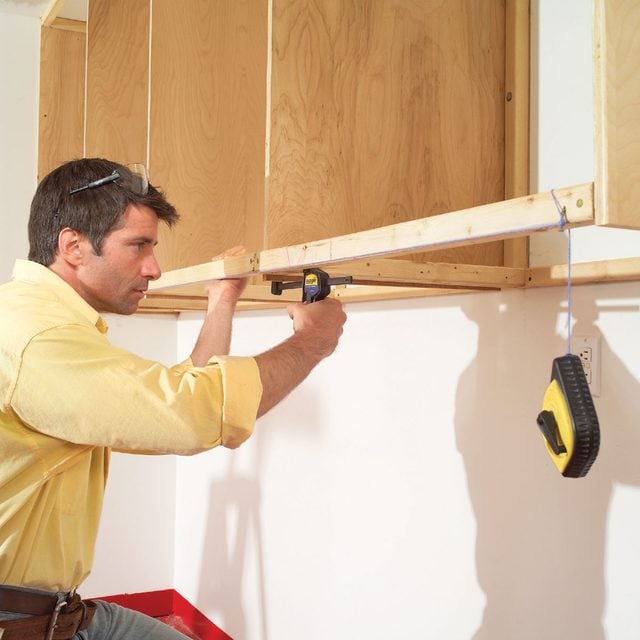
Align the bottom ladder
String a line along the bottom corner of the front rail. Straighten the rail to the line, clamp it, then screw the panels to the rungs.
Step 13
Add the sliding door tracks
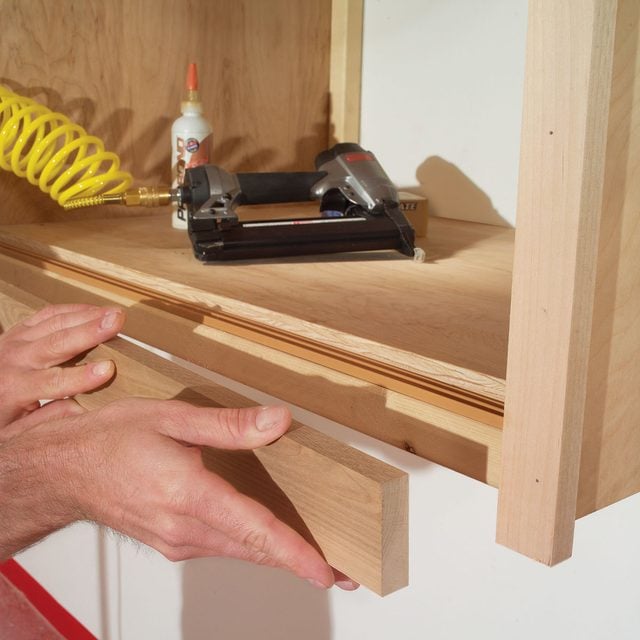
Cut the tracks to length, then tack the bottom track to the bottom rail with 1-in. brads. Punch the brads to the bottom of the grooves with a nail set. Spread polyurethane glue on the top track and tack it into place.
Step 14
Install the bottom panels
Cut 1×2 cleats and screw them to the bottom of the divider panels to support the bottom panels. Cut the bottom panels to butt against the door track. Screw them into place.

Step 15
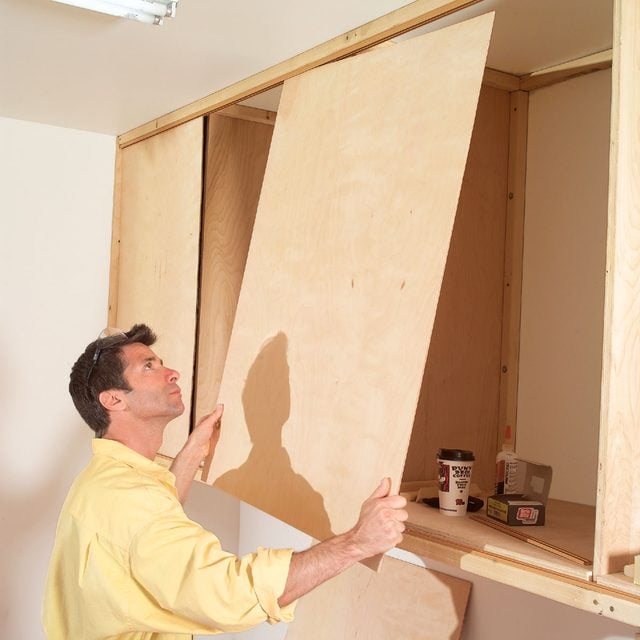
Cut the sliding doors
Cut the door from 1/4-in. plywood. If you’re using plywood for the doors, cut them from the backside to avoid splintering on the “show side.”
Measure the distance from the top of the bottom track to the inside of the top track and subtract 1/8 in. to determine door height; that will make sure they clear the bottom track.
Cut the 1/4-in. door panels to width so they overlap the end and/or divider panels on both sides of the opening.
Step 16
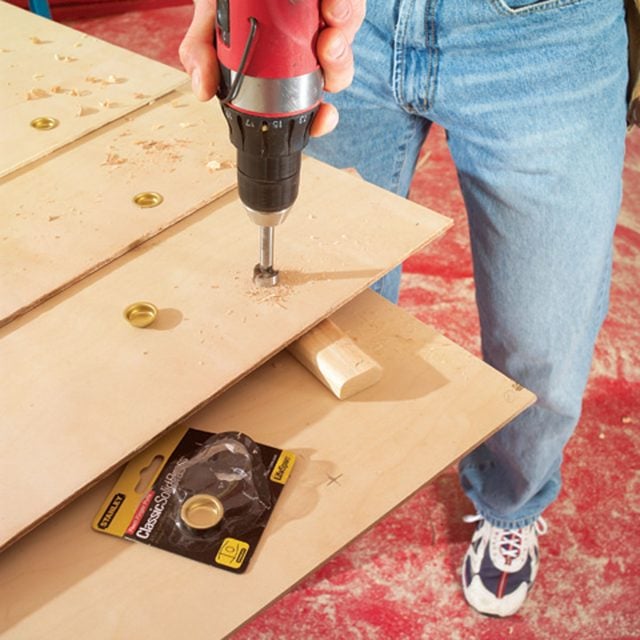
Insert finger pulls
Test-fit all the doors and slide them to the closed position. Mark the best finger-pull placement. Then drill 3/4-in. holes and press in the finger pulls. (A dab of polyurethane glue will keep them from popping out.)
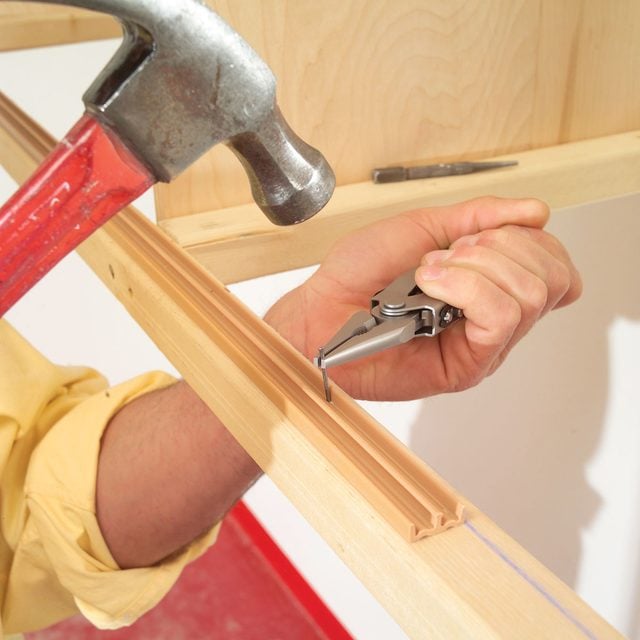
Step 17
Close-up of drilling
Detail of holes for finger pulls.
Step 18
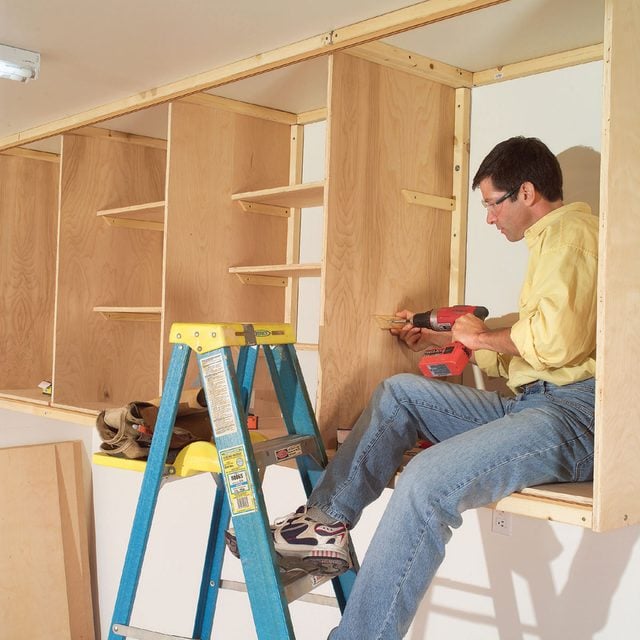
Place shelving
Lay out shelf sizes and spacing as desired, then cut and screw 1×2 cleats to the inside of the cabinets and cut the 3/4-in. shelves to fit.
Step 19
Add trim
Cut 1×2 end panel trim to extend about 3/4 in. below the end panel. Nail into place. Cut and nail 1×3 trim for the top and bottom rails.