


A table saw is all you need!
Introduction
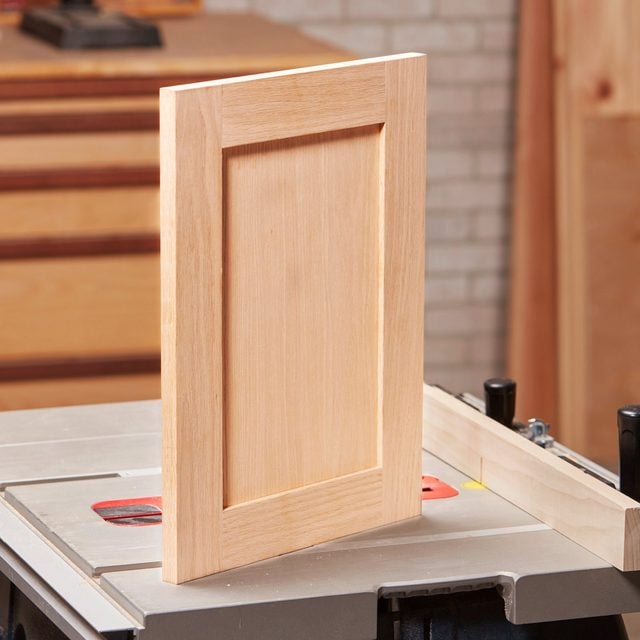
If you’ve got a table saw, you can make Shaker-style cabinet doors. You don’t need any special jigs — just your saw, large or small, a miter gauge and a sharp blade. And you don’t need any specially prepared wood; material from a home center will be fine.Shaker cabinet doors have a timeless look that works in both traditional and modern kitchens. And they’re surprisingly easy to make at home — with just a table saw and intermediate-level carpentry skills.
Plan to use 1×3 or 1×4 hardwood boards for the door’s frame. You’ll find this material at most home centers and lumberyards. Store-bought wood has very straight and square edges. For the best results, use the wood in the widths it comes in. Narrower boards ripped from wider ones have a good chance of warping, a problem you won’t be able to fix. Plus, you’ll have a hard time making the new ripped edge smooth, square and crisp, which you’ll need for tight joints. Be picky when you choose your wood. Sight down each piece to make sure it’s flat and straight. If it’s not, your cabinet door won’t be flat or straight either, and it certainly won’t close right! For the panel, look for 1/4-inch plywood that lies flat.
Project step-by-step (16)
Step 1
Measure & Shop for Materials
- Make a list of the parts of your DIY shaker cabinet doors before you begin.
- Note: For each door, you’ll need two stiles (the vertical parts), two rails (the horizontal parts) and one panel.
- To figure the length of the stiles, take the height of the door and add 1/8 inch.
- Pro tip: It’s a good idea to make your doors an extra 1/8 inch tall, so you can trim their ends after gluing.
- To figure the length of the rails, measure the total width of two stiles placed side by side.
- Subtract this number from the desired width of the door.
- Add 1/2 inch, the length of two tenons.
- Note: You’ll also need at least two extra “test” pieces that are the same thickness as your rails and stiles. For your safety, they should be at least 12 inches long. It’s best to cut the plywood panel extra large at first. Rip it 1 inch wider than the length of the rails and 1 inch shorter than the length of the stiles.
Step 2
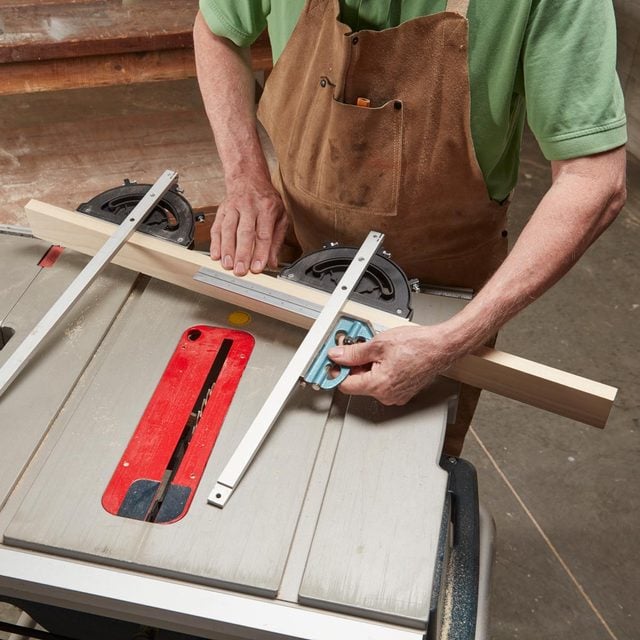
Set Up Your Miter Gauges
-
- Note: To build a square door, the stiles and rails must all be exactly the same length with perfectly square ends. A table saw makes that easy.
- Use the miter gauge that came with your table saw.
- Attach a straight 24-inch-long hardwood 1×3 for more accuracy and to avoid splintering out the end of the cut.
- Note: This fence also provides a place to clamp stops. The fence should be about 2-1/2 inches tall and 24 inches long.
- Using a second miter gauge, tie the two miter gauges together with the fence so that the pair functions as a table saw sled.
- Note: You can buy a second miter gauge for less than $20. The brand shouldn’t matter — most are made to fit 3/4-inch slots.
- Use a combination square to set the miter gauges at 90 degrees.
Step 3
Cut Parts to Length
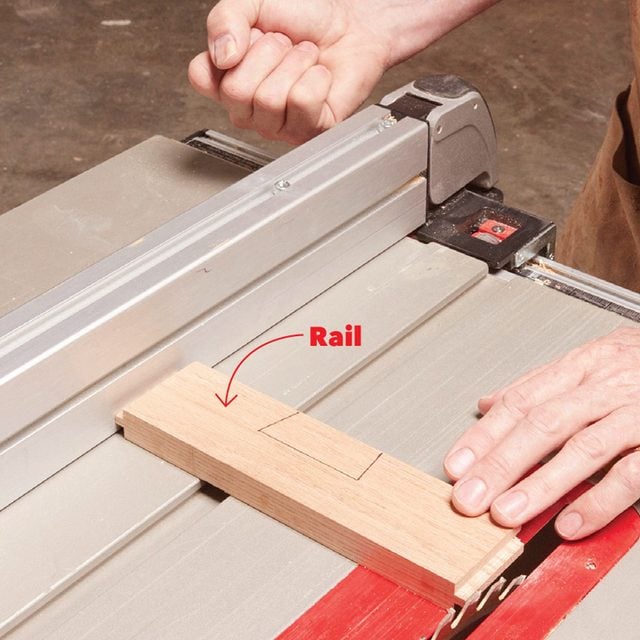
- To make duplicate cuts, use a “stop block” — a square block with the corner nipped off to prevent dust buildup.
- Cut a fresh slot in the fence, then measure from the slot to the block to set up each cut.
- Clamp the stop block to the fence.
- Pro tip: A small C-clamp works well because it won’t wiggle loose like some other clamps.
- Precut your stiles and rails an extra 1 inch long so they’re easier to handle.
- Place the part on the left side of the fence.
- Cut about 1/4 inch off the part’s right end to square it up.
- Slide the part over until it touches the block, and then cut the left end.
- Trim both ends of the test pieces now as well.
Step 4
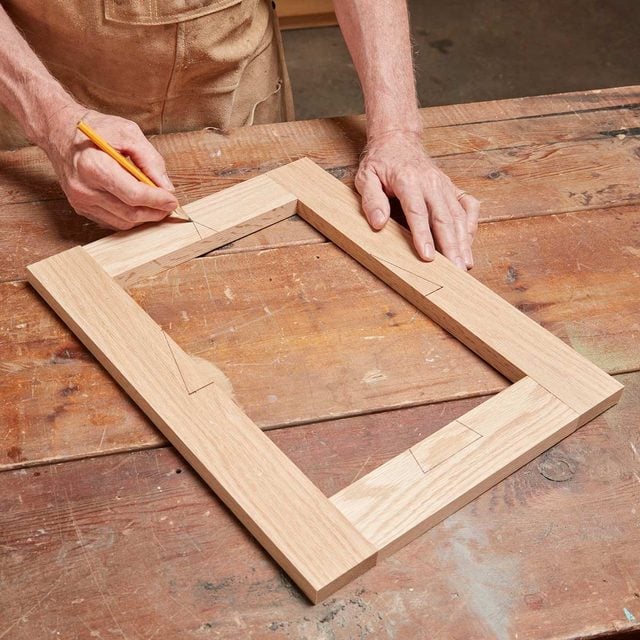
Mark the Parts
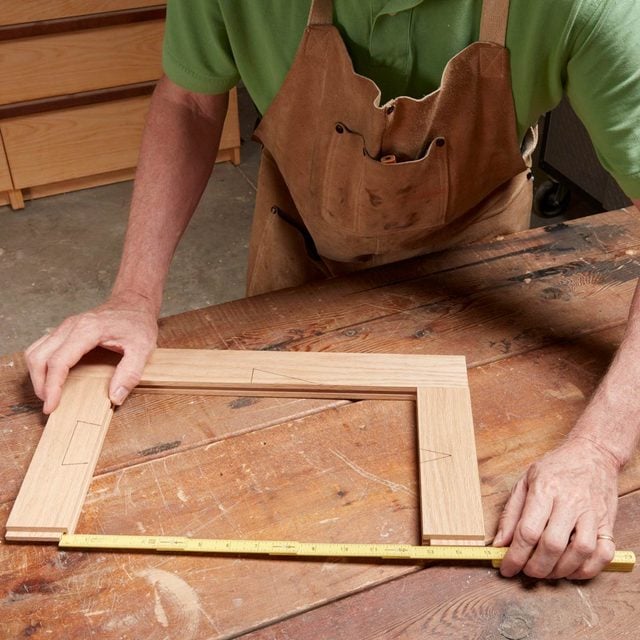
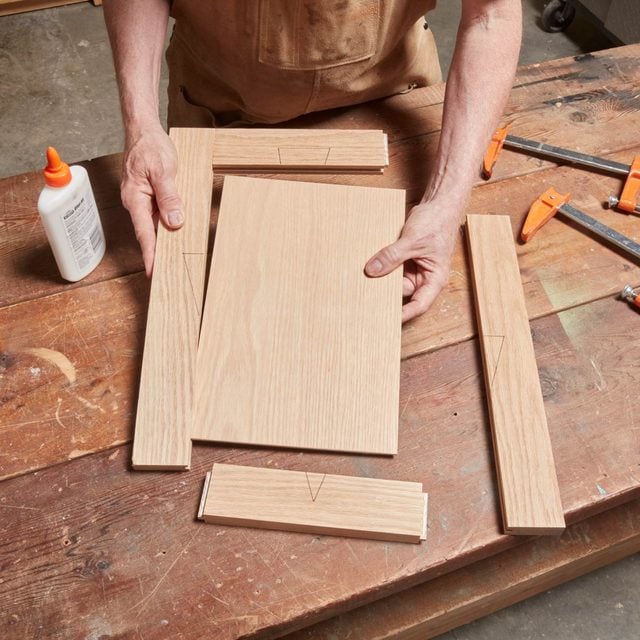
- Assemble the door’s stiles and rails, with the best side facing up.
- Draw the four sides of a “cabinet maker’s triangle” to identify which part goes where.
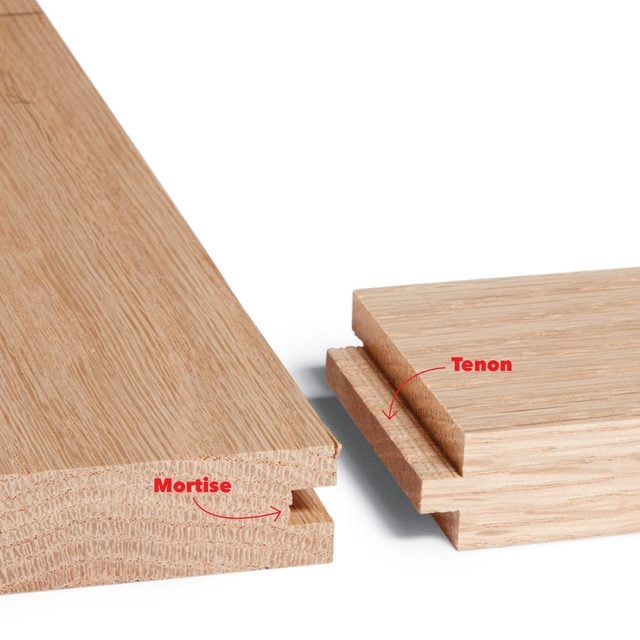
A Mortise-and-Tenon Joint Without All the Fuss
Here’s a classic way to put together a strong, good-looking door without making any unsightly holes.
Step 5
Cut the First Pass of the Groove
- Cut the grooves that receive the plywood panels and tenon tongues along the inside edges of all the pieces.
- Note: The width of the grooves must match the thickness of your plywood. You’ll accomplish this by making multiple passes, widening the groove a little each time until it’s just right. It doesn’t matter if you have a thin-kerf or standard blade — either will work.
- Start by drawing a center line on the end of one of your test pieces.
- Place this piece on your saw, then adjust the saw’s fence so that the blade is positioned slightly off the line.
- Adjust the height of the blade to cut just over 1/4-inch deep.
- Saw a groove as shown in the photo below.
- Pro tip: Always use a feather board to hold the wood tight to the fence as you push.

Step 6
Cut the Groove Second Pass
- Flip the board end for end and make a second cut to widen the groove.
- Check the groove’s depth and adjust your blade up or down if necessary.
- Check to see if your panel fits.
- Note: The panel should slide into the groove without requiring any force, but it shouldn’t wiggle, either. If the groove is too narrow — and it probably will be on the first try — nudge your saw’s fence a tiny bit and repeat both cuts. If the groove is too wide, adjust the fence and start a new groove on the other side of the test piece.
- When you have the fence setting just right, cut grooves in all the rails and stiles.
Step 7
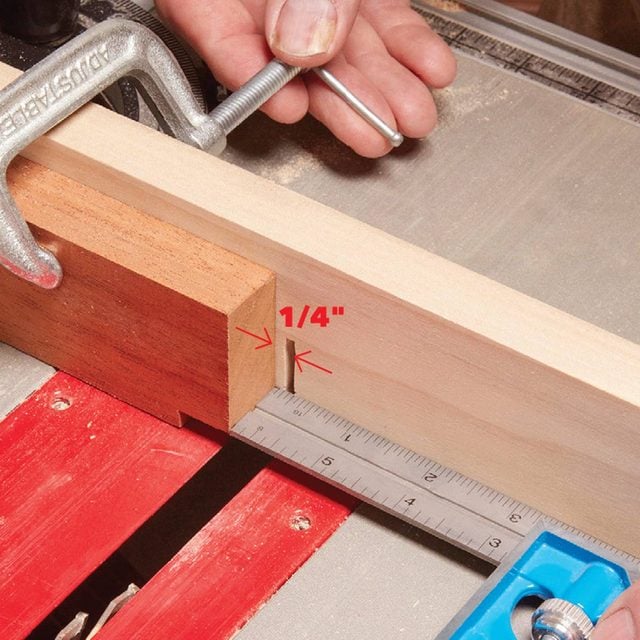
Set Up For Cutting Tenons
- Put the miter gauge back on the saw and clamp a block 1/4-inch away from the slot in the saw’s fence.
- Place one of the rails or stiles next to the blade, then adjust the blade’s height to cut just a bit lower than the groove (about 1/16 inch).
- Pro tip: This setup also requires some fine-tuning, so begin by using one of your test pieces.
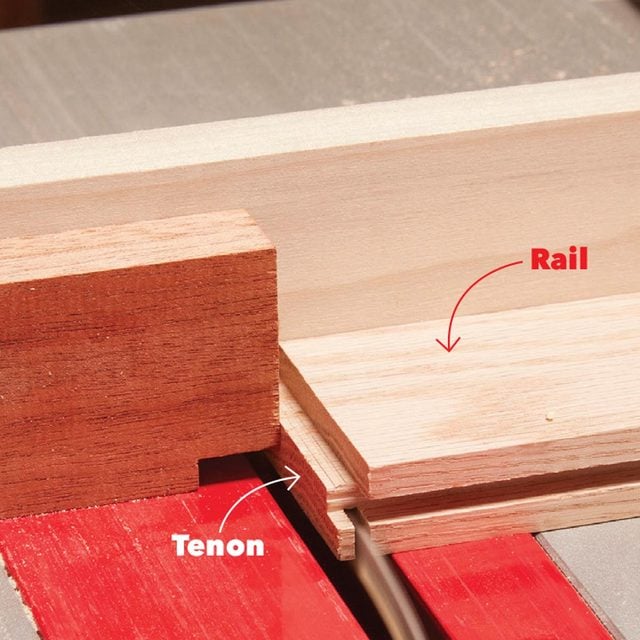
Step 8
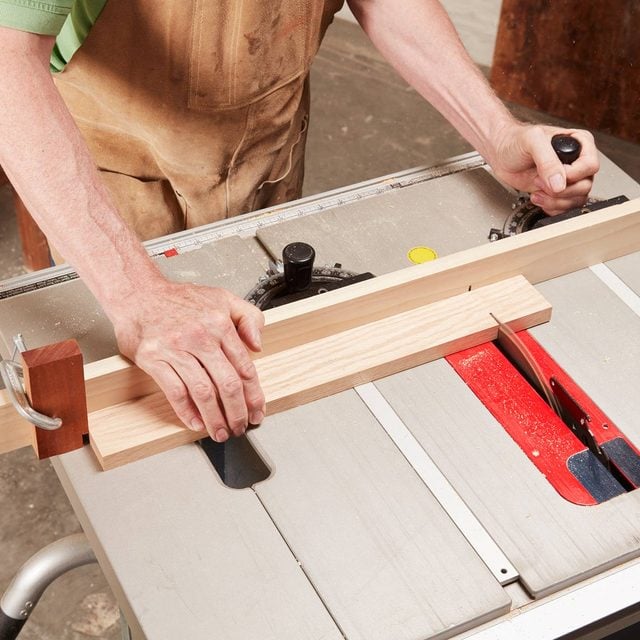
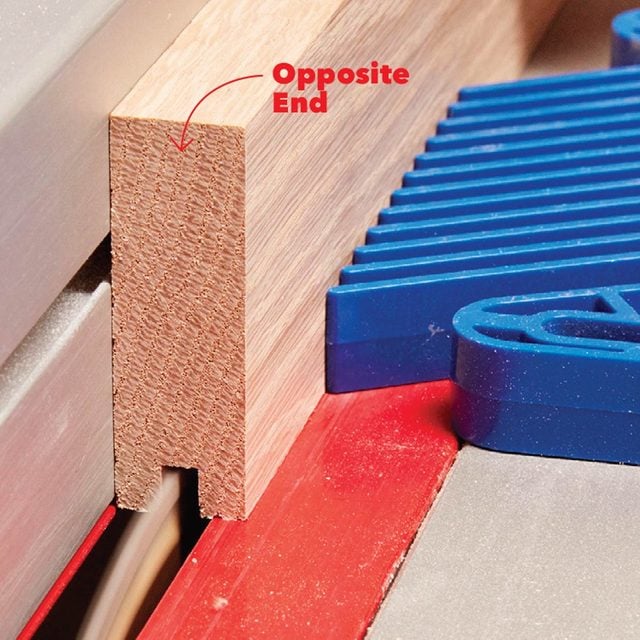
Cut the Tenons
- Make overlapping cuts on one end of the test piece.
- Flip the piece over and make the same cuts.
- See if the tenon fits into the groove as well as the plywood did.
- Note: If the tenon is too tight, raise the blade a tiny bit and cut from both sides again. If the tenon is too loose, start over using a different end of a test piece.
- Once you get the blade set at the correct height, saw tenons on the ends of both rails.
Step 9
Set the Fence
- Set up the saw for cutting the plywood panel to size.
- Move the saw’s fence so the distance from the blade matches the length of the door’s rail.
Step 10
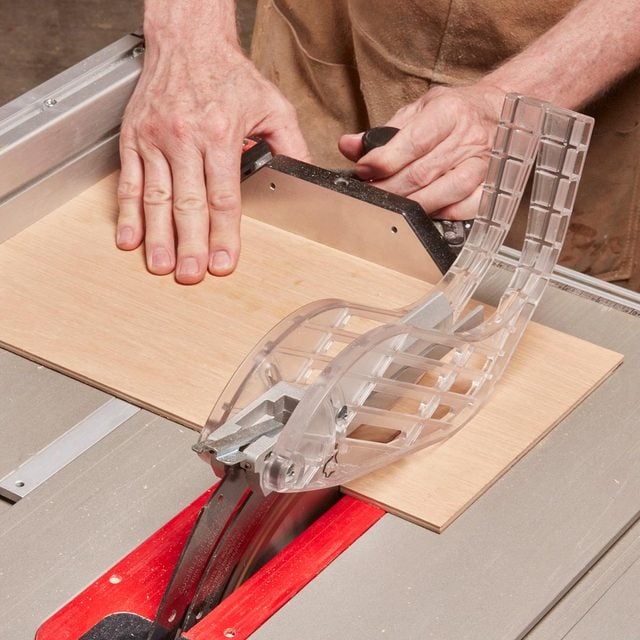
Cut the Panel to Width
- Rip the panel with the good side up to avoid scratches and chips.

Step 11
Measure for Length
- To figure out the panel’s length, assemble three sides of your door.
- Measure the distance between the tenons to determine the panel’s length.
Step 12
Cut the Panel to Length
- Adjust the saw’s fence to 1/16 inch less than the distance you measured.
- Use a miter gauge to steady the wood when you cut it.
Step 13
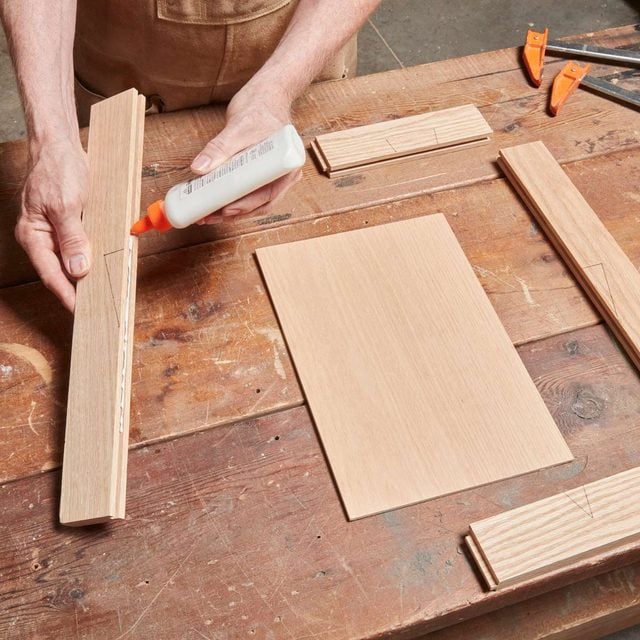
Dribble Glue in the Grooves
- Dribble glue in the grooves of all four sides of the frame.
- Note: The glue is what really holds the door together; the tenons alone are too short. To avoid cleaning up lots of excess glue, it’s best to apply glue to the grooves rather than to the panel. We like to use a small bottle of Elmer’s Glue-All because its tip can be finely adjusted to lay down just a tiny amount of glue.
- Make sure the rail is even with the end of the stile.
Step 14
Slide in the Panel
- Apply glue to both sides of the groove in one stile and one rail.
- Apply glue to the tenon of that rail.
- Push the rail into the stile, making sure the top edge of the rail is even with the end of the stile.
- Slide in the panel.
- Apply glue to the groove, tenons and shoulders of the second rail.
- Slide the rail into place, again making sure it’s even with the end of the stile.
- Apply glue to the remaining stile and nudge it into place.
Step 15
Clamp the Joints Tight
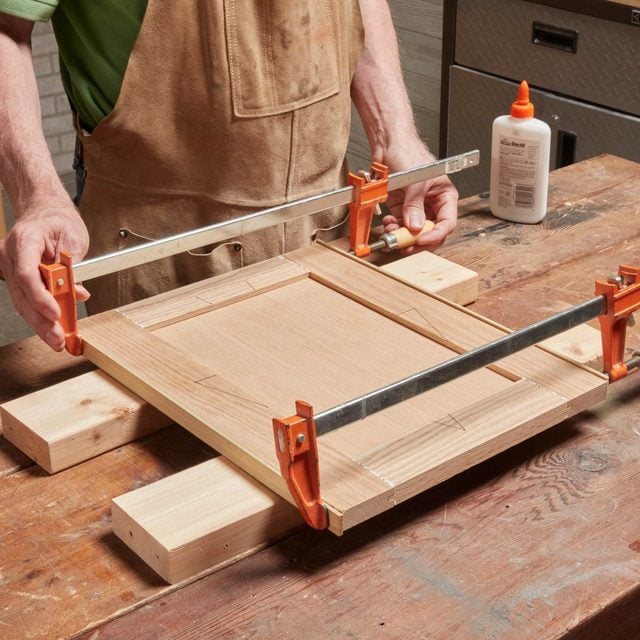
- Clamp the door as shown in the photo below.
- Lay a straightedge across it to make sure it’s flat.
- Pro tip: If one of the rails is tilted, correct this by raising or lowering the clamps.
- Wipe up the excess glue with a putty knife and a damp rag.
- Wait at least an hour before removing the clamps.
- To even up the ends of the door, cut 1/16 inch from each end using the table saw.
Step 16
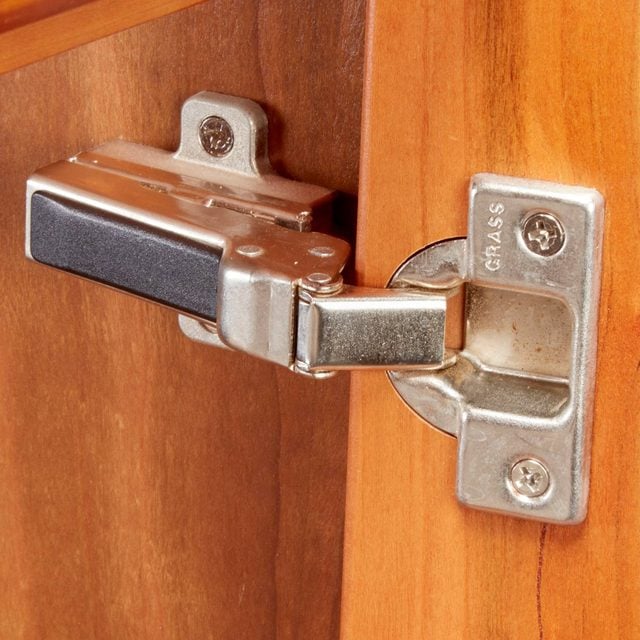
Finish it Off with Hinges
- Euro, or “cup” hinges, are the easiest, most forgiving means of hanging your new cabinet doors.
- For help sizing your doors to fit your cabinets, along with tips for selecting and installing Euro hinges read our euro hinge guide.
Project PDFs:
Click the links below to download the construction drawings for this building shaker cabinet doors project.