
Even the most experienced cabinet installers might learn a thing or two from this list of kitchen cabinet installation tips and tricks.
11 Kitchen Cabinet Installation Tips From a Professional
1
/
12
We asked Jerome Worm, an experienced installer, to show us what it takes to install basic box cabinets successfully. His tips can save you time and help you avoid costly mistakes on your next installation.
2
/
12
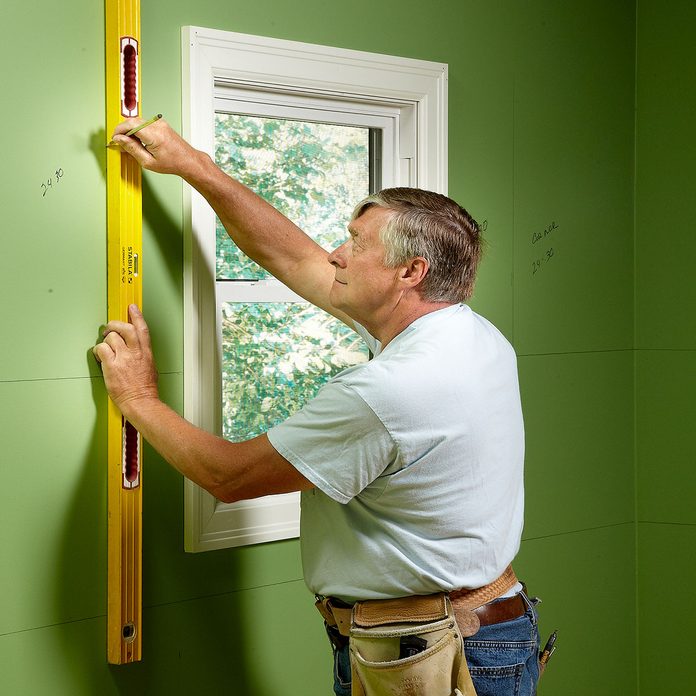
Mark Up the Wall First
Every good cabinet installation starts with a good layout. Jerome calls it “blueprinting” the wall. Here’s how to do it:
- Measure from the highest point in the floor and draw a level line marking the top of the base cabinets.
- Measure up 19-1/2 in. from that line and draw another line for the bottom of the upper cabinets.
- Label the location of the cabinets and appliances on the wall.
- Draw a vertical line to line up the edge of the first cabinet to be installed.
- Finally, mark the stud locations.
3
/
12
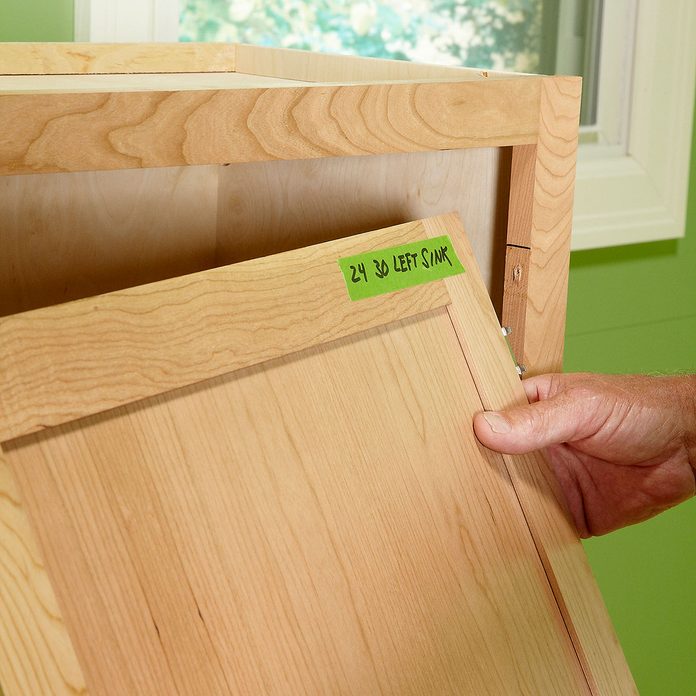
Remove the Doors and Drawers
Removing shelves, doors and drawers makes installation easier and prevents damage. Mark the location of the doors on painter’s tape, and make a pencil mark at the top of the hinges so you have a good starting point when you reinstall them. Remember that many upper box cabinets have no designated top or bottom. They can be hung in either direction depending on which way you want the doors to swing, so decide that before you mark the hinges.
4
/
12
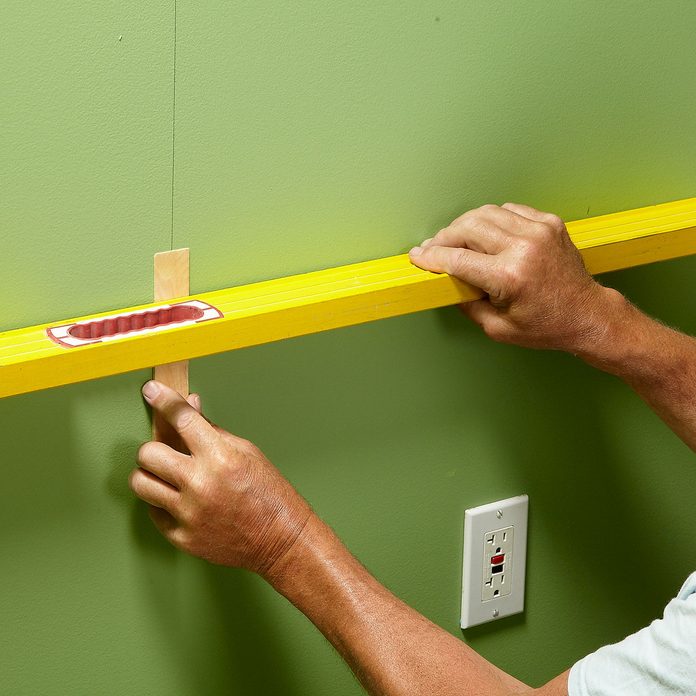
Shim Extreme Bows
Most of the time you can shim the cabinets as you go, but if there’s an extreme bow in the wall (more than 3/8-in.), shim it out before you hang the cabinet. If you don’t, you may accidentally pull the back off the cabinet while fastening it into place. Hold a level across the wall, and slide a shim up from the bottom (go in from the top when you’re doing the top side) until it’s snug. Then pin or tape it into place.
5
/
12
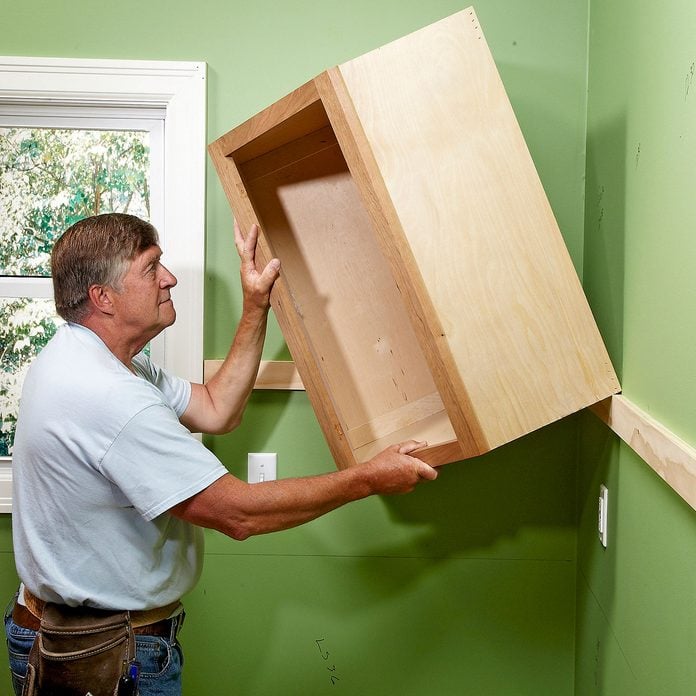
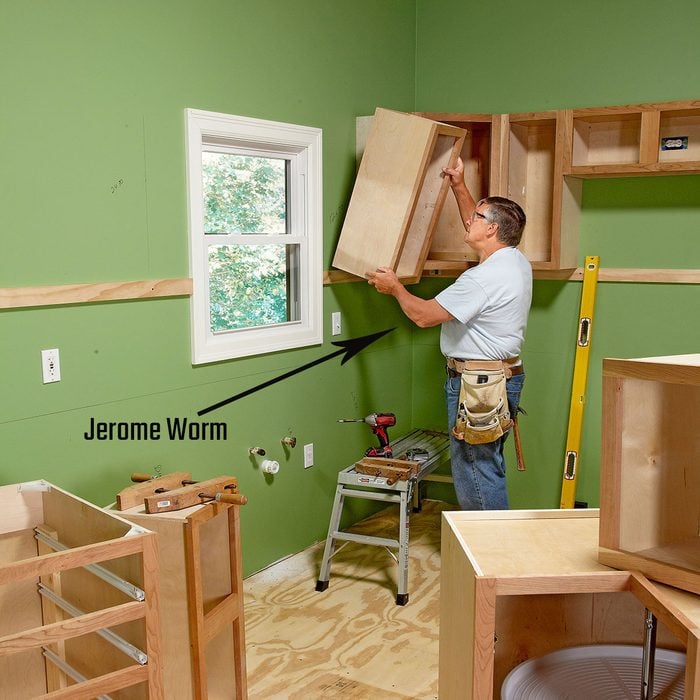
Start with the Upper Cabinets
It’s easier to hang the uppers when you’re not leaning way over the base cabinets. Rest the uppers on a ledger board—it’ll ensure a nice, straight alignment and eliminate the frustration of holding the cabinets in place while screwing them to the wall.
6
/
12
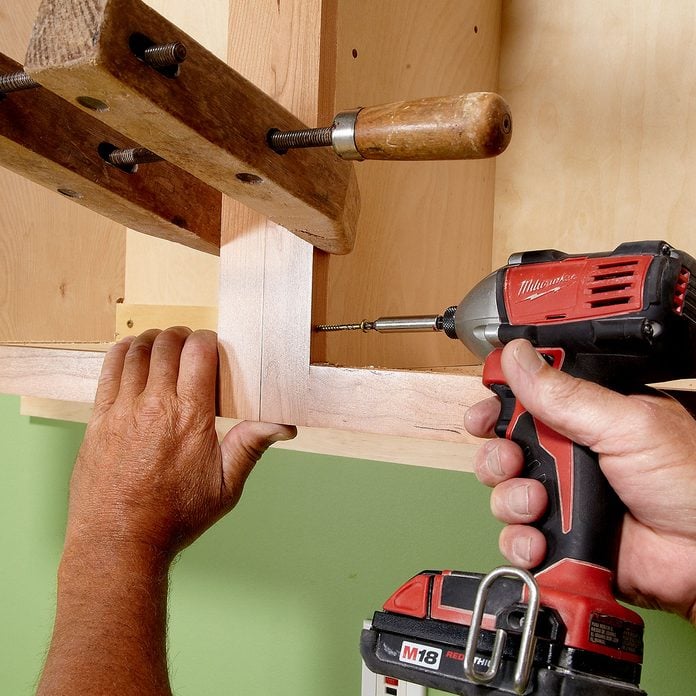
Clamp, Drill, Fasten
When connecting two cabinets to each other, line up the face frames and clamp them together. Both cabinets should be fastened to the wall at this point, but you may have to loosen one cabinet or the other to get the frames to line up perfectly. Jerome prefers hand-screw clamps because they don’t flex, and less flex means a tighter grip. Predrill a 1/8-in. hole before screwing them together with a 2-1/2-in. screw. Choose the less noticeable cabinet of the two for drilling and placing the screw head.
7
/
12
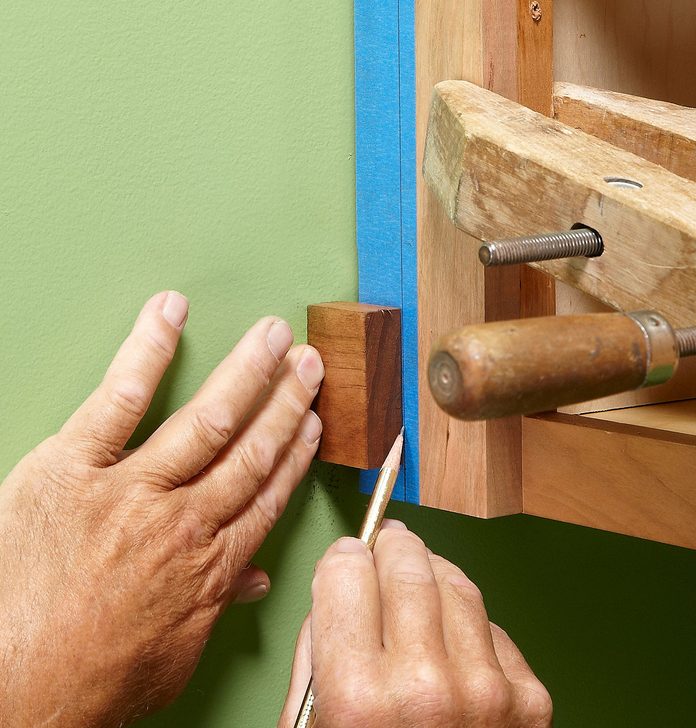
Use a Block of Wood for Scribing
Find the largest distance between the outside of the cabinet and the wall. Take that measurement and make a pencil mark on your filler strip (measure over right to left in this case). Clamp the filler onto the cabinet flush with the inside of the vertical rail. Measure over from the wall to your pencil mark, and make a scribing block that size. Use your block to trace a pencil line down the filler strip. Masking tape on the filler strip helps the pencil line show up better and protects the finish from the saw table.
8
/
12
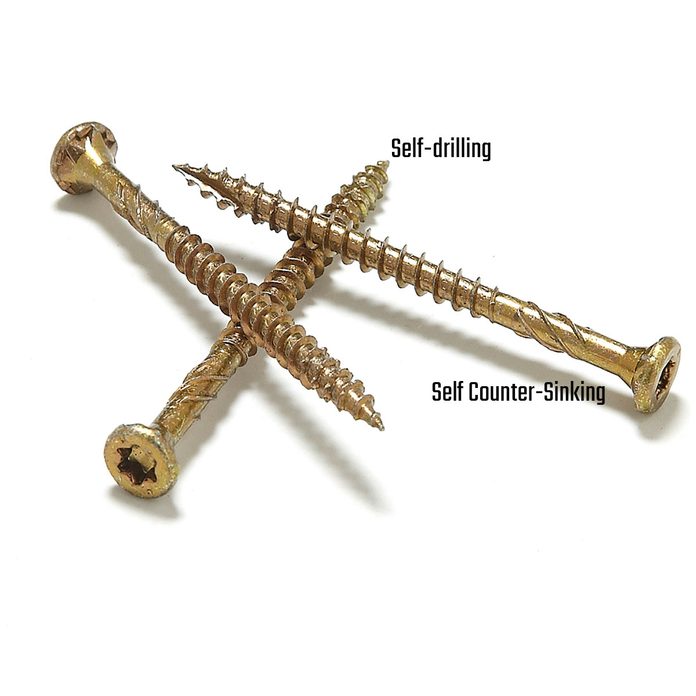
Use Good Screws
Jerome prefers GRK’s R4 self-countersinking screw, which he calls “the Cadillac of screws.” You’ll pay accordingly, but why scrimp on screws when you’re spending thousands of dollars on cabinets? Whatever you do, don’t use drywall screws—they’ll just snap off and you’ll end up with an extra hole. Learn more about the R4 screws at grkfasteners.com.
9
/
12

Fasten the Back, Then Shim
Line up the base cabinets with the level line on the wall. Fasten the back of the cabinets to that line. Once the backs of the cabinets are level, use shims to level the sides. Take your time on this step—nobody likes to have eggs roll off a slanted countertop.
10
/
12
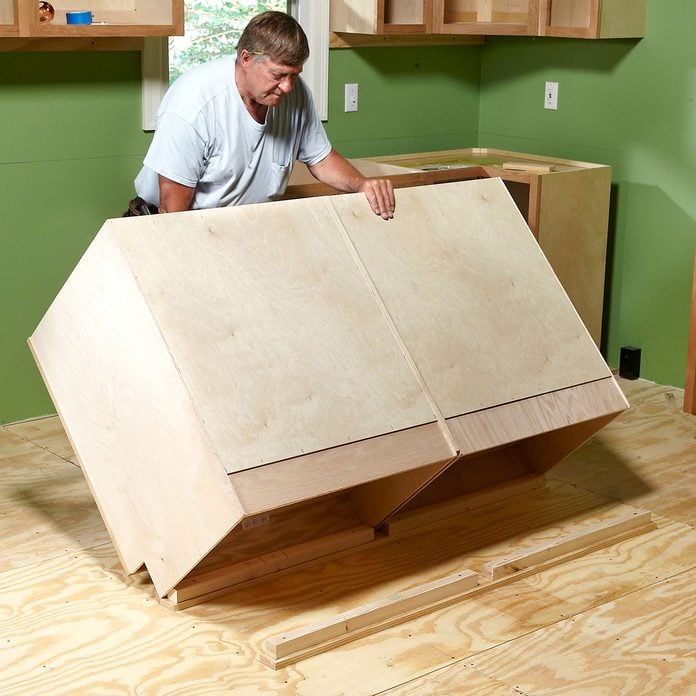
Use 2x2s to Secure Cabinets to the Floor
Cabinets that make up islands and peninsulas need to be secured to the floor. Join the island cabinets and set them in place. Trace an outline of the cabinets on the floor. Screw 2x2s to the floor 1/2-in. on the inside of the line to account for the thickness of the cabinets. Anchor the island cabinets to the 2x2s with screws. If needed, place flooring blocks under the 2x2s.
11
/
12
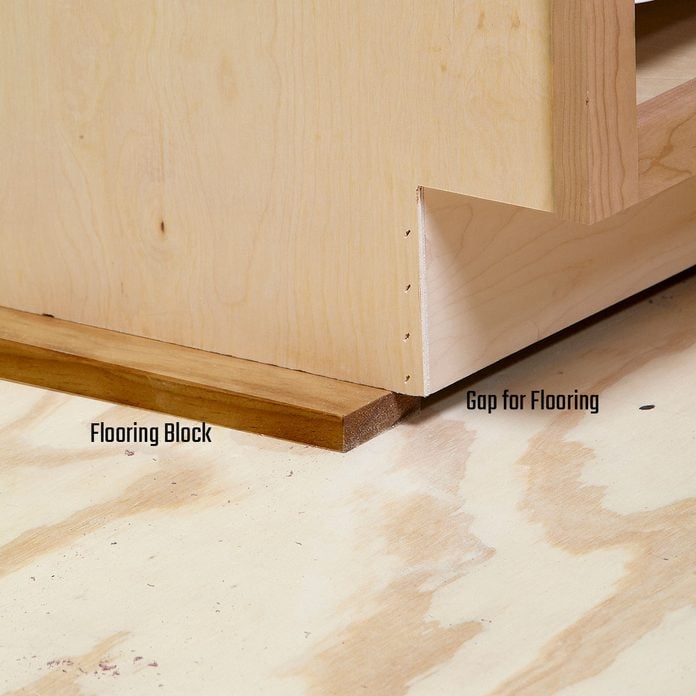
Raise the Cabinets For Flooring
If the kitchen flooring is going to be hardwood or tile, and you are installing it after the cabinets, you’ll have to raise the cabinets off the floor or the dishwasher won’t fit under the countertop. Use blocks to represent the finished floor height, and add those distances to the guideline for the base cabinet tops. Hold the blocks back a bit from the front so the flooring can tuck underneath. Your flooring guys will love you for this.
12
/
12
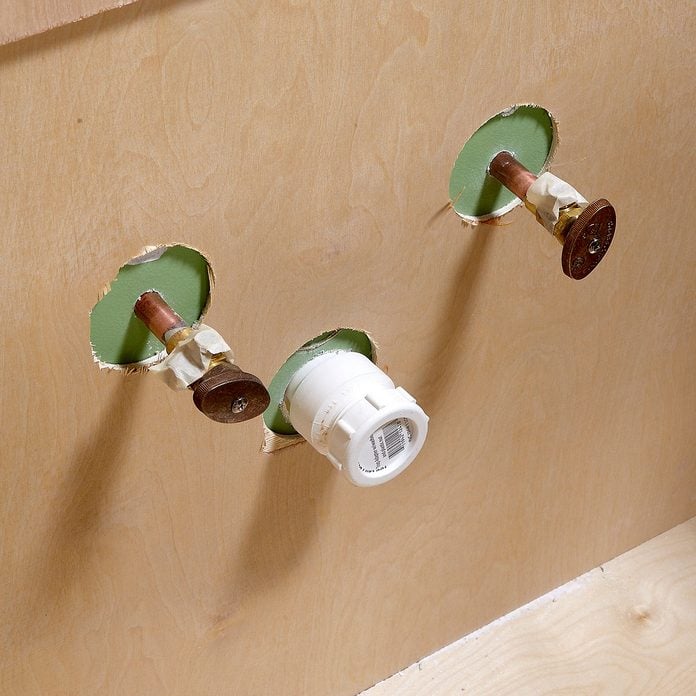
Cut Oversized Holes
Cutting exact size holes for water lines and drainpipes might impress your customer, but such precision is likely to result in unnecessary headaches for you. Cutting larger holes makes it easier to slide the cabinet into place and provides wiggle room for minor adjustments. No one’s going to notice the oversize holes once the cabinet is filled with dish soaps, scrubbers and recycling bins.