Increase your home's storage space by utilizing every possible nook and cranny, including the backs of cabinet and closet doors. With inexpensive materials and basic tools, you can easily and quickly make these clever storage boosters.
18 Inspiring Inside-Cabinet Door Storage Ideas
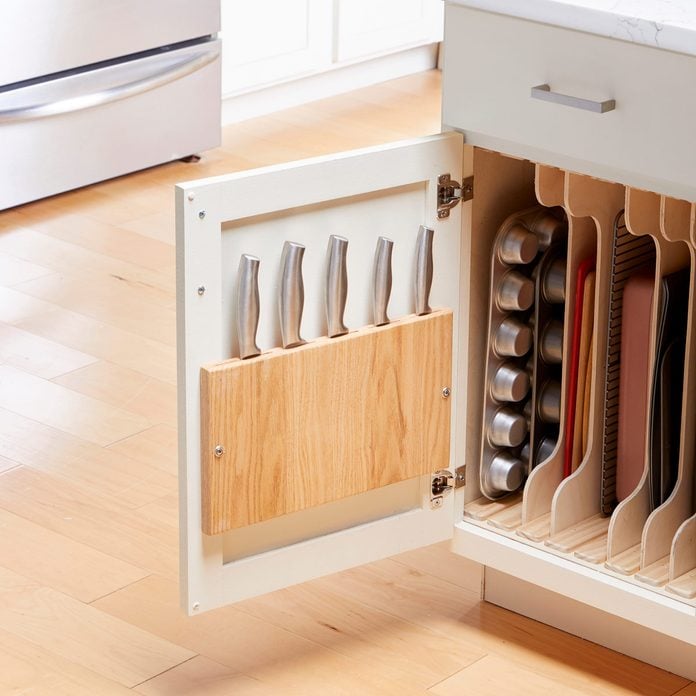
Cabinet Door Knife Rack
You can size this knife rack to suit any cabinet door and any number of knives for kitchen cabinet storage. To build this cutting board turned knife rack, you just need a table saw and wood scraps.
Run the scraps across the saw on edge to cut kerfs. Adjust the blade height to suit the width of the knife blades. You have to remove the saw’s blade guard for these cuts, so be extra careful. Also cut a thin strip to act as an end cap. Glue and clamp the kerfed scraps together and sand the knife rack until the joints are flush. To mount it, use two 1-1/4-in. screws and finish washers.
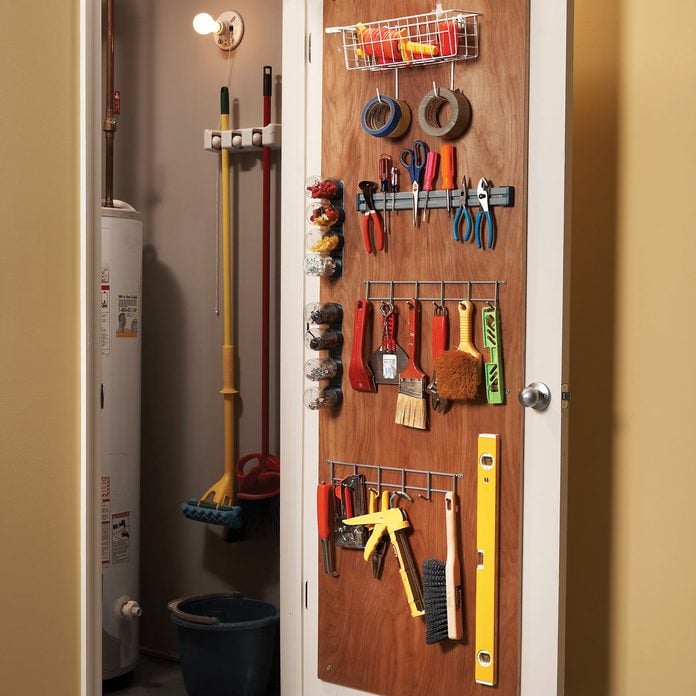
Behind-the-Door Organizer
The back of a door that opens into a utility room or closet makes a handy hanging space. The trouble is, most doors don’t offer a good mounting surface for hardware. The solution is to screw a piece of 3/4-in. plywood to the back of the door. Add construction adhesive for hollow-core doors.
Cut the plywood three or four inches shy of the door edges to avoid conflicts with the doorknob or hinges. Now you can mount as many hooks, magnets and other storage gizmos as you like.
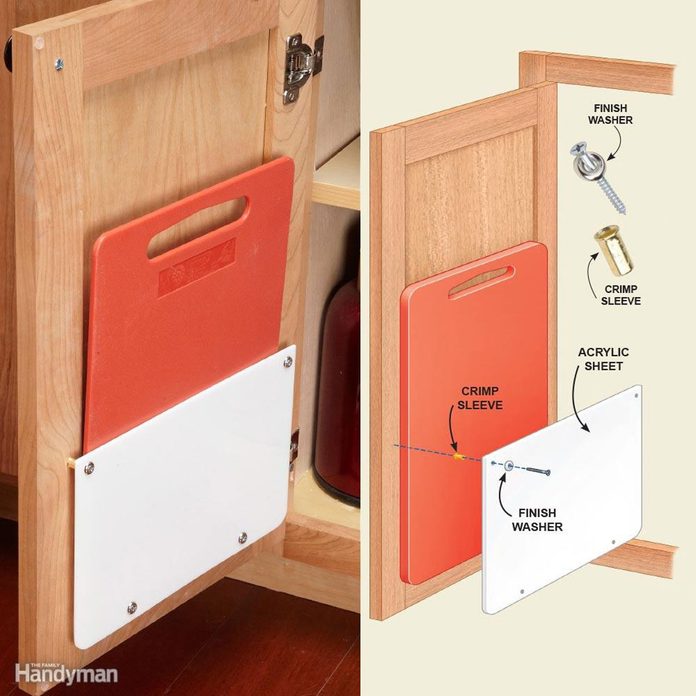
Cutting Board Storage
To store cutting boards, mount a rack on a cabinet door. Use a sheet of 1/4-in.-thick acrylic plastic; plywood would also work. You can cut acrylic with a table saw or circular saw as long as you cut slowly. Knock off the sharp edges with sandpaper. Round the lower corners with a belt sander. For spacers, use No. 14-8 crimp sleeves, or any type of tube or even blocks of wood would work.
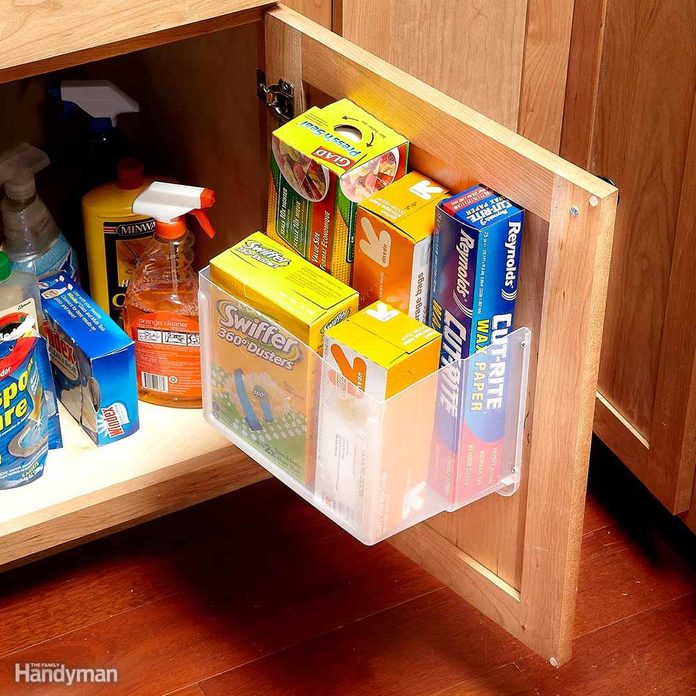
Under-Sink Storage Bins
What’s hiding under your kitchen sink? If the space under your sink is anything like ours, it’s an overcrowded jumble of cleaning supplies, sponges and plastic bags. Here’s a great way to store these items right on the door of the sink cabinet.
Cut a plastic storage tub in half with a utility knife and screw it to the inside of the cabinet door through the plastic lip at the top of the tub. Just make sure you position it so you can shut the cabinet door when all your bags and other supplies are in the bin.
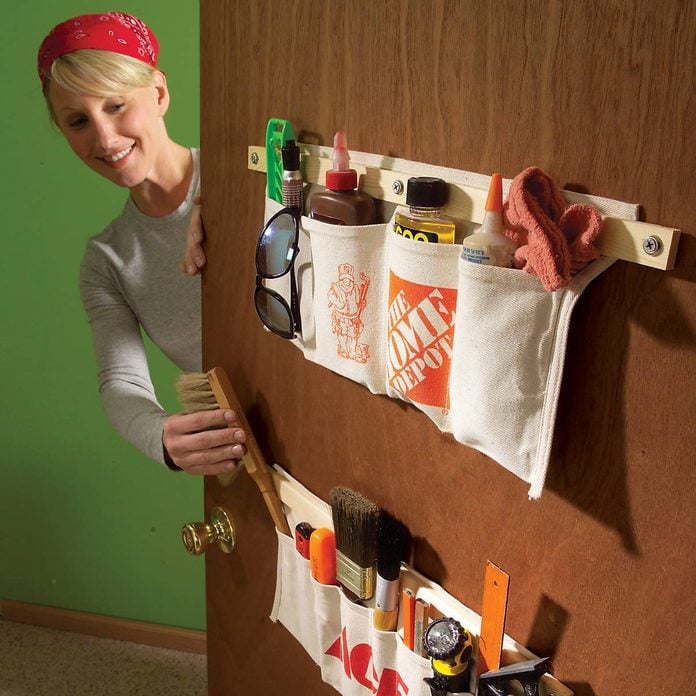
Tool-Apron Storage
Tool aprons can be modified to store nearly any household item. Just sew a variety of pocket widths in the aprons, then mount the aprons by screwing a wood strip through the top of each and into a door. For hollow-core doors, use hollow anchor fasteners to hold the screws firmly to the door.
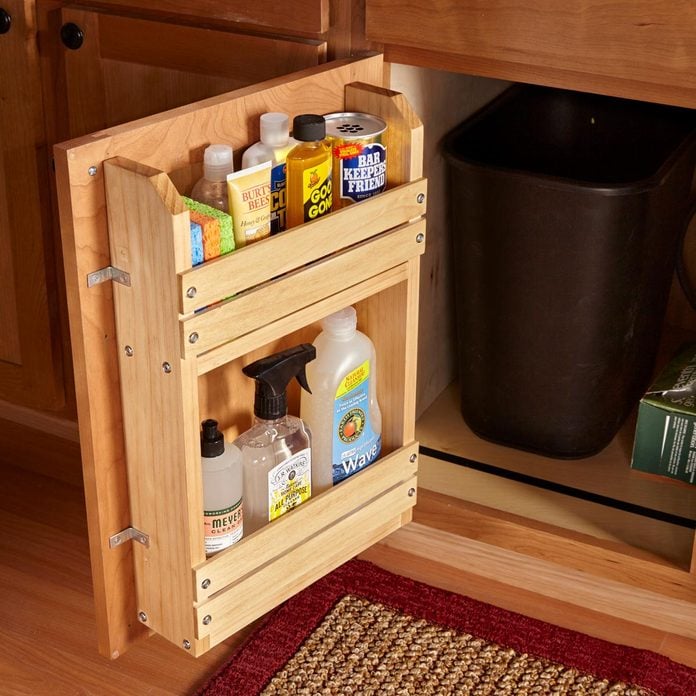
Cabinet Door Storage Rack

Closet Glove Rack
If you don’t have radiators, finding a good spot to dry wet hats and mittens can be tough. Tossing them into a plastic bin gets them out of the way, but they never dry and it’s no fun putting on damp mittens in the morning. This simple back-of-the-door glove and cap rack allows wet things to dry and keeps easily misplaced items organized.
Just string clothespins on aluminum wire (it won’t rust) and stretch it between screw eyes on the back of a closet door. This also works great out in the garage for drying garden and work gloves.
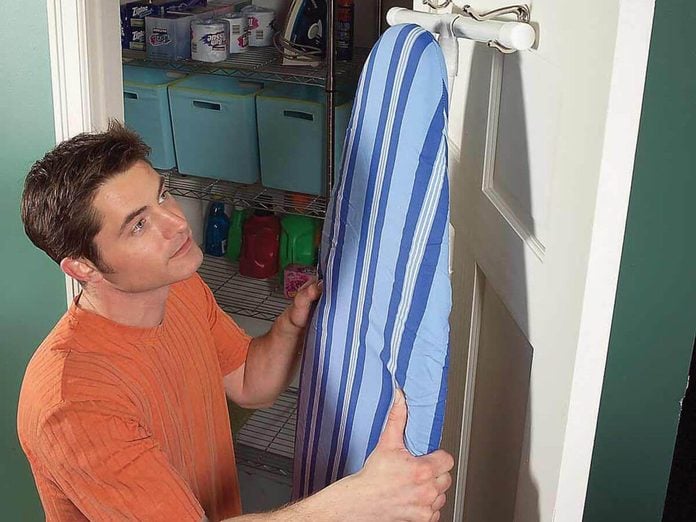
Ironing Board Hanger
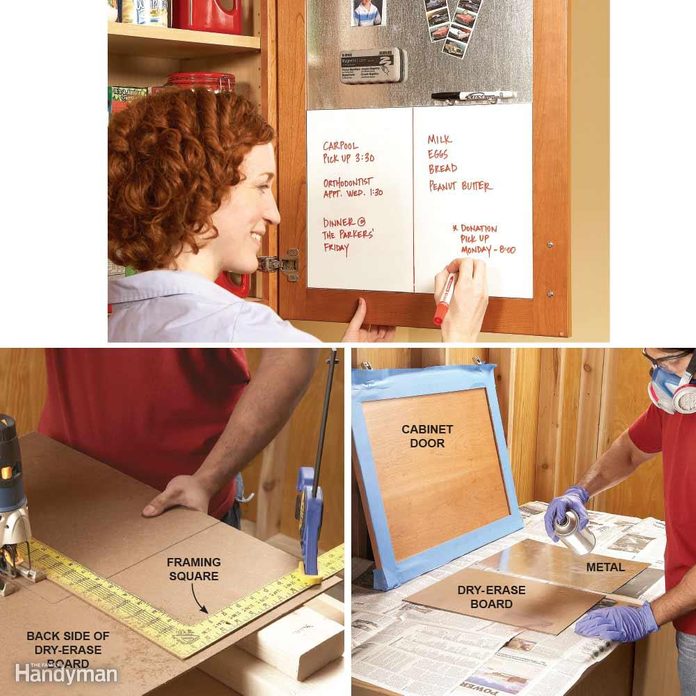
Cabinet Door Message Board
A sheet of metal and a dry-erase board can turn any cabinet door into a convenient message center. You’ll find 2 x 2-ft. lengths of plastic-coated hardboard (often called “whiteboard”) and sheet metal at a hardware store or home center. Larger hardware stores will cut the sheet metal to your specifications. Be sure to get steel instead of aluminum so magnets will stick.
If you cut the metal yourself, wear gloves to protect your hands and use tin snips carefully. Use a metal file to smooth any ragged edges (speaking of, this is why you should chalk your metal files). If you don’t have a table saw to cut the whiteboard, flip it over, mark your measurements and use a jigsaw to cut it from the back to prevent chipping or splintering. To get a straight cut, use a framing square as a guide (photo, left).
To mount the metal sheet and whiteboard to the inside of the door, take the door off its hinges, lay it flat and carefully mask off the area where you want to spray the adhesive. Follow the directions on the can to apply the adhesive to the door, metal and whiteboard (photo, right). Mount the pieces, press firmly and let dry.
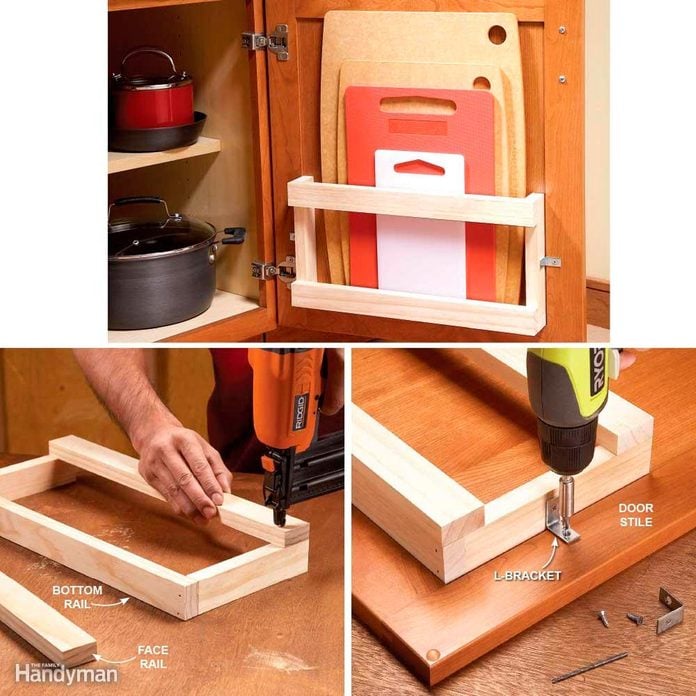
Cutting Board Rack
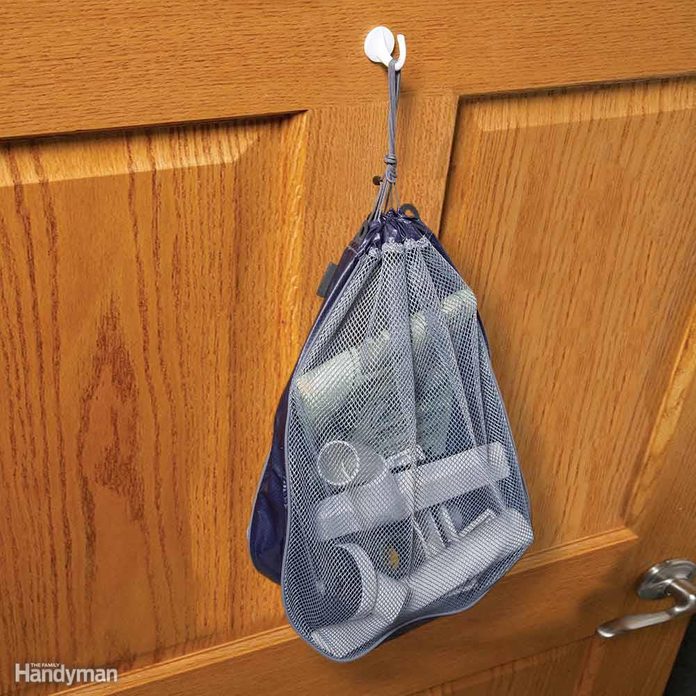
Vacuum Gear Storage
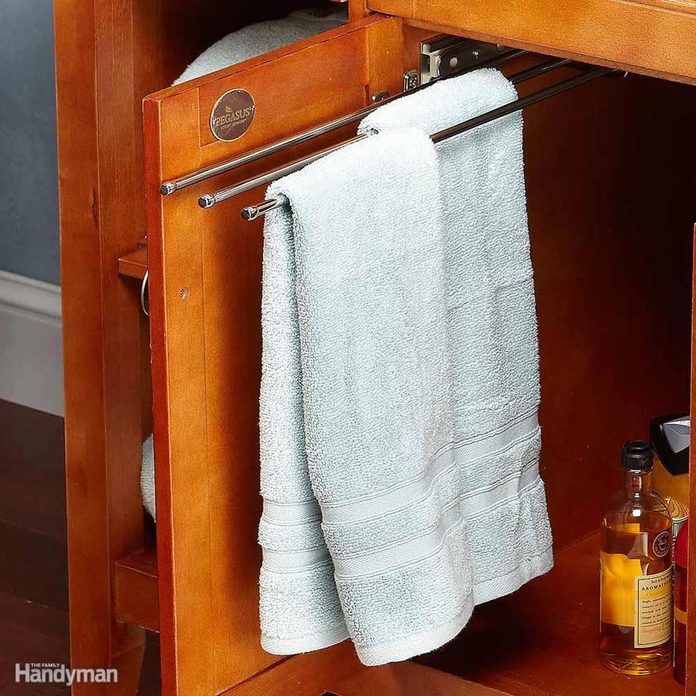
Pullout Towel Rack
Pullout towel racks are typically meant for kitchens, but they’re also perfect for cramped bathrooms. They keep damp hand towels and washcloths off the counter so they can dry out of the way.
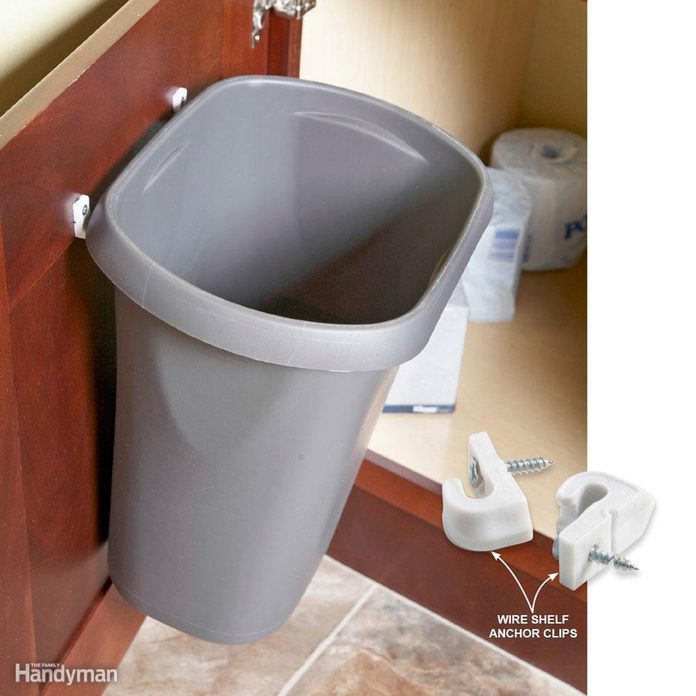
Swinging Trash
Here’s a space-saving solution to the bathroom waste-basket problem. Screw wire shelf anchor clips to the inside of the door and hook the lip of a small wastebasket right on the hooks. It’s easy to use, hides unattractive trash and frees up precious bathroom floor space.
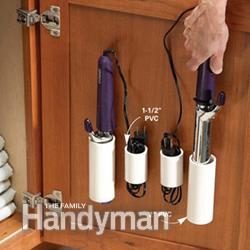
PVC Curling Iron Holsters

Plastic Bag Dispenser

Charger and Cord Pockets
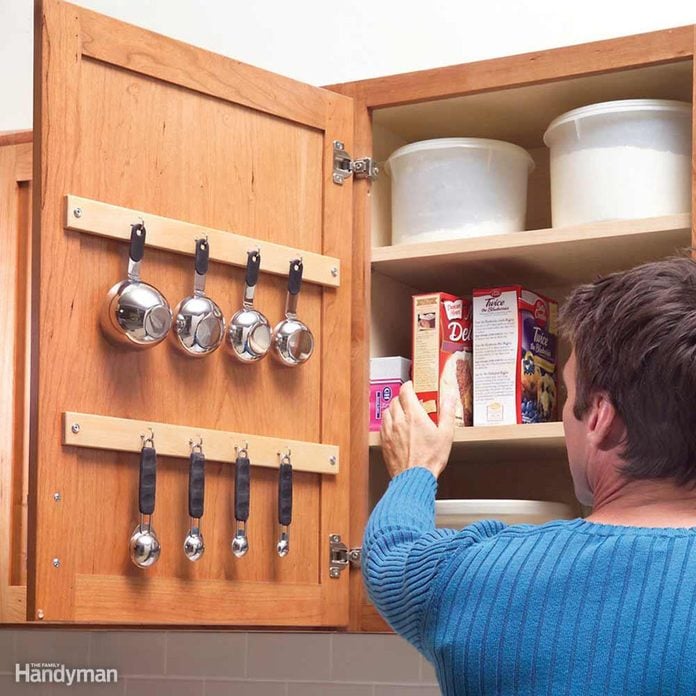
Measuring Cup Hang-Up
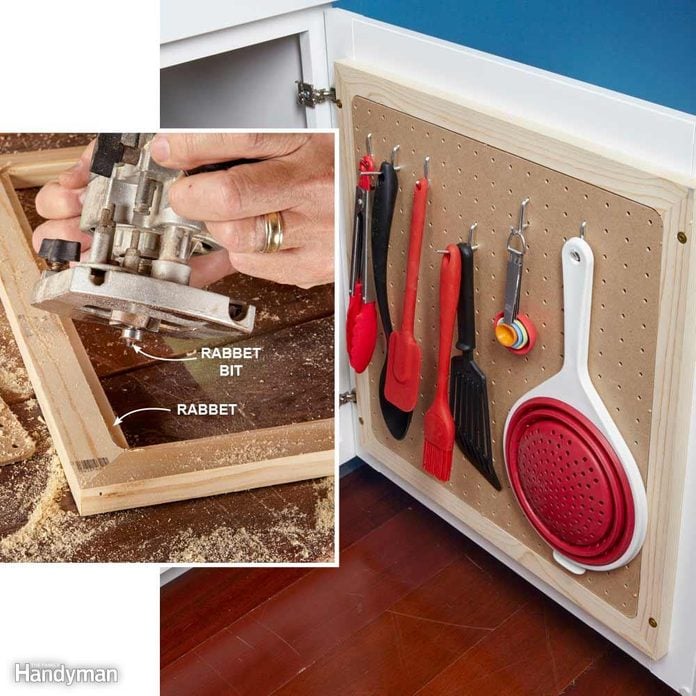
Storage Behind Closed Doors
Pegboard is great for organizing kitchens, laundry rooms and bathroom cabinets. Rout a groove in a 1×2 frame using a rabbet bit, attach the pegboard with glue and brads, then mount it to the door. The frame helps support the edges of the pegboard and creates a 1/2-in. space behind the board so pegs can be inserted. Bonus: The right pegboard accessories can do wonders to organize your space even more.


