


This sliding station keeps your tools ready to go
A full day
Beginner
$250
Introduction
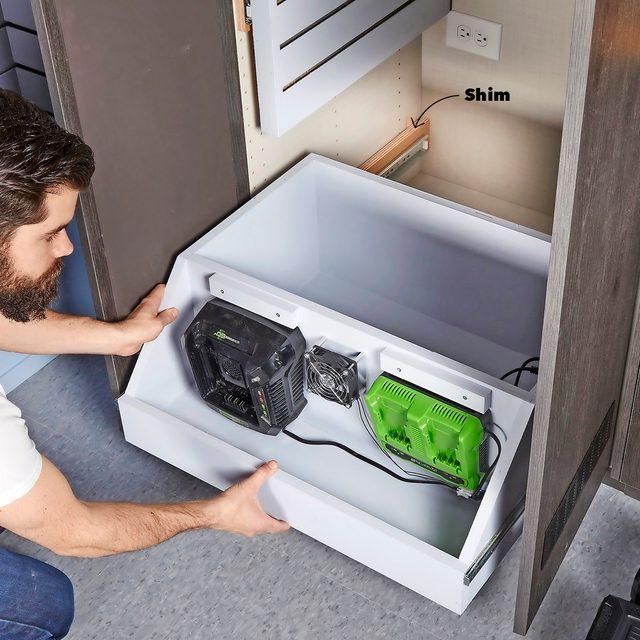
How many times have you picked up a battery-powered tool, only to find that it was put away with a dead battery? I came up with this sliding panel and drawer charging station built into a tall garage cabinet that lets me store everything in one place. With tools organized and easy to access, a bin for charged batteries and a charger at the ready, you won’t be stuck waiting for a charge.
Tools Required
- 18-gauge nailer
- Basic carpentry tools
- Drill
- Jigsaw
- Miter saw
- Table saw or Circular saw
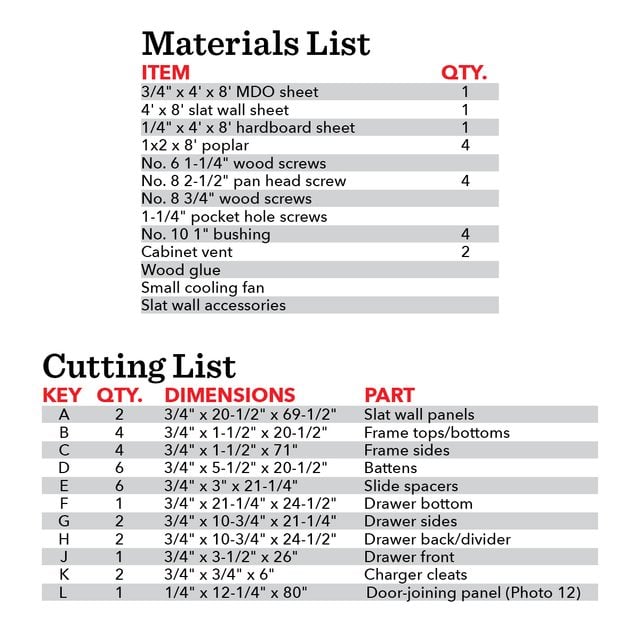
Materials Required
- #10 1" bushing
- #6 1-1/4" wood screws
- #8 2-1/2" pan head screw
- #8 3/4" wood screws
- 1-1/4" pocket hole screws
- 1" x 2" x 8' poplar
- 1/4" x 4' x 8' hardboard sheet
- 3/4" x 4' x 8' MDO sheet
- 4' x 8' slat wall sheet
- Cabinet vent
- Slat wall accessories
- Small cooling fan
- Wood glue
Project step-by-step (14)
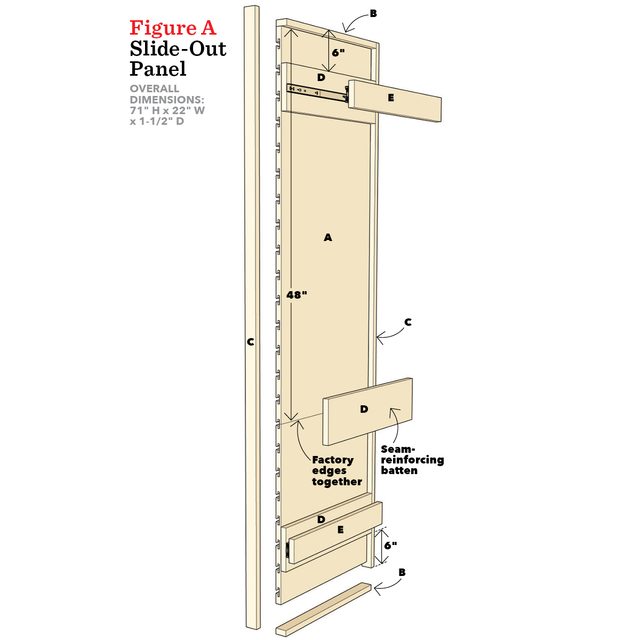
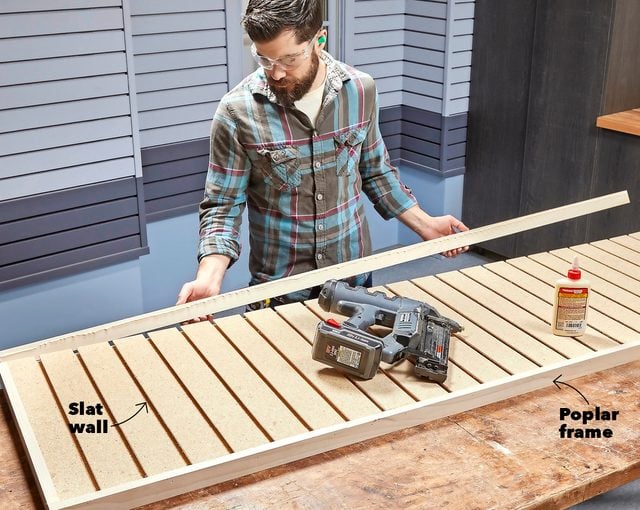
Step 1
Frame Around Slat Wall Panels
Cut the slat wall to size and attach a frame around it. The poplar frame stiffens the panel and hides the raw edges. I glued and nailed the frame parts to the edge of the panel, flush with the face, starting with the top and bottom. I cut the sides to fit and fastened them the same way.
Pro tip: The slats in the panels I bought ran the long way, so I had to put two pieces together to make the panels tall enough. The frame held the edges together, and I added an extra batten on the back to support the seam.
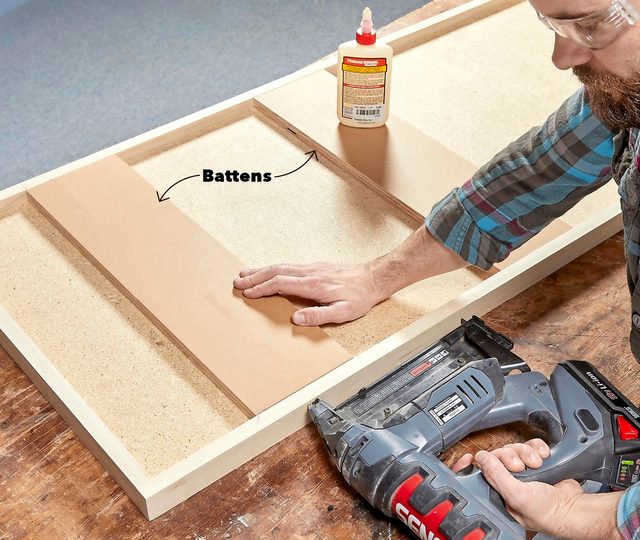
Step 2
Batten the Back
Glue and nail battens about six inches from the top and bottom of the panels. Both the frame and the battens stiffen the panels; the battens also give you something to screw drawer slides to.
Step 3
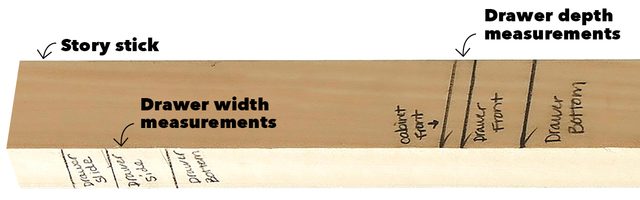
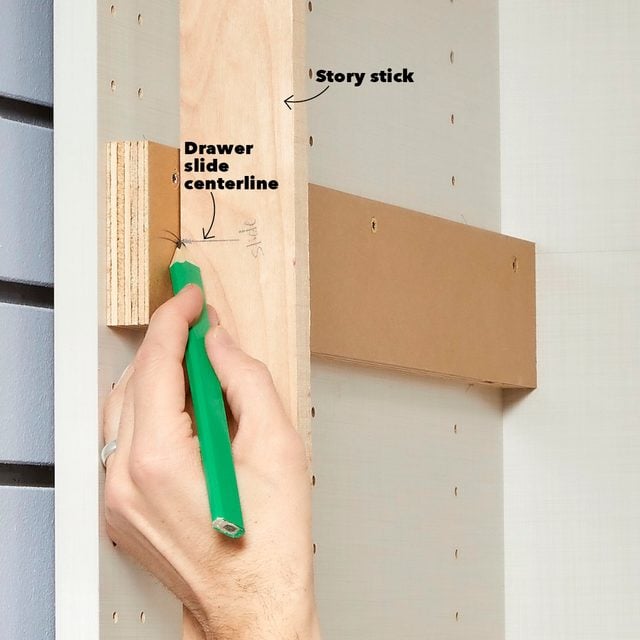
Make a Story Stick to Place the Slides
The locations of the spacers and slides are arbitrary, but they do need to line up. For this I make a story stick; it’s a custom ruler marked with all my important measurements. I marked one side of the stick for spacers, a second side for slide locations, and the other sides for the drawer width and depth.
Step 4
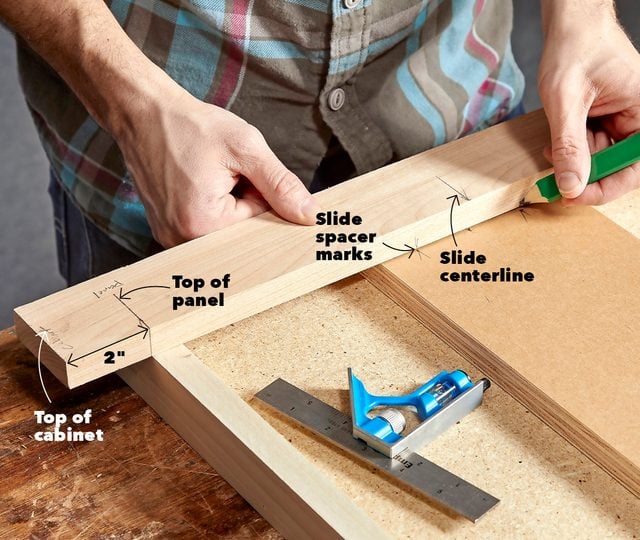
Mark your Story Stick
I made a mark two inches from the top of the story stick and lined it up with the top of my panel. I made a mark for the centerline of the slides on the spacers and the story stick, then rotated the stick and marked the locations for the cabinet spacers.
Step 5
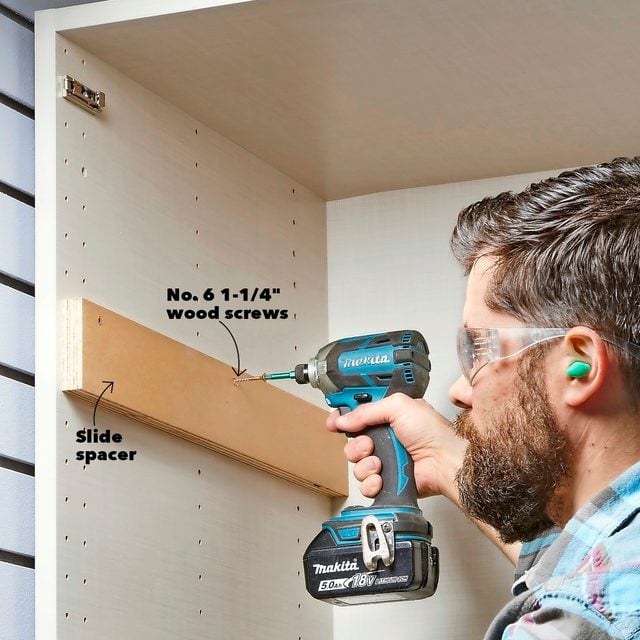
Shim Slides with Spacers
I used the story stick to locate the three-inch-wide slide spacers in the cabinet. These spacers allow the slides to clear the door hinges.
Step 6
Transfer Slide Marks to Spacers
To mark the slide locations on the spacers, hold the story stick to the top of the cabinet and transfer the drawer slide centerline marks from the story stick to the spacers. Mark both ends of the spacers, then connect the marks to make the slide centerline.
Step 7
Attach the Drawer Slides
Place the slides so their screw holes fall right on the slide centerline and the fronts of the slides are flush with the front of the panel and drawer. Drill a pilot hole and drive in the screw right on the centerline. Use this same technique for attaching each part of the slide: the cabinet member and the drawer member.

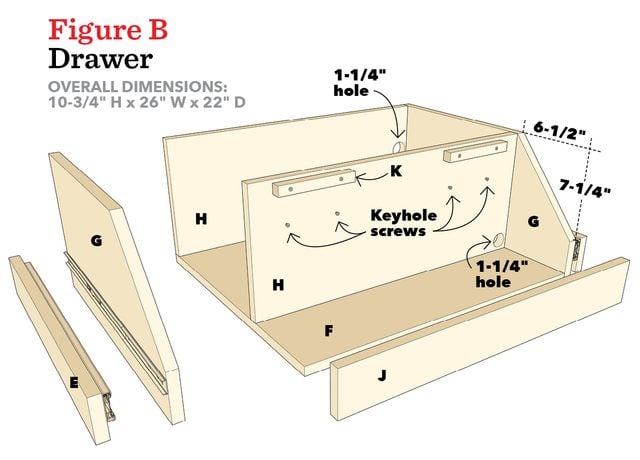
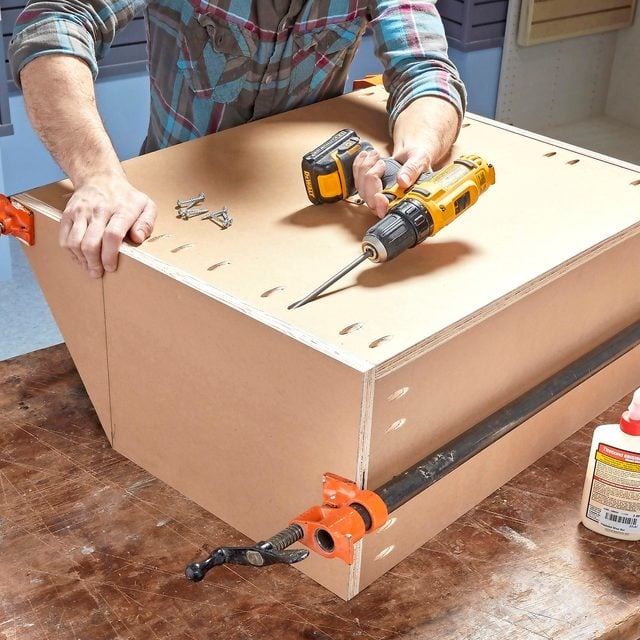
Step 8
Assemble the Drawer
Drill pocket holes in the drawer bottom and back. Glue and clamp the parts together. Then flip the drawer upside-down and drive the pocket screws. The clamps keep the drawer parts from shifting while you drive the screws.
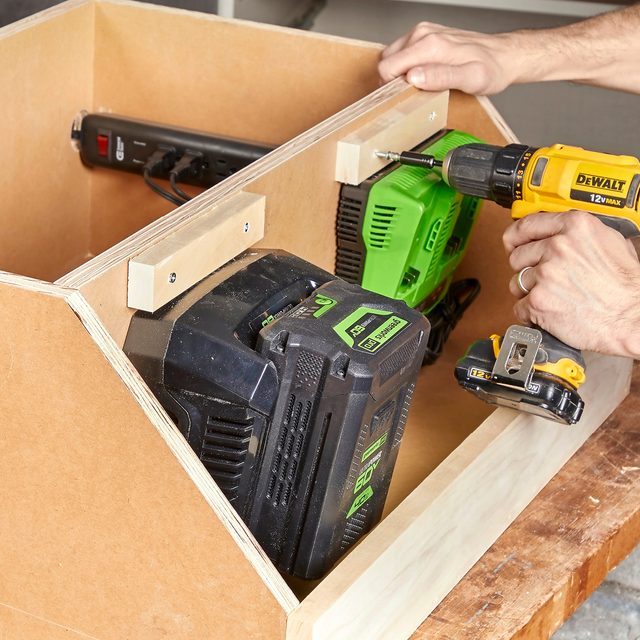
Step 9
Secure the Chargers
Most chargers have keyhole slots for mounting. That can be a problem when you’re pulling a battery off the charger, as the movement can lift the charger right off its keyhole screws. To hold them in place, I screwed cleats above the chargers. The cleats are removable so you can take your charger with you if necessary.
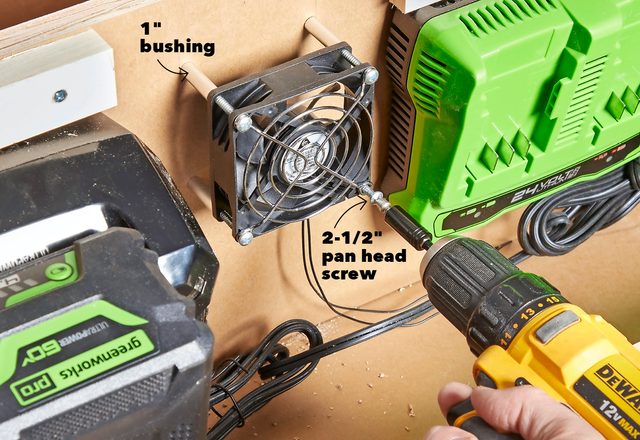
Step 10
Cool Chargers with a Fan
To help prevent heat buildup inside the drawer, I mounted a fan between the chargers. I slid one-inch bushings over 2-1/2-in. screws to keep the fan away from the divider for better air circulation.
Step 11
Install the Panels and Drawer
I removed the chargers and fan, primed and painted the panels and drawer, then slid the panels and drawers into place. That’s when I realized I’d built the drawer too narrow and the slides wouldn’t catch. To fix it, I backed out the screws in the spacer, slipped in a couple shims behind it and then tightened it back up.
Step 12
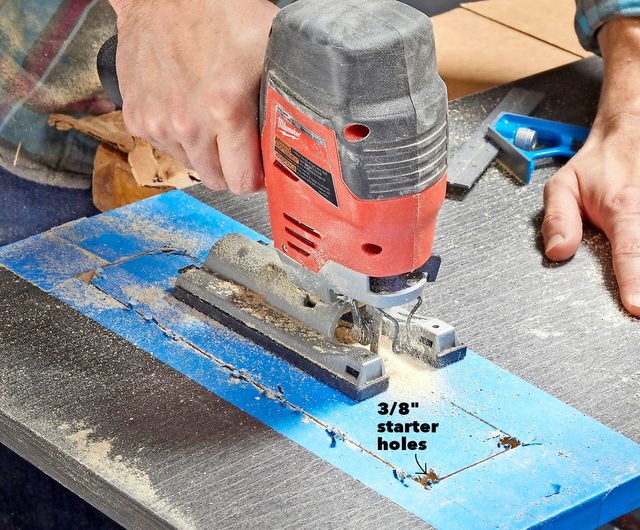
Vent the Cabinet
I added vents to the door bottoms so warm air could escape. I wrapped the area with painter’s tape to minimize chipping the laminate as I cut, then marked the opening for the vent. I drilled 3/8-in. starter holes in the corners and cut the opening with a jigsaw.
Step 13
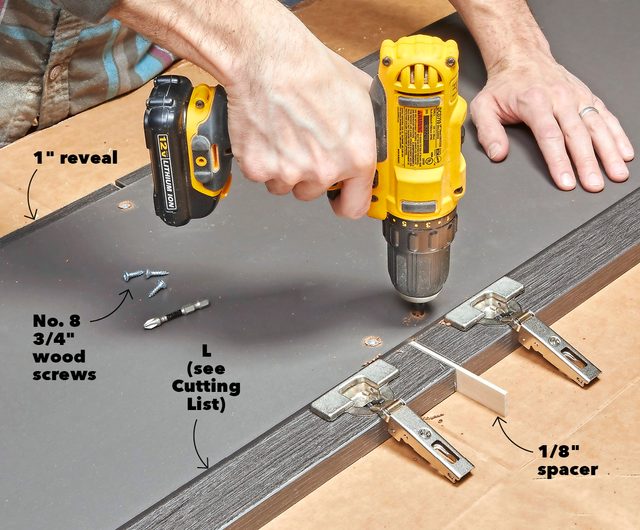
Join the Doors
Our cabinet has four doors: a pair for the top portion and a pair for the bottom. I didn’t want to open two doors on each side to access the panel or drawer. So I joined the top and bottom door pairs using a piece of painted 1/4-in. hardboard cut to fit inside the hinges and with a one-inch reveal around the other edges.
With the door pairs on a flat table and a 1/8-in. spacer between them, I screwed the hardboard to the doors. Leave the shims between the doors until the doors are installed.
Step 14
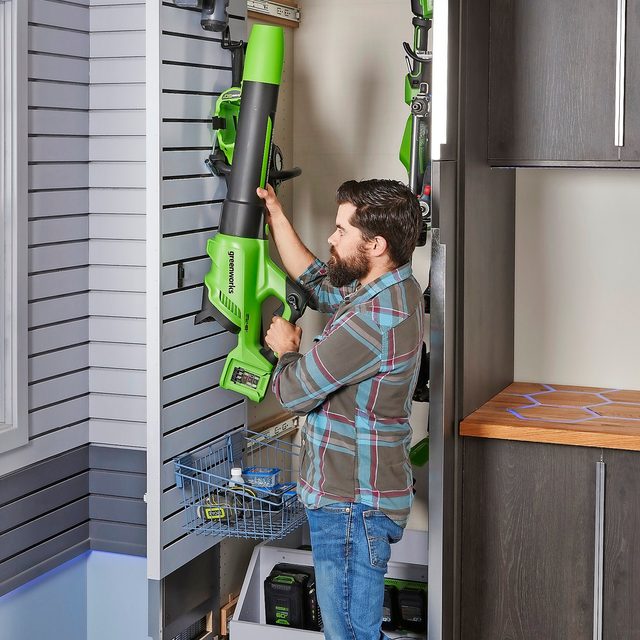
Arrange Accessories
Slat wall accessories include various hook types and sizes as well as baskets and shelves. I was able to hang a lot of lawn and yard tools on the panels. The best part of this slat wall system for storing battery-powered tools is how easy it is to rearrange them as needed.
Originally Published: June 01, 2021