
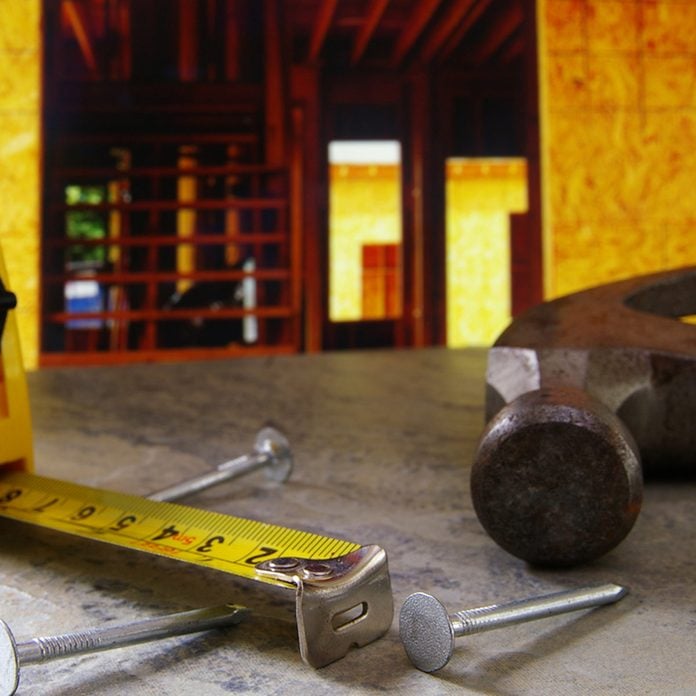
25 Handy Measuring Hacks All DIYers Should Know
Updated: Jul. 08, 2024
Taking accurate measurements is essential to any DIY project. We've gathered our favorite tips and tricks to take your measuring skill to the next level.
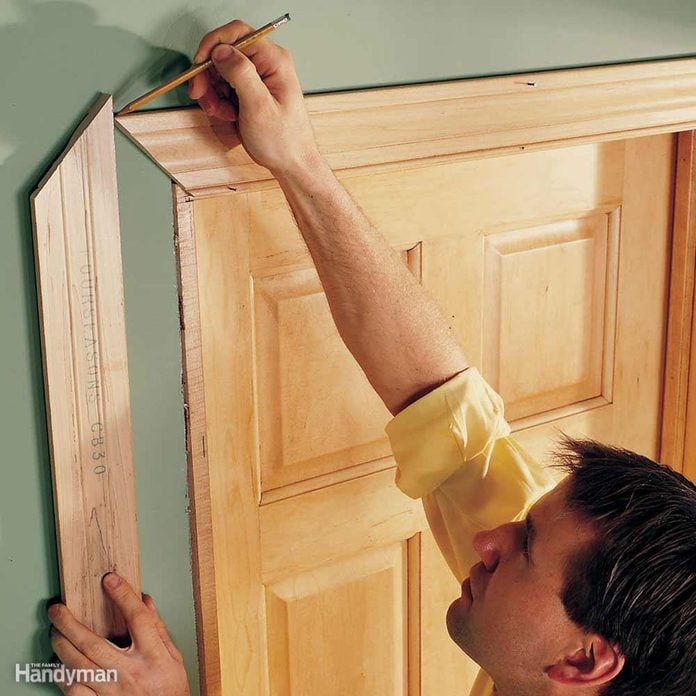
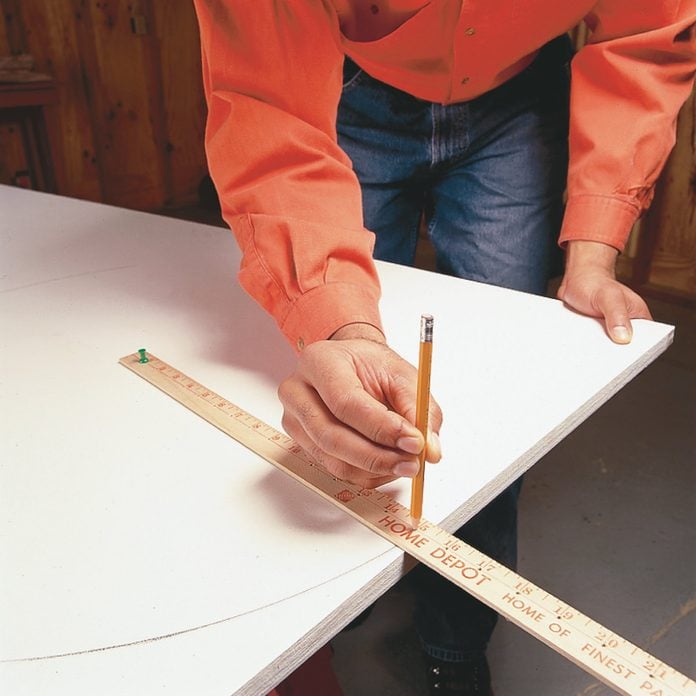
Measure to Mark
Using a tape measure on tight spaces often involves bending the measuring tape and doing your best to get a reading. Eliminate tape entirely by dry-fitting, or holding the piece in place and marking where it needs to be cut with a pencil. Make your mark with a “V” rather than a single line because it helps get a more accurate mark — the point of the “V” points to the precise location for the cut. (Don’t miss our favorite measuring and marking tools!).
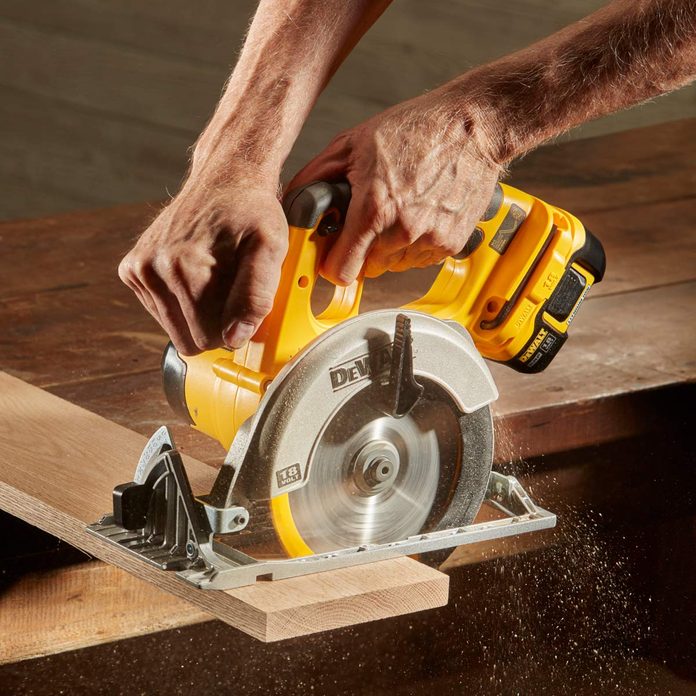
Use Pencil Lead to Mark Kerf Width
A kerf is simply a term that refers to the thickness of a saw blade. You need to know your kerf width to make accurate multiple cuts on any project. If you can’t figure out why your wood cuts are consistently short, it might be that you forgot to factor in the 1/8-in. thickness of your saw blade.
Luckily, eliminating this issue is simple — trim your carpenter’s pencil to the width of your saw blade. When measuring, verify all cuts are to the inside edge of the mark, and you’ll even be able to take multiple pieces from the same board without worrying about over-cuts. Here are a few more of our favorite circular saw tips.
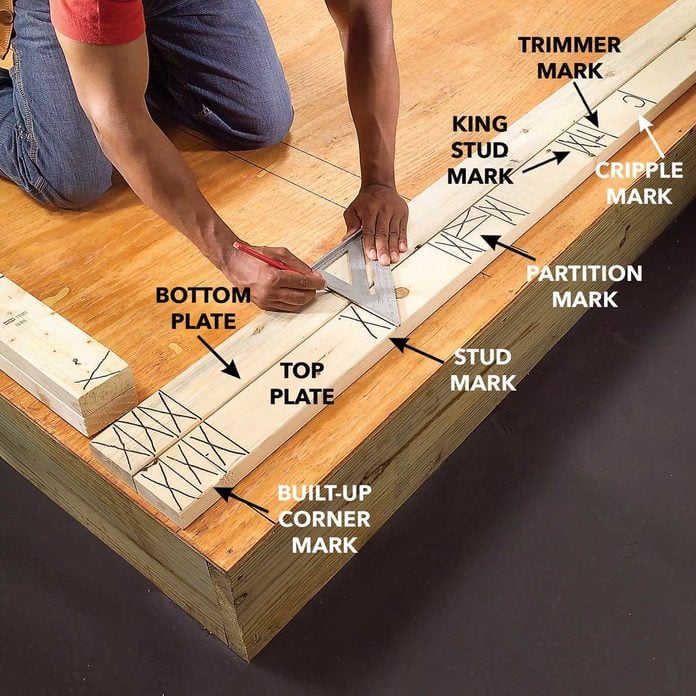
Story Pole
A story pole is like a cheat sheet for your project. It displays the measurements for a given project in actual size rather than numbers, so it’s a one-stop resource that saves time and eliminates headaches during layout and measuring. A story pole is commonly used by carpenters to help mark things like the height of siding, windows and doors. But it can also be used for all sorts of other projects from furniture building to masonry.

Hand Measuring
The best tape measure is the one that’s always within reach when you need it — your hand! Pst, this is Time magazine’s pick for the best digital tape measure of 2022!
Use a tape measure to learn the dimensions of your hands, fingers and arms. For some people, for example, two fingers together is about one inch. Measure the width and length of your hands, and the distance from fingertip to forearm for right and left sides. Then the next time you need a ballpark measurement, simply use your hands to compare lengths.
In the meantime, here’s another handy measuring tip: an in-hand notepad right on your tape measure.
Synchronize Measuring Tapes
One time-saving trick is to keep multiple tape measures in your workspace. Placing one near your table saw and another near the installation area eliminates the annoying back-and-forth when you forget to bring your tape measure along. (Find out how to use a tape measure the right way.)
Although the measuring marks on most tapes are accurate, the hooks can get bent or warped over time. To verify accuracy, pull a line on a known straight edge with both tape measures and compare their marks. Ideally this should also be done at the start of every job. But at the very least, take a few seconds to verify no serious damage has occurred if one of the tapes is dropped or otherwise abused.

String Measure
If you need to measure the outside diameter of a cylinder or sphere, use a flexible measuring tape. If you don’t have one on hand, go for a cheap and simple solution with a length of yarn, twine or string.
Simply wrap one loop around the item being measured, mark it with your finger or a black marker, then lay out the yarn on top of a tape measure or ruler to get the precise measurement. Just be careful to exert the same force on the string when you wrap it around the object and when measuring. (Never lose your tape measure again with this simple tape measure holder!)

Don’t Trust Factory Edges
Here’s a hack that’s been known to pros for years.
Just because boards of lumber have factory-finished edges doesn’t mean they are always square. Before pulling tape and marking a cut, check to make sure that it’s a reliable edge. This is easily done by throwing a speed square on the end of the lumber. (Don’t miss these 10 speed square hacks!) If the edge looks off at all, just slide the speed square over and shave off a fraction of an inch with a saw to make it square. It’s a few seconds of work that can save hours of frustration in the long run.
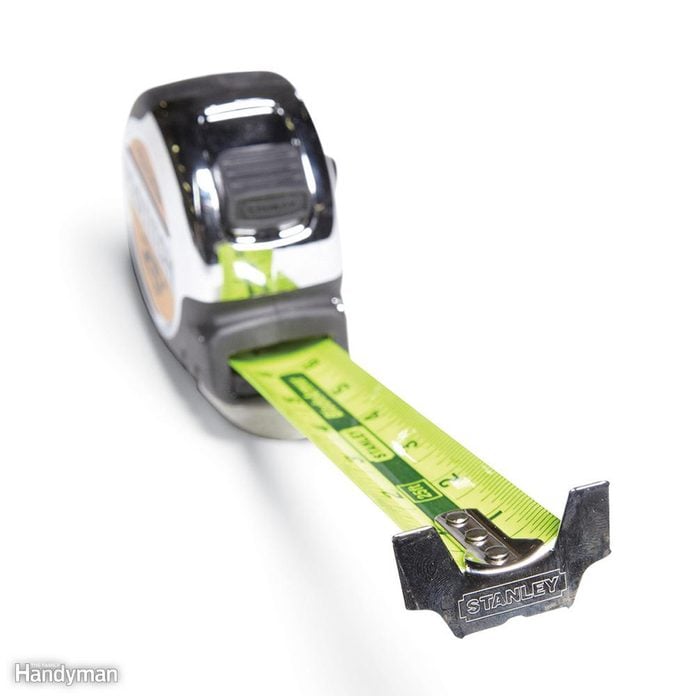
Secrets of the Tape Measure Hook
Everyone should own a quality tape measure; it’s one of the three all-around tools every homeowner should have.
If you look closely at your tape measure, you’ll see that the hook at the end has a few unique qualities. One is that it should be slightly loose on its rivets. This allows it to slide in or out to allow for accuracy whether taking an inner or outer measure. This also means that the first inch on a tape measure is inaccurate by the amount of that movement (usually 1/16 inch). So if you need to take the measure of a small item, use a section further up the tape.
Another feature is the hole in the tape measure hook. Not all tape measures have this feature, but if yours does, you’ll notice it’s exactly the right size to latch onto the head of a screw or nail. This allows you to latch onto a fastener head and take your measurement without worrying about the tape popping free. Follow this tape measure hack for your next project.
Circle Layout Tool
This tip will help you make perfect arcs and circles every time! Start by drilling a 1/8-inch hole through every inch mark on a ruler or yardstick. Place a pin through the first hole (at the one-inch mark) and place the pin where you’d like the center of the circle to be. Insert a pencil into one of the other numbered holes you created, depending on how big you want your circle to be. Then, using the pin as a pivot, rotate the yardstick around, dragging the pencil as you go, to mark the circle.
Water Level
If you don’t already have a water level — get one. A water level is a time-honored and affordable way to find equidistant height. Especially useful on irregular floors that would make straight measuring difficult, the water level is a low-budget alternative to a laser level. It’s a simple tool made with water and clear plastic tubing, with three vials that show level, plumb and 45 degrees. (Check out these handy tool tricks, including how to make sure your level is accurate!)
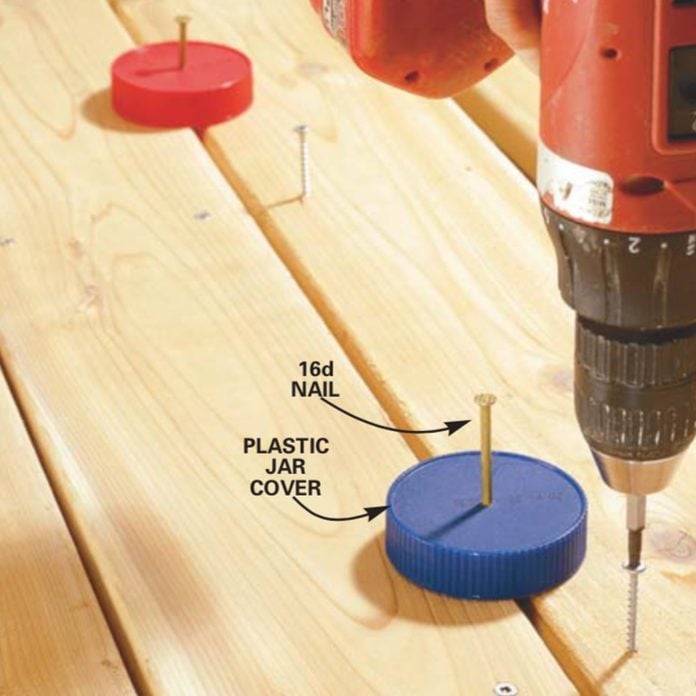
Custom Spacers
Eliminate multiple measurements and reduce the room for error by substituting spacers for tape measures. Spacers are especially useful when installing tile, deck boards or any other material that require consistent gaps to allow for grout or expansion. You can use store-bought spacers, or make your own with nails and plastic lids.

Use Your Tape Measure as a Story Pole
We’ve already discussed how a story pole can save time on the jobsite. Now we’ve got a trick to explain how you can travel with one in your pocket.
In the same way that measures and lengths are marked on a story pole, mark the length and sizes of your current project cuts directly onto your tape measure with permanent marker. Use an array of colors to keep the different items distinct. If you need to check a sizing, simply pull out the tape and look for the appropriate color. Once the project is over, just wipe down the tape with acetone to remove the marker and leave your tape fresh, clean and ready for the next job.

Borrow a Tape Measure While Shopping
There’s nothing worse than that moment when you’re picking out material in a big box store like Lowe’s or The Home Depot, only to realize that you’ve forgotten to bring your tape measure. Here’s an easy solution: Just borrow a tape measure from the tool aisle. Almost all tape measures are displayed with the tape easily accessible so that potential buyers can try out the spring action. Grab one to make your measurements, then return it to its original shelf.
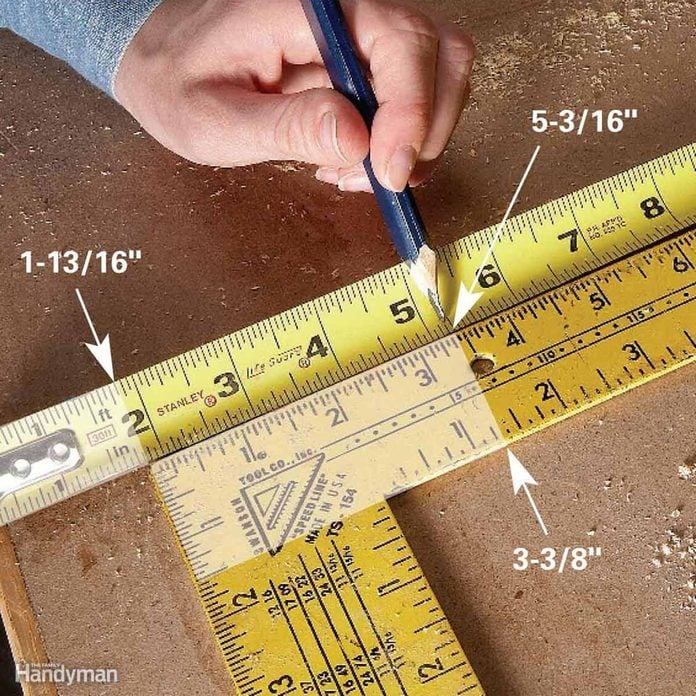
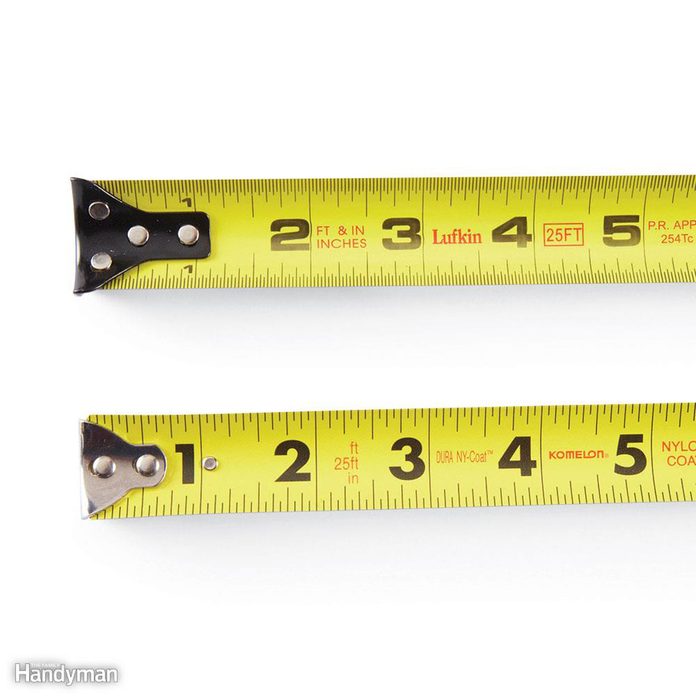
Easy Math with Two Rulers
Let’s say you have to add 1-13/16-in. plus 3-3/8-in. Normally this might be a head-scratcher, but watch how easy it is with this hack. All you need are two tape measures or rulers.
On the first tape find the 1-13/16-in. mark. Now, starting at that point, pull out 3-3/8-in on the second tape, laying it beside first one. Now on the first tape you can see that the two measurements add up at the 5-3/16-in. mark — no math needed!
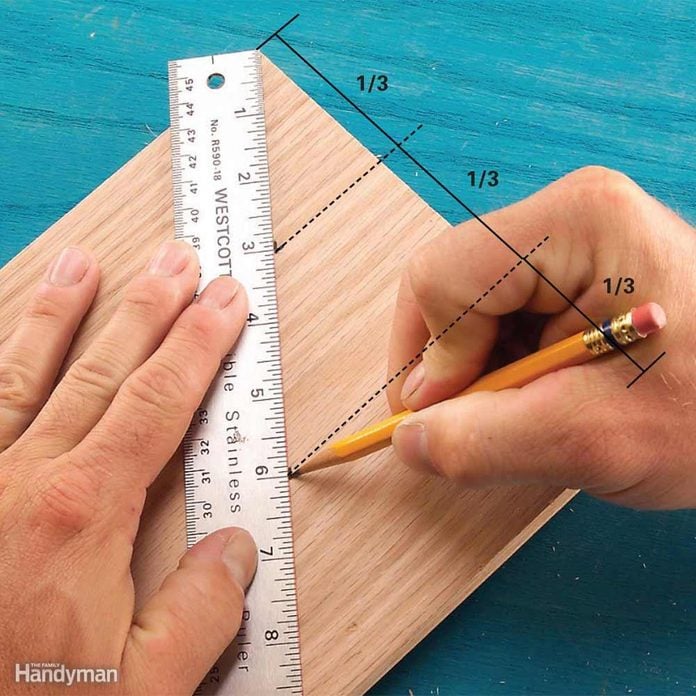
Slant-Rule Board Divider
If you need to divide material into equal parts, simply angle your tape measure or ruler across the face. When you do, adjust the tape so that it lands on a number easily dividable by the number of pieces that you want.
For example, if you need to divide a piece of lumber into thirds, pull the tape from the front corner to anywhere along the side where the tape sets at an even nine inches. Then mark at inches three and six. Just keep in mind that these distances are not three inches; once you angle the tape, you are no longer measuring distance but rather spacing.

What’s in Your Wallet?
Items in your wallet can be used as a ruler in a pinch. In the U.S. for example, dollar bills are 6.14 inches long. Fold a bill in thirds and then in half, and you’ll have a ruler roughly six inches long, the folds marking approximately every inch.
This won’t be accurate enough for precision cuts, but useful to check the size of fasteners or other odd-shaped objects. Coins and credit cards are also standard sizes, and can be easily marked when measuring. A U.S. quarter is just under one inch in diameter.
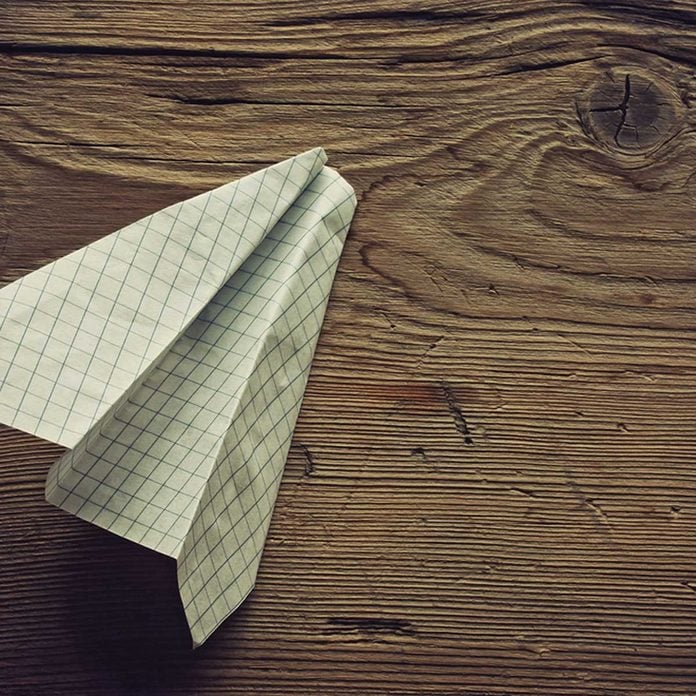
Origami
A sheet of standard printer paper in the US is exactly 8-1/2-in. wide by 11-in. tall. Because paper is cheap, it makes a great improvised ruler, and folding it can help you zero on in on more precise measurements. Fold in a corner of the paper, for example, and you’ll have a diagonal line just under 14 inches long. Or fold it into thirds or quarters in either direction to get smaller lengths.
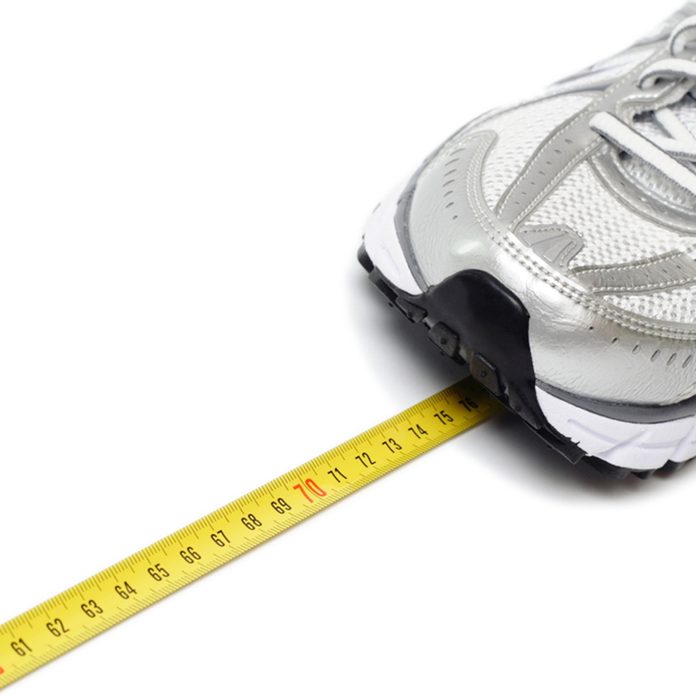
Measure By The Foot (Your Own!)
If you’re ever caught without a measuring tape and need to get a mid-sized distance, the easiest solution may be to pace it off. There’s often too much variation in a normal walking stride, so it’s more accurate to use the heel-to-toe method. Don’t depend on the length of your bare foot or shoe size, as that’s a measure of the inside of the shoe; a size 10 work boot is significantly longer than size 9 sneaker, for example.
Use the Ballpark Method for Landscapes
Instead of taking the time to get exact measurements for a big space like your yard, use the ballpark method. Make a mental comparison with a space you’re already familiar with. This might be another project you worked on previously, or any consistently sized space, such as a football field.
An American football field (without end zones) is just over one acre. Two fields (including end zones) is about a hectare. And of course this trick works with any sport that has a regulated field size. Most major league baseball fields are about 2-1/2 acres. Obviously this isn’t the way to go if you need exact measurements, but it’s great for estimating material needed for landscaping updates.
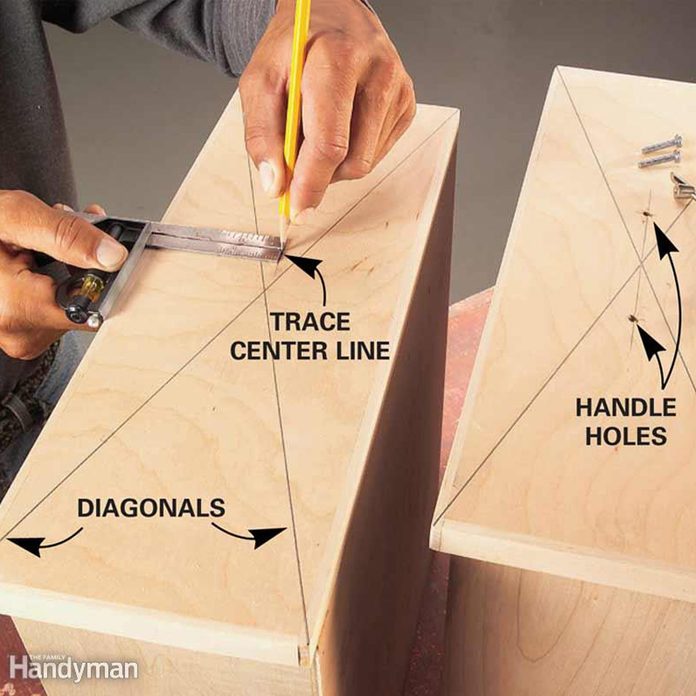
Quick Cabinet Pull Measurements
Factory drawers are square, so tracing a pair of lines from corner to corner will give you an intersection at the dead center of the drawer face, making installing hardware a breeze. If you’re installing pulls, you’re ready to drill your hole. If you’re installing handles, use a combination square to capture the distance of the center to the edge, then drill holes to either side at a distance that matches your handle set.

A Pint’s a Pound
The old expression “A Pint’s a Pound, the World Around” isn’t exactly true, but it’s good enough for approximate measures. A pint of water weighs about one pound, so a quart weighs two pounds, and a gallon weighs about eight pounds. Like most ballpark estimates, it gets farther afield the larger you go. But if you just need a quick calculation of water weight, it’s a great rule of thumb.
Know the Width of Your Tape Base
Most measuring tapes have the width of the tape shell printed on its base. You’ll notice that most tape measure bases are also flat. They’re designed that way to make it easier to make inside measurements.
If you’re measuring the width of a rough door opening, for instance, bending the tape won’t give you an exact measurement. Instead, insert the whole tape measure into the opening, take the measure from one side to the other, then add in the width of tape measure. Familiarize yourself with the tape’s width and this will quickly become second nature. (Here’s how to make your own DIY magnetic tape measure.)
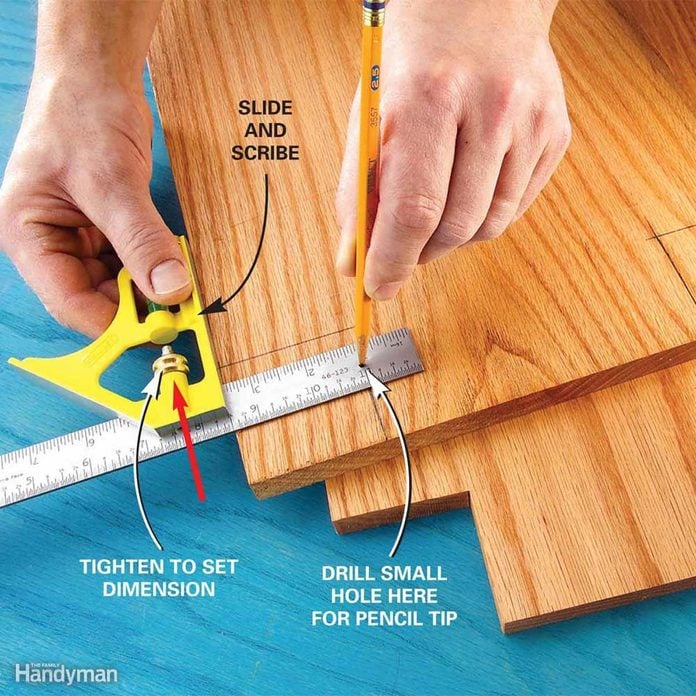
DIY Marking Gauge
If you need to scribe a line on your project material, a marking gauge will let you lay things out without the many steps involved in measuring off multiple marks and connecting them with a straightedge. But what if you don’t have a marking gauge? Luckily, there’s a DIY solution!
Take a combination square and drill a 1/8-in. hole at the one-inch mark. Be careful to center it exactly on the one inch mark, and don’t go much over 1/8-in. diameter. Set the combination square to mark out one inch beyond your intended measurement, then place a pencil in your 1/8-in. hole. Now just slide your square along the edge of your material and let the pencil mark a nice crisp line.
Tape Measure Scribing Tool Hack
Look closely at the hook on the end of your tape measure. You’ll notice it’s made of strong metal, and many models also have a serrated edge. This is no accident! It’s an intentional feature allowing the hook to be used as a scribing tool.
The next time you can’t find your carpenter’s pencil, simply push the end of your tape measure into the wood or other material. The serrated edge will leave a mark, allowing you to scribe for the perfect cut. No pencil required!
DIY Marking Gauge
This hack takes the previous two items on our list and combines them to take it to the next level.
Instead of just scribing a short mark, hold the tape measure against the open edge of material with your index finger and press lightly down on the hook. As you move across the material, the hook will scribe a cut line. This provides the ease of a scribing tool and the accuracy of a marking gauge.
Even better, if you’re working with drywall or another material that can be cut with a knife, simply use a utility knife pinched to the end of the tape hook and guide the knife straight along the cut line. If you’ve ever been on a large drywall job, you might have seen pro hangers using this technique to eliminate the mark-and-cut step of the installation.