How to Install a Garage Air Conditioner
Updated: Mar. 08, 2024
Wrenching on a car or doing a project in a sweltering garage is no fun. A garage A/C does the trick.
Our editors and experts handpick every product we feature. We may earn a commission from your purchases.Learn more.

Introduction
If you start the installation in the morning, you'll be enjoying cold air by mid-afternoon. A ceiling fan helps circulate the air and eliminate hot spots, but if the A/C unit keeps you cool enough, you can skip the fan. We'll show you how to pick the right size unit for your garage and how to install it in the wall.Project step-by-step (9)
Examining your options
In a hot garage, the heat and humidity slow you down, make you grumpy and increase your frustration. Air-conditioning your garage solves those problems and doesn’t cost a fortune. You can buy a TTW (through-the-wall) unit. Window units cost a bit less, so consider going that route if you have a suitable window. Window and TTW units are the same except for installation. A window unit comes with hardware and sealing gear for mounting it in a window, while a TTW unit requires a separate sleeve that fits into a wall opening that you frame into the wall.
Consider insulating first
If you plan to use your garage A/C only occasionally, you don’t have to install insulation. It’ll just take longer to lower the temperature to a comfortable level and the A/C compressor will run for longer periods, costing you more in electric bills. However, you can dramatically speed up the cool-down time and increase cooling effectiveness by hanging drywall on the ceiling. That reduces the size of the area to be cooled and helps the cool air circulate. Install a vapor barrier first, in case you decide to add attic insulation later on. But if you plan to frequently use the garage A/C, it’s well worth insulating and finishing the entire space.
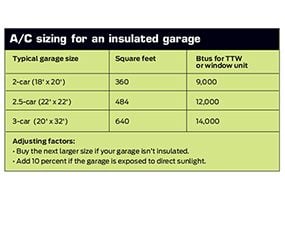
Size the A/C unit
Measure the area of your garage (length times width) to determine the total square footage, then consult the chart. Apply the adjusting factors at the bottom of the chart. Then shop around for the best price on the A/C unit and a matching through-the-wall sleeve.
Cut the stud
Cut through the center stud, leaving a space 3 in. taller than the rough opening height of the A/C sleeve to allow room for the top and bottom plates. Knock the cut piece sideways to break it loose from the sheathing and siding nails.

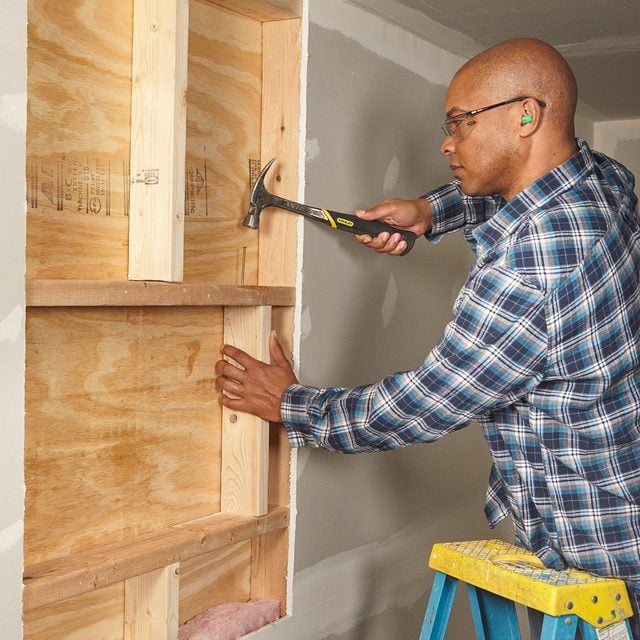
Frame the sleeve opening
Nail top and bottom plates to the center and adjacent studs. Then add a short jack stud to frame the opening to the proper width.
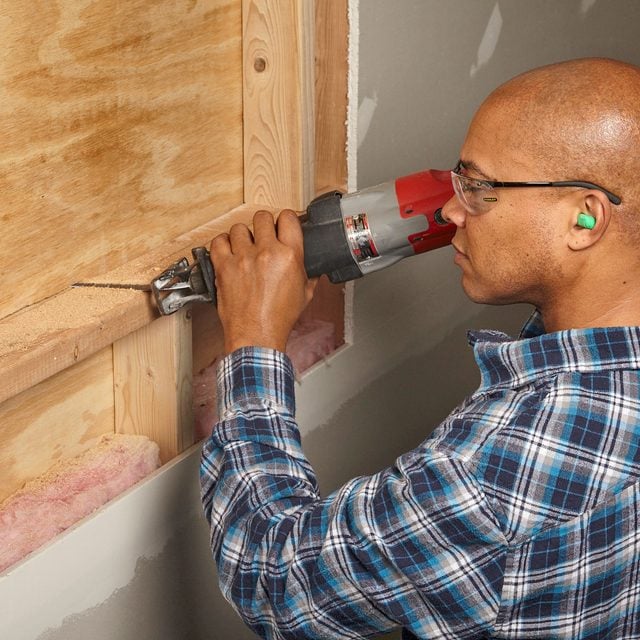
Cut through sheathing
Test-fit the sleeve before cutting out the sheathing with a reciprocating saw.
A/C units have weak circulating fans, so don’t locate one on the end wall of a large, rectangular garage. Instead, locate it in the middle of the longest wall and aim the airflow toward the garage door. If you’re installing a window unit and it’s located on the end wall of a rectangular garage, plan to install circulating fans to help move the cold air to the other end.
Next, check the sleeve installation instructions for the rough opening size. Some manufacturers want a 1-in. clearance on the sides and top of the sleeve. Plus, the distance from the ceiling is critical. Don’t place the opening directly below the top wall plate.That’ll result in rapid compressor cycling and inefficient cooling. Locate the top of the sleeve opening about 24 in. down from the ceiling (or as shown in the sleeve installation instructions). Then remove drywall (if any) in that location to expose the studs. Cut the center stud to allow for the thickness of the new top and sill plates. The biggest task is reworking the siding. In most cases it’s best to remove as much siding as needed before cutting the opening in the sheathing and then to trim and re-side around the opening. Follow the manufacturer’s instructions to mount and secure the sleeve to the framing.
Run an electrical cable to the location and install the receptacle. Most 120-volt units require a dedicated receptacle on either a 15- or 20-amp circuit breaker (no extension cords allowed). A unit sized from 9,000 to 12,000 Btu will typically run on a 20-amp, 120-volt circuit. But you’ll have to install a 220-volt circuit for larger units.
Other A/C options for your garage
We didn’t cover portable ac units for a garage in this story. They’re an option but not a very good one. Portable units use cold air from the room to cool the condensing coil and then exhaust that air to the outdoors. The negative pressure this creates inside the garage draws in an equal amount of hot humid ‘make-up’ air from outside. The portable unit then has to cool that makeup air and the cycle repeats over and over, wasting 30 to 50 percent of the rated capacity of the unit. Overall, portable units don’t come close to the efficiency of a window unit or a TTW unit.
If you want the very best cooling option and are willing to dig deep, contact an HVAC company and get quotes on a split system. Those are heavy-duty units that can quickly cool your garage and maintain the temperature even under the hottest conditions.
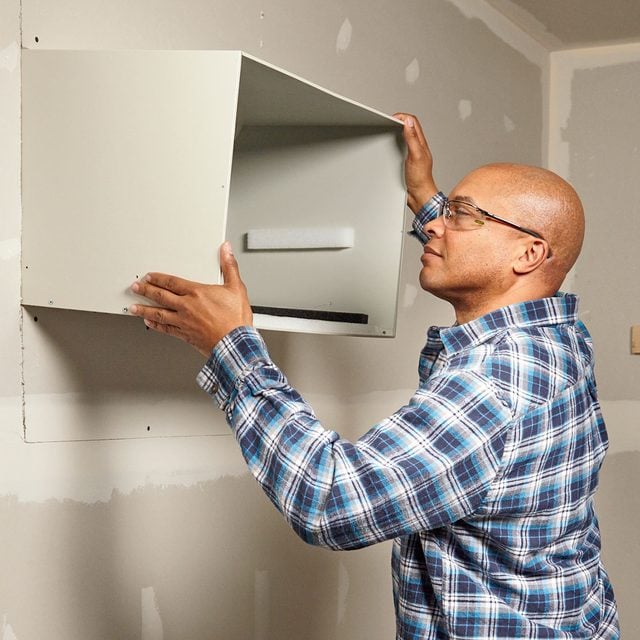
Install the sleeve
Secure the sleeve brackets (if equipped), install filler strips and secure the sleeve.
A through-the-wall A/C unit will dump most of its cool air right into the center of the garage, creating hot spots around the sides. To get more uniform cooling, add a ceiling fan to suck hot air from the ceiling corners and blow it down to the floor. Use a floor fan on the opposite side to blow the newly warmed floor air up toward the A/C unit intake.