
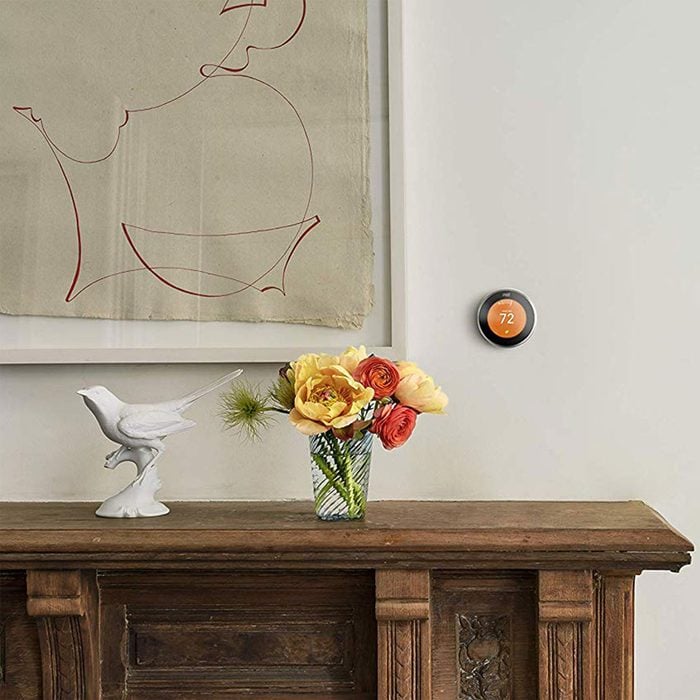
We can help you install this popular smart thermostat.
How to Install a Nest Thermostat
1
/
12
Smart thermostats are increasingly popular and Nest thermostats are one of the top sellers in this new category of products. What follows are step-by-step instructions on how to install a Nest 3rd Gen Thermostat. Watch the video to see what it takes to install this Nest and then read on for further detail for this simple process.
2
/
12

Before You Open the Box
Before installation, check your existing system’s compatibility with the Nest. You’ll want to take the cover off your existing thermostat to do this. Most residential thermostats run on smaller low voltage wires. But if you see large wires with wire caps leading to your thermostat, or a cautionary high voltage label stating 120 or 240 voltage, your existing thermostat is not compatible with the Nest thermostat. Once low voltage has been confirmed, you will next want to check the existing wires for compatibility. You can do this using the Nest website’s compatibility checker. You simply input the color of the wires and their location on the wire terminals and the compatibility software will tell if you’re good to go.
3
/
12
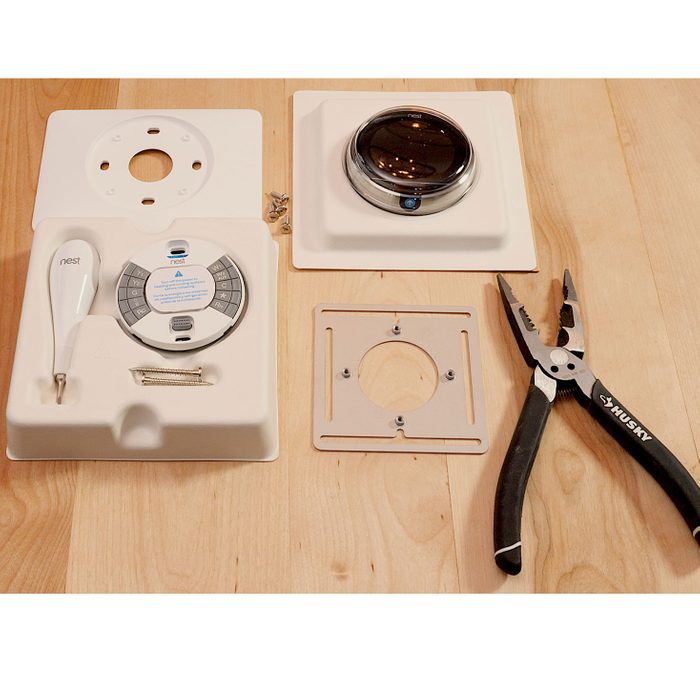
Open the Box and Check its Contents
Inside the box you’ll find a complete installation kit that includes:
- Welcome guide and installation instructions
- A larger trim plate that covers holes or a paint footprint from your old thermostat
- A metal mounting plate if your existing thermostat is installed on an electrical box
- Mounting screws and wire labels
- The Nest thermostat base and display
After you’ve laid out the contents of the box, line up your tools. Nest supplies a handy little screwdriver that’s great for getting the wires off and on their terminals, but a larger screwdriver for mounting the baseplate and a pair of needle nose pliers for altering any of the wires may also be necessary. The mounting screws Nest supplies seem to work fine in 1/2 in. drywall. But if you have plaster and lath walls or encounter any framing behind your wallboard, you’ll also need a drill with a 3/32 drill bit.
4
/
12
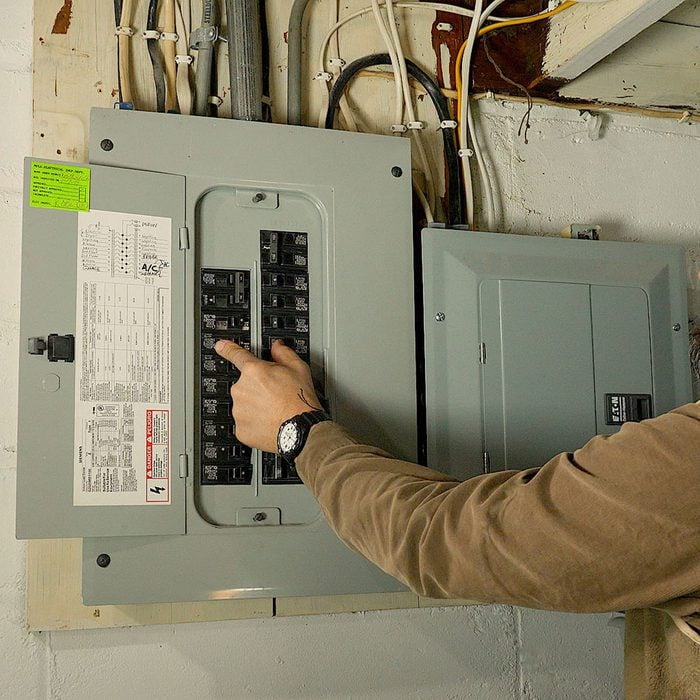
Power Down
The next crucial step is to power down your heating and cooling system. Usually you’ll find the dedicated circuit breakers for your furnace and air conditioner marked in your electrical panel. If for some reason you’re not sure which breakers to turn off, there is usually a standard shut off switch by your furnace, and a small box with secondary breaker switch by your AC unit on the exterior of your house. Once you’ve done this, it’s always a good idea to check that the power is off by force-cycling your heat or AC with your existing thermostat before removing it.
5
/
12
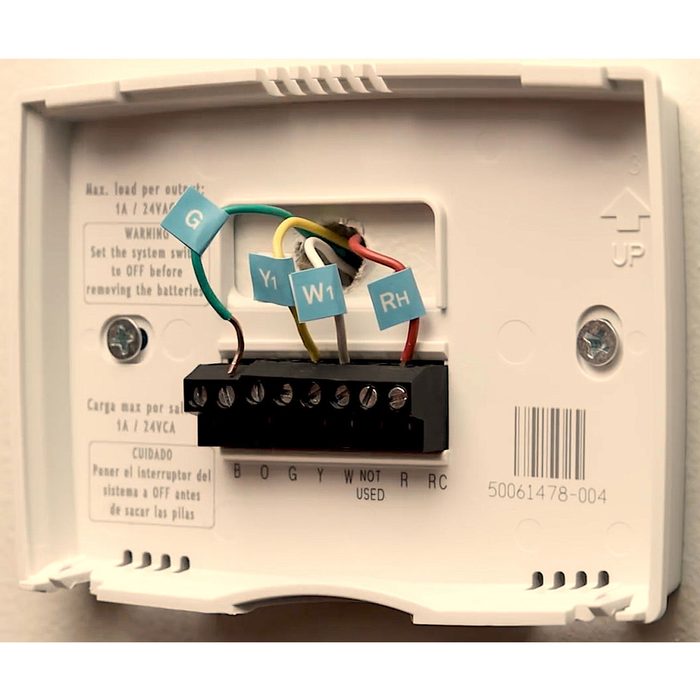
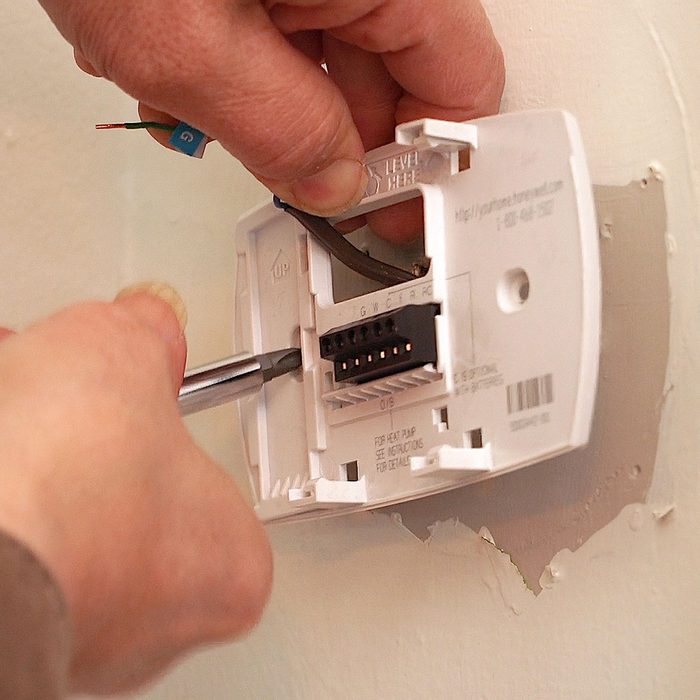
Remove Old Thermostat/Mark Existing Wires
If you haven’t already done so, remove the cover of the old thermostat. This can be a little tricky sometimes. Most are a press fit and have side tabs that you press in for removal. Others have small set screws usually found top or bottom.
Once the cover is off, it’s important to note the location and color of the existing wires. You can use the Nest’s supplied stickers to do this, but they can be a bit fussy to apply. Best to take a close-up picture with your phone and then write down the color and location of the wires to be sure.
With the wires properly noted you can now disconnect them. Most thermostats have small terminal screws that you can back off with the Nest screwdriver supplied, others have small buttons that you just press to release the wire. If you see any small jumper wires that go from one terminal to another you can remove and disregard them as the Nest will automatically compensate for their absence. Never insert more than one wire into each of the Nest’s terminal because it can damage your HVAC system and the thermostat.
6
/
12
Remove Old Mounting Plate
When the wires have all been disconnected, remove the baseplate. While you’re doing this, make sure the wires aren’t going to disappear into the wall. If you’re not confident that the wires will stay put, you can tie a temporary loop in them or, if you don’t have enough slack use a clothespin to clip them in place. Once the old cover has been removed, if there are any leftover mounting holes, now is a good time to patch and paint the footprint left by the old thermostat. The other option here, if you don’t mind the look, is to use the large trim plate that Nest supplies to take care of this situation.
7
/
12
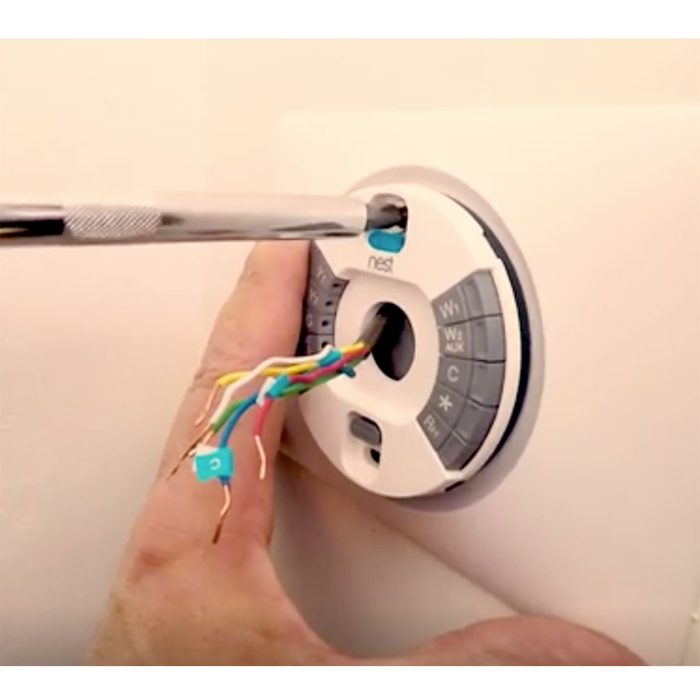
Install Nest Base
When you’re ready to install the Nest base plate, gently slide wires through center hole of Nest plate. You will want to install the top screw first. The provided Nest screws are self-tapping, but if you have to drill any holes at this point use a 3/32 drill bit or the size that best fits a wall anchor of choice if you need it, as Nest does not provide any. Once the top screw is in, leave it a little loose so you can use the integrated bubble level to straighten mounting plate. Then install the bottom screw. Once both screws are in, double-check the base for level and then snug them up.
8
/
12
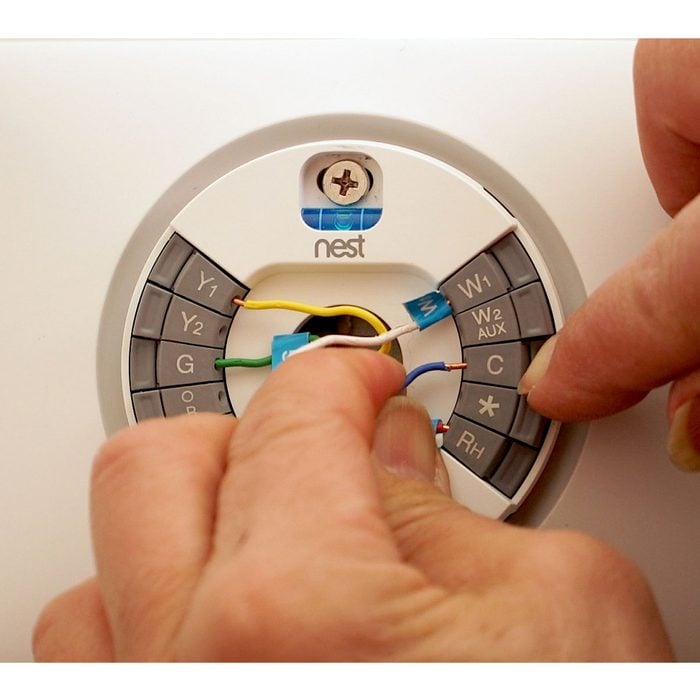
Connect Wires
First check the wire ends to make sure they are straight and flat. If not, use some needle nose pliers to do so. Also make sure the wire ends are stripped to 3/8 of an inch to insure a good fit into the Nest base. Now insert the wires into corresponding push terminal and make sure the connector buttons stay down after wires are inserted. Be sure to connect only wires that were connected previously, and only one wire per connector. It’s a good idea to take another picture at this point as you will be quizzed on your wiring configuration once you’re in Nest set-up mode. When the wires are all connected, push them in so they are flush with the wall. This enables easier install of the Nest display.
9
/
12
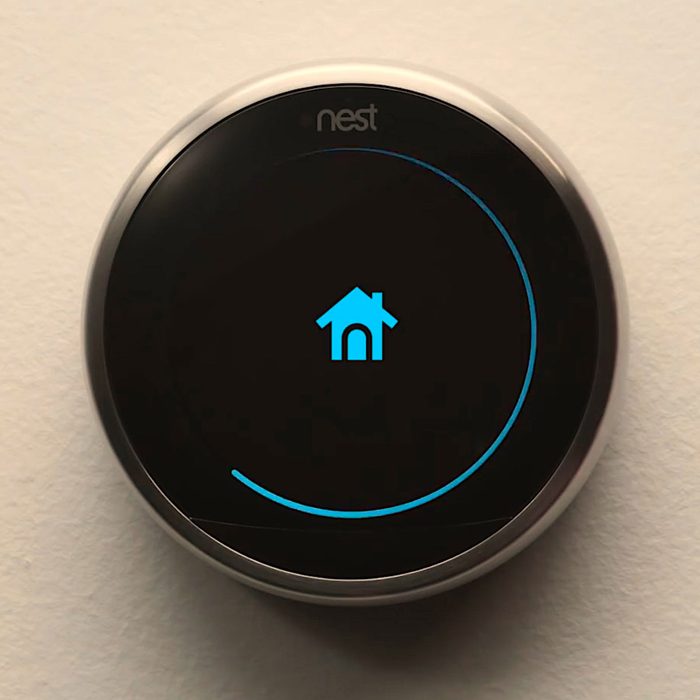
Install Nest Display and Power Up
To install the Nest display, hold it so the Nest logo is at the top and then push it onto the base until there is an audible click. Then, power up your system by turning the breakers back on and the Nest will prompt you through its programming procedure.
10
/
12
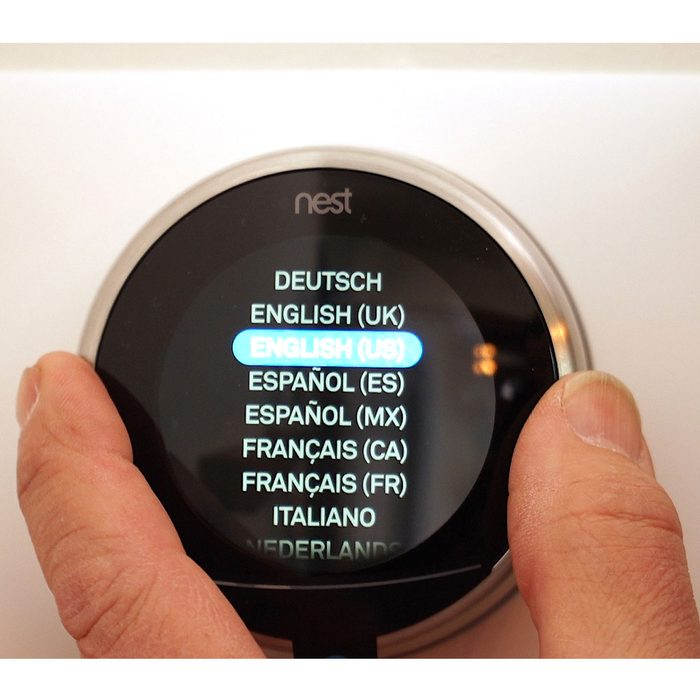
Programming
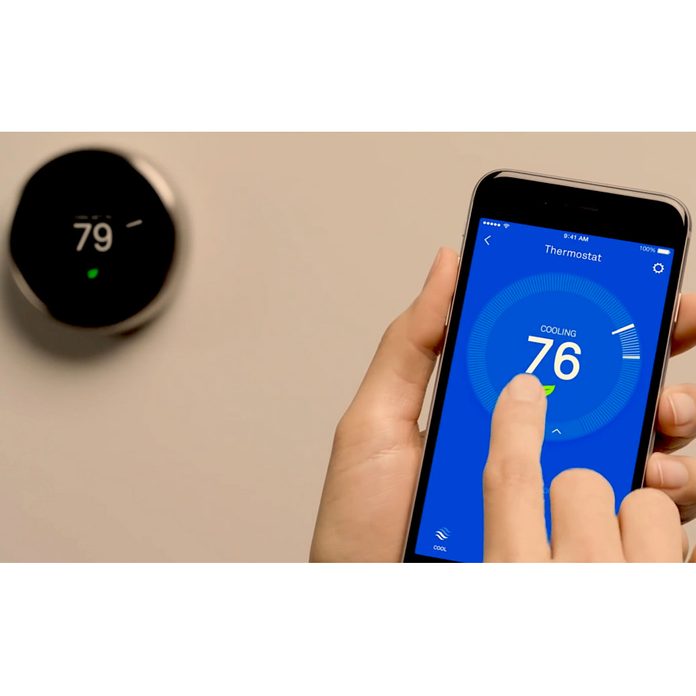
You program the Nest by rotating the display to find your selections and then pushing it in to confirm. The Nest will guide you through set-up with a series of prompts giving it the necessary information to operate. Keep your home network password handy to enable the Nest to connect to your WiFi. By doing this you can operate the thermostat from your phone, Google Assistant or Alexa.
11
/
12
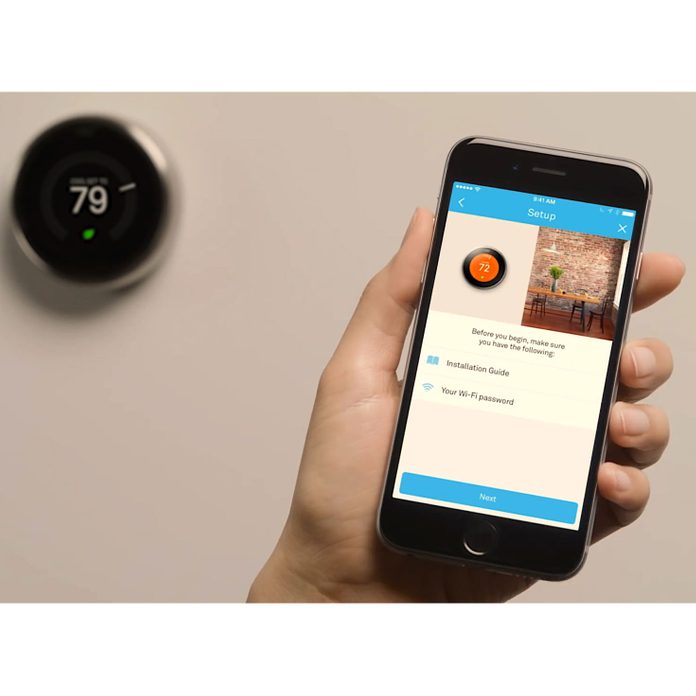
The Nest App
The last step of the set-up menu is to download the Nest App from the Apple store or Google Play onto your phone. If you already have a Nest account, make sure to get the latest version of the App. Once you’ve launched the App and set up your account, you’ll want to tap the add button and choose Nest thermostat. If you already have another Nest product set up in your App, go to settings screen and add your thermostat. After this you can skip the next few installation steps as you’ve already completed them. When you get to the key code page tap “show me how” and you’ll be guided on how to get the key code from the Nest display. Once you’ve entered the key code into your phone, you can operate your thermostat from your phone and view daily summaries of your energy use.
12
/
12
Fully Connected
Installing a Nest thermostat is straightforward process and something that shouldn’t intimidate an average DIY’er. The price point on this particular thermostat is higher than most, but the potential energy savings of its self-learning capabilities plus the convenience of monitoring your system from your phone make it worthwhile. Nest also makes another version of this thermostat that is not self-learning but is WiFi operable with your phone, and cheaper. In our increasingly connected world, there are perhaps many things you don’t need to control from your phone. But for me, being fully connected to my heating and cooling system to be better aware of my energy consumption is truly smart technology.