


How To Frame a Bathroom Mirror

Updated: Feb. 07, 2024
Framing a mirror isn't complicated or expensive, even for a novice DIYer.
A full day
Beginner
Less than $20
Introduction
If you're not happy with the look of an unframed mirror, you can frame it yourself for less than $20— even if you're a beginner. Here's how.Tools Required
- 120-grit sandpaper
- Circular saw or miter saw
- Orbital sander
- Pocket screw drilling jig
- Screwdriver
- Tape measure
Materials Required
- 1-3/4-in. wood screws
- 1x4 Lumber
- Mirror
Project step-by-step (10)
Step 1
Buy and Measure the Mirror
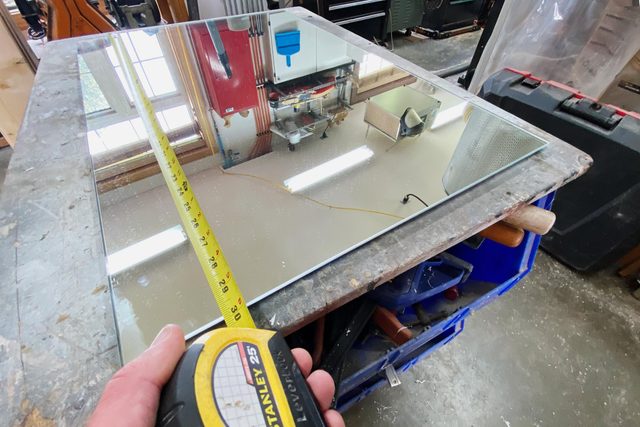
- Determine the size of the mirror you’d like to frame. Here we used a 20-in. x 30-in. mirror.
- Be sure the unframed mirror is completely flat and smooth across its entire surface. Some mirrors have beveled edges, which won’t work for this project.
- Measure the dimensions of your mirror and make note of the precise length and width.
Step 2
Measure and Cut Parts
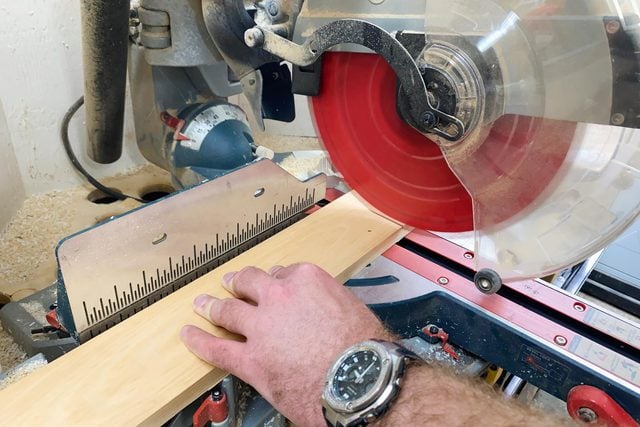
- Measure and cut your 1×4 lumber (actual dimensions 1/2-in. x 3-1/2-in.) into four pieces, aiming to make a frame that protrudes 1-in. beyond the mirror’s edges on all sides.
- Cut the parts so the horizontal frame members (rails) cap the vertical frame members (stiles), and not the other way around. Doing it this way makes for a better-looking frame (see photo). So if your mirror measurements are 20-in. x 30-in., cut two 22-in. pieces of 1×4 and two 25-in. pieces of 1×4. The 22-in. frame pieces will go on the top and bottom of the mirror and extend 1-in. beyond each side of the mirror. The 25-in. pieces will fit between the top and bottom frame pieces.
- Use a miter saw or hand saw to make the cuts, ensuring they’re exactly 90 degrees to the board’s edge. You’ll find it much easier to get smooth, precise cuts with a miter saw.
Step 3
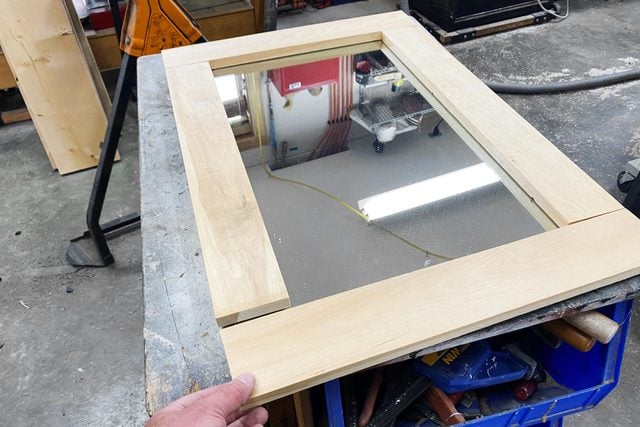
Dry-fit Frame Parts
- Lay your cut frame pieces down on the mirror and see how they fit together. You should get a fairly tight, gap-free fit with 1-in. of the frame overhanging the edges of the mirror on all sides.
- If the fit isn’t good, figure out where you went wrong and re-cut the parts.
Step 4
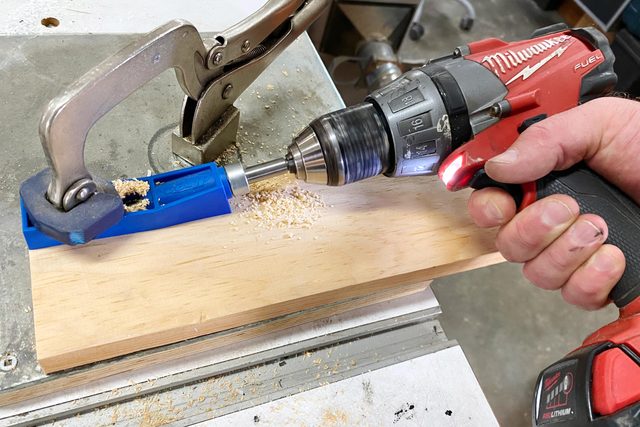
Drill Holes for Pocket Screws
Note: This step and the next one aren’t strictly necessary. But they allow you to join the frame parts ahead of time, leading to a much tighter fit at the joints and an easier gluing process.
- Use your drill and pocket screw drilling jig to drill holes for pocket screws on all four ends of the vertical frame members.
- Clamp the jig down before drilling to ensure it doesn’t move while you’re making each hole.
- Position the jig flush with the end of each frame member you’re drilling, 1/4-in. in from the closest edge.
Step 5
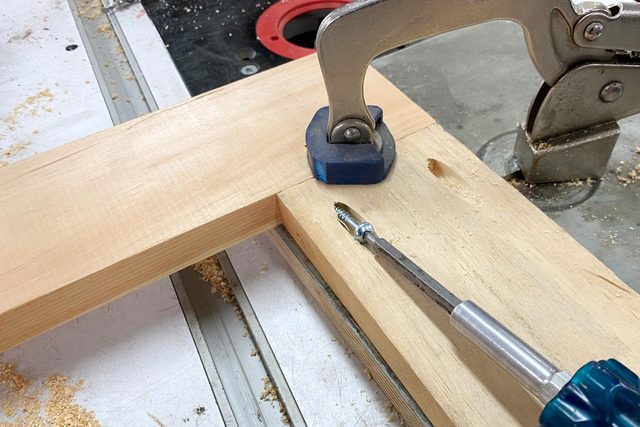
Join the Frame Members
- Use your screwdriver and 1-3/4-in. wood screws to join the four frame members.
- Be sure the edges and ends of the parts are flush with each other.
- Tighten the screws just enough to pull the parts together and remove any gaps. Don’t overtighten or you’ll strip the holes and the screws won’t grab the wood.
Step 6
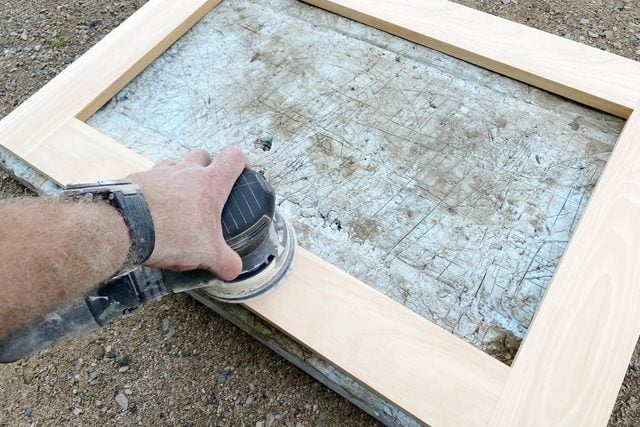
Sand the Frame
- Sand the front face of the frame with a 5-in. random orbital sander with a 120-grit disc. If using pocket screws to join the frame together, sand the entire frame at once. If not, sand the pieces individually.
- Continue sanding until all frame members are flush with each other and you can’t detect any mismatch when you run your fingers over the joints.
- Hand sand the inner and outer edges of the frame using 120-grit paper.
- Do more hand sanding with 220-grit paper, smoothening the front face and the inner and out edges of the frame. Be sure to sand only in the direction of the wood grain to avoid scratches.
- Sand all corners and edges lightly to make them less sharp and to help them accept a finish better.
Step 7
Vacuum the Frame and Apply Finish
We chose not to stain or paint our frame. If you want to stain the wood, do that and then apply a wipe-on poly finish, or paint the frame whatever color you want. Here are the rest of the steps for finishing:
- Vacuum the frame and surrounding area thoroughly, making sure you remove all dust particles before finishing.
- Wet a fresh shop rag with Wipe-On Poly (or the wipe-on finish of your choice), then rub it into the front face and all edges of the frame. There’s no need to finish the back.
- Let the finish dry overnight. Then lightly hand sand all surfaces with 220-grit paper, making sure not to sand right through the finish.
- Apply a second coat of finish. Repeat the process, applying as many coats as you like — three is typical.

Step 8
Trace Around Mirror on Back of Frame
- With the finish fully dry, lay the frame face down on a flat surface covered with a large towel, piece of paper or cardboard to protect the finish.
- Position the mirror face down on the frame.
- Use your tape measure to fine-tune its position until the overhang is equal on all sides.
- Lightly trace around the edges of the mirror with a pencil, making a reference line on the back of the frame.

Step 9
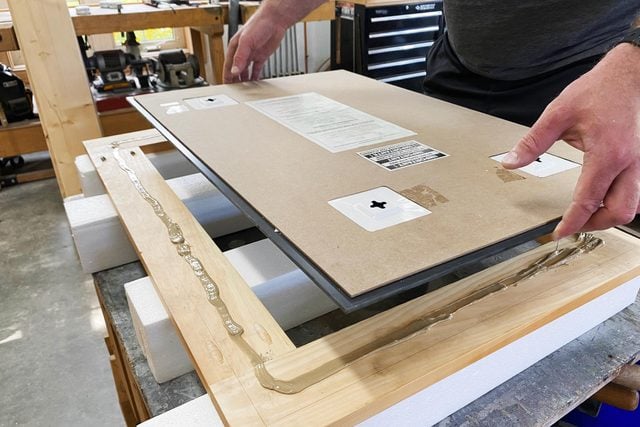
Glue Mirror to Frame
- Remove the mirror from the frame and place it to the side.
- Use your caulk gun to lay a medium-sized bead (in this case, is a continuous line of adhesive dispensed onto the work surface) of construction adhesive on the back of the frame, positioned midway between the frame’s inner edge and the line you traced.
- Gently lay the mirror face down on the glue, using the line you drew as a visual reference to position the mirror correctly.
- Place something heavy (approximately 10 lbs.) in the middle of the mirror to help it bond properly to the frame. (Skip this step if your mirror lacks a reinforcing backboard to add strength.)
- Let the glue dry overnight.
Step 10
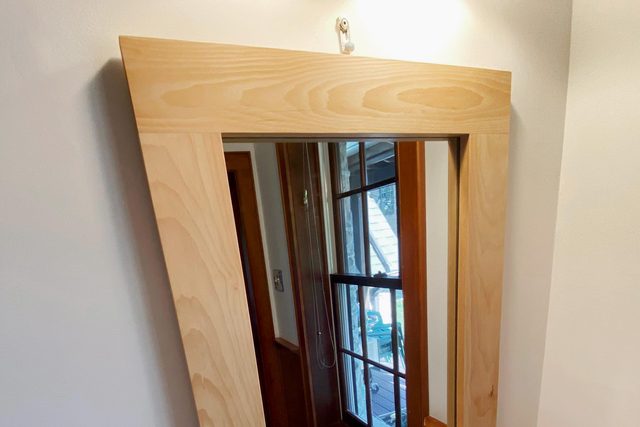
Hang the Mirror
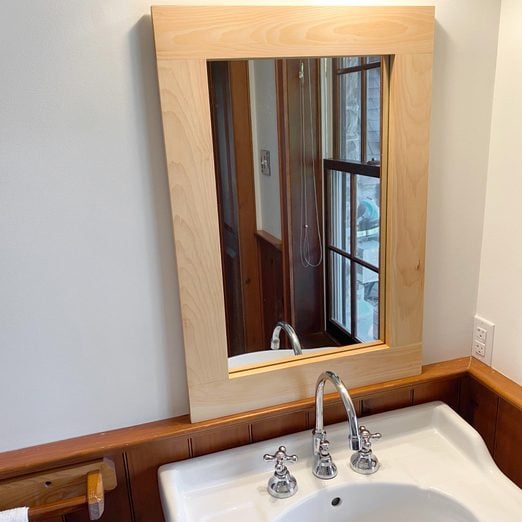
Now it’s time to hang the mirror!
- Install mirror hanging hardware (unless your mirror came with hardware pre-installed) and a wall hook (or drywall anchor).
- Carefully hang your mirror.
- Take a look at who framed it!
Originally Published: June 16, 2022