


Instead of installing tile in your shower, consider this time-saving, waterproof material. Here's what you need to know.
A full day
Intermediate
More than $1000
Introduction
Learn how to install waterproof wall panels in a shower to save time on tiling.Watch How To Install Shower Wall Panels for Your Bathroom
Tools Required
- Caulking gun
- Circular saw and cutting guide (or table saw)
- Drill/driver
- Hole saws
Materials Required
- Caulk
- Wall adhesive
- Wetwall panels
What’s on these Walls?
To skip the time and skill involved with tiling walls, we installed Wetwall, a Wilsonart Company. Wetwall is a wood/plastic composite topped with a high-pressure laminate surface. About 1/2-in. thick, Wetwall is waterproof and durable. It’s available in a wide array of panel sizes (including custom sizes) and patterns.
It can be applied to many existing surfaces, including tile. It’s easy to work with and requires no special tools — just a sharp, fine-tooth saw blade for smooth cuts. Tongue-and-groove edge joints make seams virtually disappear.
Project step-by-step (7)
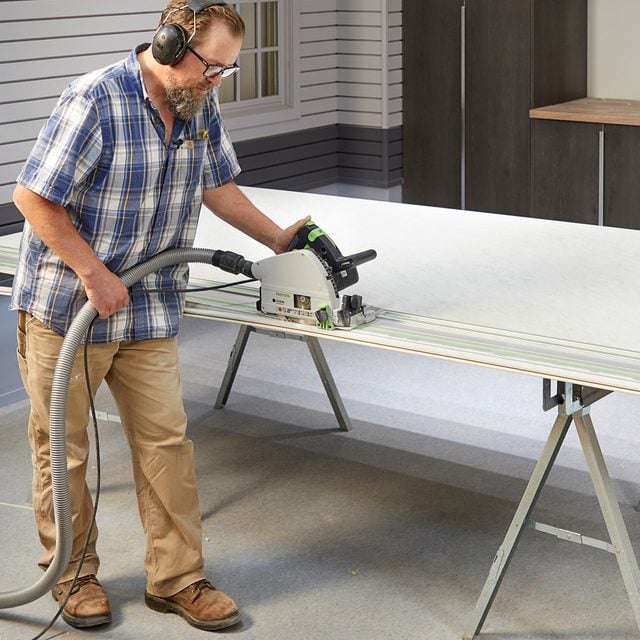
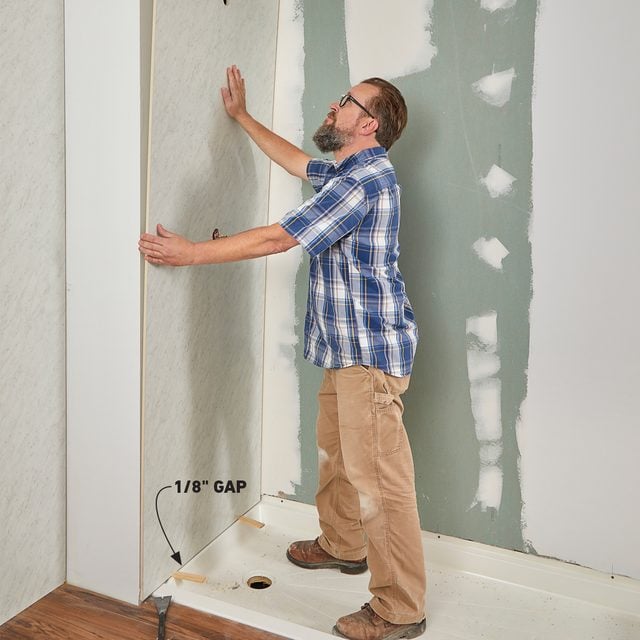
Step 1
Dry-fit the panels
Test-fit the panels and cut as needed. If you need to trim a panel, trim the edge that abuts a wall, not where two panels meet. The best way to trim large panels like this is to use a track saw or a circular saw with a cutting guide.
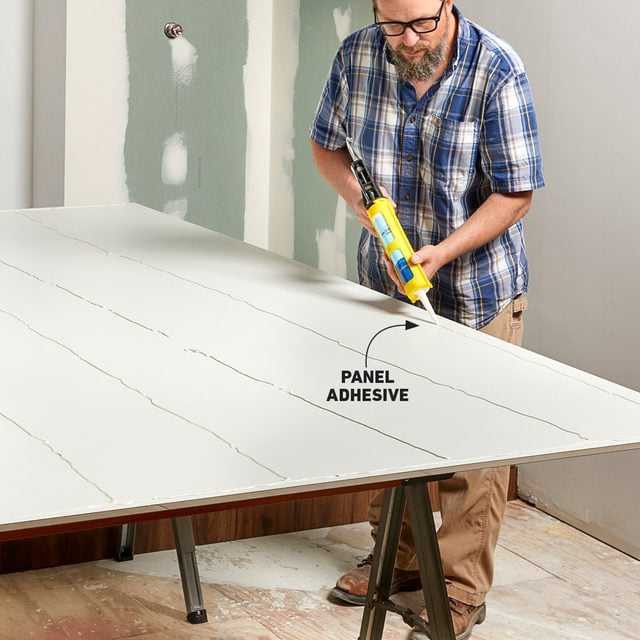
Step 2
Apply wall adhesive
Clean the back of the panel using denatured alcohol and allow it to dry thoroughly. Apply adhesive to the back of the first panel. The manufacturer recommends a 1/4-in. bead every 10 to 12 inches. Clean and dry the walls before applying Wetwall panels.
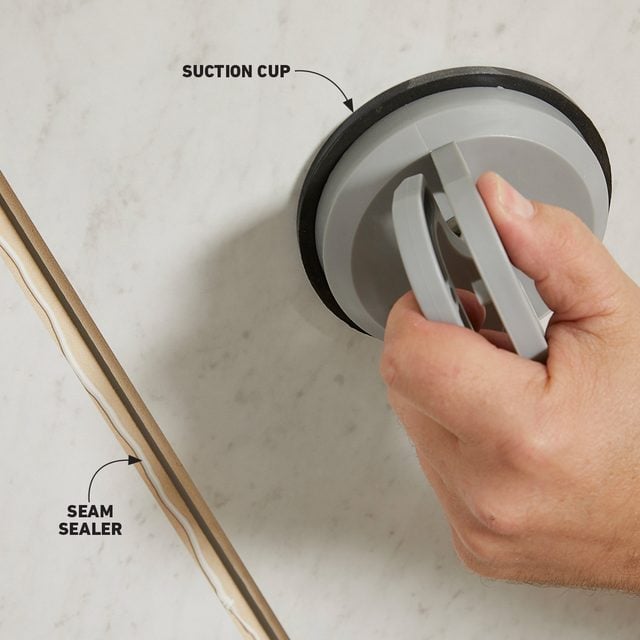
Step 3
Install the panels
Press the first back wall panel into place. Apply a bead of color-matched seam sealer to the tongue on the panel, then apply adhesive to the back of the next panel and install it. The joints are tight; get a helper. Tile-setting suction cups are also a big help.
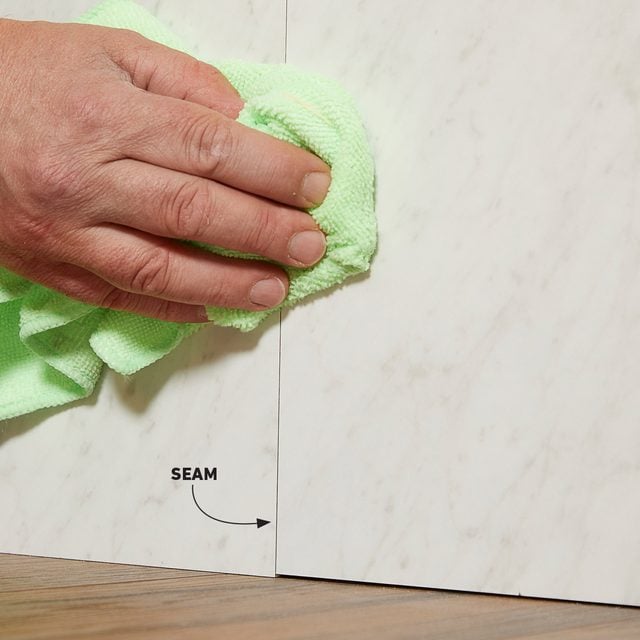
Step 4
Clean the seam
After pressing the panels together, wipe off any excess seam sealer with denatured alcohol. If the adhesive isn’t holding the panels securely in place, you may need bracing boards to hold up the panels.
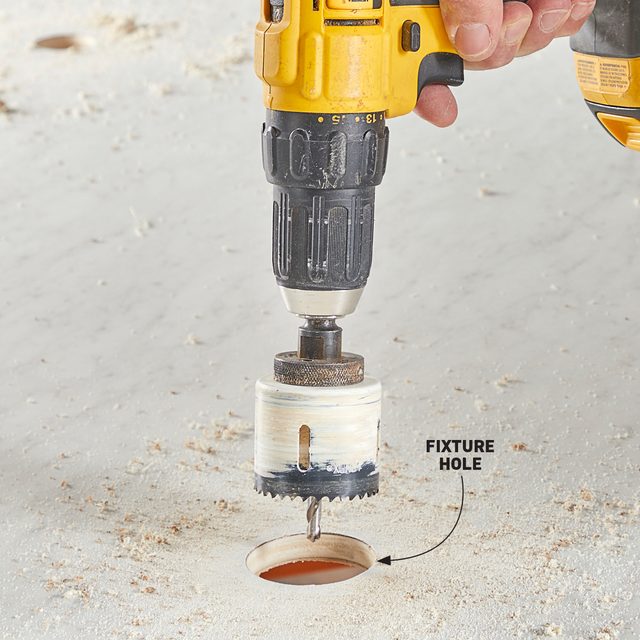
Step 5
Cut holes for fixtures
Measure and lay out the shower fixture holes on the appropriate panel. To cut the holes, use a jigsaw with a fine-tooth blade or a hole saw as your fixtures dictate.
Step 6
Install side panels
Apply the side panels as you did the back panels, trimming as needed and using adhesive on the backs and seam sealer on the tongue-and-groove joints.
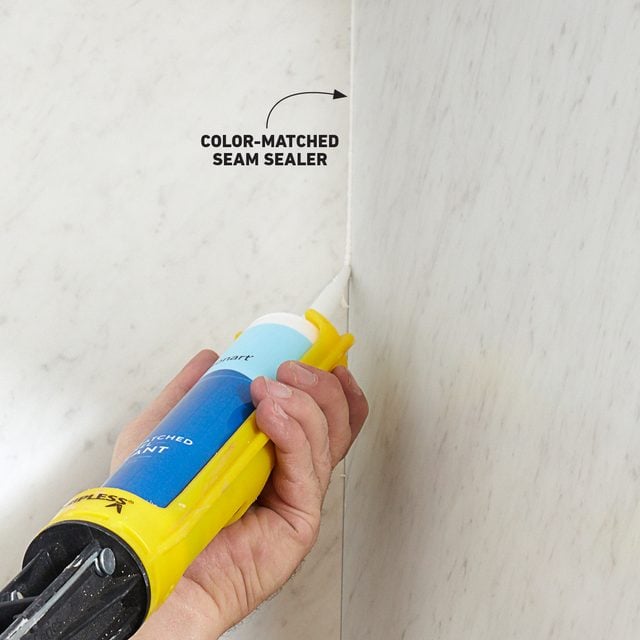
Step 7
Caulk joints
Apply a bead of seam sealer to the corners where the wall panels meet. Wetwall has color-matched sealer for all its products. For outside corners, you can order Wetwall with a bullnose edge. We chose to trim our outside corners around the shower with one-inch aluminum angle applied with construction adhesive.
Originally Published: September 15, 2021