Bathroom Ideas: Replace Tub and Shower Faucet Trim
Updated: Feb. 15, 2024Simply replace the visible trim for an brand new appearance

Change out the tub/shower valve trim
Over time, the metal on tub and shower controls and spouts can become tarnished and dull-looking despite all efforts to clean and polish it. An easy way to solve the problem is to simply install new trim.
Almost any tub spout and showerhead can be replaced by unscrewing the old one and screwing on a replacement. The handle and trim for the tub/shower controls can also usually be replaced without redoing any plumbing by using a universal replacement kit (available for most brands at home centers and plumbing supply stores). If you’re unsure what kind of shower handle or faucet replacement to buy, just take the old handle and trim to a plumbing supply store to find a matching replacement.
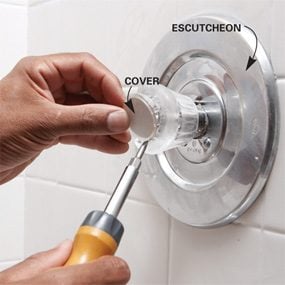
Turn off the water supply, then remove the shower handle and trim (Photo 1). Most shower handles have a removable cap covering a screw that holds the handle on; otherwise, look for a setscrew under the handle.
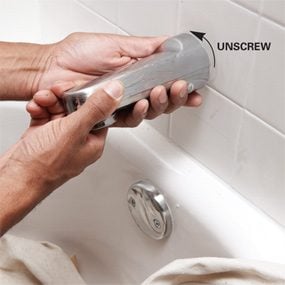
Tub spouts (faucets) unscrew (Photo 2), or pull off if they have a setscrew underneath. You may need to use two hands or even a wrench to unscrew them if the spout was caulked. Replace the spout with one that’s threaded or attached in the same way, or buy a universal-type replacement spout that comes with adapters to fit any configuration.
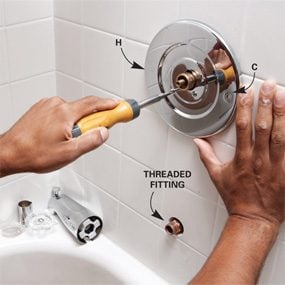
Clean old caulk and dirt off the wall before installing the new controls and spouts. Attach the shower handle replacement and trim in the reverse order that you took them off (Photo 3). Caulk the wall under the rim of the escutcheon plate with acrylic caulk before you tighten it down, when it’s roughly 1/4 in. away from the wall. Leave a 1-in. gap at the bottom, then wipe off excess caulk after the plate is tightened down. Check out some really cool showerheads you could add as a replacement.
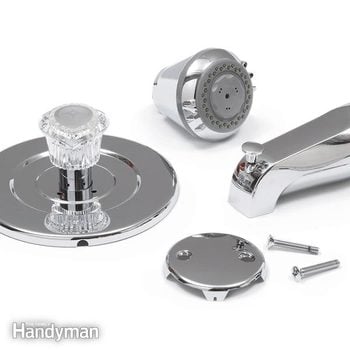
Replacement Trim Kit
A new trim kit contains a handle and escutcheon plate, a showerhead, a tub spout and an overflow cover.
Required Tools for this How to Change Shower Handle Project
Have the necessary tools for this DIY how to change shower handle project lined up before you start—you’ll save time and frustration.
- 4-in-1 screwdriver
- Pipe wrench
Required Materials for this How to Change Shower Handle Project
Avoid last-minute shopping trips by having all your materials ready ahead of time. Here’s a list.
- Acrylic caulk
- Replacement kit


