


How to Build a DIY Radiator Cover

Updated: May 01, 2023
Give your old-fashioned radiators some style. It's really not that hard, even if you're new to DIY. We'll show you how.
A full day
Beginner
$50-100
Introduction
If you own an older house with cast iron radiators, you probably love the way they heat the room but not how they look. They may not fit your modern décor, and keeping small children away from hot radiators can be challenging. Read on to learn how to design, build and install a DIY Radiator Cover.Tools Required
- Bar clamps
- Circular saw or table saw
- Dowel jig
- Drill and bits
- Orbital sander
- Router with roundover bit (optional)
- Tin snips
Materials Required
- 1-1/4-in finish screws
- 1'x2' Decorative Sheet Metal
- 1/4-in. dowels
- 3/4" x 4' x 4' MDF
- 5/16-in. staples
- Paint & primer
- Wood glue
Figure A
Overall dimensions: 33-1/4-in. H x 47-3/4-in. W x 13-3/4-in. D
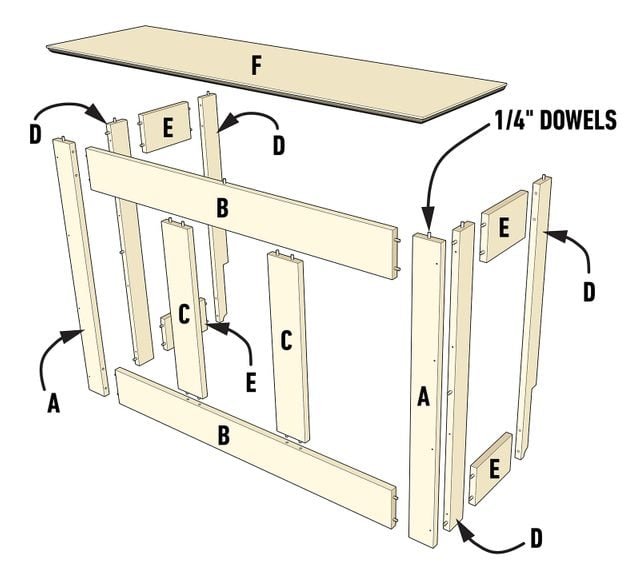
Cutting List
| KEY | QTY. | DIMENSIONS | PART |
| A | 2 | 2-7/8″ x 32-1/2″ | Front Frame Stiles |
| B | 2 | 4-3/4″ x 40-3/4″ | Front Frame Rails |
| C | 2 | 3-7/8″ x 23″ | Front Frame Mullions |
| D | 2 | 2-1/2″ x 32-1/2″ | Side Frame Stiles |
| E | 2 | 4-3/4″ x 7-1/2″ | Side Frame Rails |
| F | 1 | 13-3/4″ x 47-3/4″ | Top |
Project step-by-step (14)
Step 1
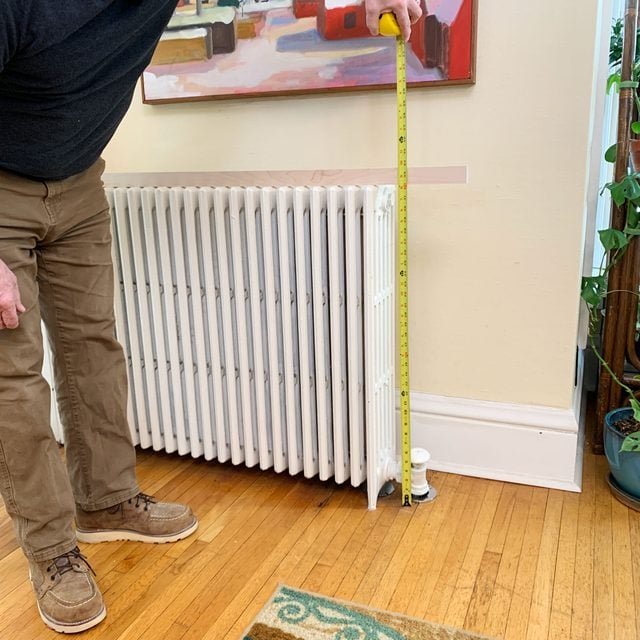
Measure the Radiator
- Here’s an easy way to measure height: Set a straight edge on top of the radiator and stretch a tape measure from the floor to the bottom of your straight edge.
- To measure the depth, hold a straight edge against the front of the radiator and measure from the wall to the inside of the straight edge.
- When measuring the width of the radiator, be sure to include all the plumbing valves and fittings.
Step 2
Designing
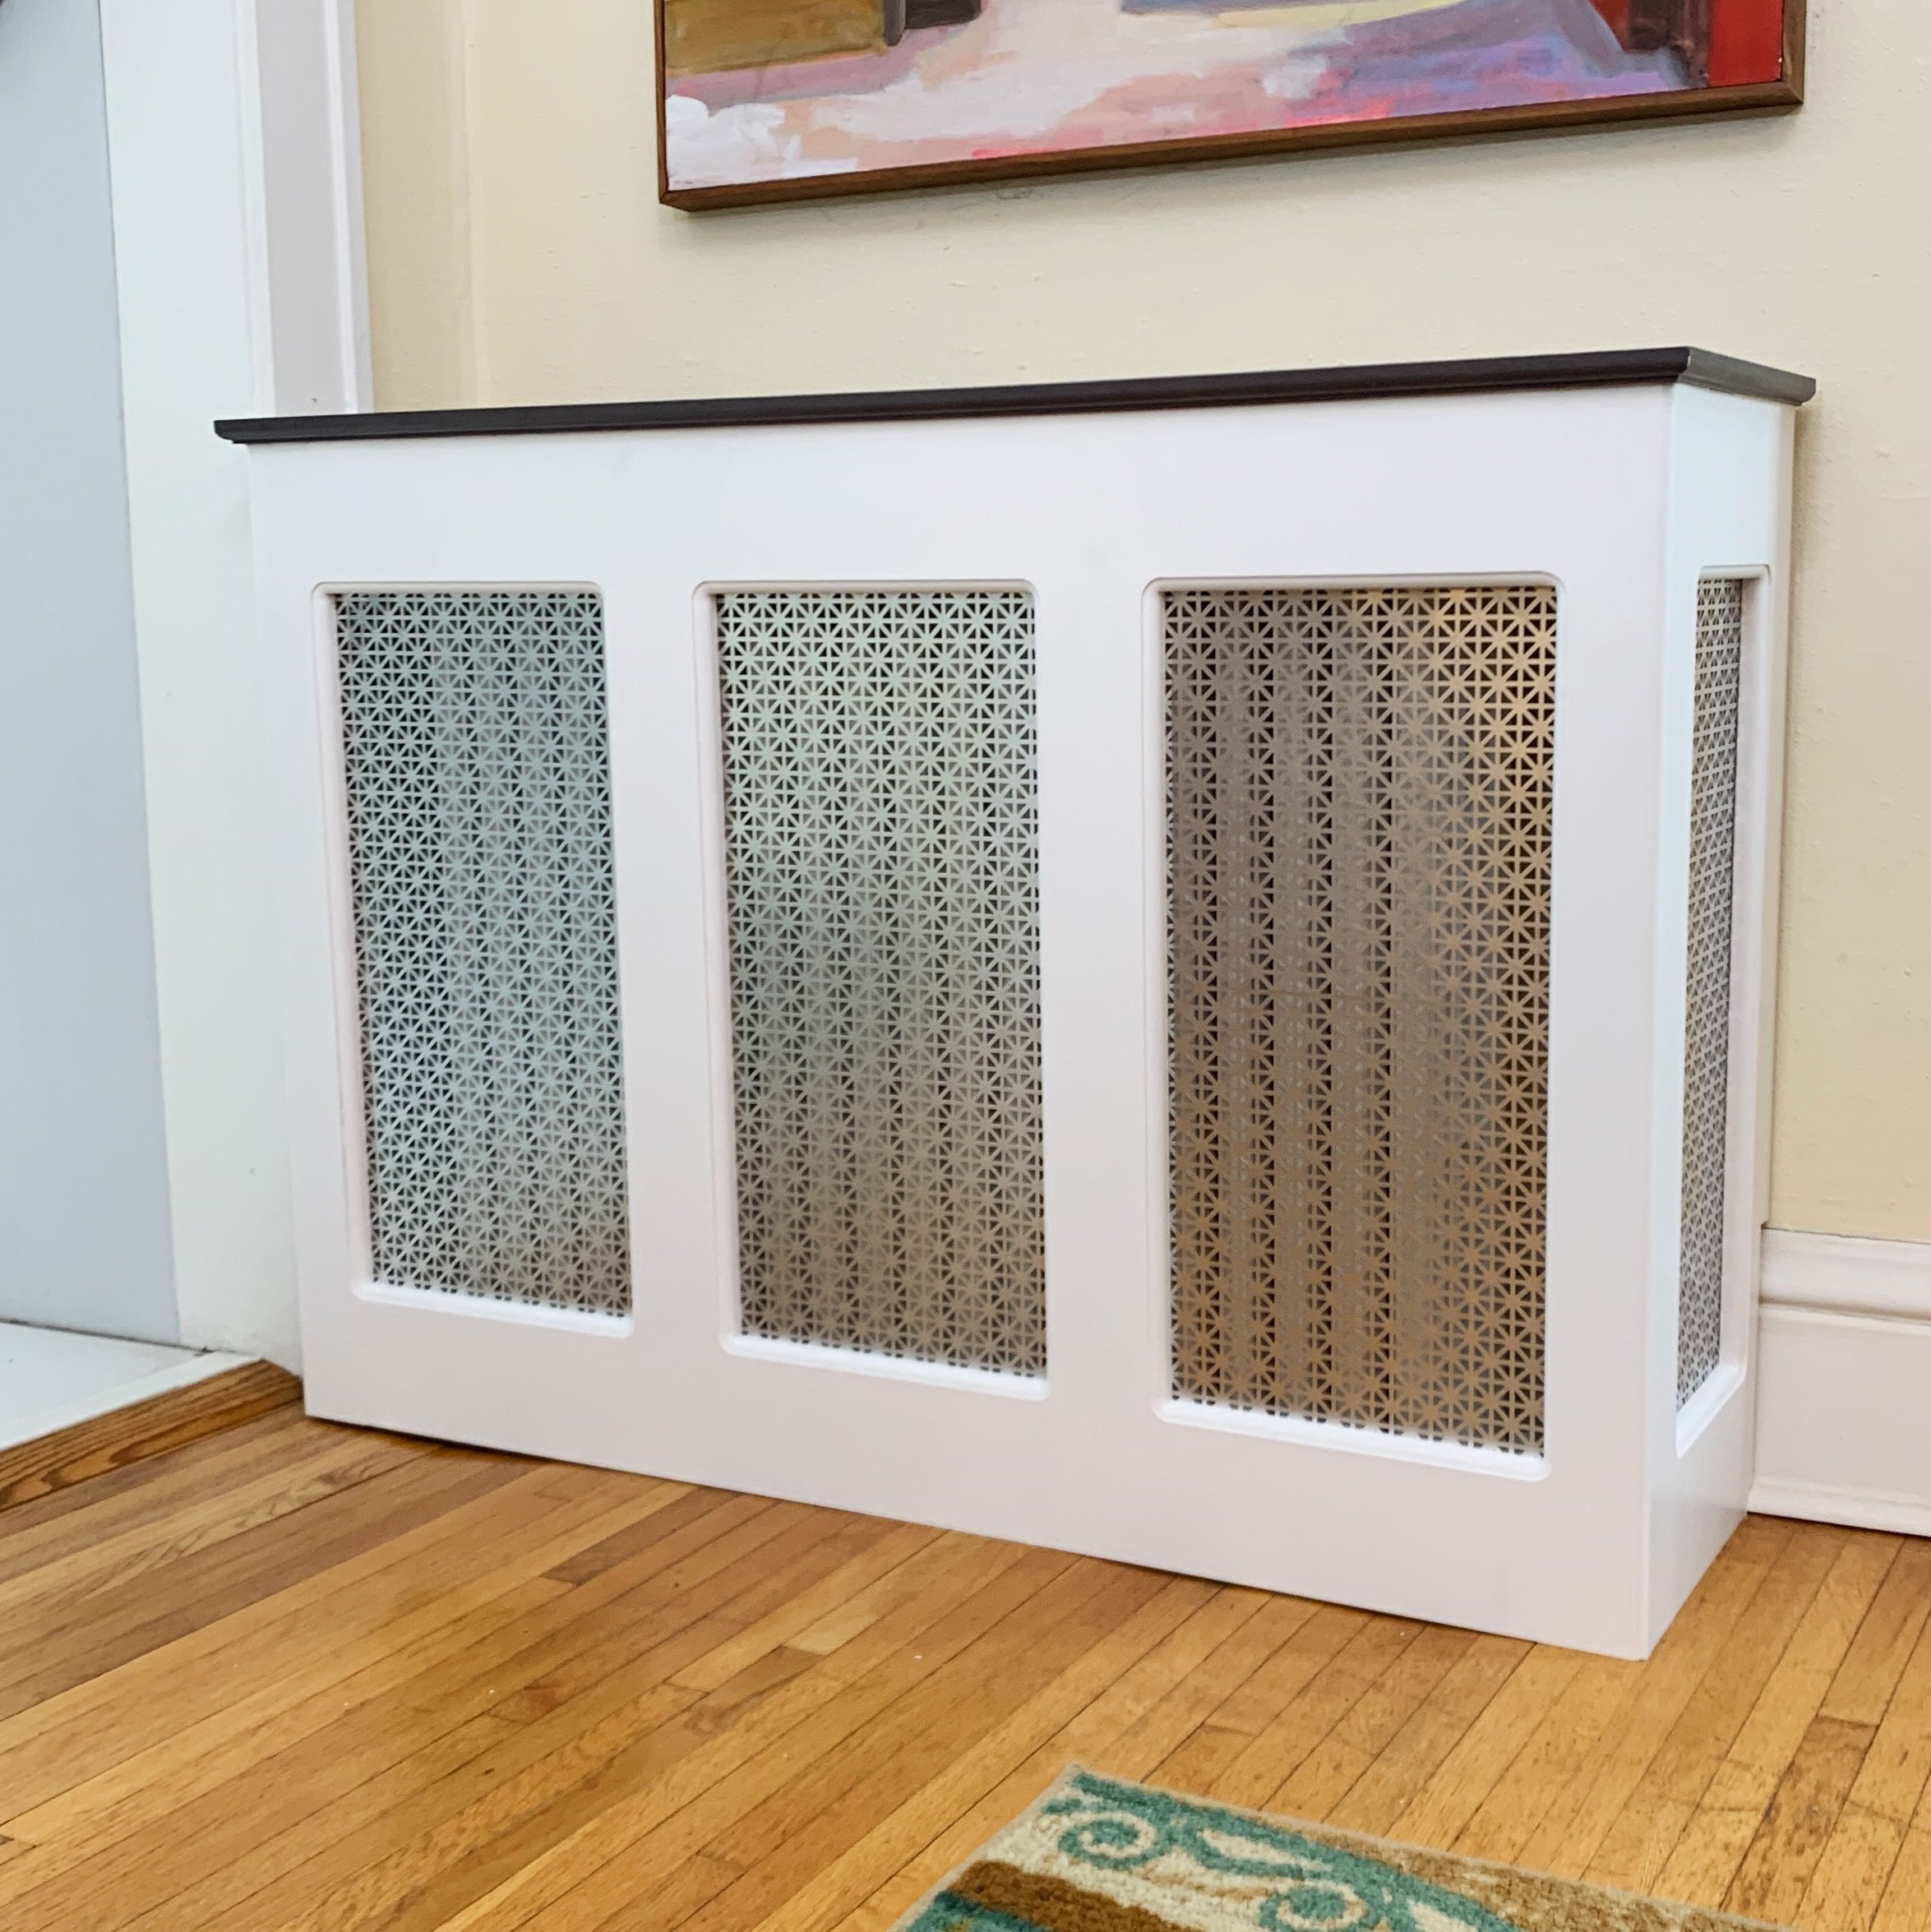
- The finished look you’re going for ultimately determines what type of wood to use in your project. You may want to match your oak trim or maple hardwood floors. For this project, we’re using 3/4-inch medium density fiberboard (MDF). We’re painting the front and side frames white to match our trim, with an accent color for the top.
- The design of this radiator cover is basically three frames: one front, two sides and a top. This piece is designed around 1-ft. x 2-ft. pieces of decorative sheet metal. Search online or at your local home store for decorative sheet metal available. The standard sizes are 1-ft. x 1-ft., 1-ft. x 2-ft. and 3-ft. x 3-ft.

Step 3
Cutting
- After you complete your design, make a cut list for all the pieces you’ll need for the project.
- Proceed to cut all the pieces on your list with either a table saw or a circular saw.

Step 4
Laying Out the Frames
- There are a few options for constructing the frames, depending on what tools you have available. You can use dowels, biscuits or pockets screws. For this project, I chose dowels and glue.

- Start by laying out your pieces for the frames on a flat surface so you can see how they all fit together. Make pencil marks at each point where the boards intersect.
- Set your adjustable square at one inch and make pencil marks where you’ll insert the dowels. (Refer to Figure A.)

Step 5
Drilling Dowel Holes
- Use a drill with a 1/4-in. inch bit along with a dowel jig to drill all your dowel holes where you have marks.
- Pro tip: Put a piece of tape on your drill bit to show when you’ve reached the proper depth.

Step 6
Glue the Frames
- It’s a good practice to dry fit all the pieces together first before gluing them.
- Apply wood glue in the dowel holes and to the pieces you’re bonding together.
- Use bar clamps to hold the frames together while the glue dries.

Step 7
Decorative Edges (Optional)
- Once the glue dries on all three frames, you can add decorative edges to your piece and/or round over the front and side edges of the top or the inside edges of the frames. You may want to match the decorative edge of your trim.
- You’ll need a router with a bearing bit for this.

Step 8
Cut Baseboard Profile
- If you happen to have baseboard trim running behind your radiator and you prefer not to cut it, you can always cut out the profile of your baseboard trim from the back stiles (D) on both side frames. This will allow the back of your radiator cover to fit tight against the wall.
- Start by measuring the height and depth of your baseboard trim including the shoe molding. Transfer those dimensions onto the back rail of both side frames.
- Cut out the trim profile and shoe molding using a jigsaw or multi-tool.

Step 9
Assemble the Frames
- Attach the two side frames to the front frame the same way you constructed the frames, using dowels and glue along with 1-1/4-inch finish screws.
- Make pencil marks two inches from each end and one mark in the center on both sides. Transfer those marks onto the back of the front frame 3/8-in. from the leading edge.
- Drill 1/4- x 5/8-inch dowel holes at each mark on the sides and 1/4- x 1/2-inch dowel holes on the back of the front frame at each mark.
- Insert dowels into each hole and dry-fit the frames together.

- Next, drill holes through the front frame into the side frames for connecting screws.
- Pull the frames apart and apply wood glue in the dowel holes and to both pieces you’re bonding together.
- Fit the frames back together securing them using 1-1/4-inch finish screws in the pre-drilled holes. Allow the glue to dry before moving on.

Step 10
Attach the Top
- Lay the top upside down on a flat surface. Set the assembled frames on the top, centering it left to right and flush with the back edge of the top.
- Draw lines on the top around the inside and outside perimeter of the frames. Now make pencil marks where you need dowel holes. Remove the frame assembly and continue the dowel lines to the center of your two perimeter lines for your dowel holes.

- Drill 1/4- x 5/8-inch dowel holes at each mark on the frames and 1/4- x 1/2-inch dowel holes on the top at each mark.
- Insert dowels at each hole and dry fit the frame to the top. Glue the top and frame together, adding clamps where needed.
- Secure the top to the frame assembly using 1-1/4-inch finish screws or nails.

Step 11
Fill Holes and Sand
- Fill all the screw holes on the front frame and top with wood filler, then allow it to dry completely.
- Sand the entire piece using an orbital sander with 150 grit sandpaper.

Step 12
Finishing
- At this point in the project, it’s time to prime and paint or stain and finish the entire piece. Allow the finish to dry completely before moving on.

Step 13
Attaching Decorative Sheet Metal
- Cut the decorative sheet metal to size using tin snips.
- Attach each piece to the inside of frame openings using 3/8-inch staples or 1/2-inch Panhead screws.
- Note: Leather gloves will protect your hand while cutting sheet metal.

Step 14
Install the Radiator Cover
- This radiator cover essentially is held in place with gravity. You can, however, attach a friction fit board along the back edge of the underside of the top, between the wall and the radiator. This will keep the cover from falling forward.
- Another option is to attach a two-inch cleat to the wall, between the radiator and the wall. Secure the top to the wall cleat with 1-1/4-inch finish screws through the top into the cleat.


Originally Published: March 03, 2022