


How To Make a DIY BBQ Grill

Updated: May 12, 2023
If you don't feel like hauling the grill, or you just feel like roughing it a little, make this simple and functional DIY BBQ grill.

An hour or less
Beginner
Less than $20
Introduction
If you're camping in the great outdoors, going to the beach or heading to your rustic off-grid cabin for the weekend, hauling a BBQ grill and bags of charcoal briquettes along may not be so practical. Fortunately, for even mildly intrepid outdoorsy types, building a DIY BBQ grill couldn't be much simpler.
You'll need to pack a few items from home, but otherwise you can improvise with the tools nature provides. And we've included some tips on how to cook over wood charcoal.
This DIY grill won't win any beauty contests, but it's intended to be temporary and functional. If you build it on public land, or private land that's not yours, remember to check local regulations about open fires. When you're done, make sure to completely extinguish the fire and clean up any remaining debris.
Tools Required
- 2 to 4 bricks (optional)
- Lighter
- Portable campfire grill/grate
- Small camp shovel
- Stones (found on-site)
Materials Required
- Fire-starter cubes or bundles
- Firewood (can be found on-site)
Project step-by-step (6)
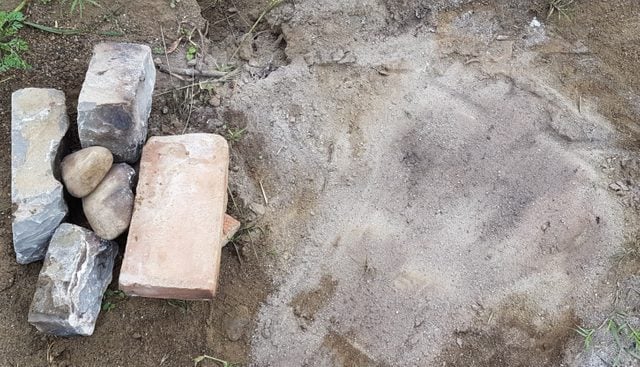
Prepare a clear area for the BBQ
- Find an area of level ground about five to six feet in circumference. (The fire is much smaller than that, but you’ll want room to sit by it and move around while you cook.)
- Pick a spot that’s sheltered from the wind.
- Make sure there are no low-hanging tree branches or foliage near the area where you’ll build the fire.
- Sweep away any leaves or other debris.
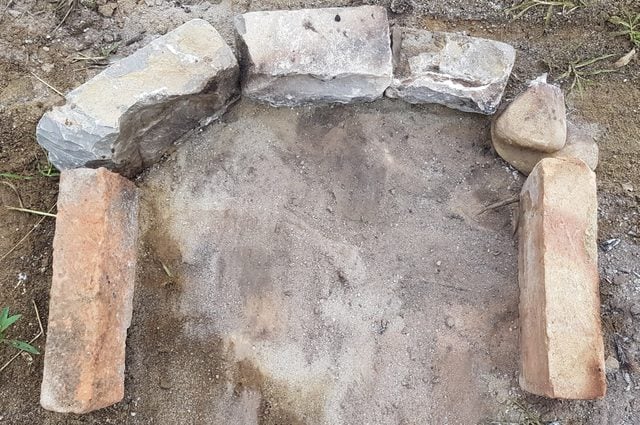
Build the Basic BBQ Form
Using the bricks you brought with you or stones found on-site, build the BBQ form.
- Choose dense, heavy stones that are roughly the same size.
- Avoid stones that are damp. Don’t take stones from creek beds or other bodies of water — they could explode when they heat up!
- Position them in a U-shape.
- If you’re building on soft sand, nestle the bricks into the sand a little so that they won’t tip over.
Pro tip: The idea is to create a shape that allows you to build the fire toward the back of the “U,” then pull cinders out for grilling (see below).
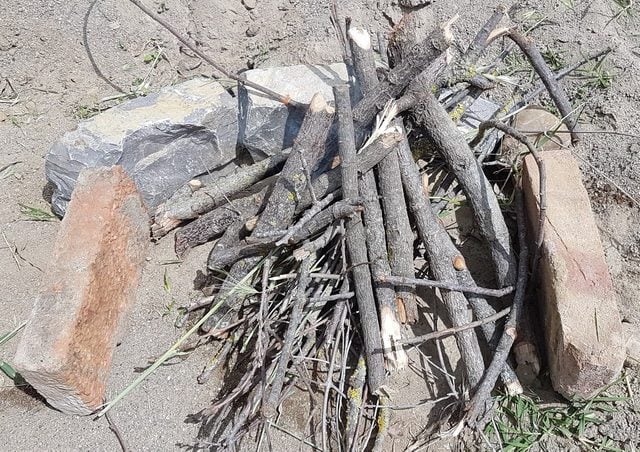
Gather Firewood and Build the Fire
With any luck, you’ll find enough downed, dry firewood on site and you won’t have to haul any with you.
- Gather softwood like pine for kindling. Use only small sticks, needles and pieces of bark.
- Gather hardwoods like oak, hickory, ash or beech for cooking.
- Gather fallen wood, which should be sufficiently dry for burning.
- Avoid any wood that’s damp or covered with vines.
Note: We created a modified tepee form by leaning wood against the stones. The kindling is inside the tepee.
Light the fire
If you’re adept at rubbing two sticks together to start a fire, go for it. We packed some natural fire-starter instead.
- Light the kindling by placing the lit fire-starter cube or bundle in the middle of the tepee.
- Once the kindling takes, start adding medium, then larger pieces of hardwood.
- Don’t add any additional pine foliage or other leaves or brush after this.
- Keep the fire burning until larger pieces are fully consumed and start to break apart.
Note: Here are three DIY fire starters:
- Waterproof Fire Starters;
- Wine Cork Fire Starters;
- Lint Fire Starters.

Make the charcoal
Unlike cooking directly over the flame, wood charcoal allows for even, slow cooking without scorching or blackening your food, and imparts a nice smoky flavor.
- With the camp shovel, pull out the chunks or glowing-red charcoal and embers that have already formed.
- To speed things along, use the shovel to break up larger, well-consumed pieces of wood.
- With the shovel, evenly spread the charcoal in an area directly in front of the fire.

Grill and go!
- Set the portable camp grill you brought along over the charcoal.
- Start cooking your items.
- As the charcoal starts to lose heat, pull more from the fire as needed.
Pro tip: For vegetables, fish, shrimp or other items that need frequent turning or might slip through a larger grill grate, we use a portable grill basket. But you’ll need to find one with legs, or use rocks or bricks to create a platform to set it above the charcoal, rather than directly over. Learn how to use a grill cleaning brick.

Originally Published: May 27, 2021