


Make artisan pizzas and more right in your backyard.
Our editors and experts handpick every product we feature. We may earn a commission from your purchases.Learn more.


Updated Jul. 25, 2024
Make artisan pizzas and more right in your backyard.
Our editors and experts handpick every product we feature. We may earn a commission from your purchases.Learn more.
About one week
Advanced
$3000 to $5000
If you love outdoor cooking and entertaining, this wood-fired pizza oven might be just what your backyard needs.

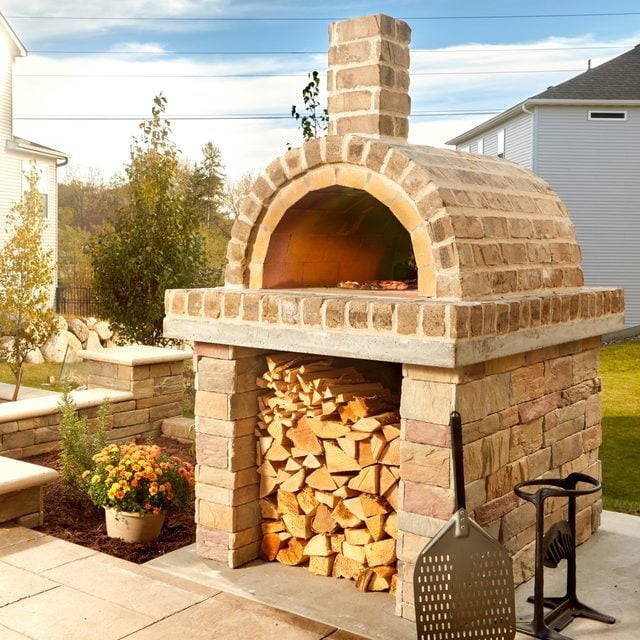
If you love backyard cooking and entertaining, a brick pizza oven might be just what you need.
Granted, this isn’t a project for someone with no DIY experience. But if you have a little skill, an attention to detail and a helper, you can build this brick backyard pizza oven for a fraction of what it would cost to have a professional build it for you. After all, you’re not building a house.
And it’s more than just a pizza oven. Once you’ve mastered controlling the temperature, you can bake anything you’d normally make in a conventional oven. Here’s everything you need to know about outdoor pizza oven kits.


Dick DeGrood, president of Twin City Brick & Stone, has been in the masonry supply industry for more than 46 years. His company supplies masonry material for projects in large commercial properties, apartment buildings, retail stores and luxury homes, as well as for small DIY jobs like wood-fired outdoor ovens. DeGrood built himself a wood-fired oven more than 20 years ago that continues to function as well as the day it was built.
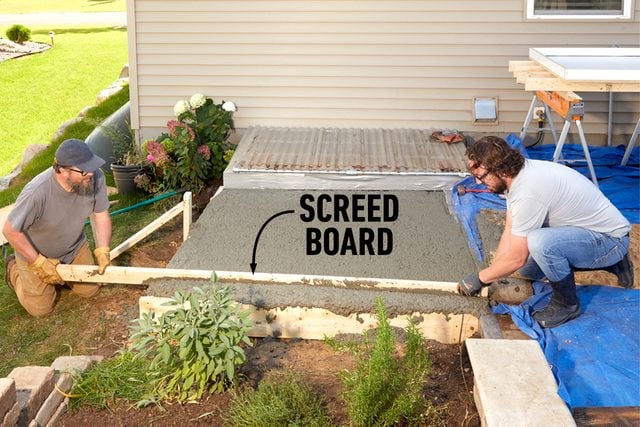
Build a form for the concrete pad with 2×10’s. Our pad is eight inches thick, so we spread class V gravel in the form, leaving eight inches to the top. Tamp down the base to compact it. Make sure you brace and slope your form so it sheds water.

Pour concrete mix into the form, then screed off the top. Once the concrete begins to set, trowel the surface and tool the edges. Allow the concrete to cure for a day before removing the form.
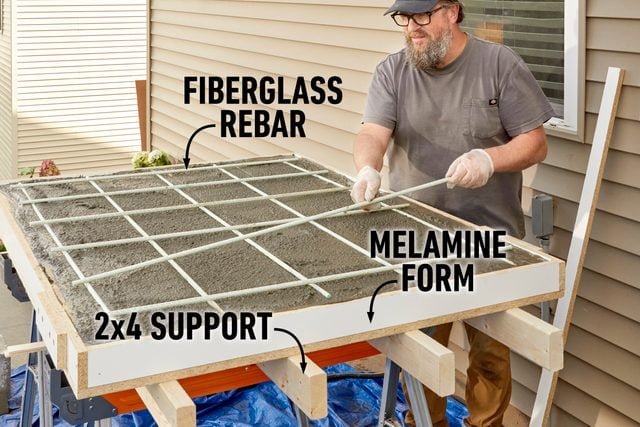
Build a form for the capstone with melamine. Set the form on sturdy sawhorses with 2×4’s underneath for full support. Apply a bead of silicone at the bottom corners of the form. Once the silicone dries, fill the form with lightweight countertop concrete mix. We used fiberglass rebar here to keep the weight down and avoid rust stains.
We set the rebar grid and then pressed it into the concrete. When the concrete begins to harden, trowel the surface and tool the corners. The capstone is only three inches thick, so we let it cure for several days before removing the form.
Lay out the outline of the base on the pad and set the first course of concrete blocks. Because our pad slopes, we set the first course of block in mortar. That way we could build up the back enough to make our base level.
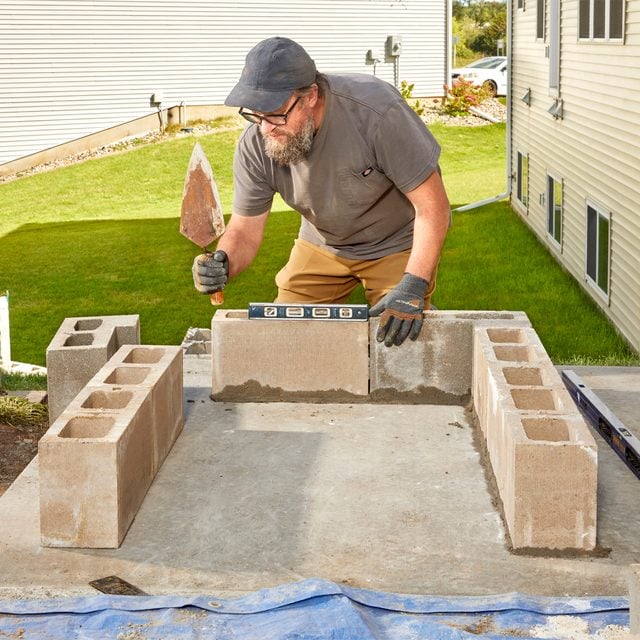
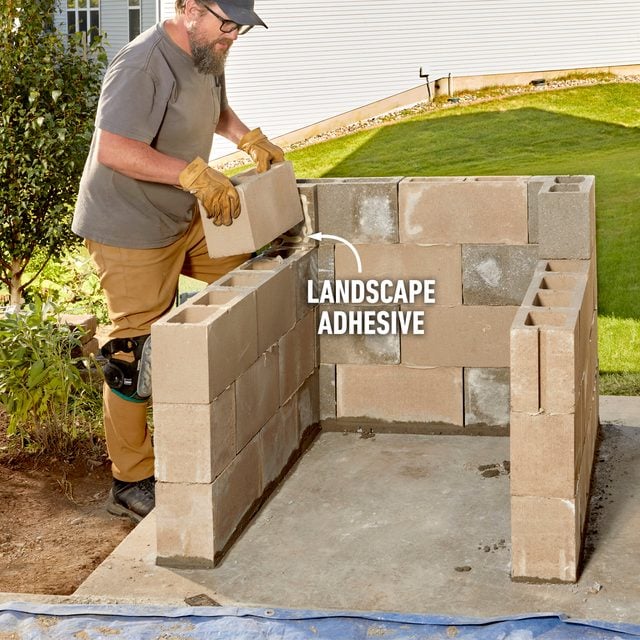
Set the rest of the block for the base with landscape adhesive. This is much easier and faster than using mortar. Be sure to keep the whole thing square, plumb and level as you build.
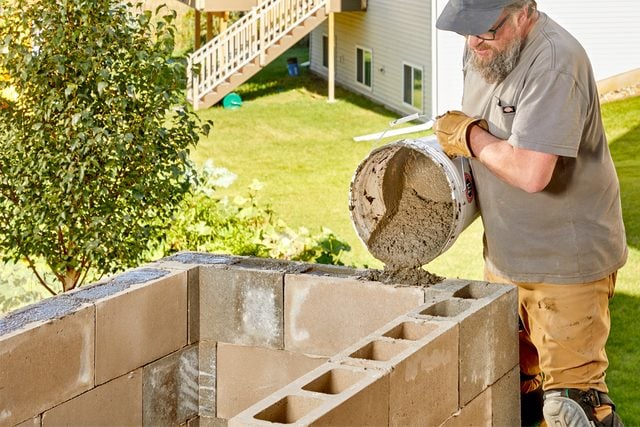
When the adhesive dries, fill all the cores with concrete mix and rebar. Before setting our first course of blocks, we drilled the pad for rebar. This way, after filling the cores, the base is firmly attached to the pad.
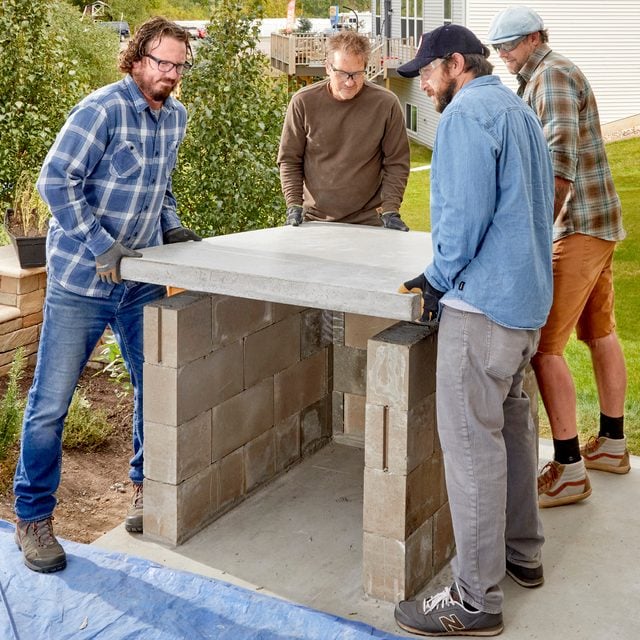
Remove the form from the capstone. Clean off any leftover silicone and smooth any sharp edges with a rub block. Apply landscape adhesive to the top of the base, then set the capstone in place. This thing is really heavy so find a few friends to help you!
Set bricks around the perimeter of the capstone, applying the mortar with a grout bag. We didn’t want the hollow sides of the bricks to show, so we cut ends off extra bricks to cover the hollow faces. Let the mortar cure for 24 hours.

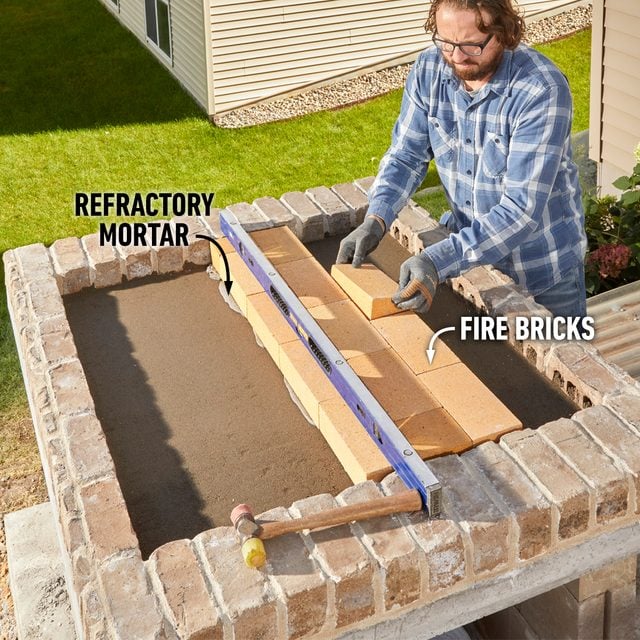
To bring the fire bricks up to the height of the perimeter bricks, we set them on a thick-bed floor-mix mortar. We set PVC pipe in place to screed the mortar to the height we wanted.
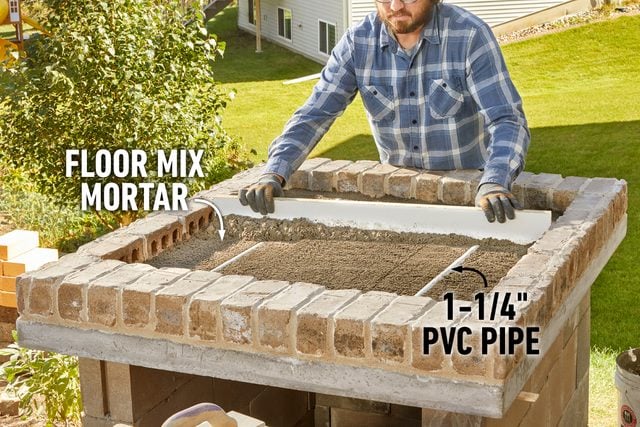
Set the fire bricks in place with refractory mortar to bring them to final level on top of the floor-mix base. Use a level or straightedge to keep them flush with the tops of the perimeter bricks. Traditionally, mortar isn’t used between the fire bricks in the oven base.
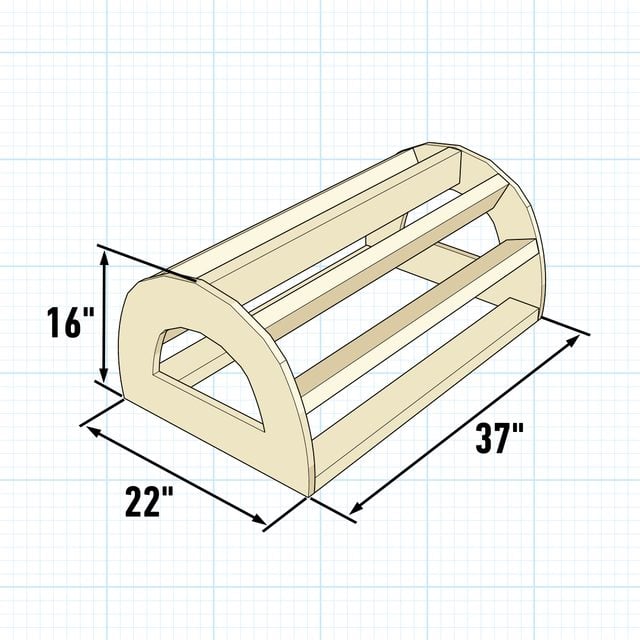
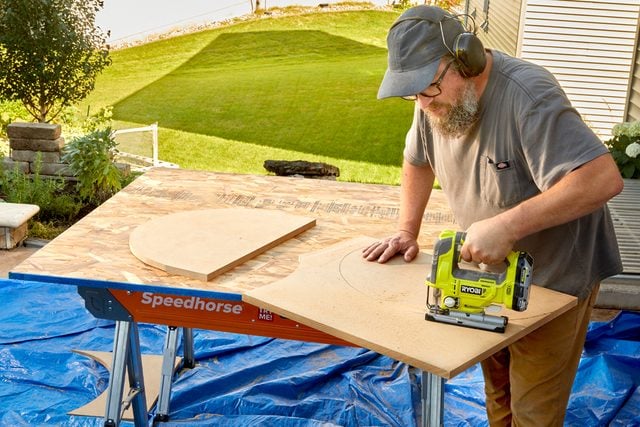
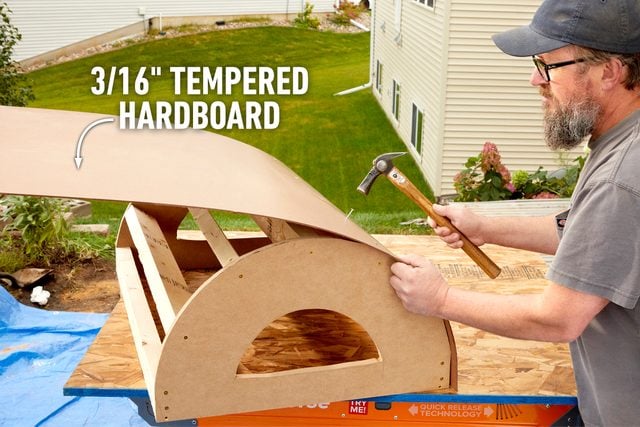
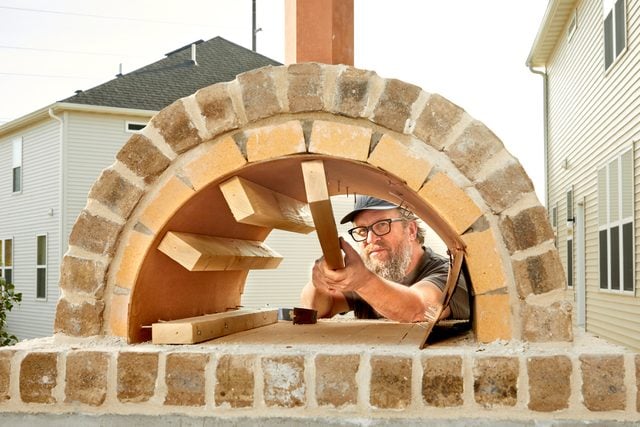
Cut the ends for the arch form as shown in Figure A. These can be made from any scrap plywood or medium density fiberboard (MDF).
Connect the arches with straight 2×4’s and construction screws. Don’t glue the form together. You want it to be easy to take apart later.
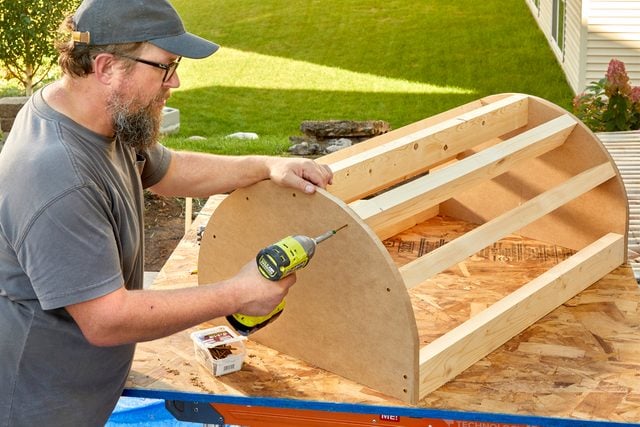
Apply the tempered hardboard skin to the arch framework with roofing nails. Cut a large hole in the center of each arch. This makes removing the form much easier.
Center the arch form on the oven base and start setting fire bricks from both sides of the form. Figure the mortar joints as you go, working it out to avoid cutting any bricks. Use refractory mortar to set the fire bricks.
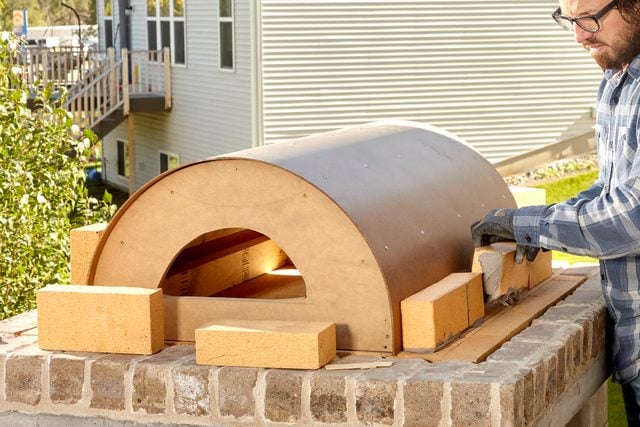
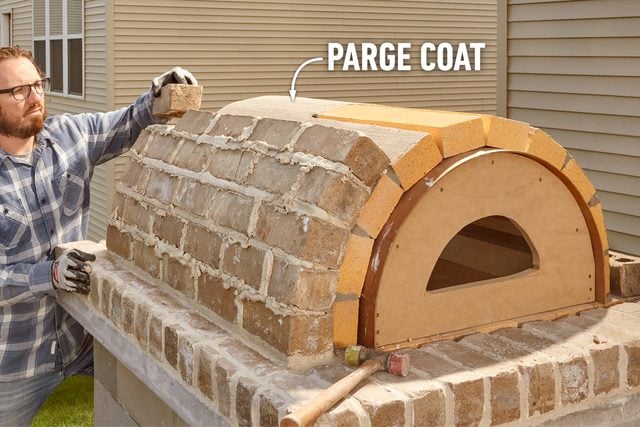
Continue working up the arch, staggering the fire brick joints on each consecutive course. After setting all the fire bricks, we applied a parge coat of mortar to the whole arch. (A thin coat gives a smooth, continuous surface to apply the outer bricks.) We left the fire bricks in the flue area loose for the time being.
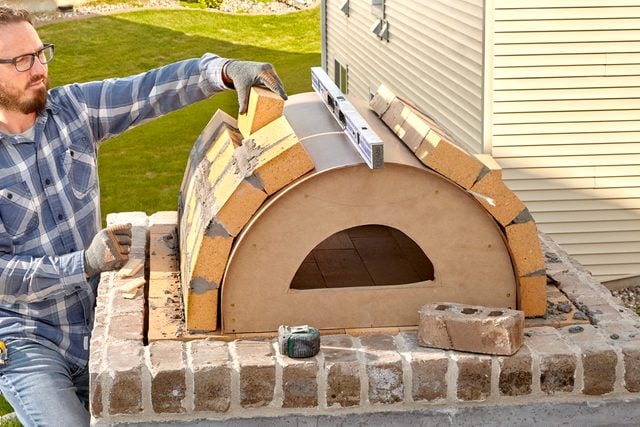
Once the mortar sets on the fire brick arch, add the outer brick veneer. We applied mortar to each brick, then filled in where needed using a grout bag. Once the mortar begins to set, tool the mortar joints.
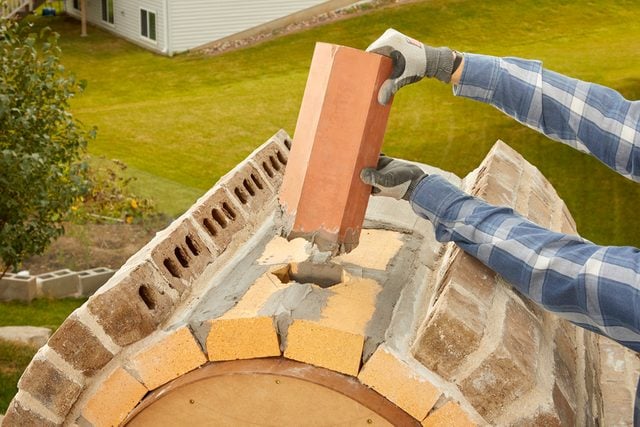
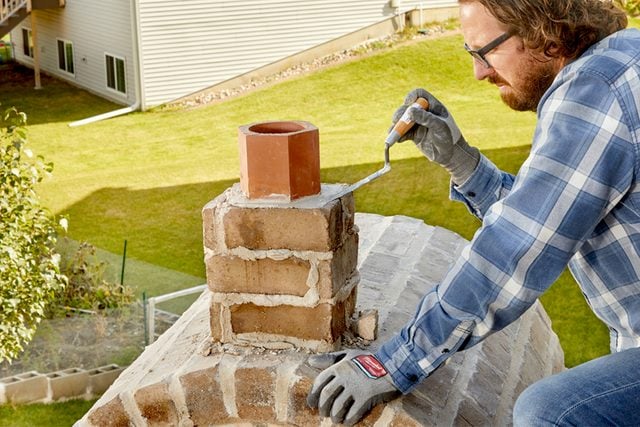
Cut out an area in the two top front fire bricks to accommodate the opening in the flue. Set those fire bricks, then mortar the flue in place. When the mortar is firm, continue setting the remaining outer bricks, cutting them to fit around the flue.
Let the arch cure for a day or two, then carefully remove the arch form. Start by unscrewing the ends. Then, as gently as possible, pull the ribs free of the hardboard. Avoid prying or pounding. You don’t want any cracks in the mortar joints .
Fill in the back of the oven with fire brick followed by a parge coat. Cover the back using slices of the outer brick mortared to the parge coat. Fill in the joints using a grout bag.
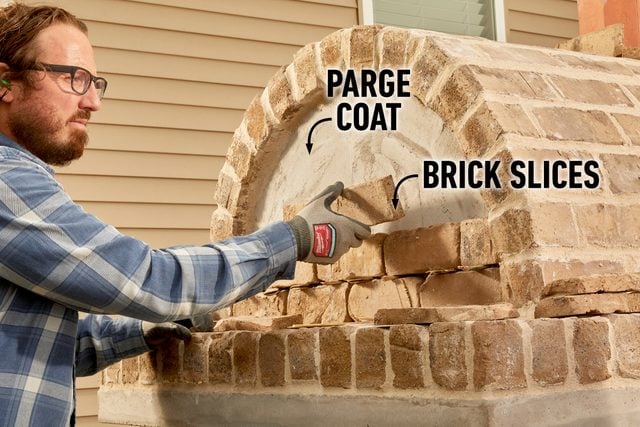
We used brick slices to veneer the flue. We staggered the corner joints and filled in mortar around the flue as we built up the veneer. At the top, we capped the bricks with a coat of mortar sloped to shed water. You can skip veneering the flue if you like.
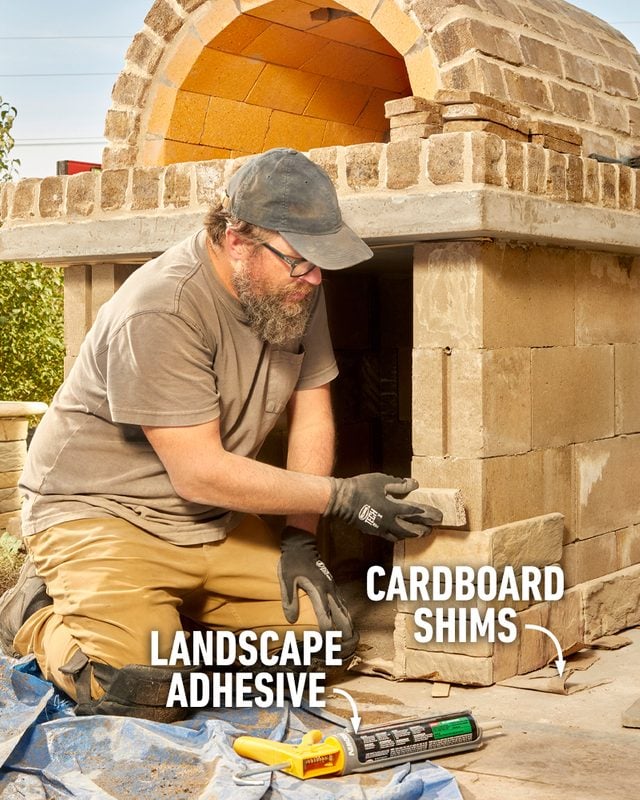
To cover the concrete block base, we applied cultured stone veneer with landscape adhesive. We started on the inside and wrapped around the front corner, then worked around the whole base. I placed cardboard shims to hold the stone up off the slab for water drainage.
Continue applying the cultured stone all the way around and back inside, working your way up. At the corners and the top, you’ll need to trim the stones, but they’re easy to cut with an angle grinder outfitted with a diamond wheel.
Originally Published: March 27, 2023