


With this DIY hot tub, you can enjoy a relaxing soak right in your own backyard — without electricity.
Two days
Intermediate
$550
Introduction
In no time, you can take relaxing dips in this easy-to-build DIY hot tub. Plus, there's no need for electricity — just good dry firewood.

Watch How to Build a Wood-Fired Hot Tub
Tools Required
- 1-1/4" Hole saw
- 1/4" Spade bit
- Bead and cove router bit set
- Carpenter's square
- Caulking gun
- Drill/driver
- Garden hose
- Hot Glue Gun
- Jigsaw
- Miter saw
- Router table
- Router with flush-trim bit
- Rubber mallet
- Screwdriver
- Table saw
Materials Required
- 1 - 100-gal. Poly oval stock tank
- 1 - 3/4" Galvanized tee
- 1 - 4' x 8' x 1" Pink foam insulation
- 1 - 4' x 8' x 3/4" plywood
- 1 - Drain valve
- 1 - Stainless steel coil heat exchanger
- 1 - Stock tank drain plug
- 1-1/2" Finishing screws
- 1-1/4” Construction Screws
- 12 - 1x3x8' Cedar
- 2 - 2x4x8' Green treated
- 2 - 3/4" Rubber couplers
- 3 - 1x4x8' Cedar
- Exterior wood glue
- Plumber’s tape
- Smokeless fire pit
- Tube of construction adhesive
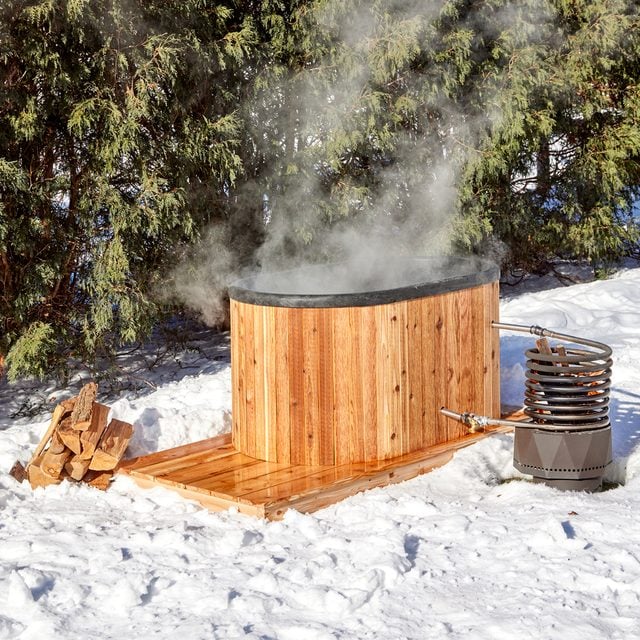
Whether it’s summer or winter, you don’t need to go to a resort to enjoy a relaxing soak in an outdoor hot tub. For a relatively small price, you can build this hot tub in your backyard and take a dip whenever the mood strikes. Fill the tub with a garden hose, light a fire to heat the water, hop in and relax!
The Tub
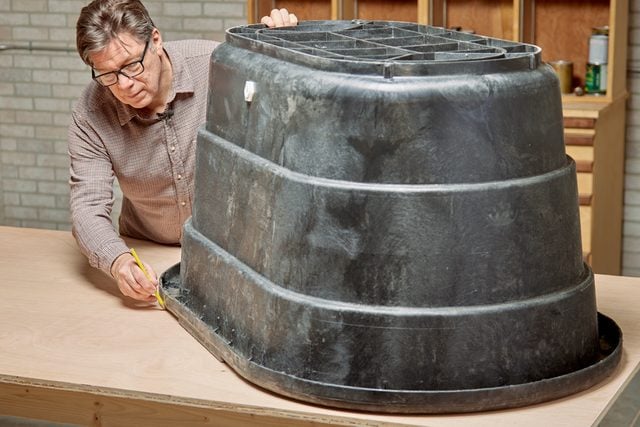
I chose a Rubbermaid 100-gallon stock tank for a few reasons.
First, it’s deeper than the metal tanks I saw. Second, the plastic itself is a more comfortable temperature in hot or cold weather than metal. Third, its rounded top edges have a larger radius than the edges of metal tanks, so they’re more comfortable to rest your arms on.
Lastly, you’ll find it more comfortable to lean back against the angled ends of the stock tank than the straight sides of a metal tank.
This tank had molded-in brackets for supporting it on a wood frame. I didn’t like the look and they would have made it harder to clad the tank, so I cut them off with a multi-tool.
Several molded styles are available, some with ridges, others without. For the purpose of making a hot tub, any style can suffice. The process of insulating will need to be adjusted if you go with a ridge free tub.
The Water Heater
To heat the water, we used a wood-fired thermosyphon heat exchanger. This 3/4-in. stainless steel coil circulates the water without a pump. It’s based on natural convection, called thermal siphoning.
Cold water enters at the bottom of the heater and expands. Convection moves the heated water upward, pushing it through the coil and out into the tub. At the same time, the heated water is replaced by cooler water below. So there is no need to wire the hot tub — a pile of dry firewood will do.
You can go out and purchase a 60-foot roll of 3/4-in. copper tube and bend a heating coil yourself. But the copper alone costs about the same as this stainless steel coil I found online and had delivered to my doorstep.
Project step-by-step (11)
Step 1
Cut the Platform
Set the stock tank upside-down diagonally on one end of a 4- by 8-ft. sheet of plywood. This lets you get the platform and a tub cover from one sheet.
With your pencil at a slight angle as shown, trace around the perimeter of the stock tank. Cut out the platform with a jigsaw. Cut the cover the same size.
Step 2
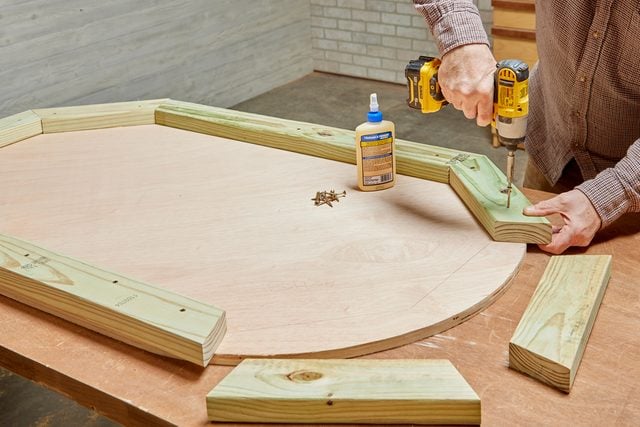
Build Up the Base
Cut treated 2x4s to form an elongated octagon. Secure the 2x4s to the platform with water-resistant wood glue and exterior screws.
Step 3
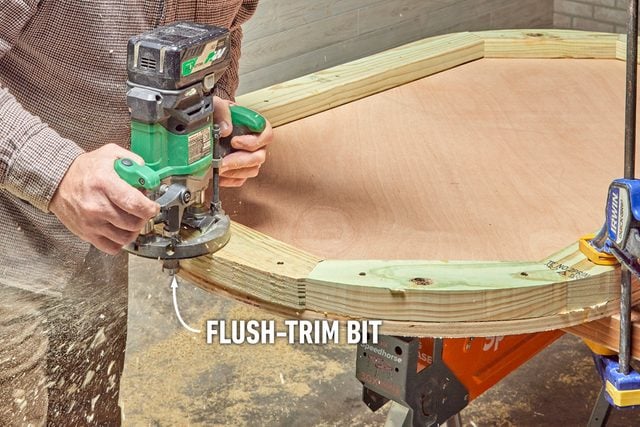
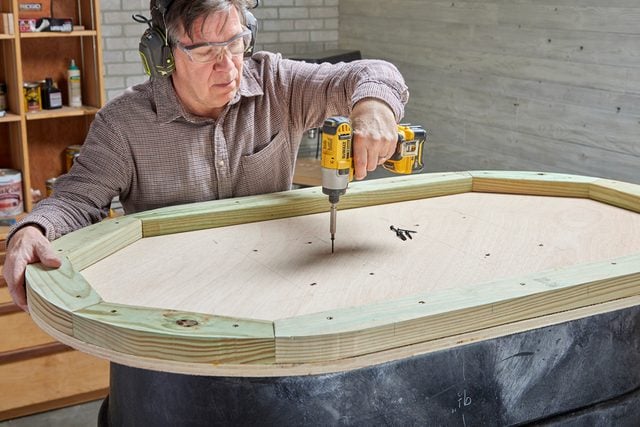
Trim the Base
Trim the 2×4 base so that it’s flush to the edge of the platform. Use a jigsaw or a router with a flush-trim bit.
Step 4
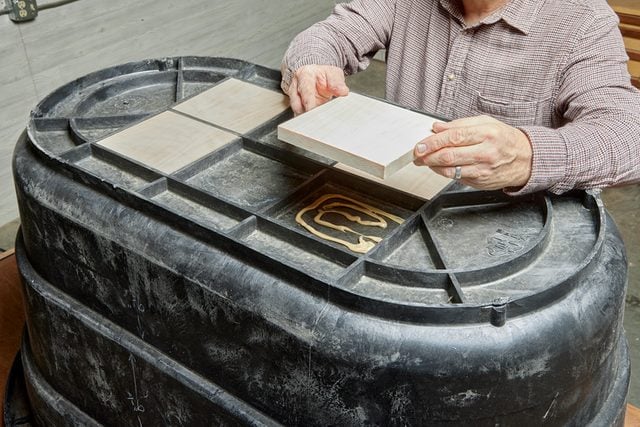
Add Mounting Block
Cut plywood squares to fill the areas between the reinforcement ribs on the bottom of the stock tank. Secure the plywood with construction adhesive and self-tapping screws through the ribs into the plywood edges.
Step 5
Attach the Base
Apply construction adhesive to the plywood squares. Set the assembled base on the upturned stock tank and center it. Secure the base with 1-1/4-in. screws through the platform into the plywood squares you installed in the previous step.
Step 6
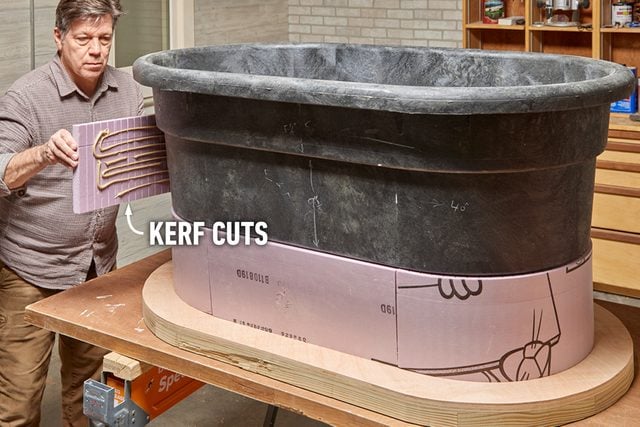
Insulate the Tub
Cut one-inch-thick foam board insulation to size with a table saw or utility knife. Make kerf cuts in the insulation on the pieces that curve around ends of the tank to allow the insulation to bend without breaking. Attach the foam insulation to the stock tank with hot glue and construction adhesive.
Step 7
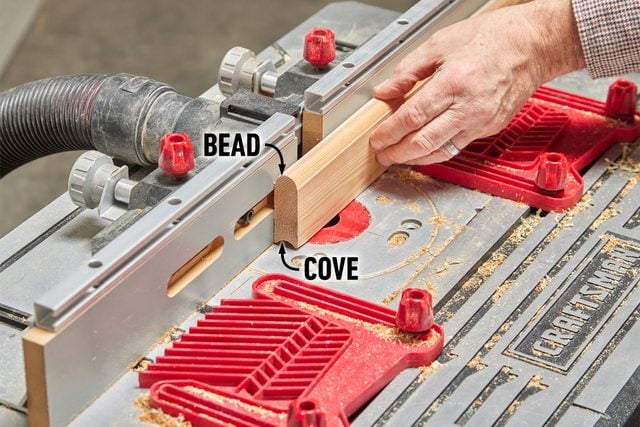
Make the Cedar Cladding
Using a router table, rout a bead on one edge of all the cladding boards, then rout a cove on the other edge of the boards. You can cut your boards to length before you run them through the router, or leave them at full length and cut them to final length after routing.
Step 8
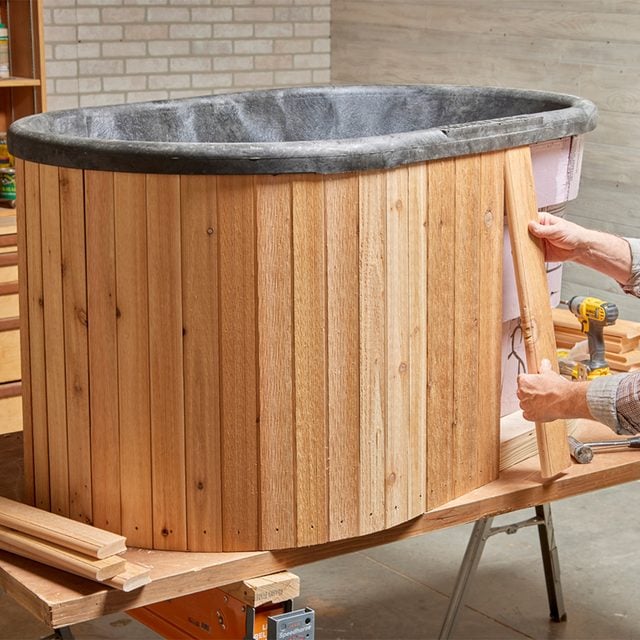
Attach the Cedar Cladding
Set the tub assembly on sawhorses to make it easier to work on. The first cladding board is the most important. Place the board under the lip of the stock tank. Then use a carpenter’s square to check the board is square to the platform. Attach the board to the edge of the platform with finish screws.
Work your way around the tub, keeping the bead on each board tight to the cove of the preceding board. Check for square as you go. The last board may need to be custom cut and routed again to fit tightly.
Step 9
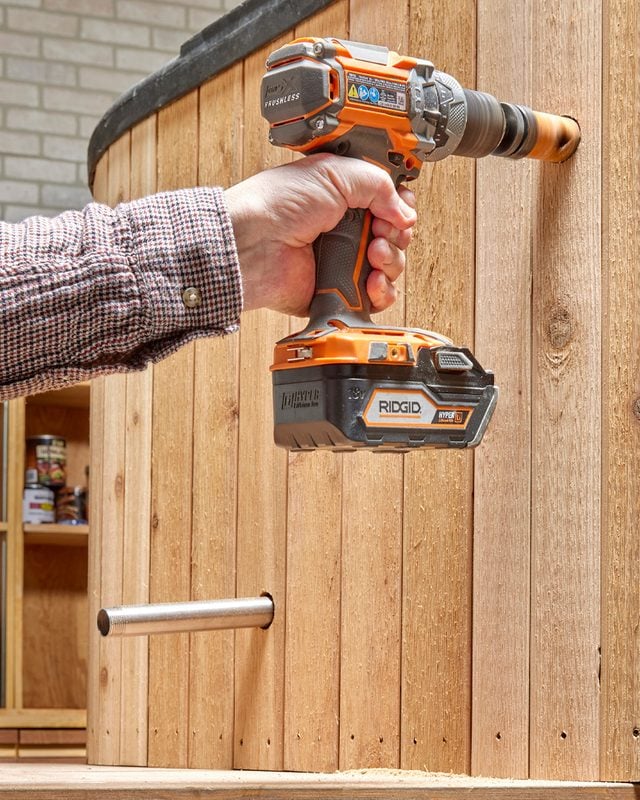
Add the Piping
Drill a 1/4-in. pilot hole from the inside of the tank through the drain plug and the cladding. Using the pilot hole as a guide, drill a 1-1/4-in. hole through the cladding from the outside.
Wrap the thread of a pipe nipple with plumber’s tape (aka Teflon tape) and thread it into the drain plug hole. Next, attach the coil to the pipe extension with a rubber coupler.
Step 10
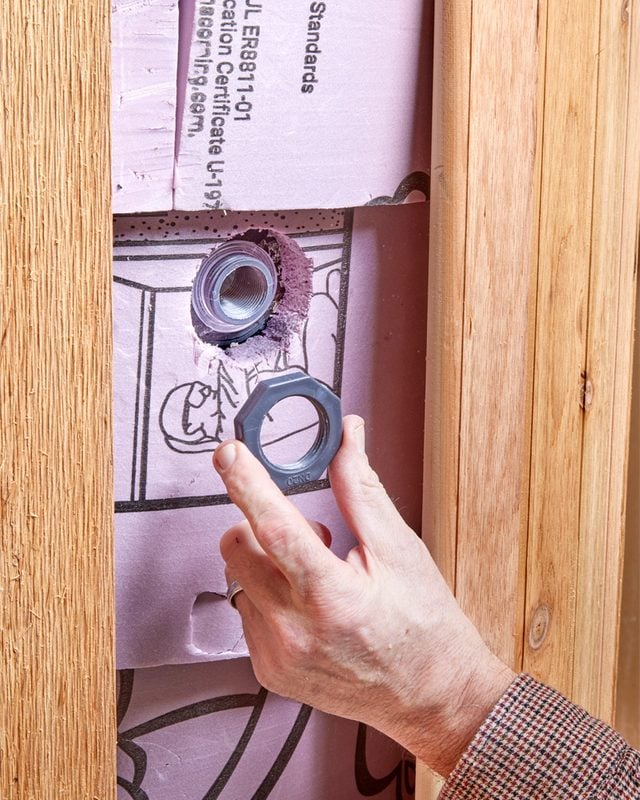
Add the Second Hole
Thread a pipe nipple onto the upper end of the coil and mark on the cladding where to drill the top hole. Again, drill a 1/4-in. pilot hole, only this time through the cladding into the stock tank.
Remove the board and drill a 1-1/4-in. hole at your pilot hole into the board. Remove enough insulation to make space for the drain plug, then drill a hole to fit the threads of your drain plug and install it.
Step 11
Attach the Heating Coil
Reinstall the bored cladding. As before, wrap the thread of a pipe nipple with plumber’s tape and thread it into the drain plug. Then attach the coil to the pipe nipple with a rubber coupler.

Originally Published: April 17, 2023