
How to Use a Gas Grill for the First Time

Updated: May 15, 2023
Want to try outdoor cooking, but not sure how to use a gas grill? Learn all about gas grills and how to cook on them, even if it's your first time.
Introduction
Nothing says summer quite like the smell and taste of grilled food. BBQ grills are a popular staple of American and world culture, for good reason. The convenience, speed and quality of cooking they offer is second to none. Grilling is also a whole lot of fun. If you've never fired up a gas grill before but want to learn, this step-by-step guide will help.
Tools Required
- Gas grill
- Lidded roasting pan
- Meat thermometer (optional)
- Small fire extinguisher
- Stainless steel scissors
- Stainless steel spatula
- Stainless steel tongs
- Stainless steel wire brush
Materials Required
- Grillable foods
- Propane or natural gas source
Project step-by-step (6)
Step 1
Hook Up and Turn On the Gas
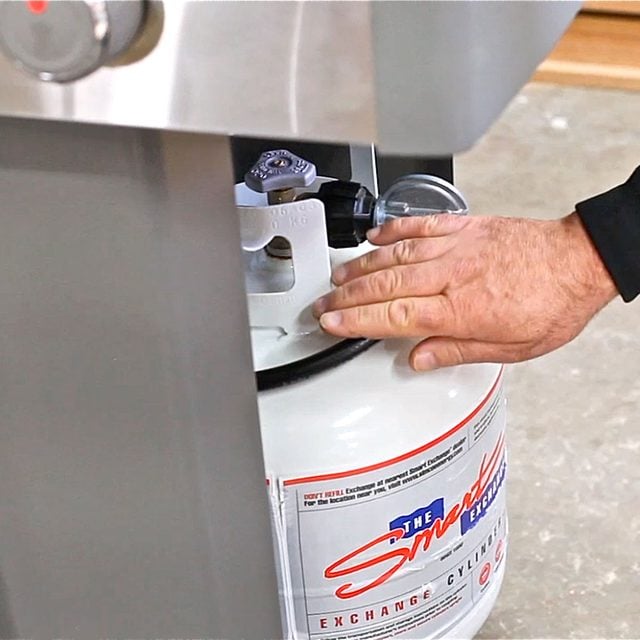
- Determine if your grill is designed for burning propane or natural gas. Most gas grills use propane, supplied from small portable tanks, but some are connected directly to the natural gas supply of a house. Here’s how to make sure that you have enough gas to grill.
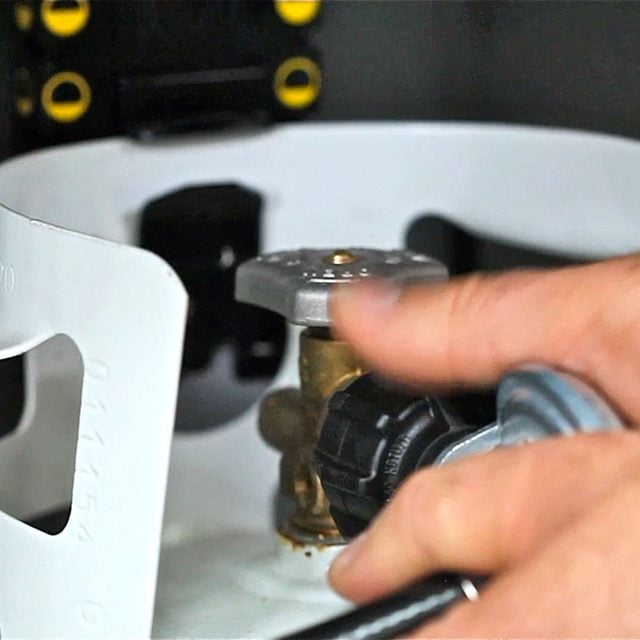
- Find your grill’s gas supply hose and regulator (the round metal piece attached to the hose). If your grill takes propane, thread the regulator onto the valve at the top of your propane tank (see photo below). Be sure to thread it all the way on, taking care that it’s aligned properly. Do not over-tighten.
- The best way to maintain a supply of propane is to have a second tank on hand at all times. When the tank you’re using runs out, which can happen at any moment, simply install the fresh tank and keep on cooking. Then swap out the empty tank for a full one. or have the empty tank refilled before your next grilling session.
- Open the propane tank valve, or the natural gas valve, all the way.
- Make sure you have a fire extinguisher within easy reach before lighting.
Step 2
Light the Grill
- Make sure your grill is outside in a well-ventilated area before lighting. Never use a gas grill indoors.
- Determine if your grill has an igniter button. Most modern gas grills do. If it does, press and hold down the igniter button, while slowly turning on the burner control knob closest to it.
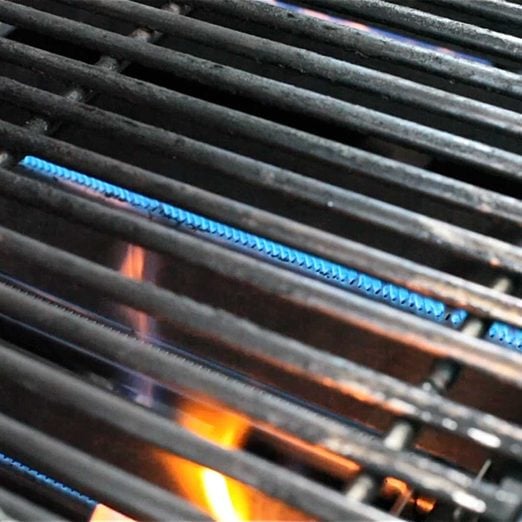
- Look through the cooking grates to see if the burner tube has ignited. You should see a row of small bluish flames. As soon as it’s lit, stop pressing the igniter button.
- Turn off the burner control knob and release the igniter button if the burner doesn’t light within a few seconds. Wait two minutes or so for the gas you’ve released to dissipate, then try again.
- Repeat the process for the rest of the burners, until they’re all fully lit.
- Use a lighter wand or long matches if your grill doesn’t have an igniter, or the igniter is not working.

Step 3
Preheat and Clean the Grill
- Turn all burners to maximum heat, then close the lid.
- Wait 10 to 15 minutes or until your grill reaches 400 F, then reduce the burner settings to medium heat. Most gas grills have a built-in thermometer in the lid to tell you the internal temperature.
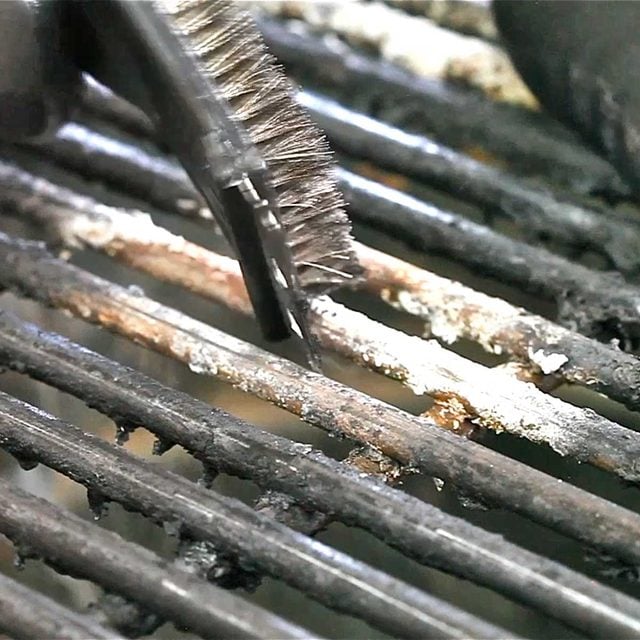
- Open the lid when the grill reaches temperature, then use your stainless steel brush to clean all debris from the cooking grates. If debris from previous grilling sessions isn’t dry and flaking off easily, close the lid and allow the grill to heat up a little more before going at it with the brush. Learn how to safely clean your grill using grill bricks.
Step 4
Lay the Food on the Grill
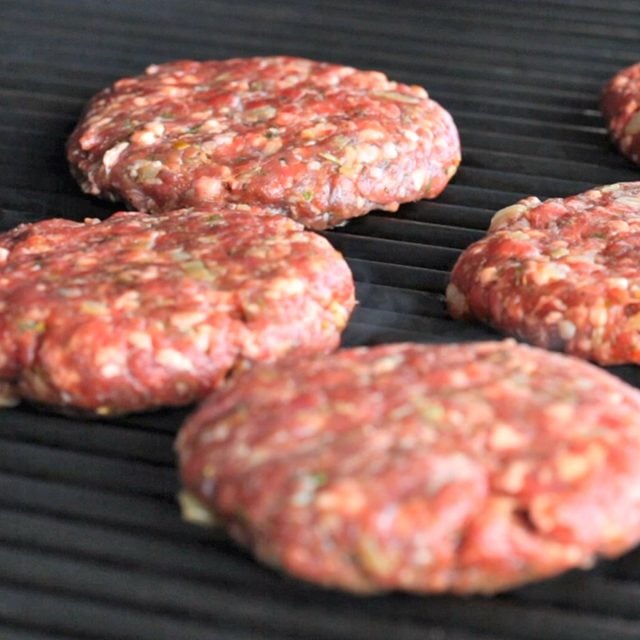
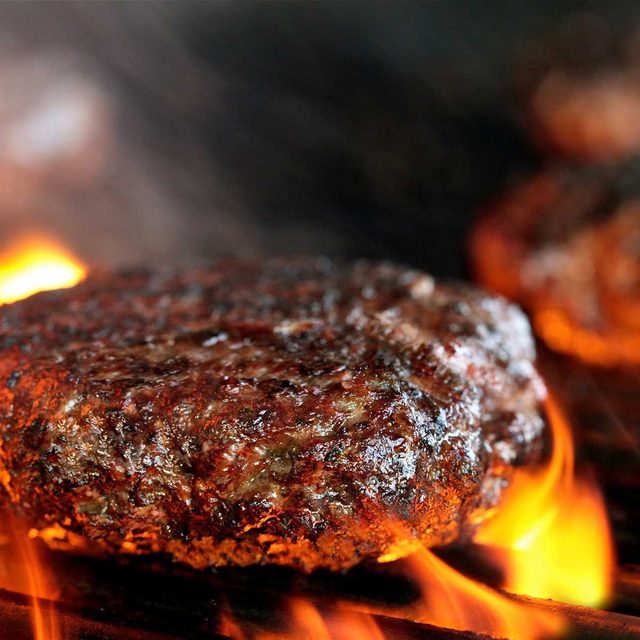
- Choose an easy-to-cook meat for your first grilling session. Burgers or steaks are excellent options because beef is really hard to mess up. It doesn’t need to be well-done to be eaten safely or taste good.
- Lay all your meat on the grill at the same time, leaving at least an inch of space around each piece.
- Resist the urge to start flipping too soon. Let the meat cook for several minutes at medium heat until the underside is nicely browned.
- When you think the food’s ready for flipping, use your tongs or spatula to gingerly test one piece. If it comes off the grill easily, without sticking, it’s the right time to flip. Flip all pieces of meat when they’re ready.
Step 5
Complete Cooking
- Inspect your food for any pieces cooking faster or slower than the rest. This happens during most grilling sessions because of differences in temperature on the cooking surface. Generally the back of most grills is hotter than the front.
- Manage the cooking process by swapping slower cooking pieces of meat with faster cooking pieces. This makes it easier to complete cooking of all pieces at roughly the same time.
- Flip the meat a couple more times during cooking, pressing it with your spatula now and then to test firmness. Raw meat is soft, but fully cooked meat is moderately firm.
- Use a meat thermometer if you’re not confident about identifying cooked meat by eye and pressure.
- Use your stainless steel scissors to carefully cut open one piece of meat when you think everything’s fully cooked. If you’re cooking burger patties, the center should be brown but still juicy. Steak can be pink or brown inside, depending on how you like it.
- If the piece you’ve examined is cooked, chances are the others are, too. Use your tongs and spatula to take all of the meat off the grill and place it in a covered roasting pan.
Step 6
Shut Down the Grill
- Shut off all burners, double-checking the knob positions to make sure there’s no more gas flowing.
- Turn the gas supply valve all the way off.
- Wait for the grill to cool down fully, then close the lid and protect it from the elements with a grill cover.
Originally Published: June 25, 2020