How to Build a Fold-Up DIY Grill Table
Updated: Jan. 03, 2024
Introduction
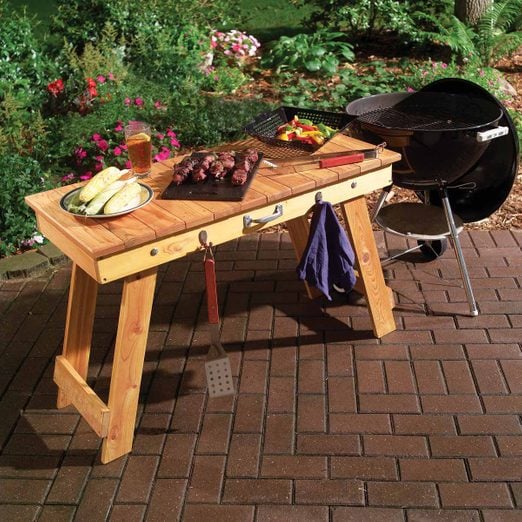
After building this fold up grill, your family will wonder how they ever grilled without it. The legs nest under the top for quick storage or carrying to all kinds of other jobs, indoors or out.There’s no shortage of grilling accessories to complete your outdoor cooking station, but over the years we’ve found a table to be the most essential.
Whether you’ve got a full-sized outdoor kitchen or just a little spot for a small grill, a table gives you a workspace to utilize. This fold-up grill table is the perfect companion to your grill station. If your patio is on the small side, this table stows easily to save space. Even if you have a huge, dedicated cooking area in your backyard, a small folding table is a useful accessory to have on hand, especially if you’re cooking for the entire neighborhood.
All you need to build this fold-up outdoor table is a drill, a saw, basic hand tools, a short stack of cedar boards and half an afternoon. The table is made entirely from 1×4 cedar boards. Wood quality varies, so pick over the lumber for flat, straight boards that are free of large or loose knots. You can make the table from eight 6-ft. boards, but buy 10 to allow for possible miss-cuts and to give you more choices for the top slats.
Fold-Up DIY Grill Table Project PDFs:
Click the links below to download the cutting list, shopping list as well as the construction drawings for this project.
Project step-by-step (8)
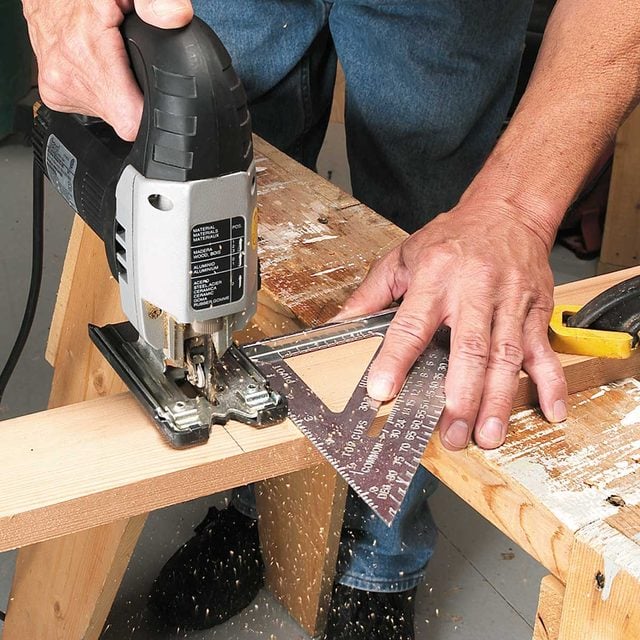
Make Square Cuts
- Use a square to help make straight cuts.
- Note: You can use a handsaw to cut the parts, but an electric jigsaw speeds up the job significantly.
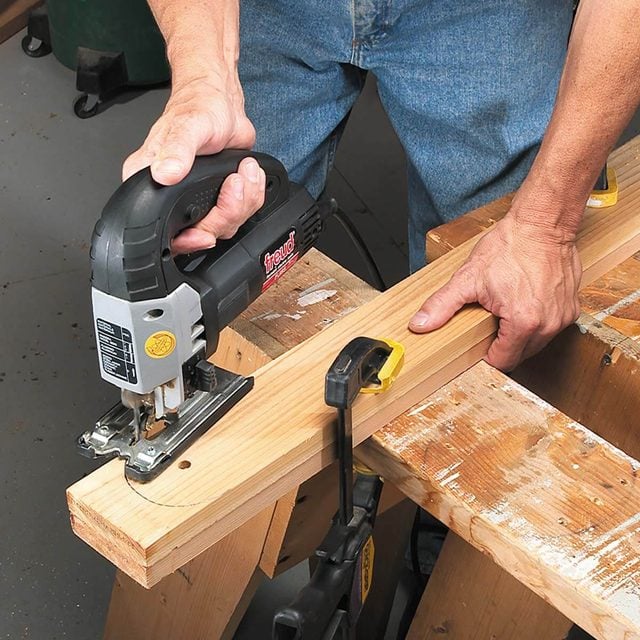
Clamp and Cut Leg Boards
- Clamp two boards together (rough side in) and mark and cut them at the same time to create identical leg pairs.
- Drill the 3/8-in. bolt hole in the upper end before unclamping.
- Note: You’ll cut the stretchers after bolting on the legs.
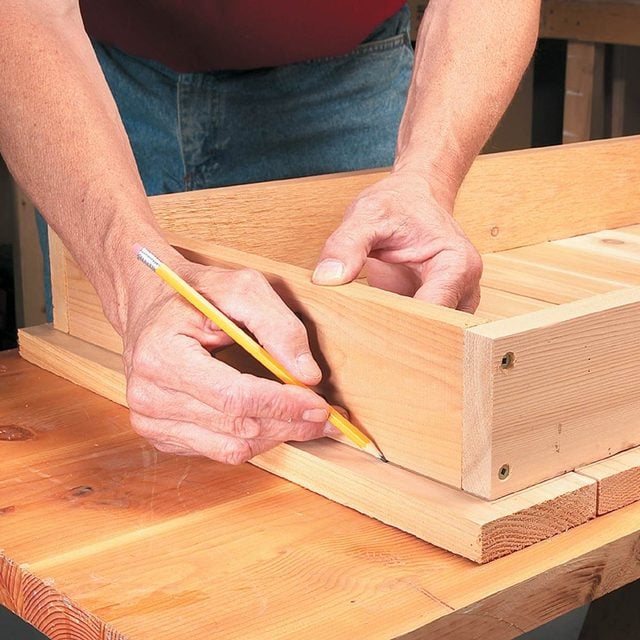
Lay Boards on Frame
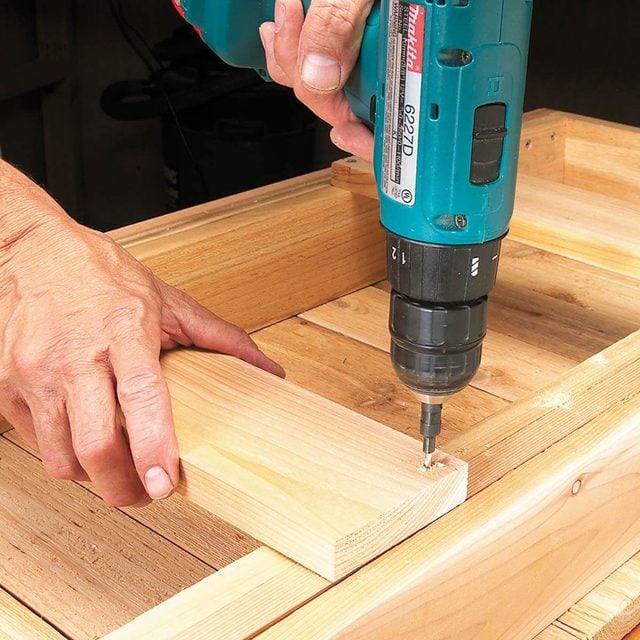
- To assemble the grill table frame, drill two holes in the ends of the longer frame boards and add a countersink hole for the screw heads to nestle into.
- Cut the slats and place them top-side up on a flat surface.
- Center the frame on the slats to create a 3/4-in. overhang on all four sides.
- Lightly trace the frame shape on the slats with a pencil so it’s easy to see where to drill holes.
- Space the top boards with about 1/16-in. gaps between them.
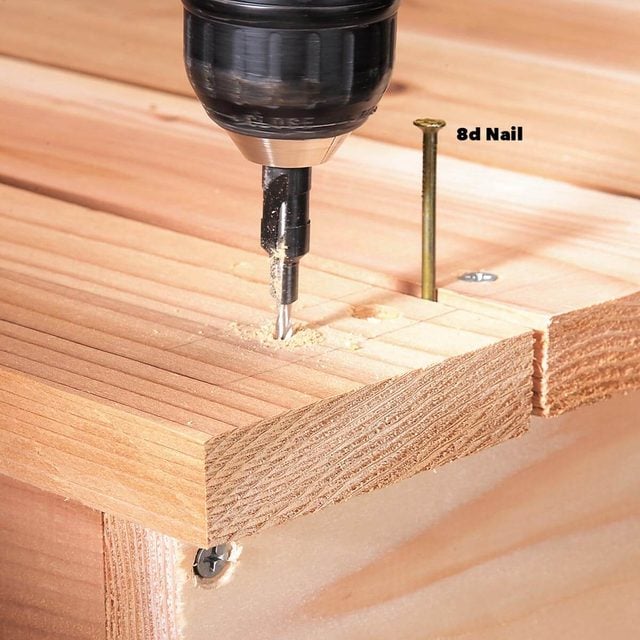
Drill Into Top Boards
- Lift off the frame and drill and countersink screw holes in the slats using the traced lines as a guide.
- Screw the slats to the frame.
- Lightly tap a couple nails between the slats while screwing them to the frame in order to create the approximate 1/16-in. spacing between the slats.
- Note: The end slats will overhang the frame approximately 3/4 in. to match the slat overhang along the frame sides.
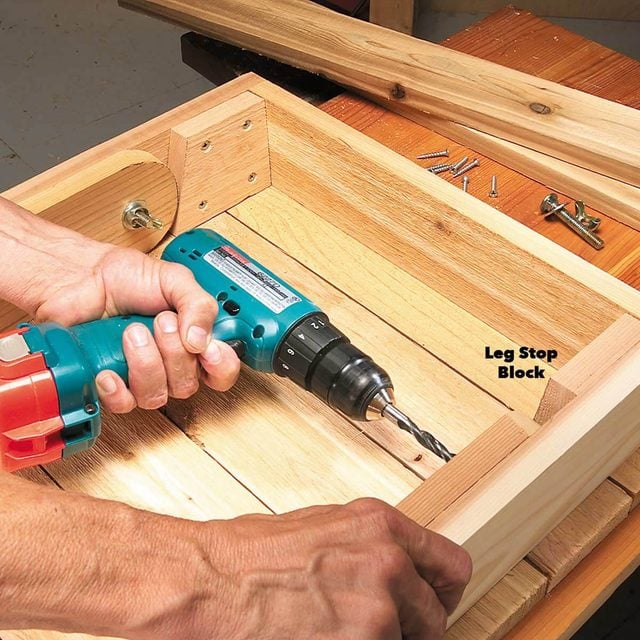
Add Angled Leg Stop Blocks
- Flip the tabletop upside down and screw the pair of angled leg stop blocks to the corners of one end.
- Butt the rounded leg ends against the blocks, then drill and bolt on the outer leg pair with the shorter 2-1/2-in. carriage bolts, washers and wing nuts.
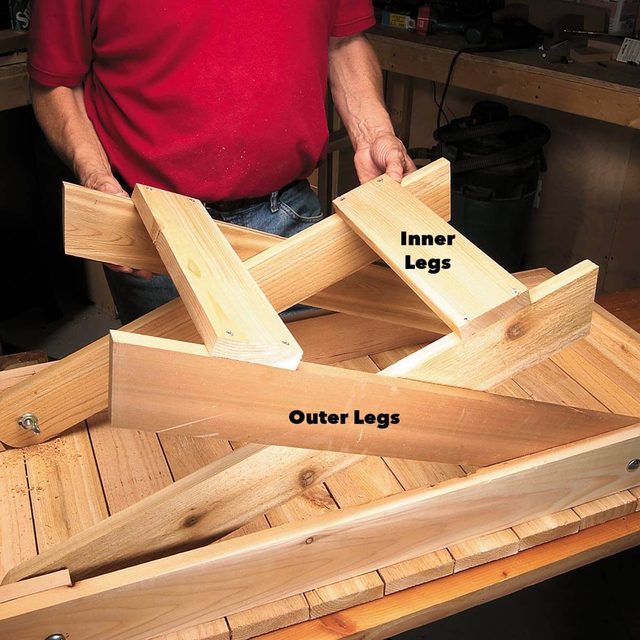
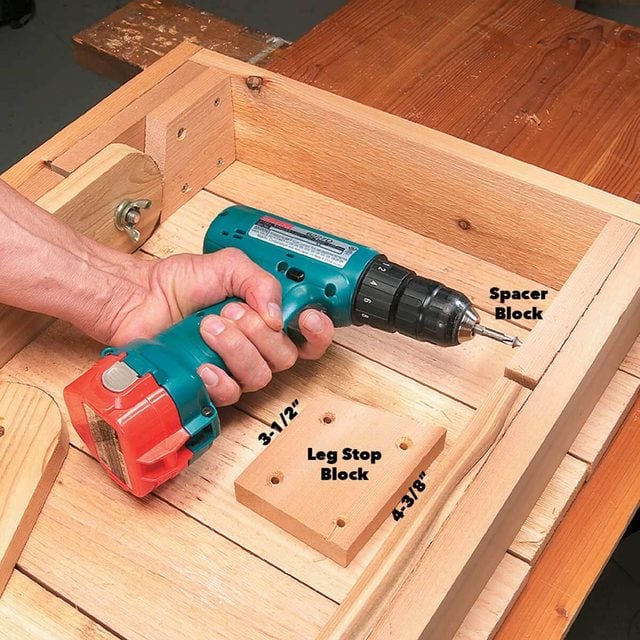
Add Spacer Blocks
- Attach the inner leg pair to the other frame, first screwing in the spacer blocks to allow the legs to nest inside the other pair.
- Add the angled leg stop blocks, then drill and bolt on the second leg pair with the longer 3-1/2-in. carriage bolts.
Attach Stretchers
- With the legs flat on the underside of the table, measure for the stretchers, cut, drill and fasten them to the legs.
- Pro tip: For best fit and overall results, mark and cut the stretchers based on the actual spacing between the legs. To pull out the legs, lift the more widely spaced pair first so the second pair can be raised without catching on the first pair’s stretcher.
Finishing Up
- Test the fit of the legs in the frame by pulling the legs up from the frame.
- Note: If they bind and scrape, sand the sides for a smoother fit.
- Sand the table with 100-grit sandpaper and, with a sanding block or rasp, slightly round the top edges of the slats.
- Put on your favorite finish.
- Pull out the legs, tighten the wing nuts and throw some steaks on the grill—just in time for dinner!