


DIY a portable sauna? No sweat.
Our editors and experts handpick every product we feature. We may earn a commission from your purchases.Learn more.


Updated Jul. 25, 2024
DIY a portable sauna? No sweat.
Our editors and experts handpick every product we feature. We may earn a commission from your purchases.Learn more.
Multiple Days
Intermediate
More than $1000
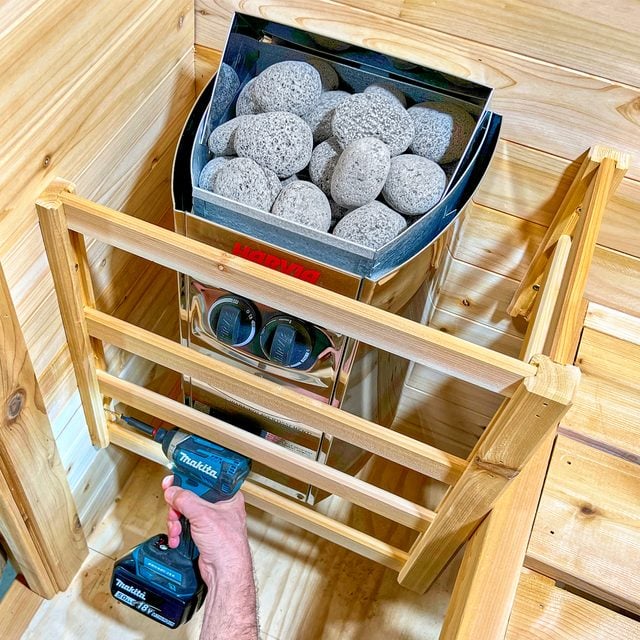
Taking a sauna has many proven health benefits. It not only helps you detoxify and relieve tension and stress, it can also help you burn calories and maintain clear healthy skin. You can build this affordable four-person outdoor year-round home sauna in your garage and take it to your cabin. All you need are reliable carpentry skills, a few power tools and a place to build it. Read on and follow this step-by-step building plan.
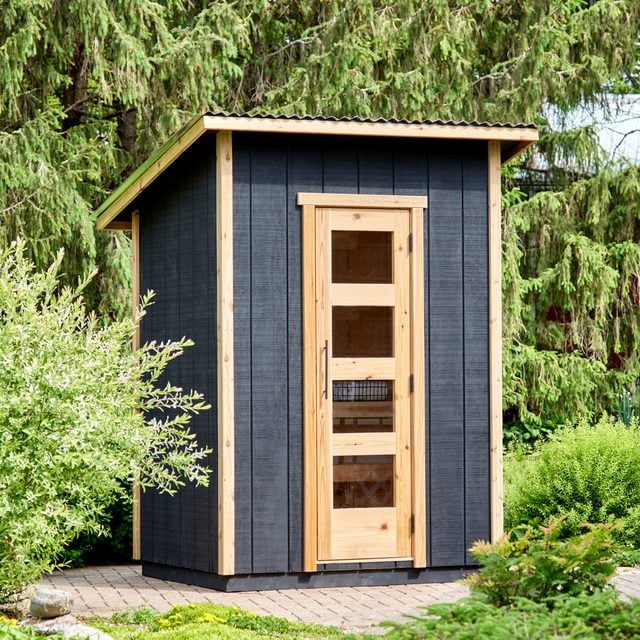
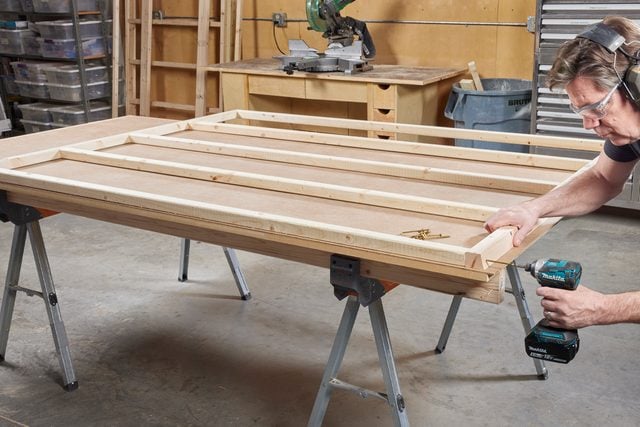
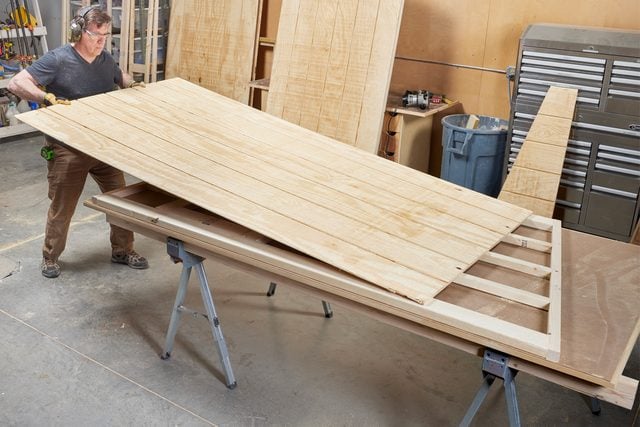
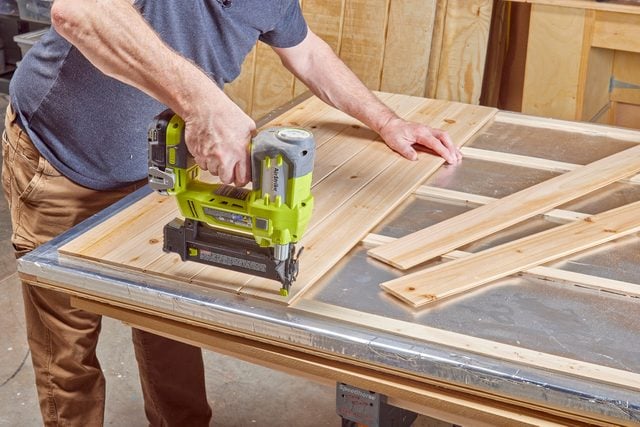
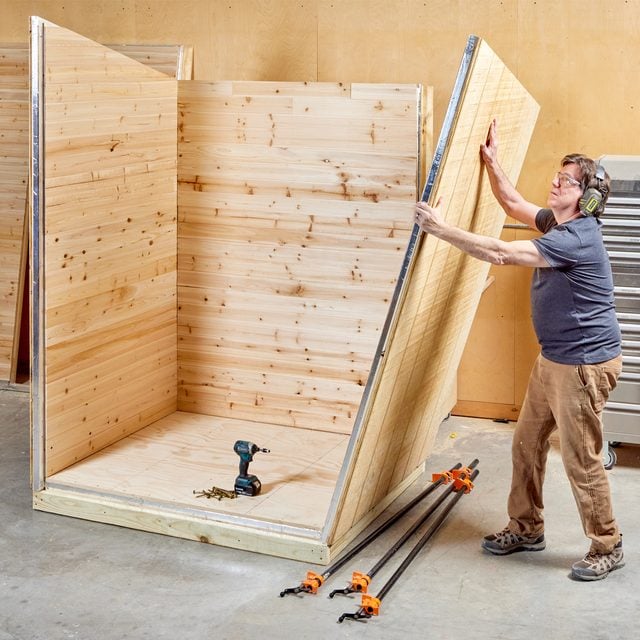
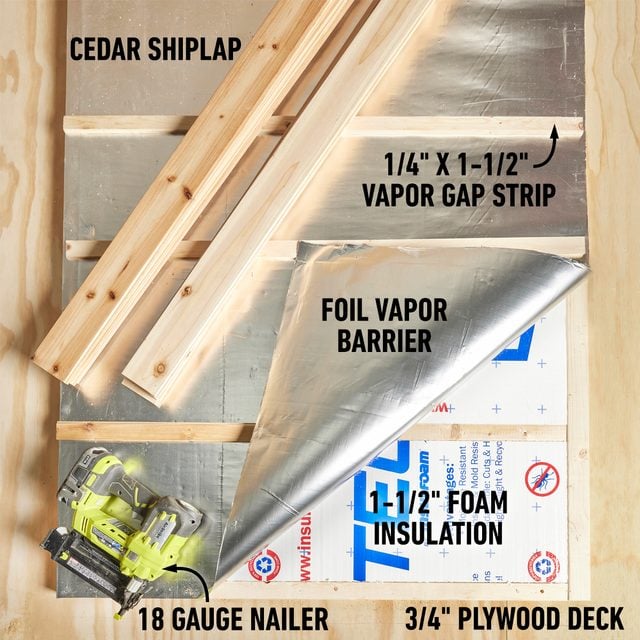
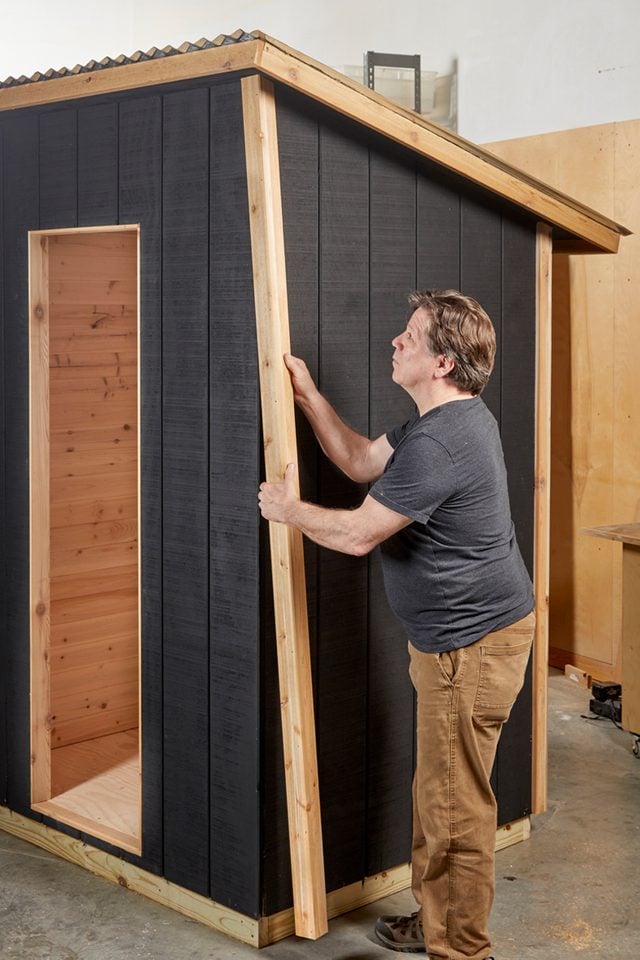
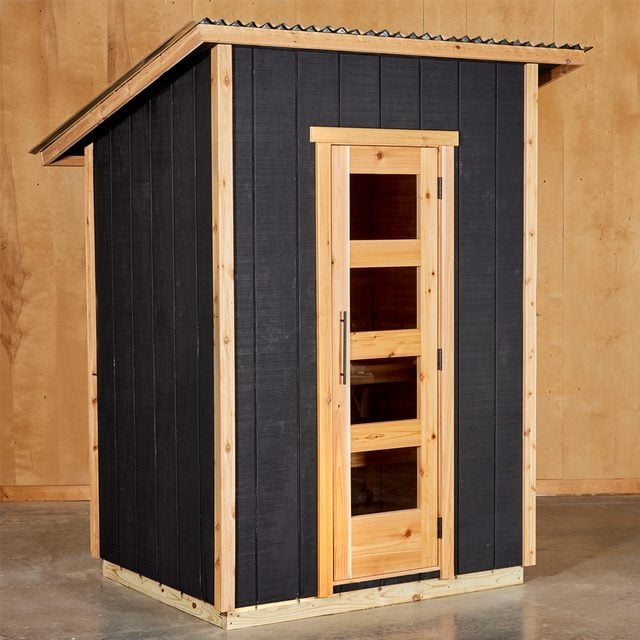
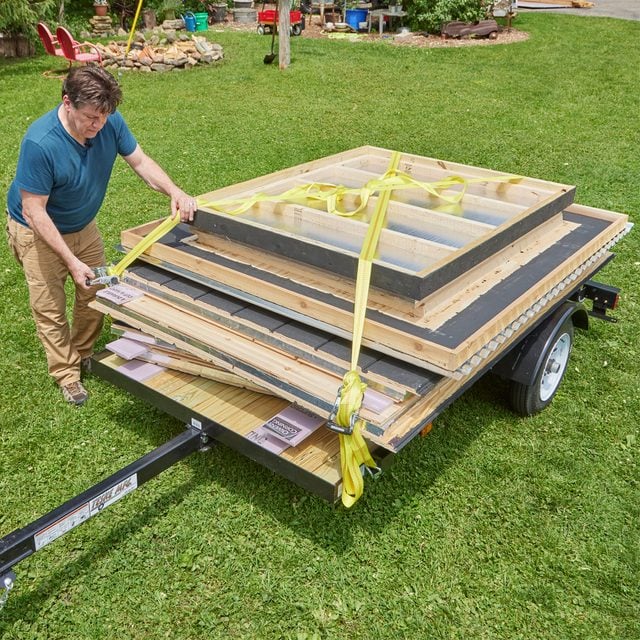
I built this portable sauna with accessible and affordable materials you can find at your local building center. The simple design enables you to easily construct the four walls, floor, roof and benches on-site or in your garage, then transport it to a remote location.
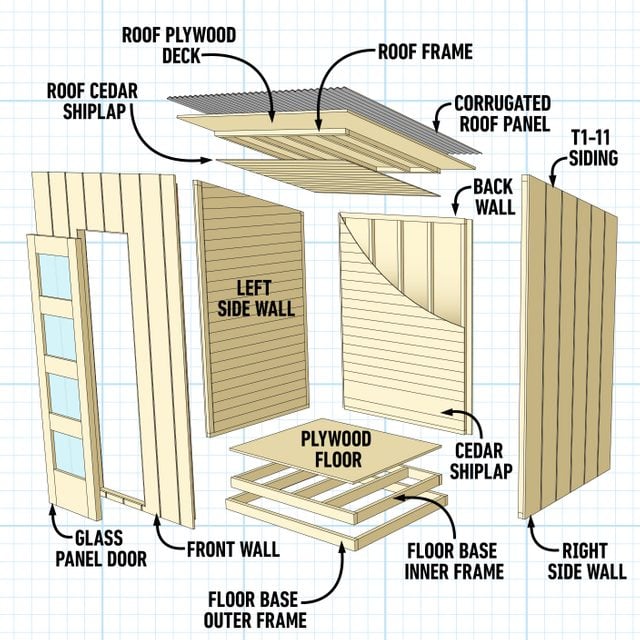
The sauna is five feet wide x four feet deep x 7-ft. 8-in. tall. Build your sauna to the size that meets your needs. See Figure 1 for a look at how it all goes together.
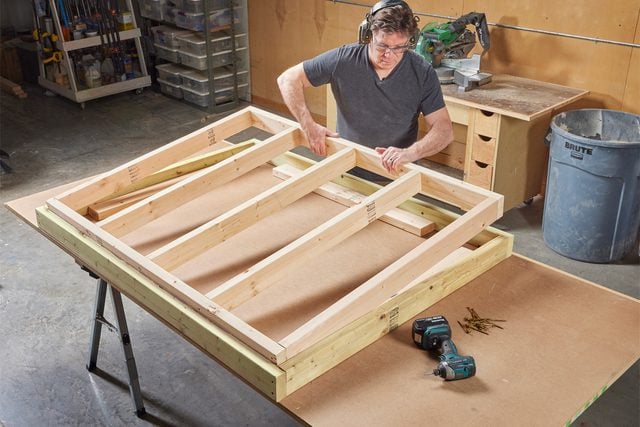
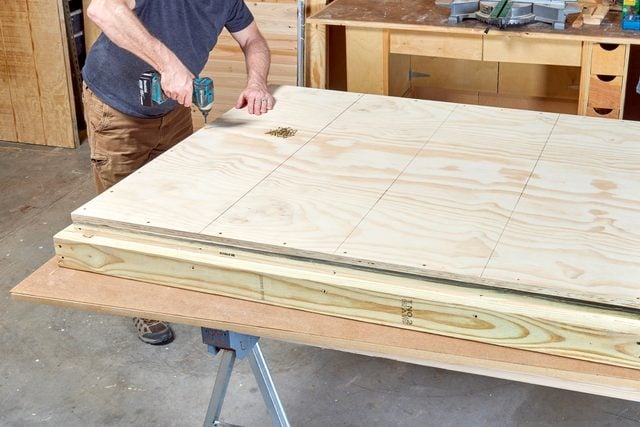
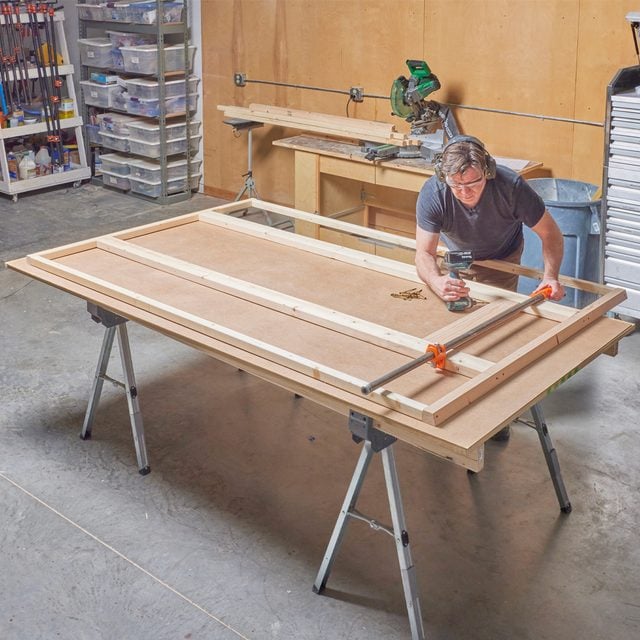
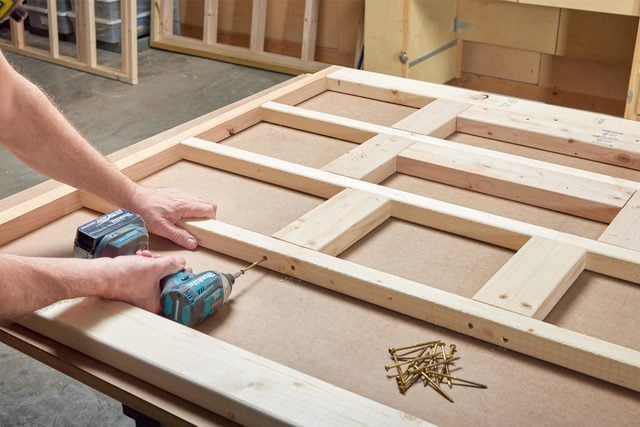
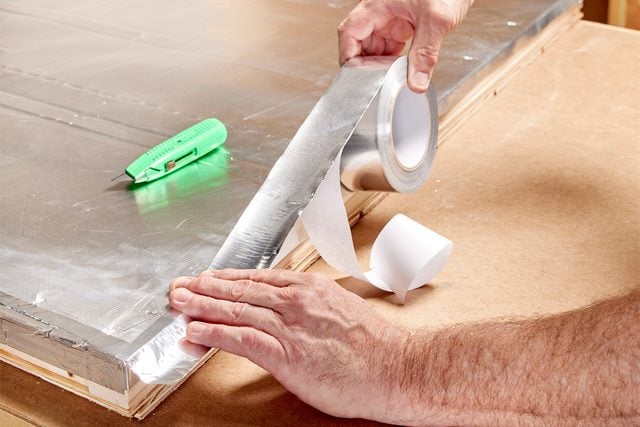
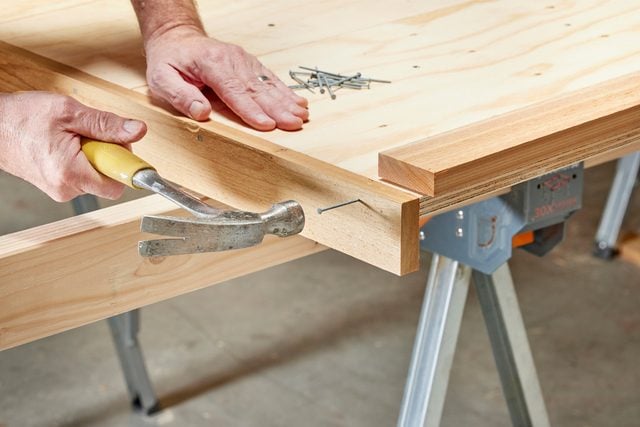
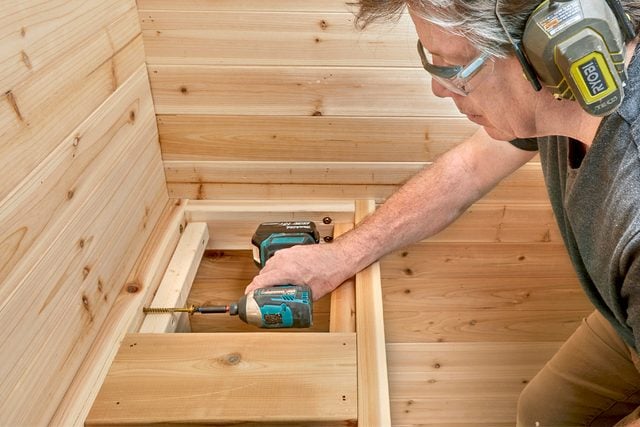
Before you start cutting boards and pounding nails, put together a flat work surface such as a 4×8 sheet of plywood on sawhorses. This will make assembling and maneuvering the components of the project much easier. Enlist a helper to assist in lifting walls and roof components.
When purchasing materials, always buy a few extra 2x2s and 2x4s for your project. You can often return extra building materials you don’t use.
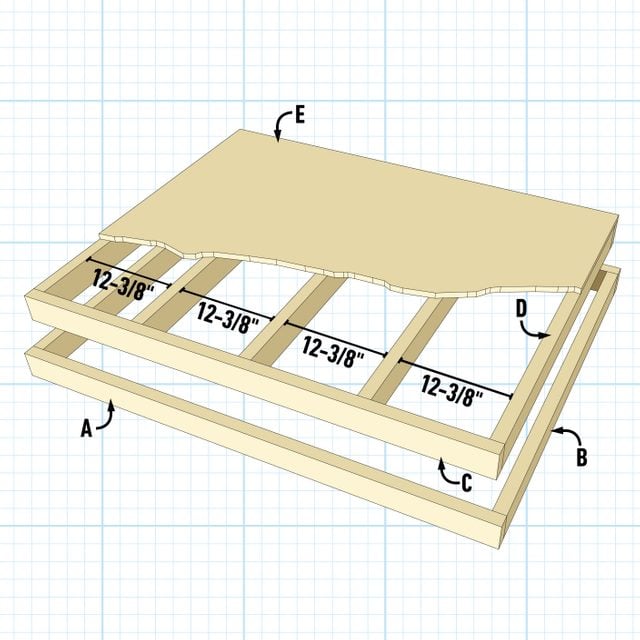
Overall dimensions: 95-in. H x 6-in. W x 48-in. D.
| KEY | QTY. | PART | DIMENSIONS |
| A | 2 | Floor Base Outer Frame Front & Back (Green Treated) | 1-1/2″ x 3-1/2″ x 60″ |
| B | 2 | Floor Base Outer Frame Sides (Green Treated) | 1-1/2″ x 3-1/2″ x 45″ |
| C | 2 | Floor Base Inner Frame Front & Back | 1-1/2″ x 3-1/2″ x 57″ |
| D | 5 | Floor Base Inner Frame Stringers | 1-1/2″ x 3-1/2″ x 42″ |
| E | 1 | Floor Base Plywood Floor | 3/4″ x 45″ x 57″ |
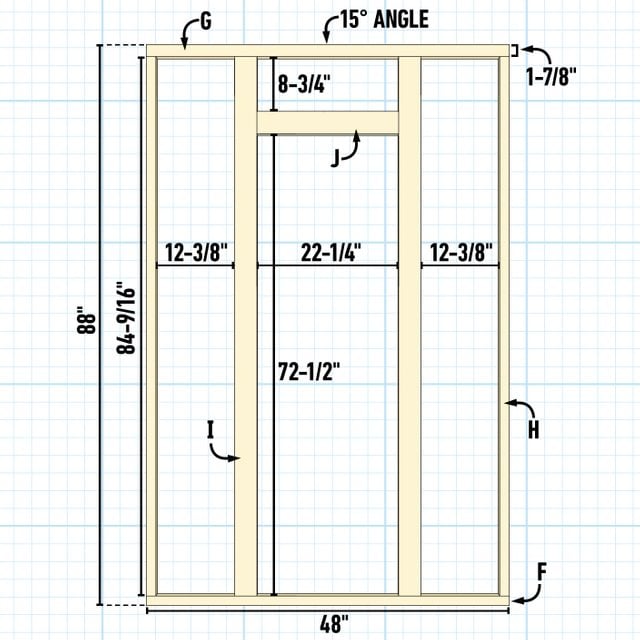
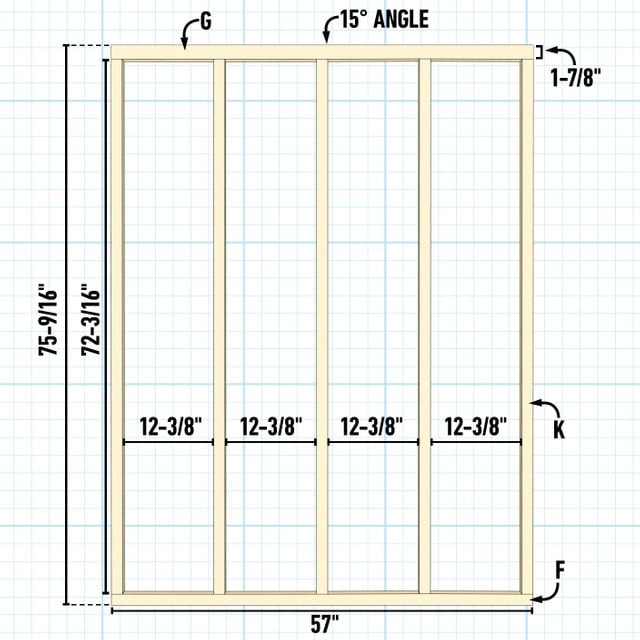
| F | 2 | Front & Back Walls Bottom Plate | 1-1/2″ x 1-1/2″ x 57″ |
| G | 2 | Front & Back Walls Top Plate/w 15-Degree Angle | 1-1/2″ x 1-7/8″ x 57″ |
| H | 2 | Front Wall 2×2 Stud | 1-1/2″ x 1-1/2″ x 84-9/16″ |
| I | 2 | Front Wall 2×4 Stud | 1-1/2″ x 3-1/2″ x 84-9/16″ |
| J | 1 | Doorway Header | 1-1/2″ x 3-1/2″ x 22-1/4″ |
| K | 5 | Back Wall Studs | 1-1/2″ x 1-1/2″ x 72-3/16″ |
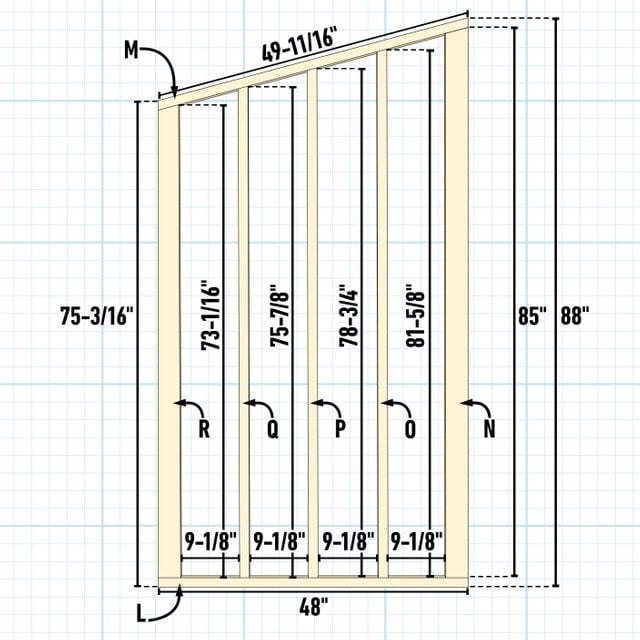
| L | 2 | Side Wall Bottom Plate | 1-1/2″ x 1-1/2″ x 48″ |
| M | 2 | Side Walls Top Plate/w 15-Degree Angles | 1-1/2″ x 1-1/2″ x 49-11/16″ |
| N | 2 | Side Walls Front Stud/w 15-Degree Angles | 1-1/2″ x 3-1/2″ x 85″ |
| O | 2 | Side Walls Stud/w 15-Degree Angles | 1-1/2″ x 1-1/2″ x 81-5/8″ |
| P | 2 | Side Walls Stud/w 15-Degree Angles | 1-1/2″ x 1-1/2″ x 78-3/4″ |
| Q | 2 | Side Walls Stud/w 15-Degree Angles | 1-1/2″ x 1-1/2″ x 75-7/8″ |
| R | 2 | Side Walls Back Stud/w 15-Degree Angles | 1-1/2″ x 3-1/2″ x 73-1/16″ |
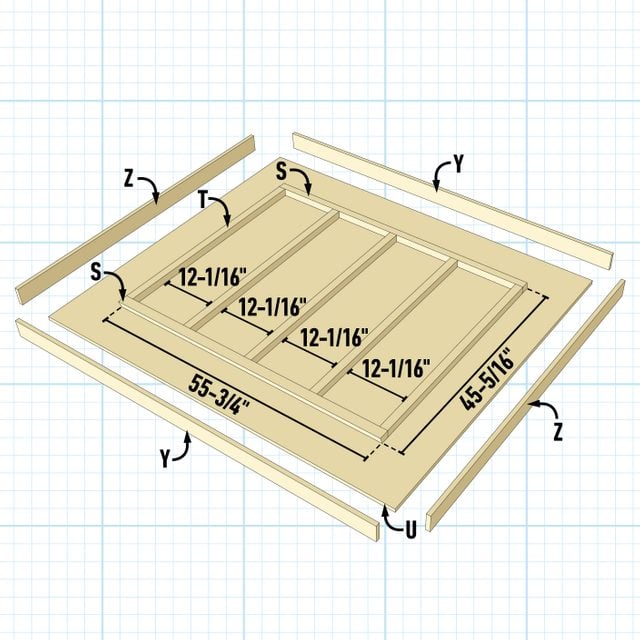
| S | 2 | Roof Frame Front & Back /w 15-Degree Angle | 1-1/2″ x 1-7/8″ x 53-3/4″ |
| T | 5 | Roof Frame Studs | 1-1/2″ x 1-1/2″ x 41-7/8″ |
| U | 1 | Roof Deck | 3/4″ x 73″ x 63″ |
| V | 13 | Roof Cedar Shiplap | 1/4″ x 3-1/2″ x 55-3/4″ |
| W | 46 | Front & Back Walls Cedar Shiplap | 1/4″ x 3-1/2″ x 56″ |
| X | 50 | Side Walls Cedar Shiplap | 1/4″ x 3-1/2″ x 45″ |
| Y | 2 | Front & Back Roof Trim | 3/4″ x 2-1/2″ x 74-1/2″ |
| Z | 2 | Side Roof Trim | 3/4″ x 2-1/2″ x 63″ |
| Aa | 2 | Side Wall T1-11 Siding | 9/16″ x 48″ x 88″ |
| Bb | 1 | Back Wall T1-11 Siding | 9/16″ x 48″ x 75-9/16″ |
| Cc | 1 | Back Wall Filler T1-11 Siding | 9/16″ x 13-1/2″ x 75-9/16″ |
| Dd | 2 | Front Wall T1-11 Siding | 9/16″ x 48″ x 88″ |
| Ee | 2 | Front Wall Filler T1-11 Siding | 9/16″ x 13-1/2″ x 88″ |
| Ff | 2 | Front Corner Trim | 3/4″ x 2-1/2″ x 88″ |
| Gg | 2 | Back Corner Trim | 3/4″ x 2-1/2″ x 75″ |


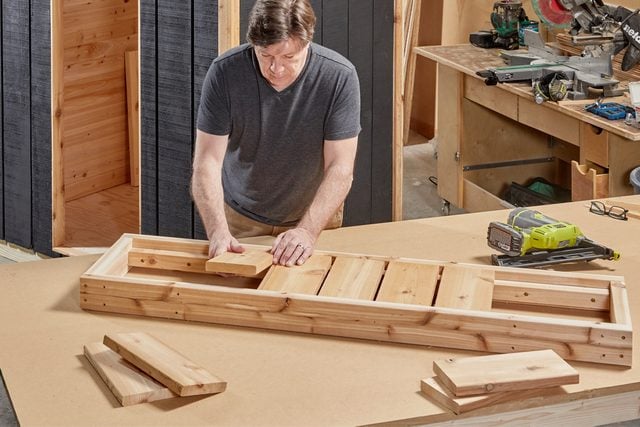
Upper bench dimensions: 3-1/2-in. H x 56-in. W x 15-in. D.
Lower bench dimensions: 3-1/2-in. H x 56-in. W x 26-in. D.
| KEY | QTY. | PART | DIMENSIONS |
| A | 4 | Front & back frame boards | 1-1/2″ x 3-1/2″ x 56″ |
| B | 2 | Upper bench frame sides | 1-1/2″ x 3-1/2″ x 12″ |
| C | 5 | Nailing cleats | 1-1/2″ x 1-1/2″ x 53″ |
| D | 2 | Lower bench frame sides | 1-1/2″ x 3-1/2″ x 23″ |
| E | 2 | Upper bench decking | 1″ x 5-1/2″ x 12″ |
| F | 5 | Lower bench decking | 1″ x 5-1/2″ x 23″ |
Originally Published: August 02, 2022