


Build this sandbox for your little sand-loving kids. The detailed plan includes hinged doors as a cover, to help keep the sand fresh and clean.
Introduction
If your kids love digging and building sand castles, a DIY sandbox might be just the right toy for them. Here are the plans, photos and instructions describing how to build a sandbox. This is a simple project that almost anyone can put together with a little lumber, plywood and a few tools. Build this by yourself or have a handy friend help with the power tools. Whoever does the cutting should wear safety glasses and earmuffs whenever they're using the tools.
Tools Required
- 1-in. spade bit
- Carpenter’s pencil
- Circular saw or table saw
- Framing square
- Hand saw or portable miter saw
- Impact driver or drill with Robertson bit
- Router with roundover bit (optional)
- Tape measure
Materials Required
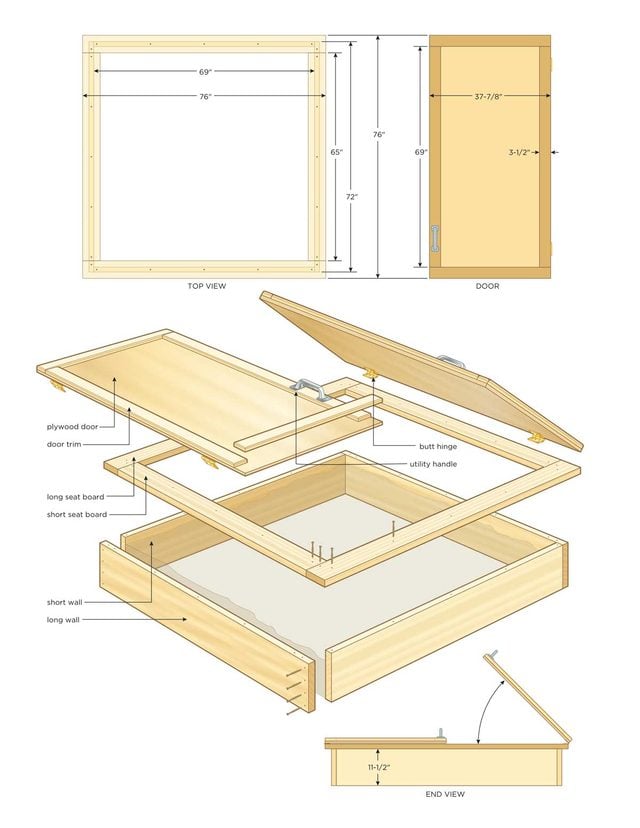
- Box Wall A: Pressure-treated lumber: 1-1/2 in. x 11-1/2 in. x 72 in. (2)
- Box Wall B: Pressure-treated lumber: 1-1/2 in. x 11-1/2 in. x 69 in. (2)
- Butt Hinges: (polished brass) 4 in. length (4)
- Door Trim: Pressure -treated lumber: 1 in. x 3-1/2 in. x 96 in. (6 cut to fit)
- Doors: Pressure-treated plywood: 5/8 in. thick (2 sheets cut to fit)
- Outdoor Utility Handles (wrought iron or plated steel): Approx. 8 in. long (2)
- Plated Deck Screws: 3-1/2 in. and 1-1/2 in. lengths
- Seat Piece A: Pressure-treated lumber: 1-1/2 in. x 5-1/2 in. x 76 in. (2)
- Seat Piece B: Pressure-treated lumber: 1-1/2 in. x 5-1/2 in. x 65 in. (2)
Project step-by-step (9)
Step 1
Choose Your Spot
- Before starting your DIY sandbox project, pick a good place to build it.
- Your location should be easily accessible and sunny, with easy-to-dig soil if you’d like to set your sandbox partially below ground level.
- Pro tip: With an in-ground sandbox, be sure to visit 811.com to get your underground utility lines marked before you start digging.
- Choose somewhere that’s easily viewable from at least one window.
Step 2
Assemble the Box
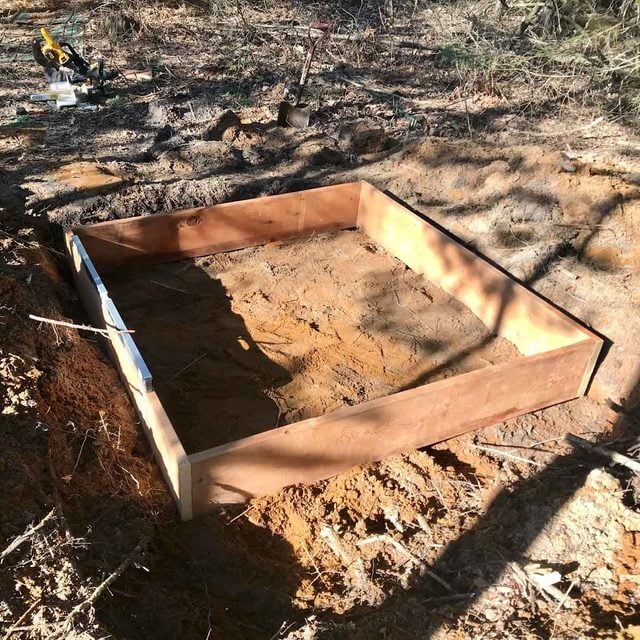
- Cut four lengths of 2×12 pressure treated lumber, two at 72 inches and two at 69 inches.
- Lay them on their edges to form a square, with the shorter pieces butting against the inside face of the longer pieces.
- This gives you a square with outside dimensions 72 x 72 inches.
- Inspect your boards as you lay them in position, making sure the high side of any bow or curvature is on the outside to minimize warping over time.
- When the boards are arranged in a square and properly oriented, use a drill or impact driver to drive four 3-1/2-in. plated deck screws into each corner to join the walls of your sandbox.
- Ensure your box is square by measuring diagonally from one outside corner to the opposite one, then measuring the other pair of opposing corners the same way.
- Pro tip: Nudge your box until these numbers match and you’ll have a perfect square.
Step 3
Install the Seat Boards
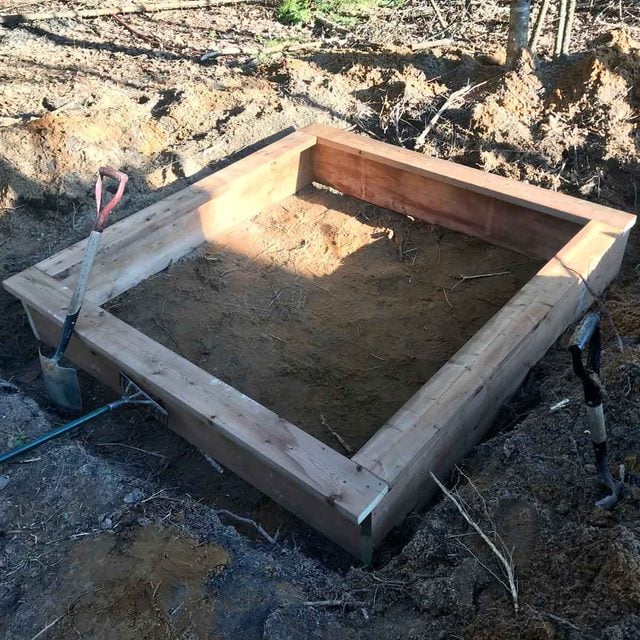
- Cut four pressure-treated 2x6s, two at 76 inches and two at 65 inches.
- Fasten them to the top edges of the box, centering them so there are two inches of 2×6 protruding on the inside and outside of the 2x12s.
- Install the 76-in. pieces on top of the shorter box walls and the 65-in. pieces on the longer walls.
- Drive 3-1/2-in. deck screws spaced every eight inches or so through the seat boards and into the box below.
- Note: These make your DIY sandbox much nicer by offering a place to sit or rest toys, snacks, drinks and whatever else you and your child need.
- Pro tips: Don’t drive screws closer than one inch or so from the end of each board as this could cause splitting.
- On the longer seat boards, be sure to drive an extra screw in each end to fasten to the adjoining box wall.
Step 4
Inset Below Ground (Optional)
- You can do this partially or completely. For this one, I dug a hole deep enough to sink the box completely into the ground, leaving only the seat boards above ground level.
- This is a fair bit of extra work, but was well worth it for us since our daughter is only two and would have trouble climbing into a 12-in.-high sandbox.
- Pro tip: Embedding your sandbox partially or fully below ground also ensures sand won’t spill out of the bottom and into your yard.
Step 5
Add Sand
- Sand is available from many nurseries; most deliver by the truckload or the cubic yard. You can also purchase bagged sand from a home center, but this is less efficient when you need enough sand to fill a sandbox.
- Depending on the type of sand available in your area, 1-1/2 cubic yards will probably be enough to fill your DIY sandbox right to the top.
- The sand will settle over time, eventually reaching the ideal level.
Step 6
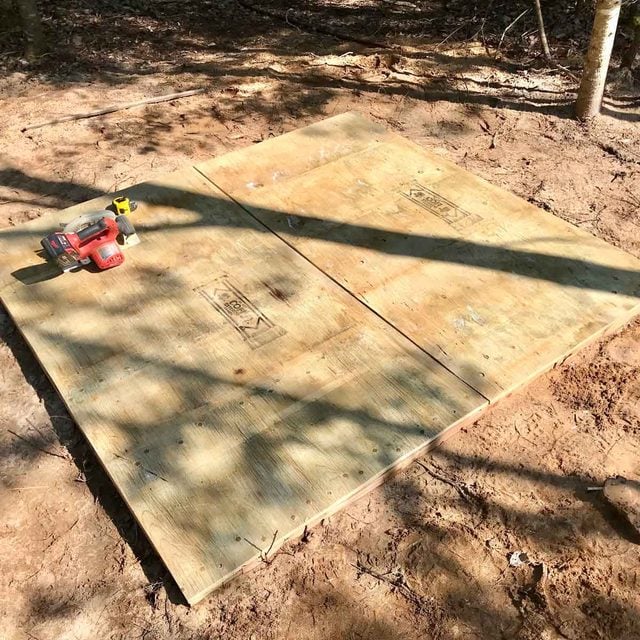
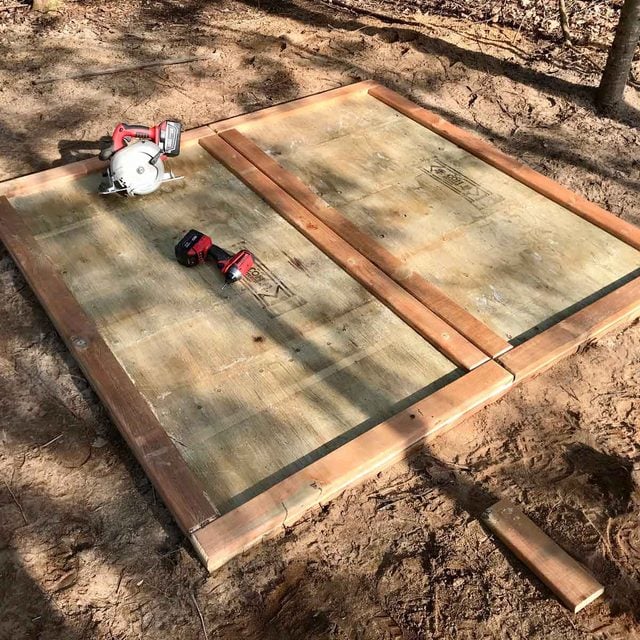
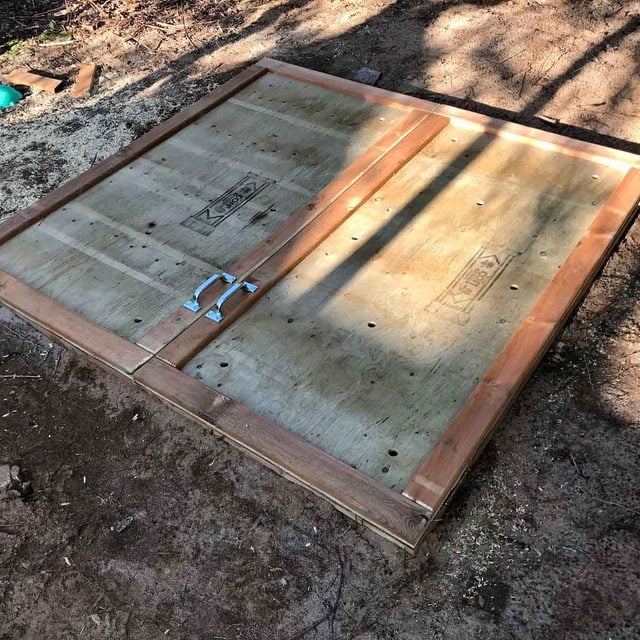
Cut Doors
- Lay two sheets of 5/8-in. exterior-grade pressure-treated plywood on top of your sandbox, leaving a 1/4-in. gap between them in the box’s center.
- Use a pencil to mark a line on both sheets of plywood where they overhang the sandbox. You’ll use this line later for cutting the plywood.
- The sheets should end up being 76 x 37-7/8-in., but don’t measure and cut these exact dimensions in case your sandbox turned out slightly bigger or smaller than planned.
- Use a circular saw or table saw to cut the sheets along your lines, then lay the cut doors on the sandbox again to ensure you got it right.
- They should be flush with the outer edges of the seat boards with a 1/4-in. gap between them in the middle.
- Note: Doors stop cats and other animals from using the sandbox as a toilet. They also prevent grass clippings, leaves or other debris from making a mess of your sandbox.
Step 7
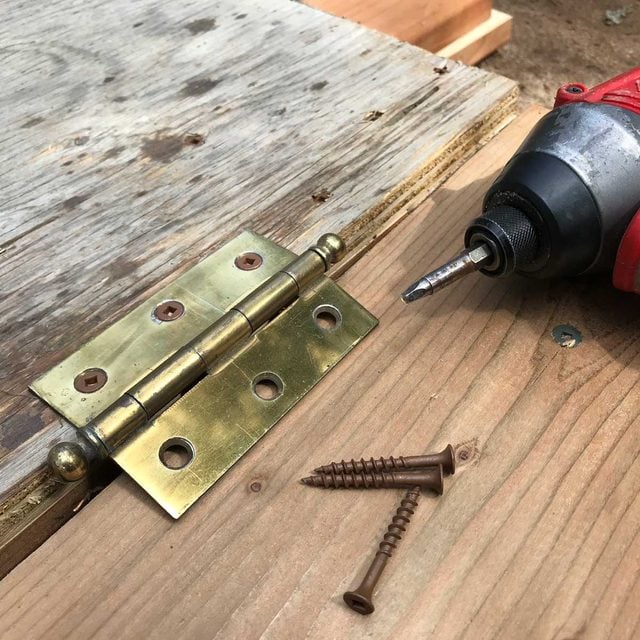
Install Hinges
- Fasten hinges to the inside face of the doors first, eight inches from the top and bottom edges.
- Fasten the other side of each hinge to a corresponding spot on the seat boards.
- Pro tip: Make sure the hinges’ knuckles aren’t touching the wood on either side.
- Note: I recommend using four 4-in. brass butt hinges, two for each door.
Step 8
Cut and Install Door Trim
- Cut four pieces of your trim of choice to a length matching the width of your doors.
- Note: Making a border for your plywood doors with wood trim doesn’t take long and makes them look much better. Use either regular pressure treated 2x4s or, if you want thinner trim, 6-in.-wide 5/4 decking stock rip-cut in half to form 3-in.-wide strips.
- Cut four more to fit on the doors vertically between the top and bottom pieces.
- Pro tip: Using a router and roundover bit to route the edges and ends of all trim boards before installation. This gives them a more finished, classic look.
- With the boards cut and routed, fasten them to your doors with pairs of 1-1/2-in. deck screws, driven through the plywood from the back, spaced every eight inches.
- Pro tip: Make sure your trim pieces are flush with the edges of the plywood doors before fastening. Temporarily clamping them in place helps.
Step 9
Install Handles and Drill Vent Holes
- Fasten an outdoor utility handle near the inside edge of each door, a foot from the bottom. Center each handle on the door trim, and make sure they mirror each other so your doors won’t look mismatched.
- Finish up by drilling eight or 10 one-inch diameter holes in each door. Space them out neatly and evenly.
- Pro tip: The ventilation holes are an important step in how to build a sandbox. Sand holds lots of moisture that will promote rot in your sandbox if it can’t escape. Holes will also stop the doors from holding rainwater and rotting from the outside.
- And that’s how to build a sandbox! Your sandbox is now ready to use. Flip open the doors when it’s playtime, then close them between uses. If you want to make the sandbox even nicer, paint the doors your child’s favorite color.
Originally Published: May 01, 2020