


Learn how to build a bat box to limit voracious mosquito eaters. Bats are on the decline, but bat boxes can help.
3 hours
Intermediate
$150
Introduction
Bat boxes, or bat houses, give bats a safe place to roost. That's important because many species of bat are in decline.
Erecting a bat box in your yard doesn't just help out bats. They return the favor by eating hundreds of mosquitoes an hour. Bats are one of the safest and most effective forms of insect control, as well as crucial pollinators. By putting up a bat box, you also encourage them to roost there, which helps keep them away from eaves and attics.
Building a bat box is time-consuming, so if you want one in a hurry, purchasing one is probably the way to go. But if you have the time, it's a fun and rewarding project. We used free plans provided by the nonprofit Bat Conservation International, with a few modifications. Here's how to do it.
Watch How To Build a Bat Box
Tools Required
- Drill with Phillips bits and 1-1/2-inch holesaw
- Hammer
- Jigsaw
- Orbital sander (optional)
- Paint brush
- Pencil
- Rags
- Safety glasses
- Skill saw
- Square or straightedge
- Stapler
- Tape measure
- Wood clamp
Materials Required
- 1 can clear varnish spray
- 1 quart latex paint (dark in color)
- 1 quart latex primer
- 1-1/2-inch exterior screws (1 lb.)
- 1-1/4-inch exterior screws (1 lb.)
- 1-inch exterior screws (1 lb.)
- 120-grit sanding discs
- 3-foot x 5-foot roll of polyethylene mesh
- Exterior-grade paintable caulk
- One 1x6-inch x 8-foot pine or similar board
- One 4x4-foot sheet of 1/2-inch outdoor-grade plywood
- Outdoor staples (200)
Project step-by-step (7)
Step 1
Mark and Cut the Pieces from the Plywood and the 1×6 Board
- Refer to the diagram for dimensions and bevels. Following the cut list in Figure 1, begin to mark the plywood for your cuts. Pro tip: Mark your cut lines one at a time. If you mark them all at once, your boards will be too short, because the saw blade removes part of the wood.
- Use the skill saw or jigsaw to make your first cuts, taking time to keep the cuts as straight as possible. After these parts are cut, mark your next lines and repeat.
- Label each piece once you cut it so that you can easily identify it during assembly.
- Perform the same procedure, marking and cutting the 1×6 into its pieces.
- Using the orbital sander (or by hand), lightly sand all boards, including the edges, to prevent splinters.

Step 2
Prepare the Boards and Attach Mesh to the Interior
For this step, the plans we used called for making grooves in all interior surfaces. That would have taken several hours or more. So we opted to use polyethylene mesh instead, which is deemed safe by other bat conservation organizations. If you go this route, be sure to apply polyethylene, which won’t deteriorate as fast as other plastics.
- Prime and paint the three interior partition boards, as well as the interior of the front and back panels. Let them dry thoroughly.
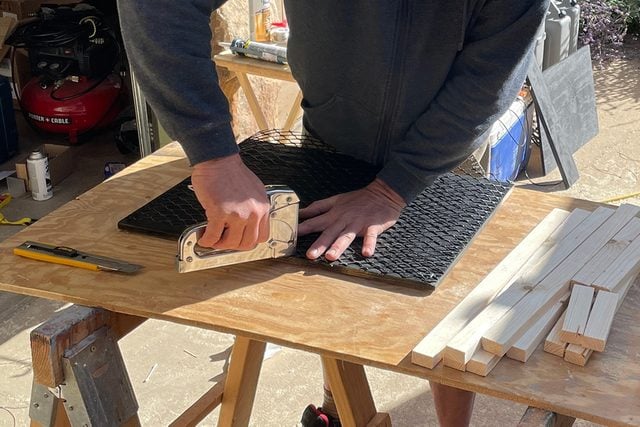
- Staple the polyethylene mesh to both sides of the three center partition pieces. Make sure it’s firmly attached with no edges sticking up.
- Staple the mesh to the interior of the back piece from top to bottom.
- Staple the mesh to the interior of the two front pieces, upper and lower.
- Trim any mesh overhanging the edges of the boards.
- Lightly coat the remaining interior pieces with spray varnish. Set aside and let it dry thoroughly.
Step 3
Attach Side Panels to Back Piece
- Lay the back panel on the work table, with the longer beveled edge against the table.
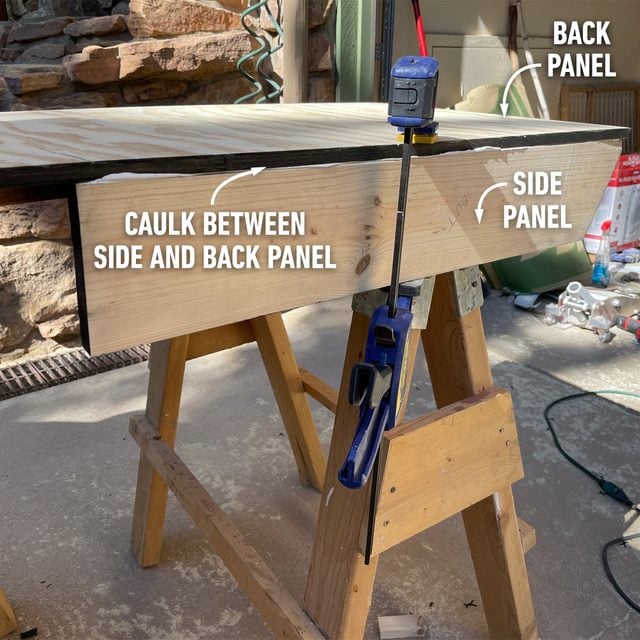
- Place a small bead of caulk on the rear edge of the side panels.
- Place one side panel on top of the rear panel, aligning the beveled edge and the slope of the side panel.
- Push the side panel down to force excess caulk out of the seam. Wipe off any excess.
- Using a clamp, affix the side panel to the rear panel, then turn the rear panel over so the side panel hangs off the edge of the table.
- Use 1-1/2-inch screws to attach the rear panel to the side panel.
- Repeat this process for the other side panel.
Step 4
Attach Internal Spacers and Assemble Partitions
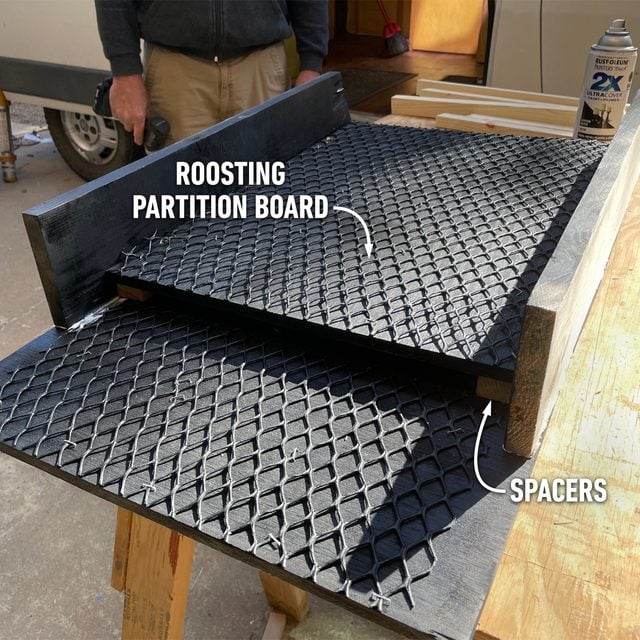
- Attach the 5-in. and 10-in. spacers to the inside corners using 1-in. screws. (If you live in a Southern state or other warm, humid climate, don’t block the vent location with these spacers.) Refer to Figure 1 for placement.
- Place the first roosting partition board (which has the mesh attached) against the spacers, and even with bottom of the roof. Use 1-1/2-in. screws to attach it.
- Place the 20-in. spacers on top of this partition, aligned with the bottom edge of the roof. Use 1-1/2-inch screws to screw through the partition into the first spacers.
- Repeat for the third partition.
Step 5
Attach Front and Roof Panels
- Place a bead of caulk along the front edge of the side panels.
- Place the upper front panel onto the caulked edge, aligning the beveled edge with the angle of the side pieces. Sand if necessary for proper alignment.
- Screw this panel to the front of the side panels using 1-in. screws. Refer to Figure 1 for placement.
- Place the lower front panel in the same manner, leaving a 1/2-in. space between the bottom front panel and the top front panel. Screw this panel into the front of the side panels and wipe off excess caulk.
- Place the roof braces along the inside top edge of the roof support panels, using 1-1/4-in. screws. Don’t allow any screws to protrude into the roosting chambers.
- Place a bead of caulk along the top of the side panels, the top of the rear panel, and along the top of the upper front panel.
- Screw the roof panel into the roof supports with 1-1/2-in. screws.
- Caulk along the entire top to ensure the roof seals well to all sides, front and rear panels.
Step 6
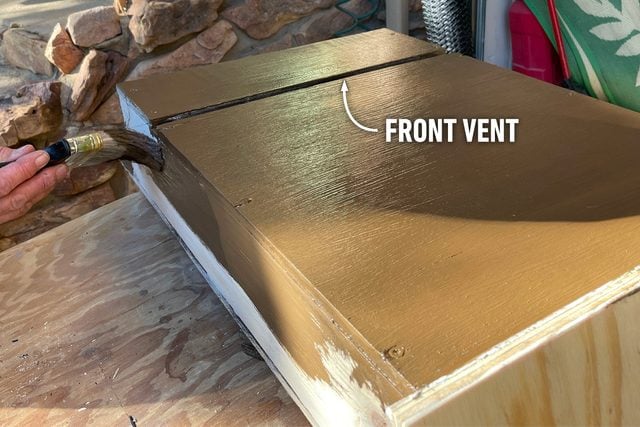
Prime and Paint the Exterior
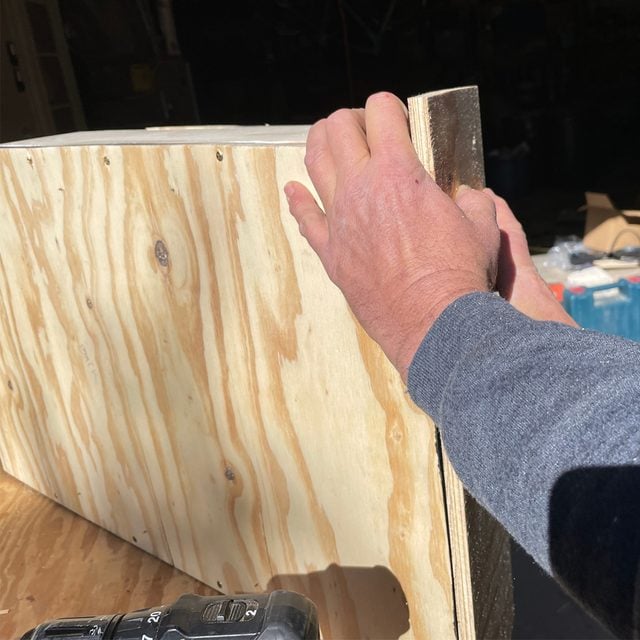
Inspect all the edges to ensure the bat house is sealed at every connection. Add caulk to fill any gaps.
Prime all exterior surfaces.
Paint the exterior with two coats of exterior-grade paint. See Figure 3 for what colors Bat Conservation International recommends for your region.
Note: Side vents and the front vent are optional based on your regional climate, as shown in the plans. We went with a front vent but not side vents because we live in Colorado.
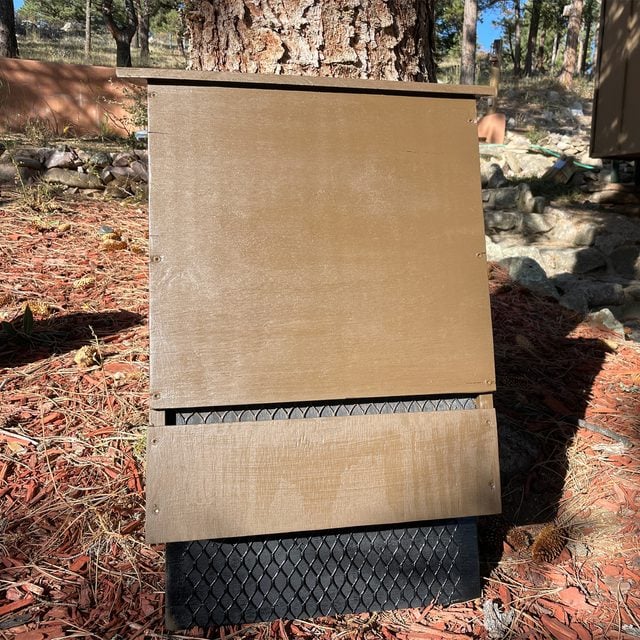
Step 7
Hanging the Bat Box
- Choose a sunny location; bats like to be warm.
- Put it at least 15 feet off the ground so bats feel safe from predators.
- The side of a building is ideal because it retains heat better, but a pole will also work. Trees are okay, but not as tempting to bats because there’s often too much shade, too many branches to block their flight and easy access for predators. How you attach it will depend on what you attach it to, but make sure to affix it firmly so it doesn’t move.
- Adding a water source to your yard will make life especially easy for mother bats to care for their young.
- And remember, the more the merrier. The more house options you install, the more likely bats are to move in and stick around.
Also, find out if bats spread rabies.