


Get to know these tricks before you tackle electrical projects at home.
Our editors and experts handpick every product we feature. We may earn a commission from your purchases.Learn more.

Get to know these tricks before you tackle electrical projects at home.
Our editors and experts handpick every product we feature. We may earn a commission from your purchases.Learn more.
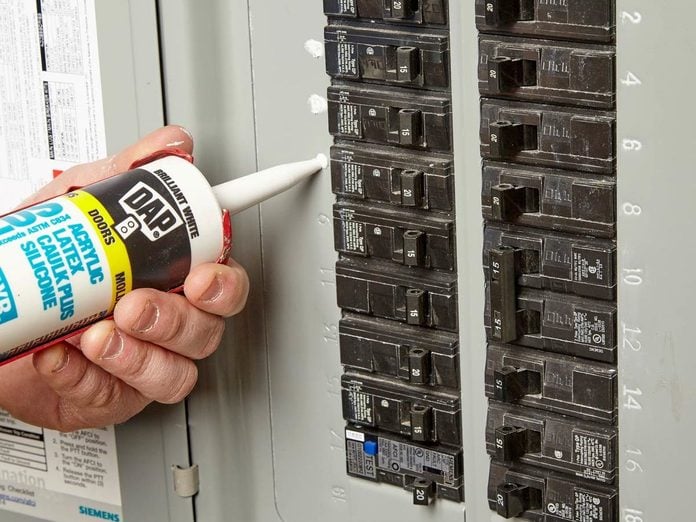


I had to switch off a few circuit breakers in my basement and found it hard to see the stamped numbers on the electrical panel because it’s pretty dark down there. Tired of squinting, I decided to make them easier to see with a little bit of white painter’s caulk. I put a dab on each of the numbers and wiped off the excess with my finger, leaving behind easy-to-read numbers. — Casey Overland
I like to have my switches and outlets labeled, so it’s easy to figure out which breaker to shut off when I need to change a switch or outlet. When I moved into a new home, I had to label everything anew. I didn’t have a helper, so I used a radio instead.
I plugged it into an outlet and turned up the music. Then I flipped breakers until the radio shut off. Light-bulb socket adapters with receptacles built into the sides helped identify the lighting circuits. I had everything labeled in an hour. — Collin Grace
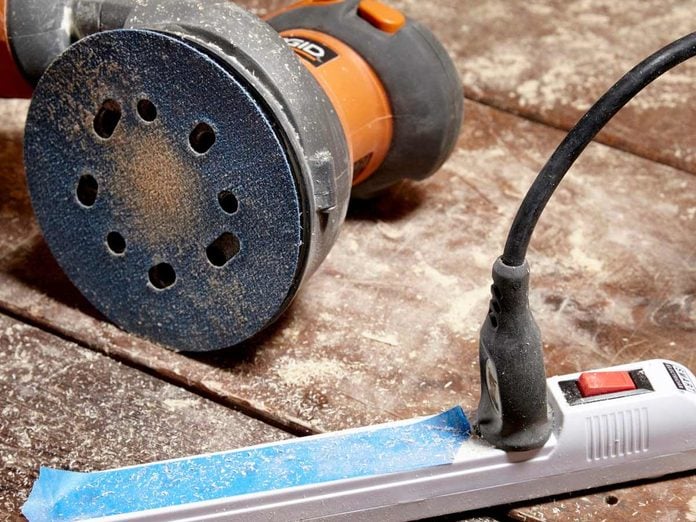
I do a lot of power sanding at my workbench, and all the sawdust kept getting into the outlet strip and interfering with the electrical contact. Now I put a strip of masking tape over outlets I’m not using and replace it as needed. The power strips last a lot longer! — Helene Lesel
Family Handyman
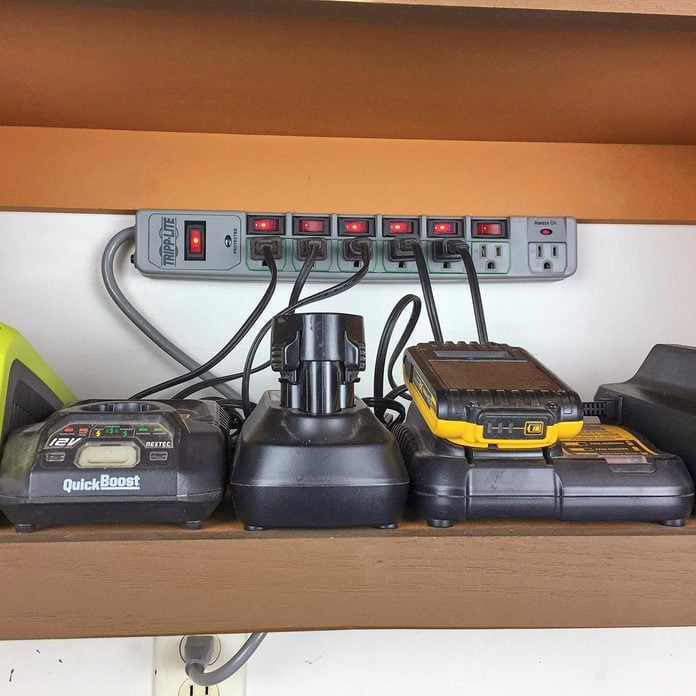
Awhile ago, I created a power-charging station where I could amass a bunch of my battery chargers. All the chargers were connected to one power strip. It did help organize my shop, but it always bugged me that all those chargers sprang to life when I turned on the power strip even when I only needed to charge one battery. It’s not a big deal if the chargers are empty, but I often leave batteries sitting in the cradle until they’re needed again.
I solved the problem by buying a power strip that has a separate switch for each outlet. There are a few brands available online. I bought the Tripp Lite model TLP76MSGB. Six of the outlets are switched while one stays on all the time, and all seven have surge protection. — Frank Thomas
To cut down on plugging and unplugging and flipping switches, try this solution: a power strip with keyholes in the back for mounting to the side of a cabinet. It’s got a switch that turns the outlets on and off.
Plug in a light and vacuum so when you flip the switch on the strip, they both come on. Then start your saw and you’re ready to go. Don’t try to plug in too many things; most strips are rated at just 15 amps. — Ken Collier
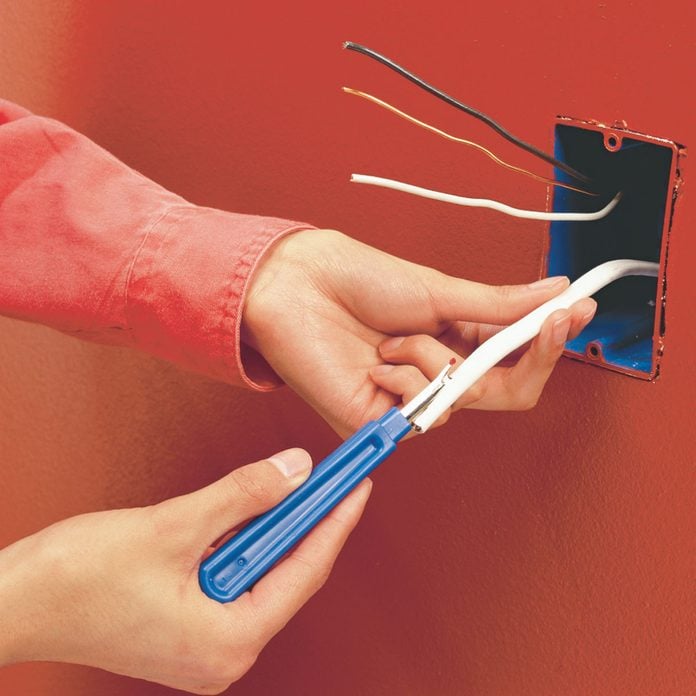
When you add an electrical outlet, you need to use wire the same gauge as the existing wiring. How do you tell if your old wiring is 12-gauge or 14-gauge? A simple visual makes it easy.
Twelve-gauge is about the thickness of a nickel, and 14-gauge about the thickness of a dime. Also, look at the breaker for the circuit in question to see if it’s a 15-amp or a 20-amp breaker. A 20-amp circuit requires wire size 12-gauge or larger.
Eliminate the trial and error of aligning double switches. Create a jig by drilling 1/2-inch holes in a double cover plate to access the device mounting screws.
Level the cover plate over the switch or outlet, and screw the switches down tight through the 1/2-inch holes. Remove the jig and attach the “real” cover plate. — Wallace L. Trout
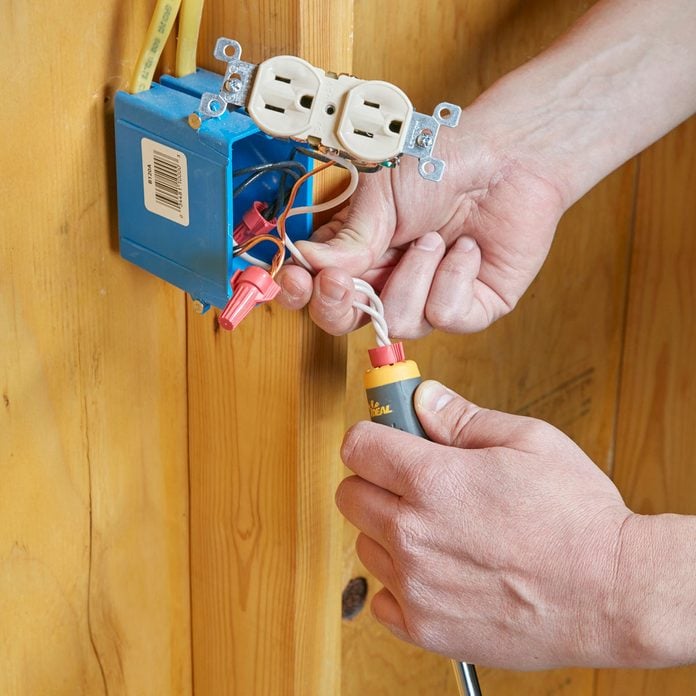
When you have multiple or heavy-gauge electrical wires to join, twisting on wire connectors by hand can be a real bear, even when they have wings on them. Several manufacturers have tools that make the job easier, but we especially like this one from Ideal Industries.
Ideal added a recess in the handle of several of its screwdrivers, conduit reamers and other tools. You just insert the wire connector into the star-shaped recess as shown. The recess and the tool’s large rubber grip make twisting wires much easier.
I decided to mount my flat-screen TV on the wall and place the game components below on a low table. The only downside was the bunch of unsightly cords hanging down the wall.
To hide the wires, I built a chase from plywood and painted it to match my walls. I used 1/2-in. plywood for the back and sides and hardboard for the front panel. — John Fontaine
I do some minor soldering for hobbies, and I always have problems holding the wires together to solder them — even when I’m using alligator clips to hold things in place. I’ve found that a simple washer simplifies the task.
I clamp the wires on each side of the washer with alligator clips. The hole in the washer gives me nearly 360-degree access to the solder joint. — Joseph Johnson
Strip electrical cable sheathing with a sewing seam ripper! Slide the ripper up the cable to slice through the sheathing and expose the internal wires. — Martie Tompkins
Ever try holding two strands of wire in one hand, a spool of solder in the other, and maneuver a soldering gun besides? Solder more effectively with this great tip from reader Randy Witmyer.
Cut a couple of six-inch pieces of wire from a coat hanger and crimp alligator clips on the ends. Drill holes in a board, stick in the alligator clip wires and clamp in the wire ends you’re soldering. You now have two hands free, one for the gun and one for the solder.
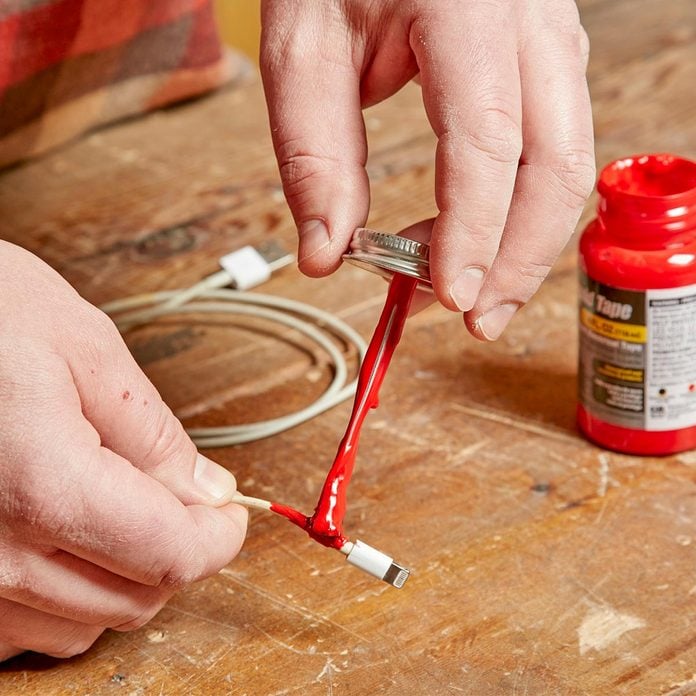
Charger cables for cell phones usually last only a few years before the insulation starts fraying on the ends. Replacement cables cost $10 and up, but there’s a cheaper solution.
If the insulation is cracked but the copper wire inside is still intact, try covering the crack with a couple of layers of liquid electrical tape. Just let the cable dry completely before it touches anything.
Shut off the power to any electrical junction boxes in the ceiling and cover them with painter’s tape to keep the wiring dry when spraying water on the popcorn as you work to remove the texture from the ceiling.
Overlap the sides of the junction box with the tape, then trim around the perimeter with a utility knife, being careful not to nick the wires.
Whenever soldering near wood or flammable materials, make sure you protect them from the flame. Make use of a flame-resistant blanket. Hang one behind the joint you are working on to insulate the flammable material and prevent fires. A piece of sheet metal could be substituted in a pinch.
It is also beneficial to dampen the area around the soldering job with a spray bottle of water in order to prevent fires. And, as a precaution, always keep a fire extinguisher on hand.
[embed_shop_button shop_btn_text=”SHOP NOW” shop_btn_url=”https://www.amazon.com/dp/B072N5WTF2/?tag=fhmeag-20″ shop_btn_tab=”true” /
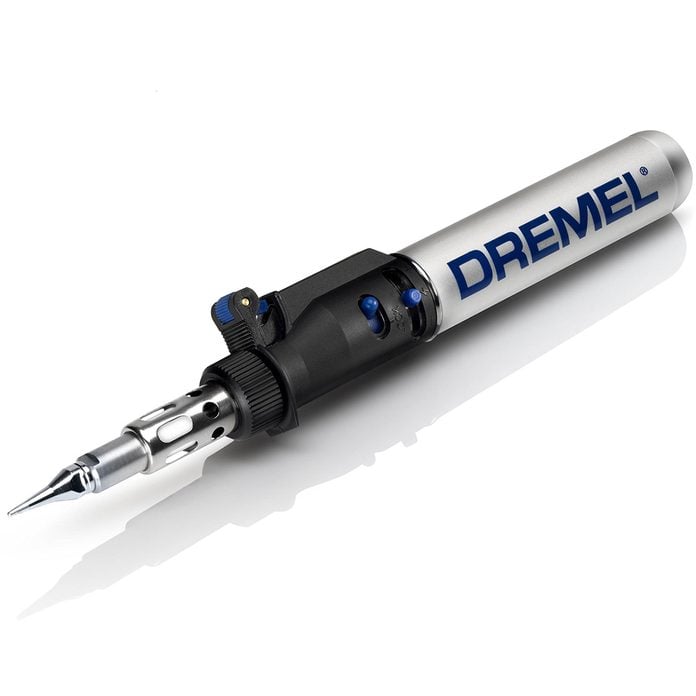
Ideal for soldering, the Dremel VersaTip Butane Torch offers seven functions in a 14-piece kit. And it will help DIYers get the detail they require on projects, including melting, welding, shrinking, cutting and even removing paint.
[embed_shop_button shop_btn_text=”SHOP NOW” shop_btn_url=”https://www.amazon.com/dp/B00MJW08JK/?tag=fhmeag-20″ shop_btn_tab=”true” /
It’s tempting to fish low-voltage wires like coax and Cat-6 through existing holes occupied by electrical cables, but don’t do it! Even though insulated, the high-voltage current can interfere with the signal in the low-voltage wires. This could result in bad TV reception or unreliable internet service.
Drill a new hole, keeping the new low-voltage wire several inches away from electrical cables. It’s OK to run low-voltage wires perpendicular to cables, and it’s also OK to run low-voltage wires next to electrical wires that are encased in conduit or metal sheathing.