


Electric oven heating element replacement is a surprisingly simply DIY fix. Here's everything you need to know.
A few minutes
Beginner
$20-50
Introduction
As an appliance repair technician with more than 30 years experience, I've done this easy oven heating element replacement hundreds of times. It only takes about 15 minutes and requires no special skills, just a few basic household tools.
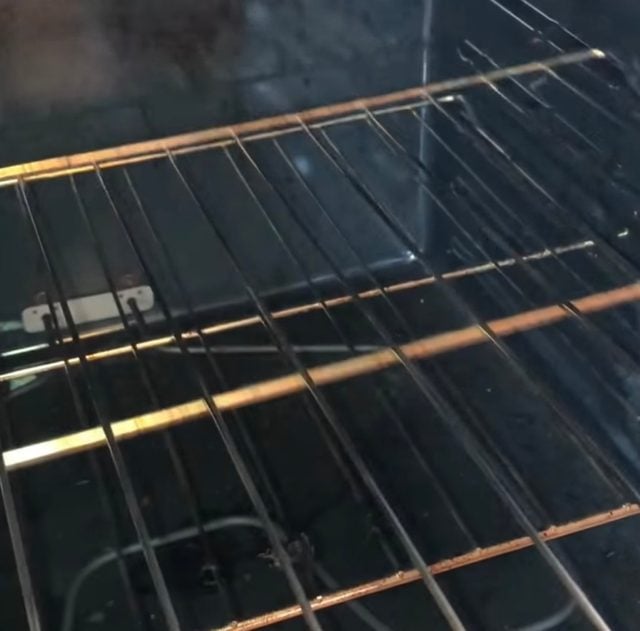
First, know that your oven has up to three heating elements. Most ovens feature a lower bake element and upper broil element. Some have a third convection element located behind the oven cavity rear panel.
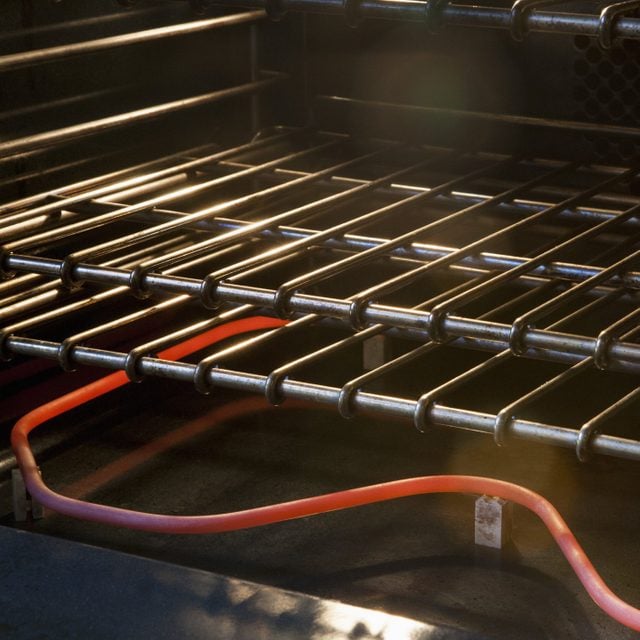
The lower bake element is the one most commonly replaced because it's used the most. It can also melt when you engage the self-cleaning feature to clean your oven, which causes temperatures to exceed 800 F.
Here we're replacing the exposed lower bake heating element, which you can see as soon as you open your oven door. (Note: Some modern ovens have a hidden bake element that lies flat under the bottom panel and can be removed from the back.)
Bake heating elements are inexpensive and easily available from online retailers like Amazon. Have the model number of your oven ready so you can find the correct element. It's probably on a sticker in one of three places:
- On the bottom, top or sides of the interior door jamb;
- On the metal frame inside the bottom drawer opening;
- Under one of the electric burners on the cooktop.
Tools Required
- Needle-nose pliers
- Phillips-head screwdriver
- Nut driver
Project step-by-step (10)
Step 1
Test the old element (optional)
If you need to confirm whether the heating element is flawed, check the resistance with your multimeter. Here’s how:
- Set your multimeter for an ohms reading.
- Put one multimeter probe on one of the element terminals and the other probe on the other terminal. Look for a resistance reading.
- If there’s no resistance, it indicates the electrons cannot flow through the element to heat it. That’s why your oven isn’t heating. A new heating element will correct the problem.
Step 2
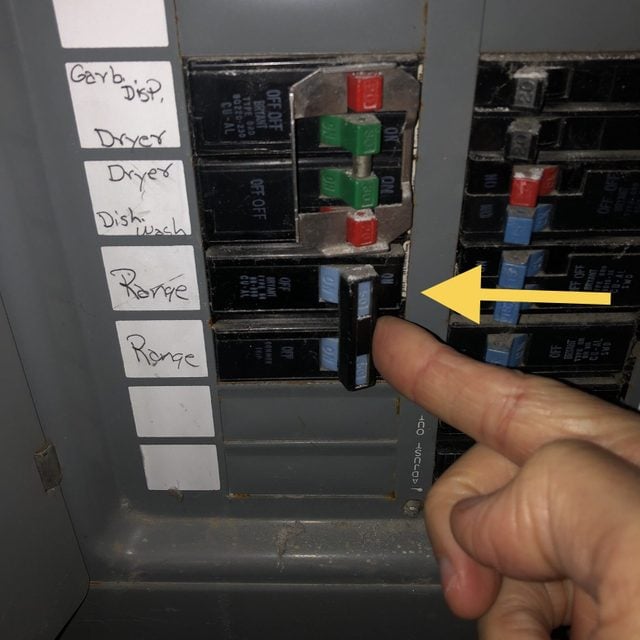
Turn Off The Power
- Pull the range away from the wall and unplug it.
- Remove the bottom broiler pan and reach underneath to unplug it.
- There will be two circuit-breakers for your oven. Make sure they are both off.
- Double-check that the power is off by confirming no lights turn on and none of the burners heat up when you turn them on.
Step 3
Remove Racks
- Pull out the racks to give you more room to work. Most racks pull straight out toward you. You may have to tilt the racks up slightly to get them out.
Step 4
Remove The Door (optional)
Though you can replace the heating element with the oven door in place, removing it allows better access to your workspace. To remove the door:
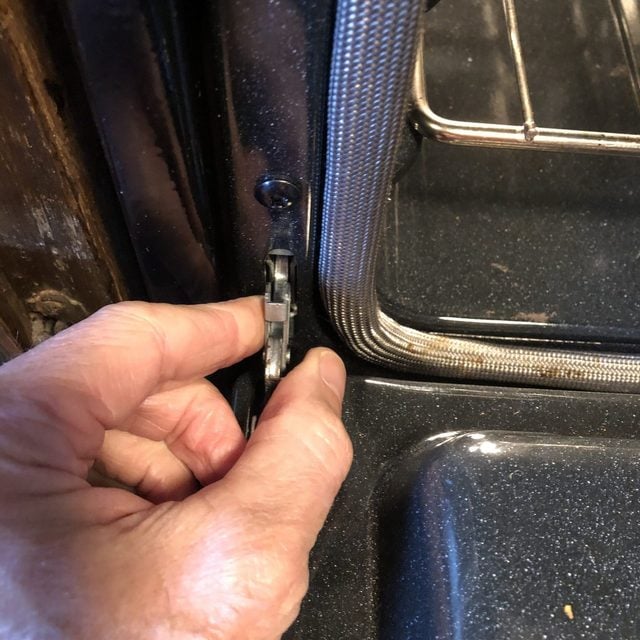
- Open the door fully.
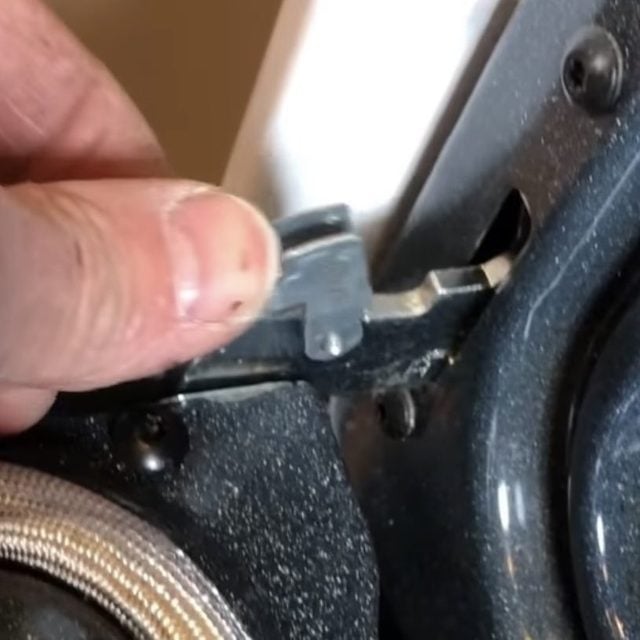
- Pull right and left latches up and then toward you. You might need to pry up on latches with a flat head screwdriver to get them to move up.
- Close the oven door almost fully as you hold on to the handle.
- Lift the bottom hinges out of the oven cavity. Be prepared to hold the weight of the door.
- Let the door rest against your legs so you don’t hurt your back. Oven doors can weigh up to 40 pounds.
- Set the oven door flat on a towel on the kitchen floor.
Step 5
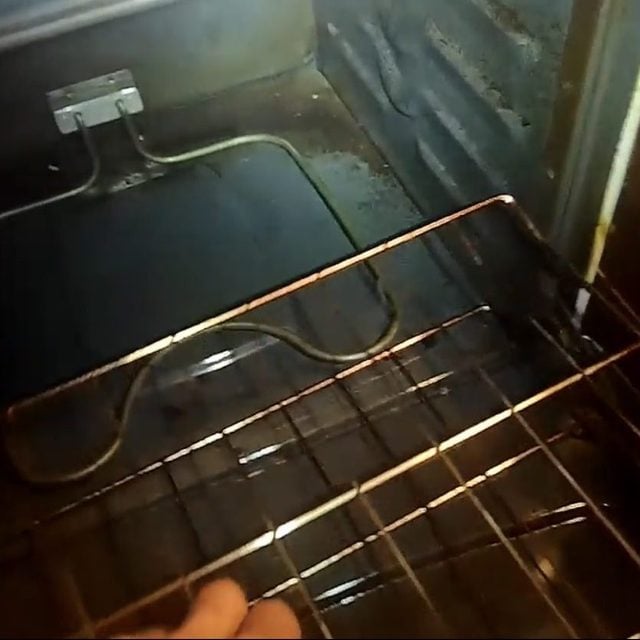
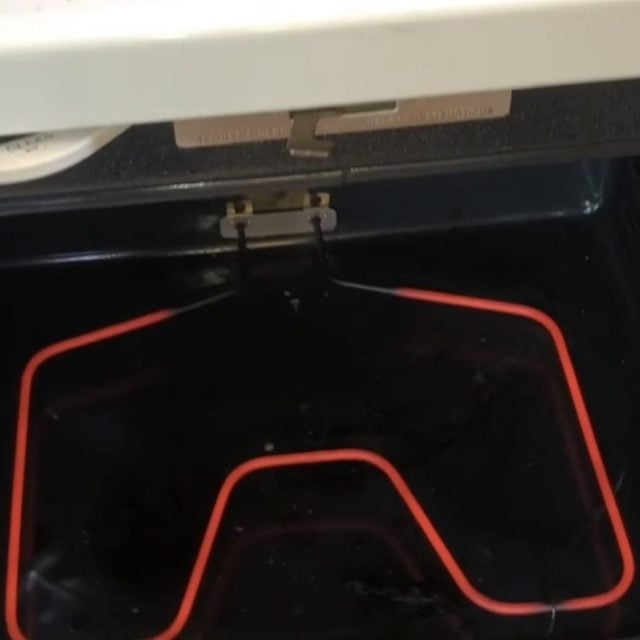
Remove Screws Holding The Oven Heating Element
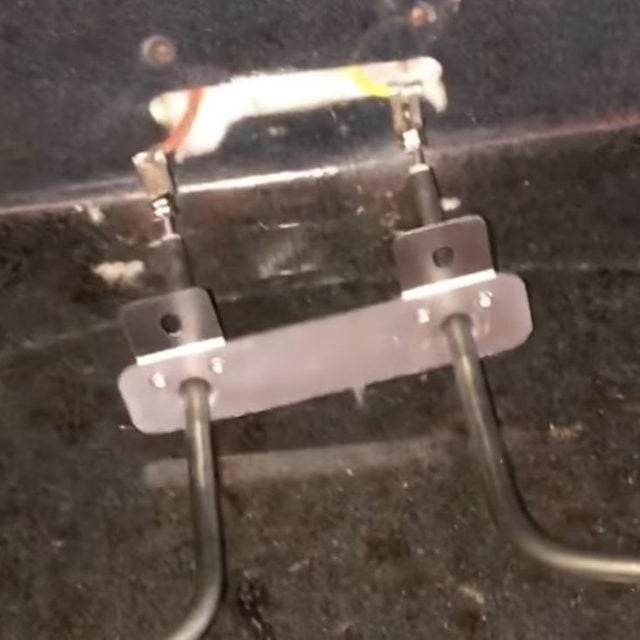
- Using a Phillips head screwdriver or a 1/4-in. nut driver, remove the two screws securing the heating element to the body of the oven.
- Slowly pull the heating element toward you.
- Be careful that the two wires connected to the terminals on the heating element aren’t pulled off as you slide out the old element. Take your time and try to get the element to come toward you by about three inches.
Note: Some white heating insulation may come out with the old element. Push it back in later when you install the replacement element.
Step 6
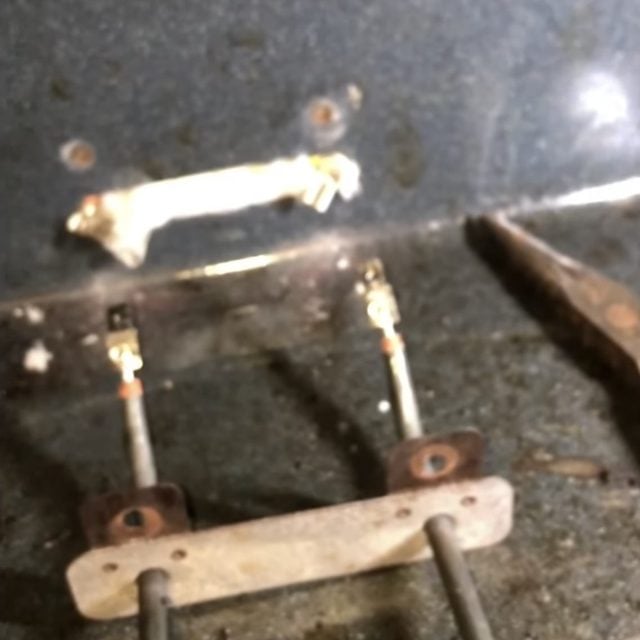
Remove Wires from the Oven Heating Element
- Remove the metal spade connectors from the element terminals (ends) using your fingers or needlenose pliers. Make sure to only pull on the metal spade connectors and not the wires.
- Don’t let the wires fall back into the oven cavity. You’ll need them in the next step to connect to the new heating element.
Step 7
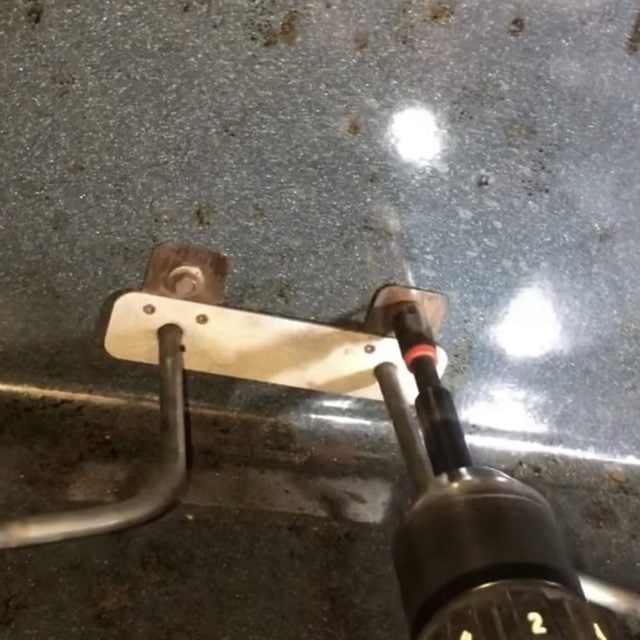
Install The New Oven Heating Element
- Wiggle the spade connectors onto the terminals of the new heating element. Make sure the connectors are snug and all the way on, as far as they can go.
- Push gently on the heating element until it’s all the way back into the oven cavity.
- Reinstall the two screws to hold it securely.
Step 8
Reinstall The Door (If You Removed It)
- Hold the oven door handle and rest the door against your legs as you carefully put the oven hinges back into the oven cavity, as far in as they will go.
- Bring the oven door down to a flat 90-degree angle, perpendicular to the oven. Maintain inward pressure on the hinges as you hinge the door down flat.
- Move the latches all the way toward the oven and down as far as they go.
- Confirm that the oven door is on correctly by closing it all the way. If it’s not closing properly, repeat the installation process until it does.
Step 9
Reinstall Racks
- Confirm the angular side of the rack is pointing up and a slide it in at a slight angle. Then slide the rack all the way in.
- Repeat with the other rack.
Step 10
Test New Oven Heating Element
- Restore power to oven.
- Set your oven to bake at 350 F.
- Check to see that the bake element glows red.
- Use an oven thermometer to confirm the temperature reaches 350 F.
Originally Published: January 13, 2022