How To Replace a Power Cord Plug

Updated: Jun. 23, 2023
Five dollars and 30 minutes are all it takes to replace a power cord. I fixed my vacuum, but this easy project works for almost any cord in your home.
A few minutes
Beginner
$5–10
Introduction
Vacuum cleaner cords take a ton of abuse. We yank them out of the socket. We run over them. We let our dogs to use them as chew toys. (Wait, maybe that's just me...)
If you've been meaning to buy a new appliance or lamp because the cord is damaged, don't. Replace the plug for about five bucks and a trip to the local hardware store. I have a vacuum service center on my block, but you can find replacement plugs online, too.
If the cord damage is right next to the appliance, replace the whole cord, not the plug. Vacuuming the living room with a two-foot cord doesn't sound like much fun.
My vacuum had a two-wire, ungrounded polarized plug. Polarized means there are distinct hot and neutral blades (the metal parts that go in the socket), and it matters which wire is hooked to each. Buy the same style plug you are replacing.
Check that the replacement will accommodate the shape of your cord, too. Some cords are round and some are flat.
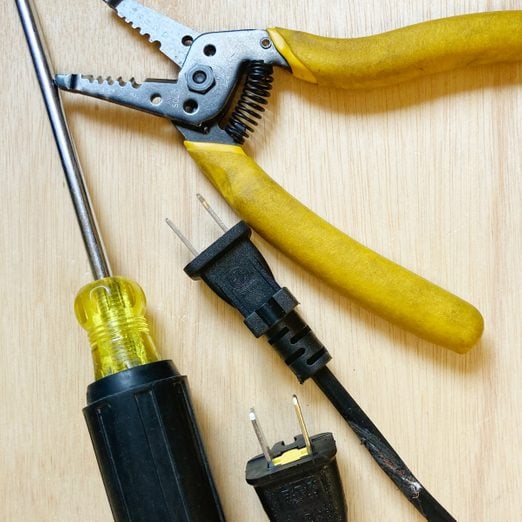
Tools Required
- Standard screwdriver
- Wire strippers
Materials Required
- Screw-terminal replacement plug
Project step-by-step (5)
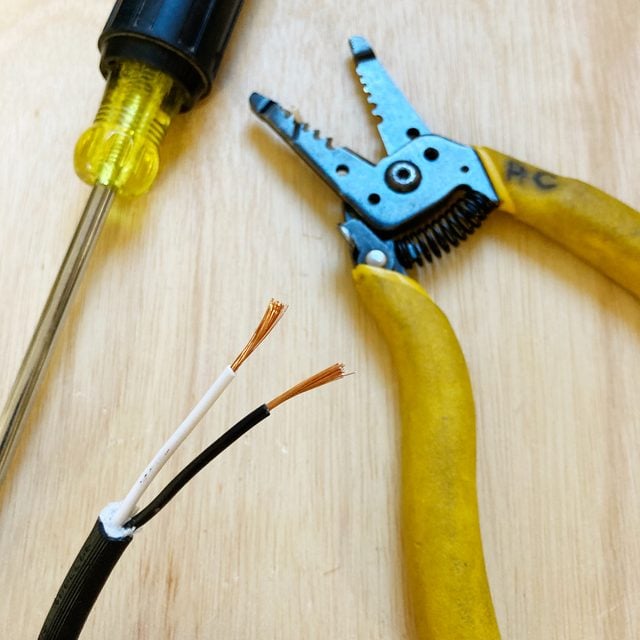
Prep The Cord
- Remove the old plug with wire strippers.
- Examine the cord and cut off any part with cuts or nicks.
- Strip off about 1-1/2-inches of the outer covering by scoring it with wire strippers and bending the cord back and forth.
- Cutting with a knife increases the chance of nicking the interior wiring.
- Start over if you accidentally cut the wire while removing the outer covering.
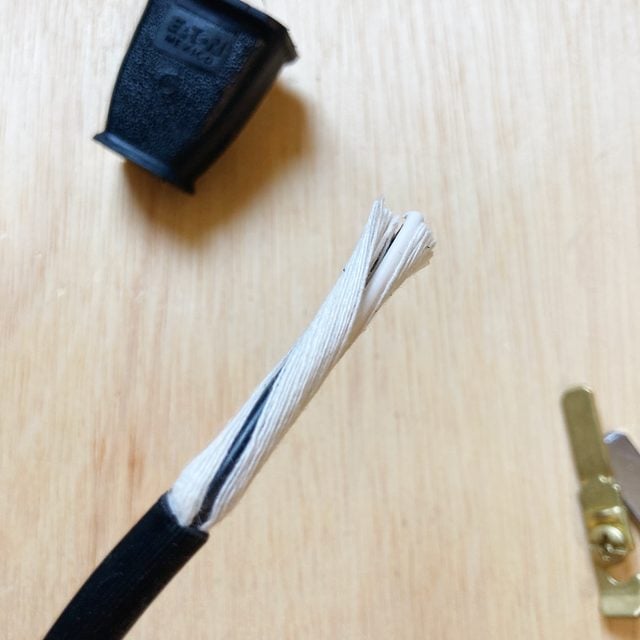
- Cut away the interior cloth insulation, leaving only the black and white wires.
- If you do not have a white wire, look for ridges along the length of the wire. This is the neutral wire. The hot wire will be smooth.
Prep The Plug
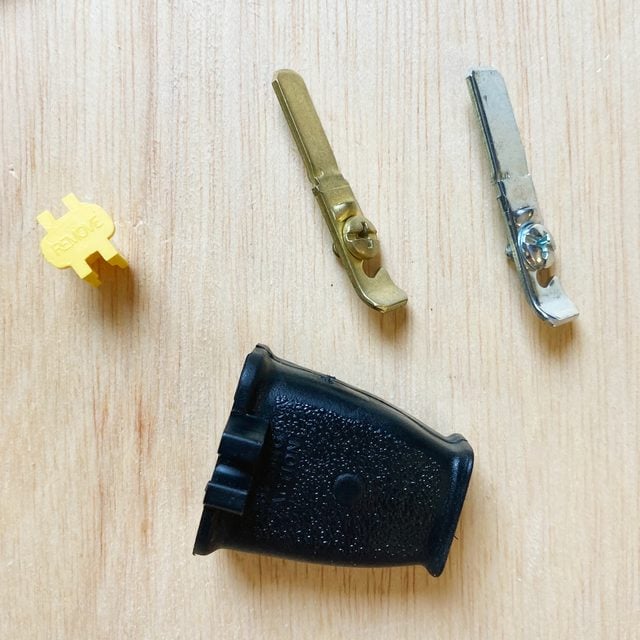
- Push the yellow insert out of the center of the plug by inserting a screwdriver through the cord end and pushing up.
- Keep this piece for reassembly later.
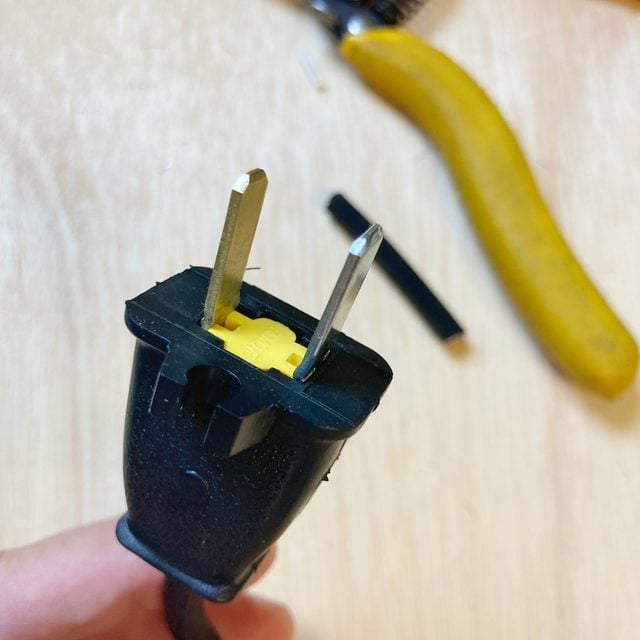
- Take out the blades, noting their orientation within the plug.
- Practice putting these back in a few times. They fit in one way.
- Don’t forget: Slide the plug case onto the cord before continuing to the next step.
Cut and Strip Interior Wires
- Strip off one-half to three-quarters of an inch of insulation from each wire.
- Check the gauge marked on the cord to know what slot on the strippers to use. My cord was 18-gauge.
- Examine the wires to make sure you didn’t accidentally cut any strands.
- Twist the strands tightly between your fingers and form each wire into a hook shape.
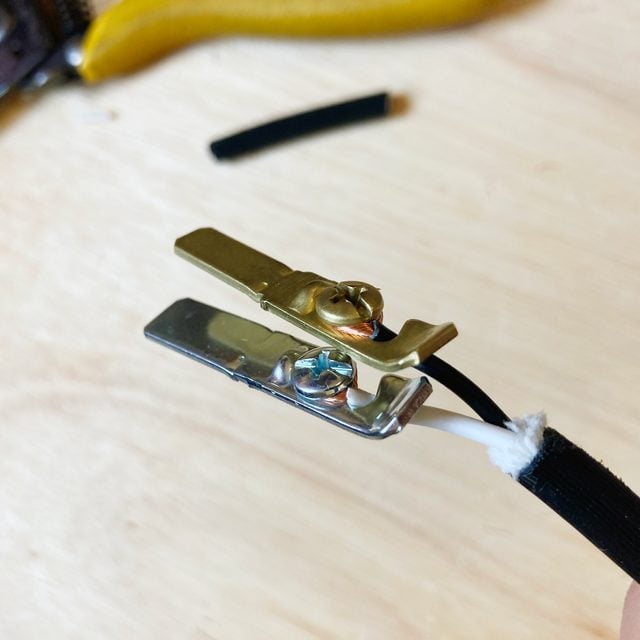
Attach Wires To Screw Terminals
- Attach the black wire to the brass blade, and the white wire to the silver one.
- Loosen each screw just enough to wrap the hooked wire end around the screw.
- Wind the free end of the wire clockwise around the screw. This helps the wire stay on the screw while tightening.
- Squeeze the hook end closed around the screw and tighten.
- Hold strands around screw as you tighten.
- Slide the insulated ends of the wires through and behind the notch in the blades.
Wrap Up The Project
- Slide the plug case up the cord and fit the blades in as they were before.
- When the blades are properly oriented, they will fit snugly and be upright at a 90-degree angle to the case.
- Put the yellow tab back in between the blades.
- This keeps the black and white wires separate and holds the blades in the plug.
- Plug in the vacuum cleaner and test out your work.