If your electric stove burners aren't working, you can fix or replace the heating element in 15 minutes!
An hour or less
Beginner
$20-50
Introduction
When you turn on your electric stove burners, they're supposed to heat up quickly. When they don't, you might be tempted to set up a service call to get them fixed.
But wait! You might be able to easily fix the problem yourself. Here you'll learn the simple steps to troubleshoot the problem, and two possible solutions.
Tools Required
- Wire brush
Materials Required
- Electric burner elements
All you’ll need for this quick appliance repair job is a set of four burners and a wire brush or sandpaper. Check your stove’s model number to make sure you’re buying the correct burners. If you pull out the bottom broiler drawer, you’ll find a sticker on the frame with the model number. You may be able to order a single burner if that’s all you need.
Project step-by-step (5)
Step 1
Test the Burners
- Turn the knobs for all the burners to full heat.
- If none of the burners get red-hot after five minutes, check your electrical breaker box to confirm that both breakers for your stove are in the full on position. Your stove needs 220 volts to operate, so if one of the breakers is off, your stove’s lights may work but not the burners.
- If any of the burners don’t heat up, continue to the next step.

Step 2
Remove the Burner
- Unplug your stove or turn off both stove breakers. Make sure the power is off before you start.
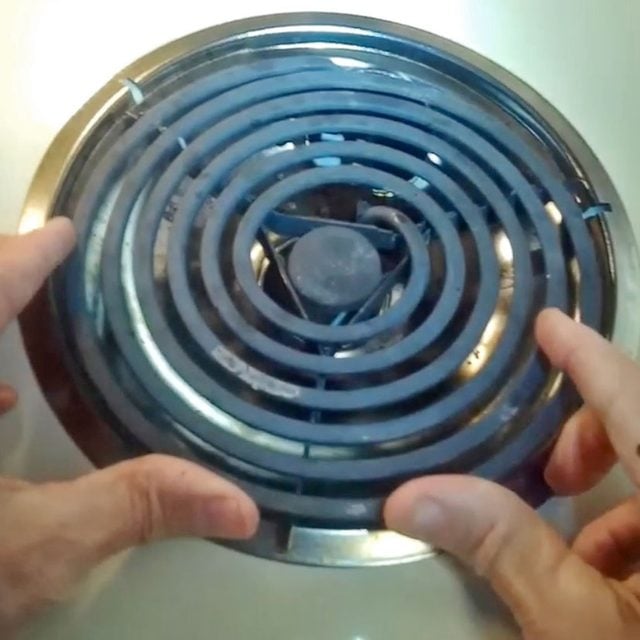
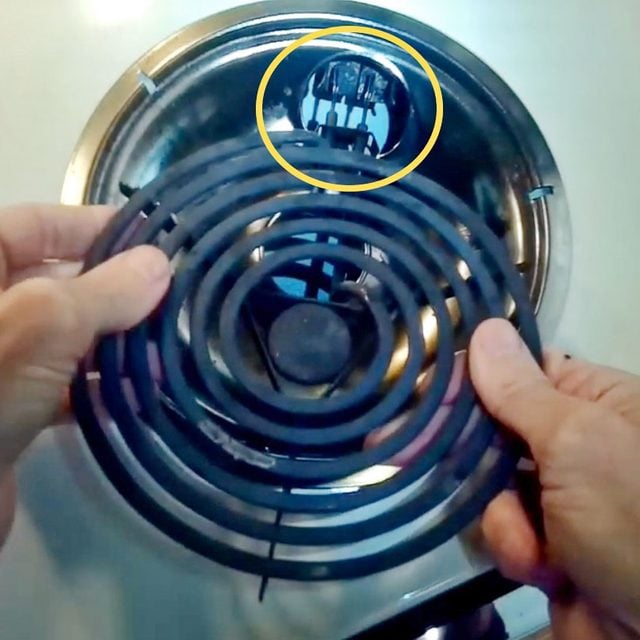
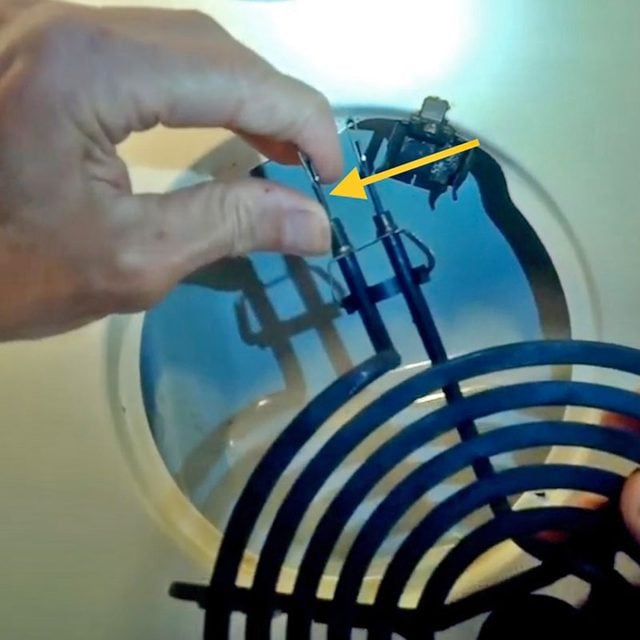
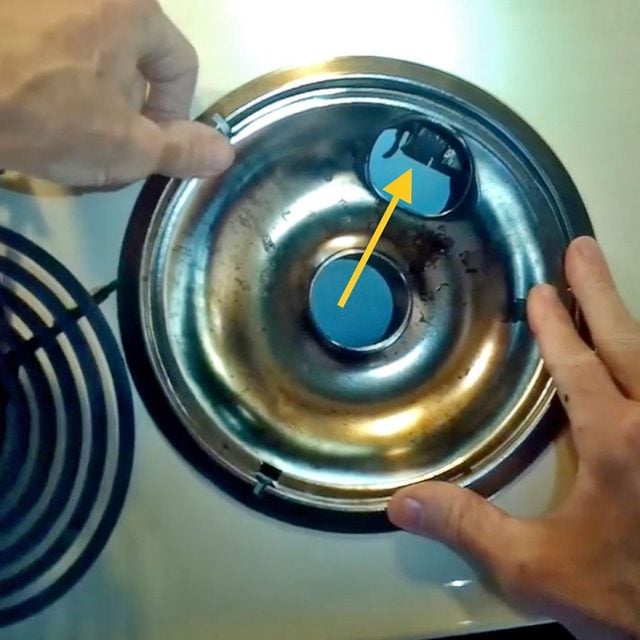
- Look at the burner(s) that didn’t heat up during the first test. You’ll see two metal rods going through the spill plate into your stove.
- Grab the other end of the burner(s) and carefully pull and wiggle the element out, lifting it a few degrees as you pull.
Step 3
Clean the Burner Element Ends
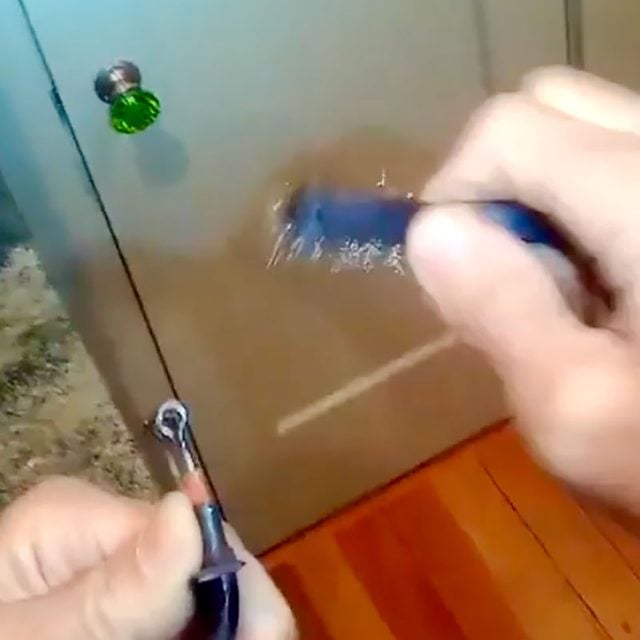
- Clean the ends (terminals) of the element using a wire brush or sandpaper.
- Try to get the ends so clean that they shine.
Step 4
Fix the Burner
- Grab one end of the burner element with your fingers and slightly bend it out, away from the other end, by about 1/8-inch. This will cause the two ends of the burner element to make better contact with the inside of the power socket where they fit.
- After a while, the movement of pots causes the ends of the burner to lose contact with the socket. Simply bending the end outward lets the burner element make good contact again.
- Gently push the burner element back through the spill plate into the electrical socket.
- Restore power to the stove.
- Turn the burner knob to high heat.
- If your burner still won’t heat, it’s time to replace it, as shown in the next step.
Step 5
Replace your burner element
- Order your new burner(s), as mentioned in the introduction.
- When you have the new burners, unplug your stove or turn off its two breakers.
- Remove the broken burner element and discard.
- Push your new burner element into the socket by gently wiggling the ends into the socket as far as they will go.
- Push down from the top until the burner element sits completely flat.
- Restore power to the stove.
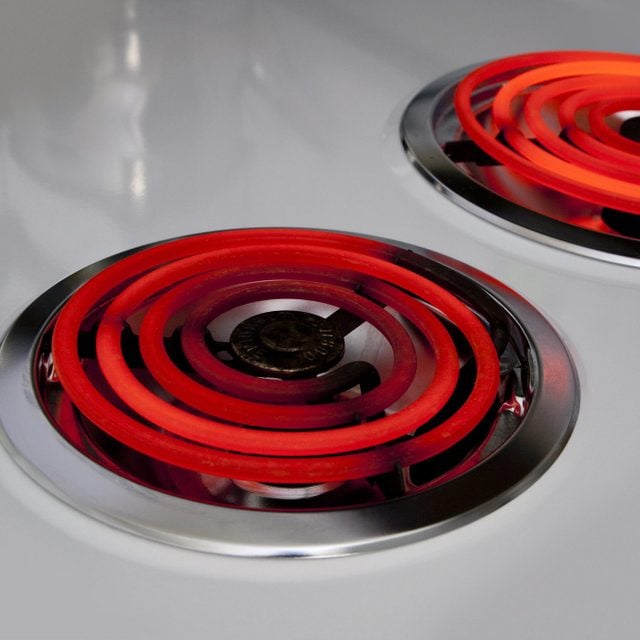
- Turn on the burner to high heat to test the burner element. It should now glow bright red.
- It’s good to run the fan or open a window while testing your new element, because it will smoke until some of the oils from manufacturing are burned off. That should take a few minutes.
If your element still will not heat, it’s time to call a pro to replace the burner socket or switch.