


If you've got a gas stove that won't light, we've got three quick-and-easy DIY fixes for you to try.
Less than 10 minutes
Beginner
Free
Introduction
Gas stoves that won't light can be frustrating, but there's good news — they are actually very easy to fix.
There are two simple reasons a gas stove won't light:
- There's not enough gas to light the burner.
- There's no spark to light the burner.
No gas getting to the burner is the most common and easiest to fix. It can be repaired in less than 30 seconds using a straightened paperclip!
The front burners are far more likely to not light because they are used more than the back burners.
The main cause of a gas burner that won't light is a pot that boils over and clogs the small hole that the gas comes out of.
Here are three quick-and-easy fixes to get your gas stove working again.
Level: Beginner
Cost: Free
Time: Less than 10 minutes
Tools Required
- Crescent wrench
- Flashlight
- Paper clip
- Phillips-head screwdriver
- Small wire brush
Materials Required
- Cotton swaps
- Electrical cleaner spray
- Rubbing alcohol
Watch How To Fix a Gas Stove That Won’t Light
Project step-by-step (4)
Step 1
Gas Stove Not Lighting: No Gas
If all of the burners won’t light, check the gas supply valve behind stove to make sure it’s on. The gas valve handle should be in-line with the gas line. When you’re sure the gas is on, follow these steps:
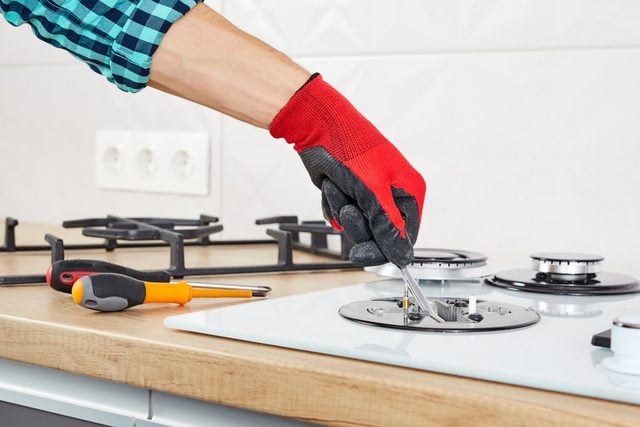
- Lift up the burner cap and set it aside.
- Using a flashlight, look for a brass-colored piece with a small hole in the center. This is called the gas orifice.
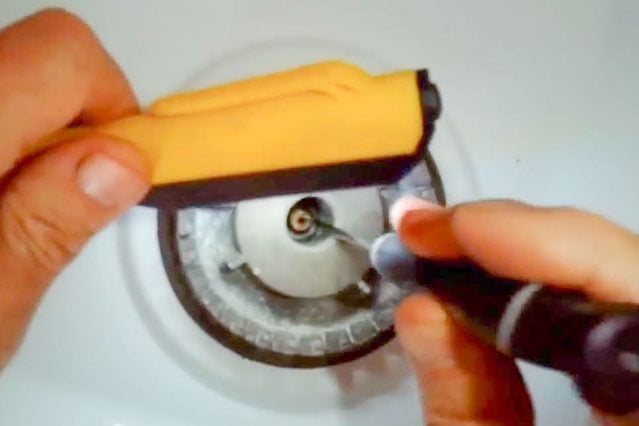
- Straighten out a metal paperclip, so it’s as long as possible.
- Push the end of the straightened paperclip down into the small hole in the center of the brass piece. The hole is usually less than one inch down inside the gas burner, but can be as deep as four inches.
- Rotate the paperclip in the hole four full revolutions to break up any blockage.
- Remove the paper clip.
- Put the burner cap back on. Make sure that it sits completely flat. You may need to wiggle it around to get it to sit completely flat against the burner.
- Test your gas stove burner. It should now light right away and the flame should be stronger.
When you light the burner, the gas will jettison the clog you broke up.
If you don’t have a spark, try option two.
Step 2
Gas Stove Not Lighting: No Spark
If you light your burner and don’t see a spark, follow the below steps:
- Make sure your gas stove is getting power by trying the oven. You may need to plug in your stove or turn on the breaker for your stove if you don’t have power. If your gas oven isn’t heating properly, you can probably fix it yourself.
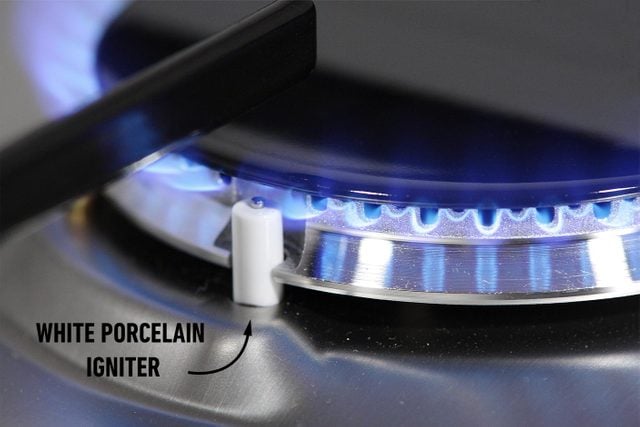
If you turn on your burner and hear a clicking noise, but the burner doesn’t light:
- Soak a cotton swab in alcohol and clean the white porcelain igniter thoroughly. Also clean the metal burner cap with a cotton swab.
- Try the burner again. If you still hear clicking but don’t see a spark then it’s time to try option three, thorough cleaning of the metal burner head parts.
Step 3
Gas Stove Not Lighting: Clicking but no Spark
If you made sure the gas can flow, you cleaned the igniter, you can hear clicking but still no spark:
- Lift off your burner cap. Using your wire brush thoroughly clean the underside of the burner cap. Use alcohol or electrical cleaner to further clean the burner cap.
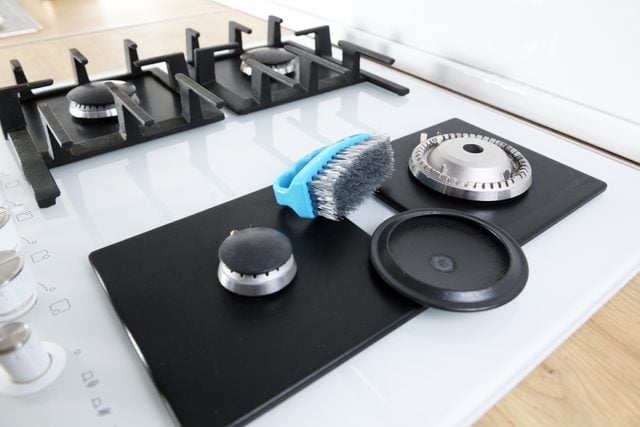
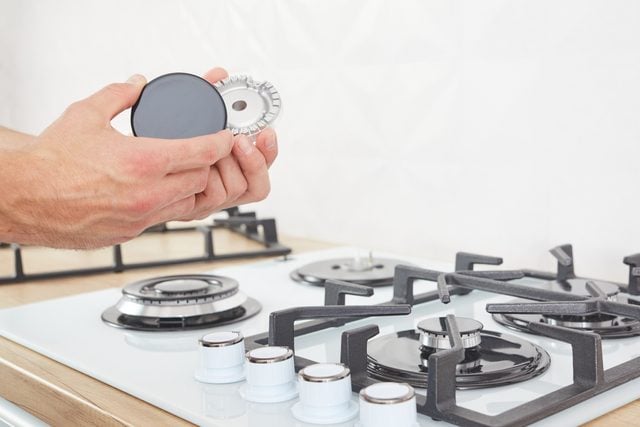
- Lift off the next piece of the burner assembly called the burner head. It may be held down with screws or a large nut. Remove any fasteners and lift it off.
- Using the straightened paperclip, clean out any holes you can find in the burner head. Look carefully, sometimes the holes are very small.
- Thoroughly clean the metal burner head with your wire brush and alcohol or electrical cleaner.
- Look where the burner head sits and clean that area with a wire brush and alcohol or electrical cleaner until it’s shiny.
- Get every part of the metal burner assembly very clean. Each metal part of the burner fits together precisely. When it’s clean the burner creates a strong ground electrical connection for the spark to jump from the tip of the igniter to the burner. If any part of the burner is dirty or not fitting snug the ground connection will weaken and the spark won’t jump.
- Burner parts often get knocked out of position during cooking or get covered with grease and food debris. The misalignment of parts or the debris from cooking can cause a weak spark and the burner will not light properly. Thoroughly cleaning the parts and carefully lining them up should give you a strong spark to light the burner every time.
Step 4
Finishing Up
If you don’t hear clicking and don’t see a spark at any of your burners and you’ve confirmed you have power, it’s time to call in a pro and have them replace your stove’s spark module.
Also, learn how to install a new gas stove safely.